-
Administration Guide for Cisco Virtualization Experience Client Manager 4.9
-
Preface
-
Getting Started
-
Device Manager
-
Package Manager
-
Cisco VXC Firmware and Configuration Upgrade Procedures
-
Update Manager
-
Report Manager
-
Configuration Manager
-
Appendix A: Working with Groups and Views
-
Appendix B: About Cisco VXC Manager Security
-
Appendix C: Upgrading Cisco VXC Manager Agents
-
Appendix D: Device Discovery, Device Imaging, and Mass Imaging Tool
-
Appendix E: Troubleshooting
-
Appendix F: Licensing and Sales Keys
-
Appendix G: Additional Package Manager Procedures
-
Appendix H: Cisco VXC Manager ScriptBuilder Tool and Scripting Language
-
Appendix I: Autogenic Imaging
-
 Feedback
Table Of Contents
Adding and Automatically Discovering Devices
Adding Devices Using Manual Discovery
Changing Basic Device Information
Configuring ThreadX Device Information
Searching for a Device with Find Device in View and Quick Find
Creating and Viewing Log Files
Using the Package Distribution Wizard to Schedule a Package for Distribution
Using the Remote Task Manager to View Applications, Processes, and Performance for a Device
Device Manager
This chapter describes how to perform routine device management tasks using the Administrator Console. It provides information on managing the devices within your Cisco VXC Manager environment.
Managing Devices
Click Device Manager in the tree pane of the Cisco VXC Manager Administrator Console to open the Device Manager. The Device Manager allows you to quickly view and manage the devices within your Cisco VXC Manager environment (see Table 2-1). It also allows you to easily display the devices you want by using the available filtering and customizing features.
Figure 2-1 Device Manager
After you choose the devices you want (you can use Ctrl-click or Shift-click to choose multiple devices), you can then begin performing your tasks.
Tip
For information on using available icons to perform Device Manager tasks, see Device Manager Icons. For information on setting your Device Manager preferences (device check-in, upgrade, and discovery), see Device Manager Preferences.
Table 2-1 provides a quick overview of what you can do using the Device Manager.
Table 2-1 Routine Device Manager Tasks
Choose a View (defaults or one that you created) to use with Device Manager so you can quickly find the devices you want.
In the tree pane of the Administrator Console, right-click Device Manager and choose Switch View to open and use the Select Current Manager View dialog box.
After creating Views according to your device Group Types, Networks, and so on, choose a Current Manager View to view the devices you want (see Managing Views).
Create a Device Filter to use with Device Manager so you can quickly find the devices you want.
In the tree pane of the Administrator Console, right-click Device Manager and choose Create Device Filter to open and use the Filter Devices dialog box.
View device details of your selected devices.
Click the device details tab you want.
Search for the device that you want to use with Device Manager.
To determine the View (path) in which the particular devices you want to find are located, right-click Device Manager, and then choose Find Device in View to open and use the Find Device in View dialog box.
To quickly find the particular devices you want, right-click any device name in the details pane, and then choose Quick Find to open and use the Quick Find dialog box.Searching for a Device with Find Device in View and Quick Find
TipAdd a device to the system using Dynamic Discovery.
Cisco VXC Manager can discover the devices automatically using your preferences in the Preferences dialog box of the Configuration Manager.
Adding and Automatically Discovering Devices and Adding Devices Using Manual Discovery
Add a device to the system manually.
Right-click Device Manager, and then choose New > Device to open and use the Add a Device dialog box.
Adding and Automatically Discovering Devices and Adding Devices Manually
Change basic device information (device name, location, and so on).
Choose the devices you want, right-click the selection, and then choose Change Device Information to open and use the Change Client Information dialog box.
Change device network information (IP Address, DNS Server, and so on).
Choose the devices you want, right-click the selection, and then choose Change Network Information to open and use the Change Client Network Settings dialog box.
Remotely shadow a device (to view and control a device remotely).
Right-click the device you want, and then choose Remote Shadow to open and use the VNC Authentication dialog box.
Execute a DOS command on a device.
Right-click the device you want, and then choose Execute Command to open and use the Execute dialog box.
You can type executable commands for a given device (if the executable is not in the path of the device, you must provide a fully qualified path).
Configure the available device settings for a ThreadX device.
Right-click the ThreadX device you want, and then choose ThreadX Device Settings to open and use the ThreadX Device Information window.
Create a Diagnostic Report containing a summary of hardware and software information and a list of running processes.
Right-click the device you want and choose Diagnostic Report to view the Diagnostic Report.
Create and view log files.
Right-click a device in the details pane of the Device Manager and choose Get Logs to open and use the Create Log File dialog box. To view a log file, right-click a device in the details pane of the Device Manager and choose View Log to open and use the View Logs dialog box.
Shut down devices.
Choose the devices you want, right-click the selection, and then choose Shut Down.
Reboot devices.
Choose the devices you want, right-click the selection, and then choose Reboot.
Wake devices.
Choose the devices you want, right-click the selection, and then choose Wake On LAN.
Delete a Device from the system.
Choose the devices you want (you can use Ctrl-click or Shift-click to choose multiple devices), right-click the selected devices, choose Delete Device, and then confirm the deletion.
Caution
Use the Package Distribution Wizard to schedule a package for distribution.
Select the devices you want (you can use Ctrl-click or Shift-click to select multiple devices), right-click the selected devices, choose Package Distribution Wizard to open and use the Package Distribution Wizard.
Using the Package Distribution Wizard to Schedule a Package for Distribution
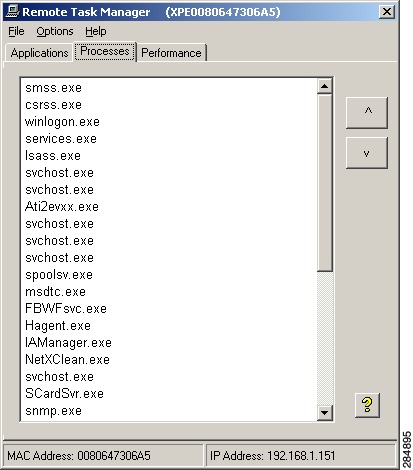
Use the Remote Task Manager to view Applications, Processes, and Performance for any selected device.
Select the single device you want, right-click the selected device, choose Remote Task Manager to open and use the Remote Task Manager.
Using the Remote Task Manager to View Applications, Processes, and Performance for a Device
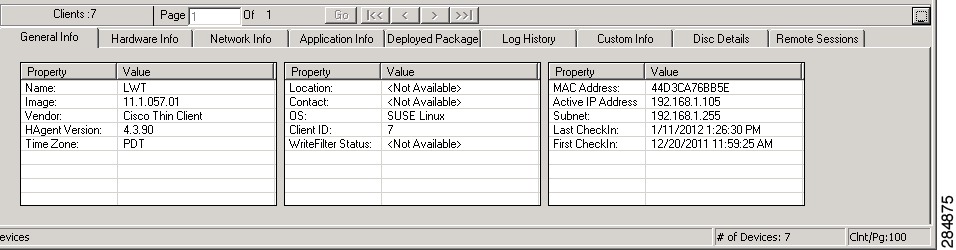
Viewing Device Details
The General Info tab is displayed in the bottom of the details pane by default (see Figure 2-1).
Figure 2-2 General Info Tab
Tip
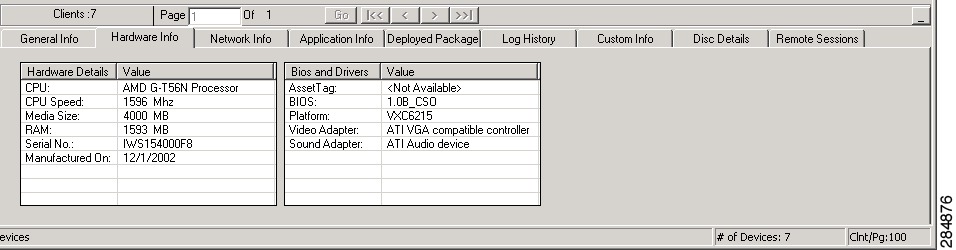
The Hardware Info tab (see Figure 2-3) displays the detailed hardware information, including the partition details of the disk from which the OS is booted and boot agent information for the device.
Figure 2-3 Hardware Info Tab
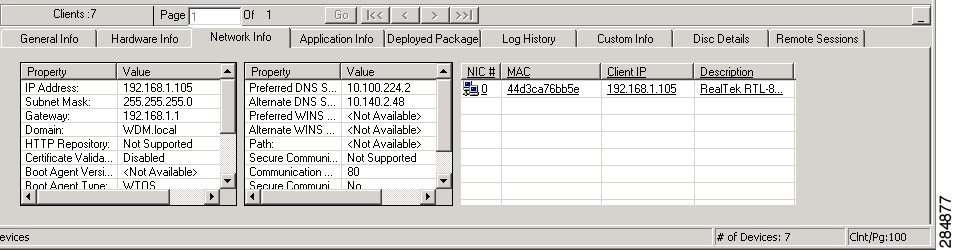
The Network Info tab (see Figure 2-4) displays the detailed network information for the selected device, including the communication details between different components of Cisco VXC Manager.
Figure 2-4 Network Info Tab
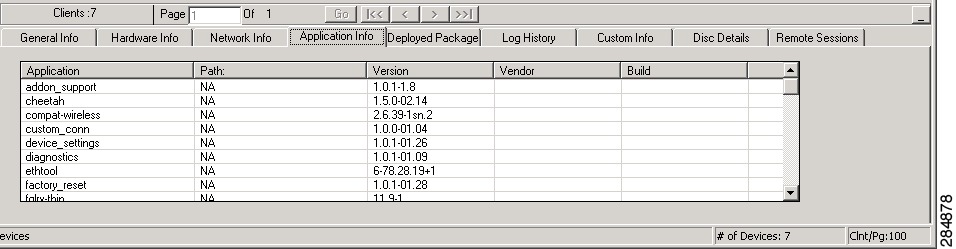
The Application Info tab (see Figure 2-5) displays the list of the applications installed on the device.
Note
Figure 2-5 Application Info Tab
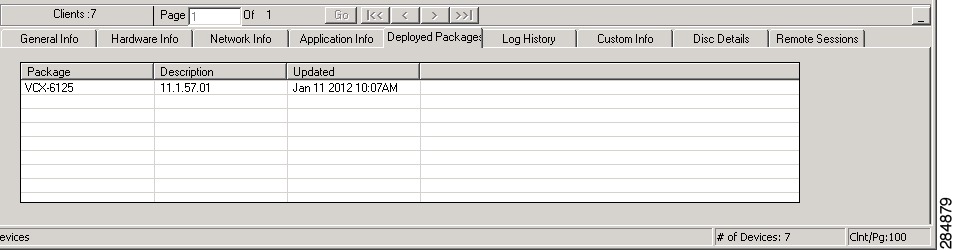
The Deployed Package tab (see Figure 2-6) displays the list of all Cisco VXC Manager packages distributed to the device.
Figure 2-6 Deployed Package Tab
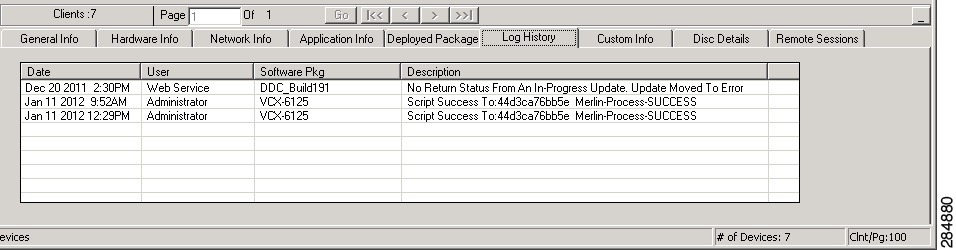
The Log History tab (see Figure 2-7) displays the list of all logs corresponding to Cisco VXC Manager package distribution for the selected device.
Figure 2-7 Log History Tab
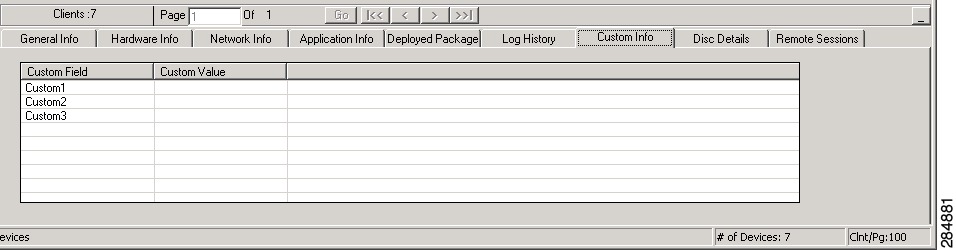
The Custom Info tab (see Figure 2-8) displays all custom information (such as, location, contact, and so on) for the selected device.
Figure 2-8 Custom Info Tab
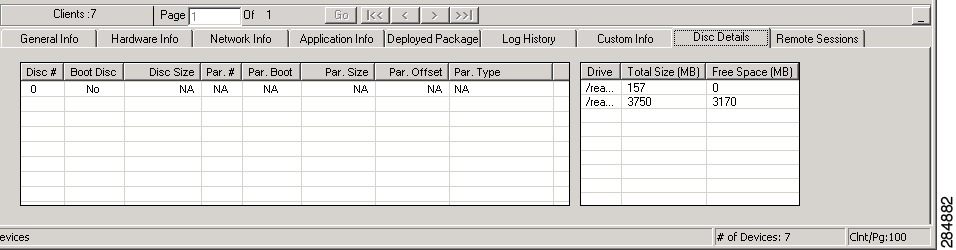
The Disk Details tab (see Figure 2-9) displays the list of all disks including their partition details existing in the selected device.
Figure 2-9 Disc Details Tab
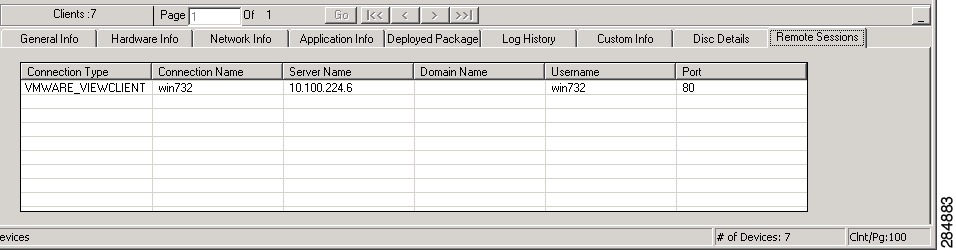
The Remote Sessions tab (see Figure 2-10)displays all remote information (connection type, connection name, server name, and so on) for the selected device.
Note
Figure 2-10 Remote Sessions Tab
Adding and Automatically Discovering Devices
Cisco VXC Manager becomes aware of the devices in your network using either dynamic discovery or a manual process. After Cisco VXC Manager identifies the devices in the network, it stores information about them in the Cisco VXC Manager Database. You can then use Cisco VXC Manager to manage the devices.
Devices with the Cisco VXC Manager Agent (also referred to as the HAgent) installed must be linked to the Web Service so that the devices can check-in regularly. At check-in time, the Cisco VXC Manager Agent provides the Web Service with device information such as device name, hardware information (such as platform, flash size, memory, CPU, asset number, serial number), network information (such as WINS, DNS, IP address, Domain Name, subnet), image number, and so on. There are five ways in which devices can be linked to the server that contains the Web Service:
•
•
•
•
•
You can add devices to Cisco VXC Manager either by having Cisco VXC Manager discover the devices using Dynamic Discovery or by manually adding devices.
Using Dynamic Discovery, the Cisco VXC Manager Agent checks in periodically with the Cisco VXC Manager Web Service. This form of check-in is based on pull communications because the Cisco VXC Manager Agent initiates communications. For more information on using Cisco VXC Manager to discover devices, see Adding Devices Using Manual Discovery.
When you add devices manually, you instruct Cisco VXC Manager to discover devices on command. This method uses push communications because the Cisco VXC Manager Server initiates the operation. When you choose this method of adding devices, you can specify whether to add devices through a UDP broadcast or through a TCP connection to every device within a subnet or an IP Range setting. For more information on manually adding devices to Cisco VXC Manager, see Adding Devices Manually.
Adding Devices Using Manual Discovery
With new devices that come with the Cisco VXC Manager Agent pre-installed, you must link the Cisco VXC Manager Agent on the devices to the Cisco VXC Manager Web Service. Once the link is established, the devices check in periodically using Dynamic Discovery.
Use the following guidelines to manually discover devices with the Device Manager:
Procedure
Step 1
Step 2
Step 3
a.
b.
Step 4
a.
b.
If you did not enable the Show Subnet Hierarchy preference, continue with the next step.
c.
Note
Step 5
Adding Devices Manually
Cisco VXC Manager also allows you to manually add devices to the Cisco VXC Manager Database (for example, in cases where technical issues prevent you from discovering a device that is otherwise operating normally, or in cases where the operating system of a device has become corrupt and the device does not operate normally).
Use the following guidelines when adding devices manually:
Procedure
Step 1
Step 2
•
•
•
•
•
•
•
•
•
Step 3
Changing Device Properties
Device Properties consist of basic properties and network properties. You can change basic properties by using the procedures in Changing Basic Device Information. You can change the network properties by using the procedures in Changing Network Properties.
Changing Basic Device Information
Caution
Procedure
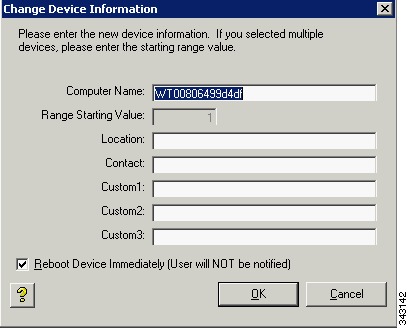
Step 1
Step 2
Figure 2-11 Change Device Information
Step 3
•
•
•
•
•
Step 4
Step 5
Changing Network Properties
Caution
Procedure
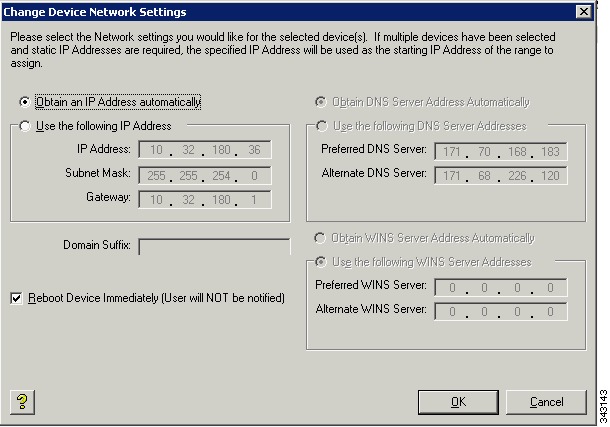
Step 1
Step 2
Figure 2-12 Change Device Network Settings
Step 3
•
•
Tip
Step 4
•
•
Step 5
Step 6
•
•
Step 7
Step 8
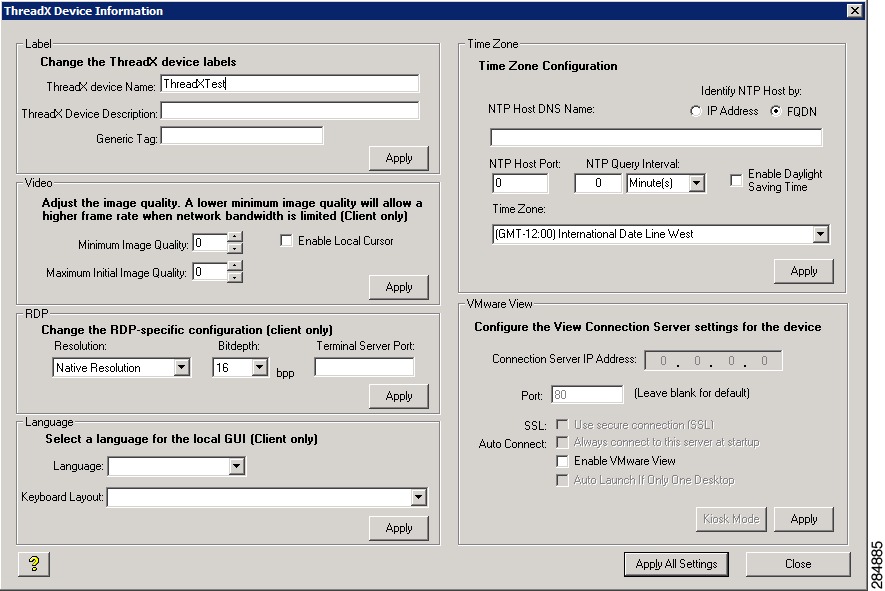
Configuring ThreadX Device Information
Caution
Use the following guidelines to configure ThreadX device information.
Configuration Settings—Cisco VXC Manager supports the following configurations on the device side:
•
•
•
•
Note
•
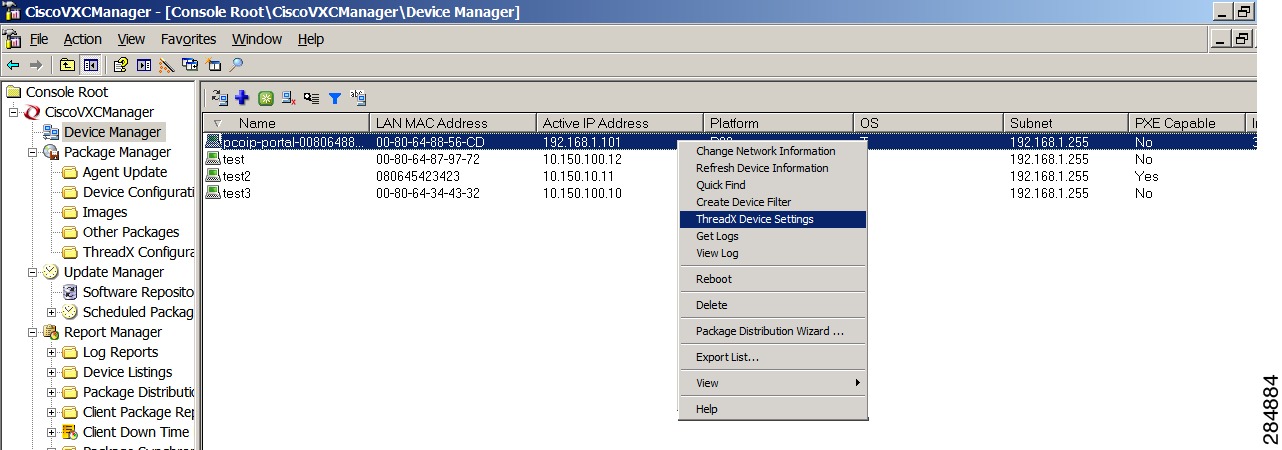
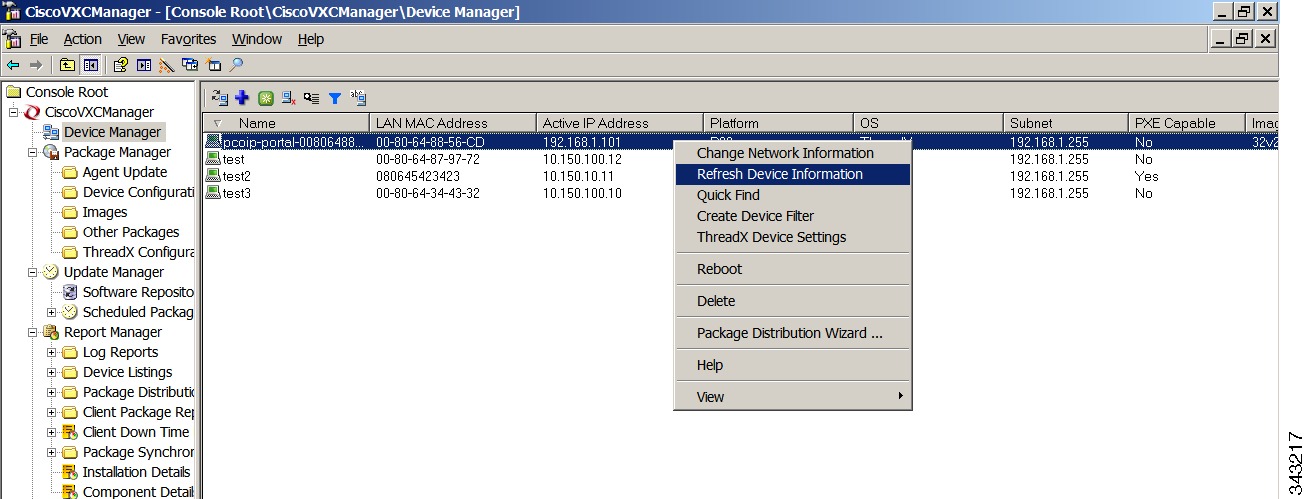
Figure 2-13 ThreadX Device Settings Menu Option
To configure the available device settings for a device, right-click a device and choose the ThreadX Device Settings menu option to open and use the ThreadX Device Information window.
Figure 2-14 ThreadX Device Information
After you configure the device settings, click Apply to apply a single configuration set or click Apply All Settings to apply the entire configuration set at one time.
Tip
Refresh Device Information—To manually refresh the device information, right-click a device and choose the Refresh Device Information menu option.
Figure 2-15 Refresh Device Information Menu Option
Reboot—To manually reboot the device, right-click a device and choose the Reboot menu option.
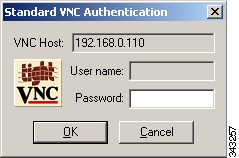
Remotely Shadowing Devices
Viewing and controlling a device remotely (shadowing a device) is useful to help a user with a particular application and to troubleshoot device problems.
Caution
Procedure
Step 1
Step 2
Step 3
Figure 2-16 VNC Authentication
Step 4
Step 5
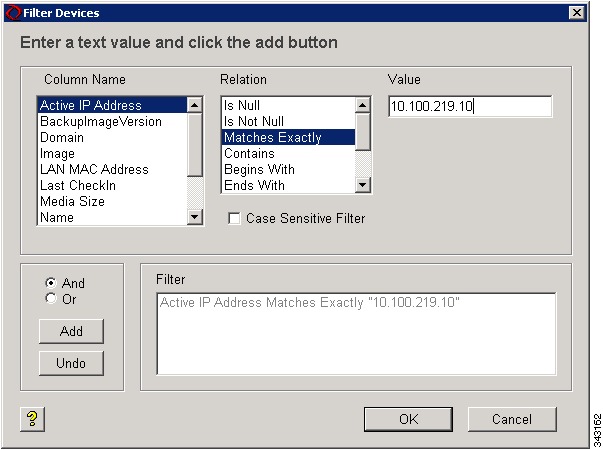
Creating a Device Filter
Create a Device Filter with Device Manager to quickly find the devices you want.
Procedure
Step 1
Figure 2-17 Device Filter
Step 2
•
•
•
•
•
Step 3
Tip
Editing a Device Filter
In the tree pane of the Administrator Console, right-click Device Manager, and then choose Edit Device Filter to open and use the Filter Devices dialog box.
Deleting a Device Filter
In the tree pane of the Administrator Console, right-click Device Manager, and then click Remove Device Filter.
Searching for a Device with Find Device in View and Quick Find
While you can use either of the Cisco VXC Manager search tools to find the devices you want, use the search tool best suited for your environment and needs as follows:
•
•
Using Find Device in View
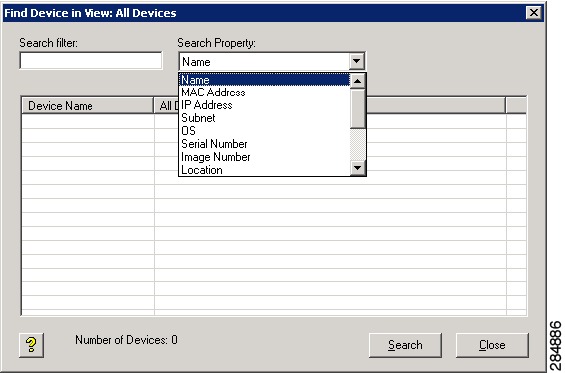
In the tree pane of the Administrator Console, right-click Device Manager, and then choose Find Device in View to open the Find Device in View dialog box displaying a list of all the devices in the view and the view path next to each device.
Tip
Figure 2-18 Find Device in View Search
You can use the Search Filter field (enter your text) and Search Property field (choose a property) to filter and find the devices you want.
Using Quick Find
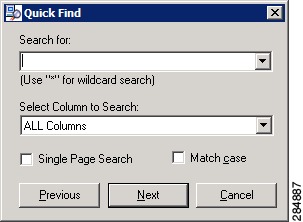
Right-click any device name in the Device Manager view and choose Quick Find to open and use the Quick Find dialog box.
Figure 2-19 Quick Find Search
Tip
Use the following guidelines when searching:
•
–
–
•
•
•
•
•
•
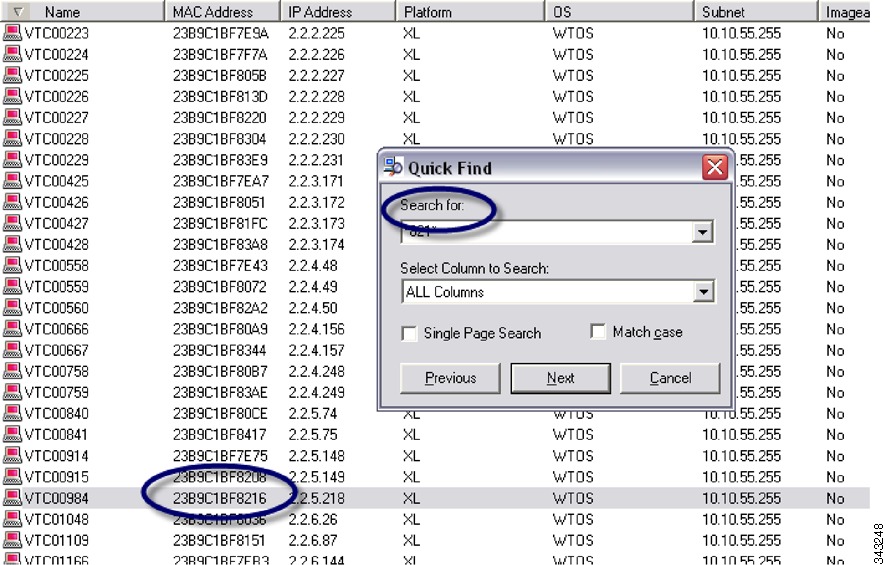
Figure 2-20 Successful Search Results
Tip
Figure 2-21 Devices Displayed on a Single Page
Creating and Viewing Log Files
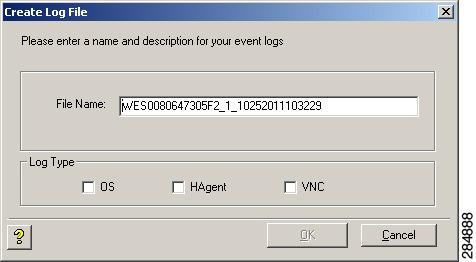
To create log files that you can view, right-click a device in the details pane of the Device Manager and choose Get Logs (enter a name, choose the type of log file you want, and then click OK).
Note
Figure 2-22 Creating Log Files
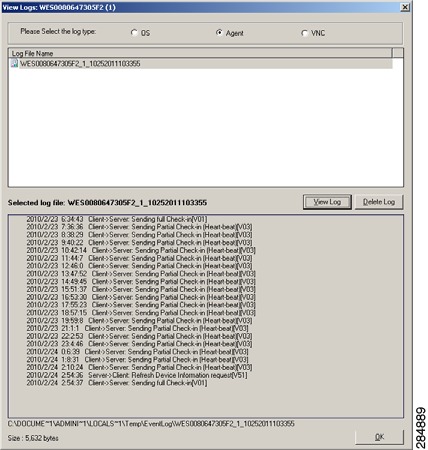
To choose the log file you want to view, right-click a device in the details pane of the Device Manager and choose View Log (choose the type of log file you want, choose the log file name you want, and then click View Log).
Figure 2-23 Viewing Log Files
Tip
Using the Package Distribution Wizard to Schedule a Package for Distribution
Step 1
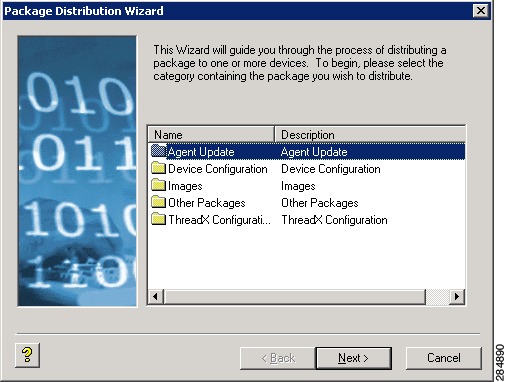
Step 2
Figure 2-24 Package Category Selection
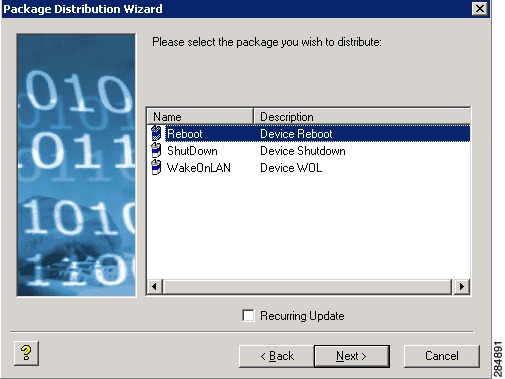
Step 3
Note
Figure 2-25 Package Selection
Step 4
Figure 2-26 Package Schedule
Step 5
Figure 2-27 Create Schedule
Step 6
Step 7
Using the Remote Task Manager to View Applications, Processes, and Performance for a Device
Step 1
Step 2
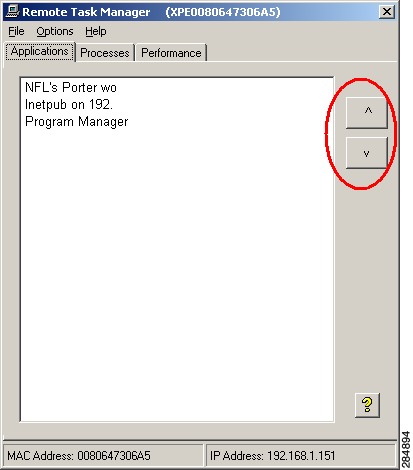
Step 3
Figure 2-28 Applications Tab
Step 4
Figure 2-29 Processes Tab
Step 5
Figure 2-30 Performance Tab
Step 6