-
Administration Guide for Cisco Virtualization Experience Client Manager 4.9
-
Preface
-
Getting Started
-
Device Manager
-
Package Manager
-
Cisco VXC Firmware and Configuration Upgrade Procedures
-
Update Manager
-
Report Manager
-
Configuration Manager
-
Appendix A: Working with Groups and Views
-
Appendix B: About Cisco VXC Manager Security
-
Appendix C: Upgrading Cisco VXC Manager Agents
-
Appendix D: Device Discovery, Device Imaging, and Mass Imaging Tool
-
Appendix E: Troubleshooting
-
Appendix F: Licensing and Sales Keys
-
Appendix G: Additional Package Manager Procedures
-
Appendix H: Cisco VXC Manager ScriptBuilder Tool and Scripting Language
-
Appendix I: Autogenic Imaging
-
 Feedback
Table Of Contents
Managing Licenses and Certificates
Managing Cisco VXC Manager Sales Keys
Deleting Cisco VXC Manager Sales Keys
Licensing and Sales Keys
This appendix provides information on Cisco VXC Manager licensing. It includes the detailed steps to activate Sales Keys.
Note
Cisco VXC Manager does not require license keys to manage Cisco VXC clients. This section applies only to third-party products that may require licenses to interoperate with Cisco VXC Manager.
Managing Licenses and Certificates
Cisco VXC Manager allows you to manage licenses and certificates.
For information on tracking certificate expirations, see Using the Certificate Expiration Tracker.
Managing Cisco VXC Manager Sales Keys
Cisco VXC Manager allows you to view, add, upgrade, and delete Sales Keys as needed.
Viewing Sales Key Details
In the tree pane of the Administrator Console, expand Configuration Manager, click Licensing, right-click on the Sales Key you want to view, and then choose Properties to display the license details.
Adding Sales Keys
Procedure
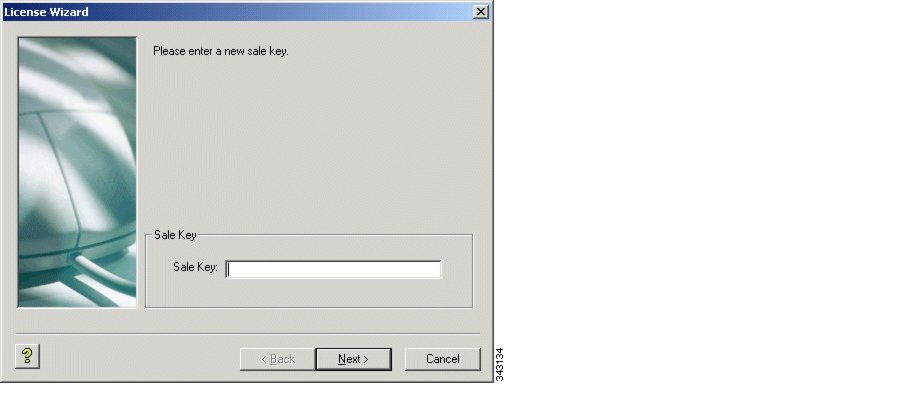
Step 1
Figure F-1 Add License Wizard
Step 2
Step 3
Step 4
Activating Your Sales Key
Caution
Use the following guidelines:
Procedure
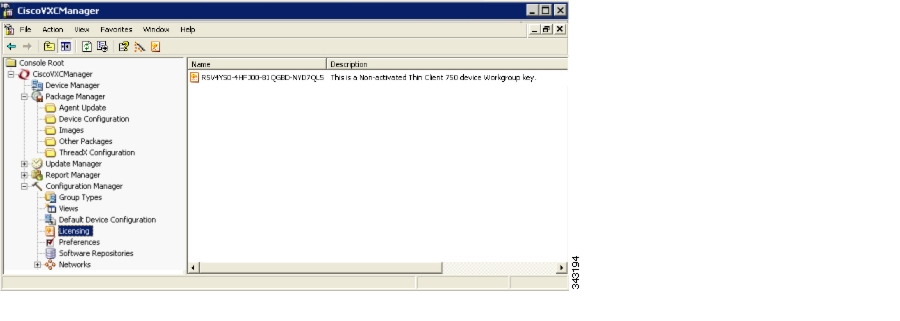
Step 1
Step 2
Tip
Figure F-2 Cisco VXC Manager Administrator Console - Licensing
Step 3
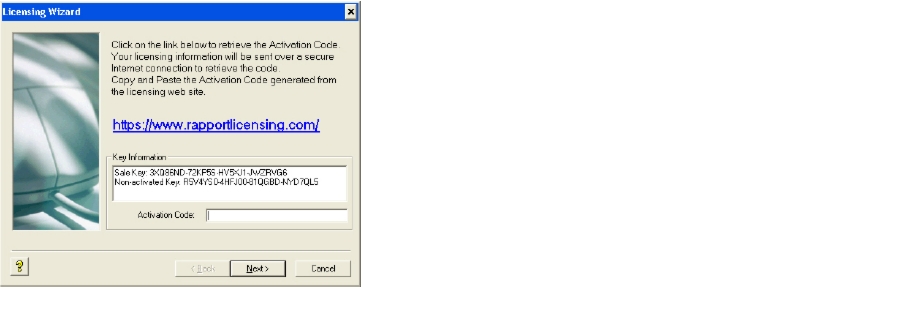
Figure F-3 Licensing Wizard
Step 4
Tip
Step 5
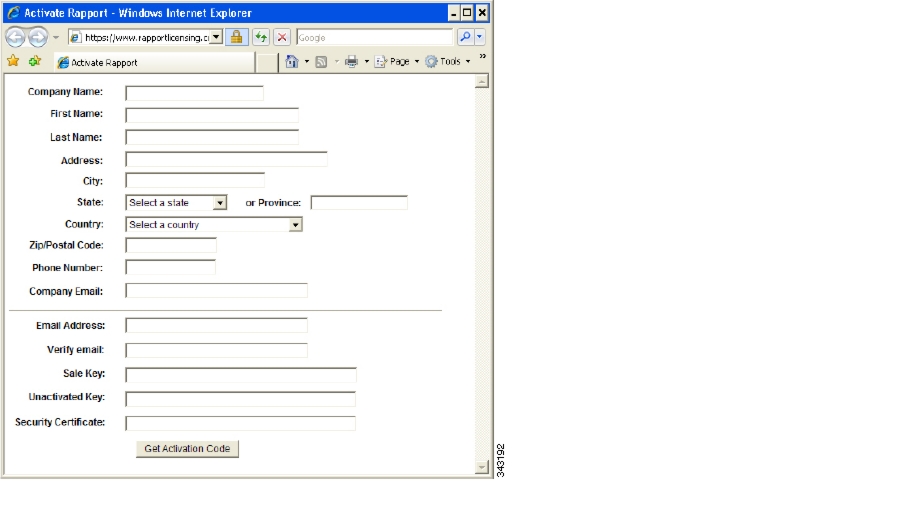
Figure F-4 Licensing form
Step 6
Step 7
Step 8
Deleting Cisco VXC Manager Sales Keys
In the tree pane of the Administrator Console, expand Configuration Manager, click Licensing, right-click on the Sales Key you want to delete, choose Delete, and then click Yes to confirm.