-
Cisco Content Security and Control SSM Administrator Guide, 6.1
-
Preface
-
Introducing the Content Security and Control SSM
-
Verifying Initial Setup
-
Configuring Mail Traffic (SMTP and POP3)
-
Configuring Web (HTTP) and File Transfer (FTP) Traffic
-
Managing Updates and Log Queries
-
Administering Trend Micro InterScan for Cisco CSC SSM
-
Monitoring Content Security
-
Troubleshooting Trend Micro InterScan for Cisco CSC SSM
-
Reimaging and Configuring the CSC SSM Using the Command Line
-
Using CSC SSM with Trend Micro Control Manager
-
Glossary
-
Index
-
 Feedback
Table Of Contents
Administering Trend Micro InterScan
for Cisco CSC SSMConfiguring Connection Settings
Managing Admin Email and Notification Settings
Performing Configuration Backup
Administering Trend Micro InterScan
for Cisco CSC SSM
This chapter describes tasks you might perform infrequently, such as installing a patch, and includes the following sections:
•
Configuring Connection Settings
•
•
•
Configuring Connection Settings
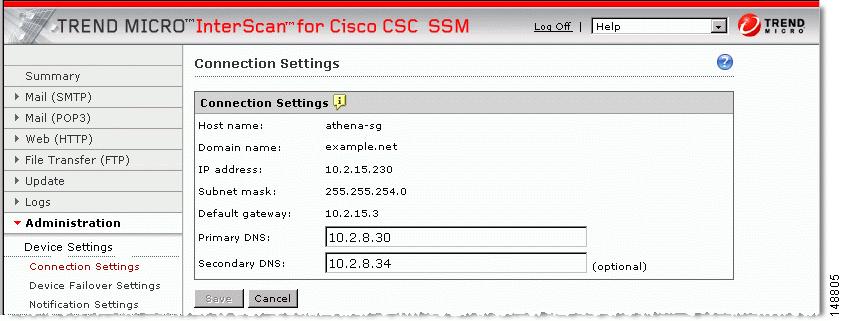
To view your network connection settings, select Administration > Device Settings > Connection Settings. The Connection Settings window (shown in Figure 6-1) displays selections you made during installation.
Figure 6-1 Connection Settings Window
The Primary DNS and Secondary DNS IP address fields can be changed on this screen. To change your other connection settings, such as host name, domain name, or IP address, go to Configuration > Trend Micro Content Security and select CSC Setup from the menu.
You can also change these settings using the command-line interface (CLI). Log in to the CLI, and issue a session 1 command. If this is your first time logging in to the CLI, use the default user name (cisco) and password (cisco). You are prompted to change your password.
After you log in, select option 1, Network Settings, from the Trend Micro InterScan for Cisco CSC SSM Setup Wizard menu. Follow the prompts to change the settings. See the "Reimaging the CSC SSM" section on page A-4, for more information.
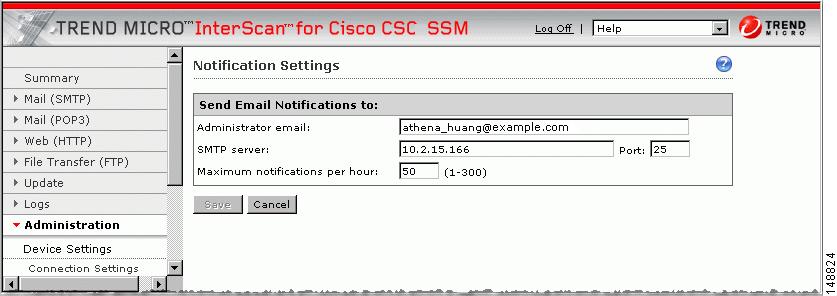
Managing Admin Email and Notification Settings
The Notification Settings window (shown in Figure 6-2) allows you to:
•
•
•
Figure 6-2 Notification Settings Window
To make changes on this window, enter the new information and click Save.
You can also make these changes in the ASDM by selecting Configuration > Trend Micro Content Security, then select CSC Setup from the menu.
Performing Configuration Backup
Trend Micro InterScan for Cisco CSC SSM provides the ability to back up your device configuration and save it in a compressed file. You can import the saved configuration and thus restore your system to the settings configured at the time of the save.
Note
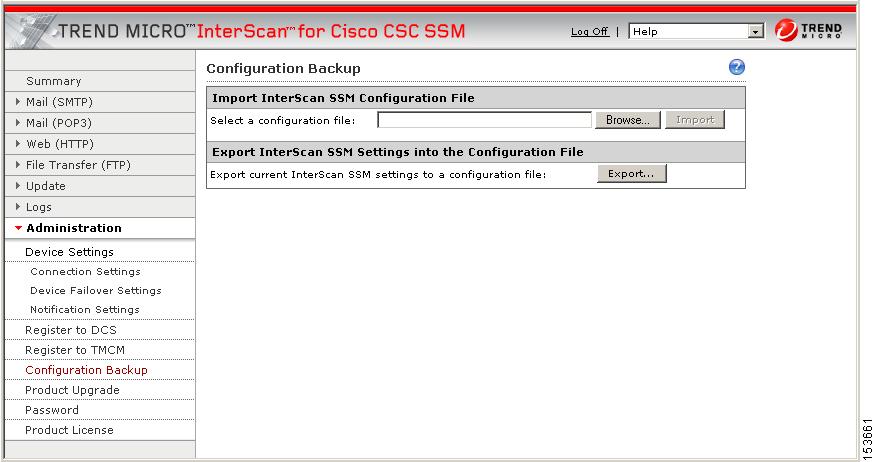
As soon as you finish configuring Trend Micro InterScan for Cisco CSC SSM as described in previous chapters, perform a configuration backup. Go to Administration > Configuration Backup to display the Configuration Backup window, shown in Figure 6-3.
Figure 6-3 Configuration Backup Window
Export (Save) Configuration
Click Export to save your configuration settings. A File Download dialog box displays. You can open the file, which is named config.tgz by default, or save the file to your computer.
Import Configuration
To restore a saved configuration file, on the Backup Configuration window, click Browse. Locate the config.tgz file and click Import. The file name displays in the Select a configuration file field. The saved configuration settings are restored to the appliance.
Importing a saved configuration file restarts scanning service. You should notice, for example, that the counters on the Summary window reset.
Configuring Failover Settings
Trend Micro InterScan for Cisco CSC SSM provides capability to replicate configuration to a peer unit in supporting the device failover feature on the ASA. Before you configure the peer device, or the CSC SSM on the failover device, finish configuring the primary device first, that is, enable spyware/grayware scanning, customize your notifications if you plan to do so, and so on.
When you have fully configured the primary device to perform as you want it, follow the steps exactly as described in the checklist below to configure the failover peer. Print a copy of the checklist that you can use to record your steps as you progress.
Caution
When you complete the steps on the checklist, the failover relationship is successfully configured.
If at a future time you want to make a change to the configuration, for example, you change the spam filtering threshold from Low to Medium, you should modify the configuration on the primary device only. Trend Micro InterScan for Cisco CSC SSM detects the configuration mismatch, and updates the peer with the configuration change you made on the first device.
The exception to the auto-synchronization feature is uploading a system patch. A patch must be applied on both the primary and secondary devices. See the "Installing Product Upgrades" section for more information.
If for some reason the peer device becomes unavailable, an email notification is sent to the administrator. The message continues to be sent periodically until the problem with the peer is resolved.
Installing Product Upgrades
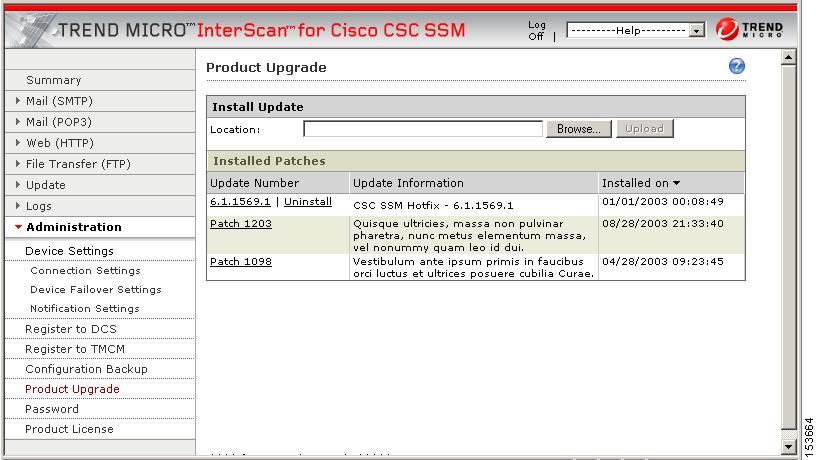
From time to time, a product upgrade becomes available that fixes a known issues or offers new functionality. First download the system patch from the Web site or CD provided, then go to Administration > Product Upgrades to display the Upgrade window, shown in Figure 6-4.
Figure 6-4 Product Upgrades Window
Caution
See the online help for this window for information about installing and removing upgrades.
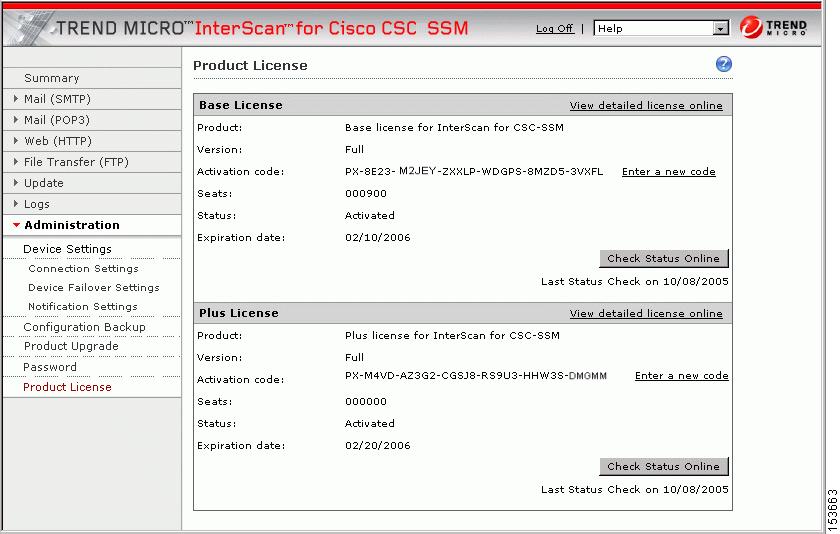
Viewing the Product License
The Product License window (shown in Figure 6-5) allows you to view the status of your product license, including:
•
•
•
•
•
•
Figure 6-5 Product License Window
If your license is not renewed, antivirus scanning continues with the version of the pattern file and scan engine that was valid at the time of expiration plus a short grace period. However, other features may become unavailable. See the License Expiration section for more information.
License Expiration
As you approach and even pass the expiration date, a message displays in the Summary window under the window header, similar to the example shown in Figure 6-6.
Figure 6-6 License Expiration Message
When your product license expires, you can continue using Trend Micro InterScan for Cisco CSC SSM, but you are no longer eligible to receive updates (to the virus pattern file, scan engine, and so on). Your network may no longer be protected against new security threats.
If your Plus license expires, content-filtering and URL-filtering are no longer available. In this case, traffic is passed without filtering content or URLs.
If you purchased the Plus License at a later time after you purchased and installed the Base License, the expiration dates are different. You can renew each license at different times as the renewal date approaches.
License Information Links
The Product License window contains some helpful links. These are:
•
•
The View detailed license online link takes you to the Trend Micro online registration Web site where you can view information about your license, and find instructions for renewing. Check Status Online displays a message below the Product License window title that describes the status of your license, similar to the example in the previous figure.
View the online help for the Product License window for additional information.