-
Cisco Active Network Abstraction Administrator Guide, 3.6
-
Introducing Cisco ANA
-
Getting Started With Cisco ANA Manage
-
Deploying Cisco ANA
-
Using Cisco ANA Manage Tables
-
Managing Cisco ANA Units
-
Managing AVMs and VNEs
-
Managing Global Settings
-
Managing Links
-
Managing Workflows
-
Managing Security
-
Database Backup and Restore
-
Utility Scripts
-
Golden Source Registry
-
Ports Used By Cisco ANA
-
Drools Rules Engine
-
VNE Persistency Mechanism
-
Index
-
 Feedback
Table Of Contents
Database Backup and Restore
This appendix describes the database backup and restore procedure.
•
Overview—Provides an overview of the backup procedure.
•
•
•
•
Overview
The backup procedure is used to perform data backup once a week. It operates through the UNIX cron mechanism. The factory settings entry in the cron table (crontab) runs the backup procedure every Sunday at 1:00 AM. To activate the backup procedure, the user needs to remove the comment for the relevant line in the cron table.
The restoration is done manually by executing the restore.pl script.
Backed-Up Content
The data that has been backed-up is:
•
•
•
Backup Procedure
The backup script is a scheduled task. It operates through cron.
The backup files are stored in the following directory, ~sheer/db/db_backup/[date+time].
Note
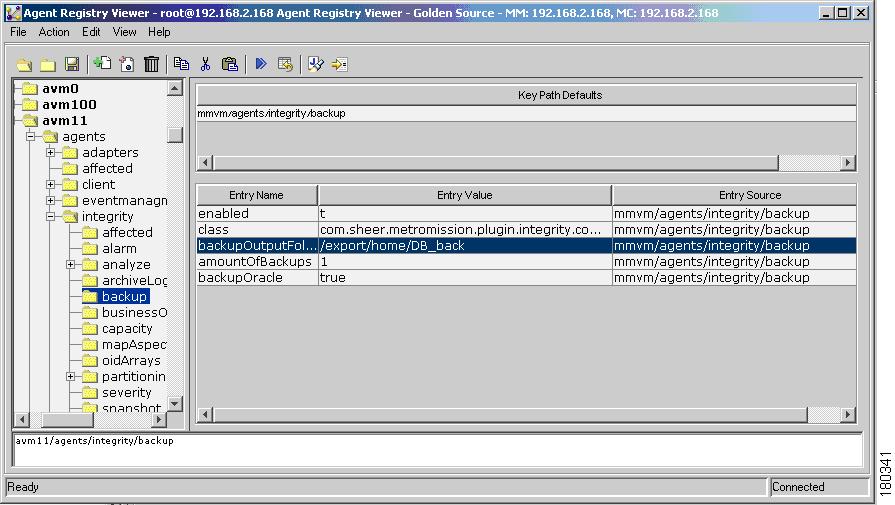
The location is configurable through the registry. For more information, refer to registry path, avm11/agents/integrity/backup.
The figure below displays the backup registry entries.
Figure A-1 Backup Registry Entries
The backup is disabled by default.
To enable the backup:
Step 1
Step 2
crontab -eStep 3
0 1 * * 0 cd Main;./mc.csh localhost 8011 integrity.executeTest backup > /dev/null 2>&1
Note
The user can activate the backup procedure immediately.
To activate the backup procedure immediately:
Step 1
Step 2
cd ~/MainStep 3
./mc.csh localhost 8011 integrity.executeTest backup
Changing Periodic Backup Time
A crontab file consists of lines of six fields each. The fields are separated by spaces or tabs. The first five are integer patterns that specify the following:
•
•
•
•
•
To specify days using only one field, the other field should be set to *.
For example, 0 0 * * 1 would run a command only on Mondays.
Another example cleans up core files every weekday morning at 3:15 am:
15 3 * * 1-5 find $HOME -name core 2>/dev/null | xargs rm -fThe sequence 0 0 1,15 * 1 runs a command on the first and fifteenth of each month as well as every Monday.
Restore Procedure
Install the Cisco ANA gateway. For more information, refer to the Cisco Active Network Abstraction Servers Installation Guide. Note that you will need to login as root.
To restore from a backup:
Step 1
cd ~sheer/Main/scriptsStep 2
restore.pl [backup-files-location]
Note
Step 3
su - sheercd Main./mvm.csh
Note