Feedback
Table Of Contents
When to Add a Distribution Profile to a Job Profile
Introduction to the Delivery Profile
Understanding Delivery Settings
Delivery Formats (Delivery Profile)
Delivery Method (Delivery Profile)
Show and Share Delivery (Delivery Profile)
Streaming URL (Delivery Profile)
Rename on Delivery (Delivery Profile)
Understanding the FTP .tmp File Extension
How to Enable the .tmp File Extension
Adding a Delivery Profile to a Job Profile
Variables Used for File and Directory Naming
Introduction to the Notification Profile
When to Use the Notification Feature
Understanding Notification Settings
Notification Criteria (Notification Profile)
Email Notification (Notification Profile)
HTTP Post (Notification Profile)
TCP Post (Notification Profile)
UDP Post (Notification Profile)
Creating a Notification Profile
Adding a Notification Profile to a Job Profile
Introduction to the Output Profile
Save Local Output File (Output Profile)
Adding an Output Profile to a Job Profile
Variables Used for File and Directory Naming (Output Profile)
Introduction to the Webcast Profile
Understanding Webcast Settings
Streams 1-10 (Webcast Profile)
Adding a Webcast Profile to a Job Profile
Understanding the IP Stream Profile
Adding an IP Stream Profile to a Job Profile
Distribution Profiles
Distribution profiles tell the Cisco MXE 3500 what to do with output files once encoding is complete. Distribution Profiles are optional. You may add one or more Distribution Profiles to a Job Profile. This chapter contains the following information:
•
When to Add a Distribution Profile to a Job Profile
Distribution Profiles are divided into the following types:
•
When to Add a Distribution Profile to a Job Profile
Distribution Profiles allow you to save encoded output according to specific business needs in addition to or instead of the default location.
Distribution Profiles are not required components of Job Profiles. By default, output files will be saved to the system default locations set on System Administration page. When any type of Distribution Profile is added to a Job Profile, the system default will be overridden.
Likewise, Distribution Profiles are used to automate portions of the encoding workflow. For example, if encoded clips must be reviewed before they are moved to a streaming server, you can add a Delivery Profile to automatically send the media to the reviewer's server using FTP, eliminating the need to manually FTP files. Or, if encoding files for an external customer, you can add a Notification Profile to automatically post job statuses (via HTTP Post or e-mail) to a site for client reference.
Delivery Profile
This section includes the following topics:
•
•
•
•
•
Introduction to the Delivery Profile
A Delivery Profile is an optional component of a Job Profile.
The Delivery Profile controls the distribution of encoded media files. Encoded media can be copied to a network drive or can be delivered to another site via File Transfer Protocol (FTP). Multiple deliveries and multiple delivery methods may be specified in one Delivery Profile. For instance, within one job, you can have Real, QuickTime, and PacketVideo outputs delivered to a network drive and FTP'd to another site. To set different deliveries for different encoders, you must create another Delivery Profile.
If a Delivery Profile is not added to a Job Profile, files will be saved to the system default location or to the client default location defined on the System Administration page. See also: Introduction to Administration.
Understanding Delivery Settings
This section includes the following topics:
•
•
•
•
•
Common (Delivery Profile)
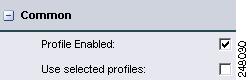
Figure 9-1 shows the Common section.
Figure 9-1 Delivery Profile: Common Section
Check the Profile Enabled box to enable this profile for job processing.
Check the Use selected profiles box to enable the profiles checked below in Delivery Formats.
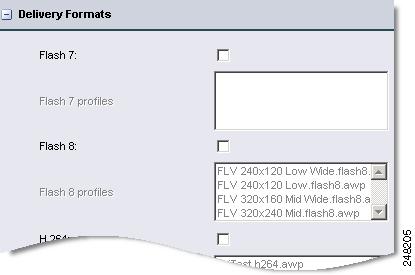
Delivery Formats (Delivery Profile)
Select file type(s) to be delivered to the location defined in the Delivery Method section, shown in Figure 9-2. A checkbox for each encoding format licensed on the Cisco MXE 3500 will display in this section.
Check the box next to a particular format type to specify that all output media from that encoder will be delivered.
See also: Delivery Method (Delivery Profile).
Figure 9-2 Delivery Profile: Delivery Formats Section
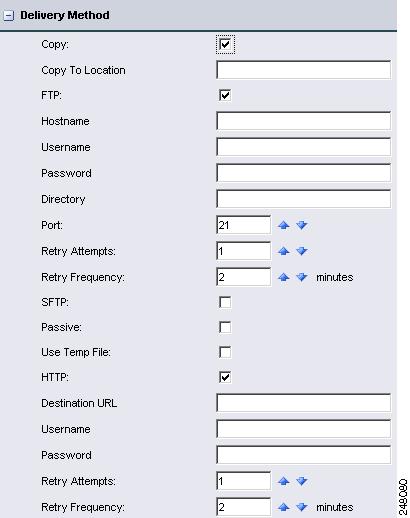
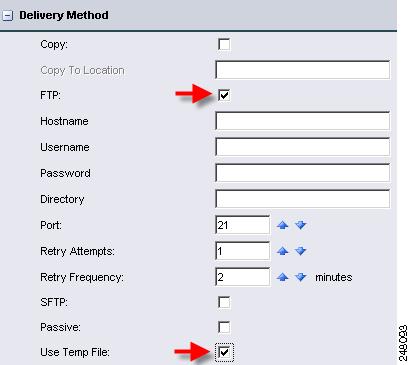
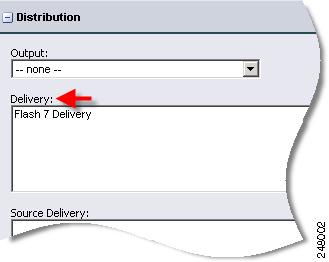
Delivery Method (Delivery Profile)
Use this section, shown in Figure 9-3, to specify delivery method, choosing to copy the output to a file location and/or to FTP the output to a Host.
Figure 9-3 Delivery Profile: Delivery Method Section
Table 9-1 describes the settings.
Table 9-1 Delivery Profile: Delivery Method Settings and Descriptions
Copy
Check the Copy box to allow encoded files to be copied to a network folder.
Copy to Location
Specify the network folder to which the encoded files will be copied, by entering the UNC path of a network folder (Example: \\Machine\EncodedMedia).
Note
FTP
Check this box to send encoded files to another server via FTP, and specify the FTP settings, if applicable.
Hostname
The hostname (or address) of the FTP server that will receive the output files.
Username
The username used to establish the FTP session, if required.
Password
The password used to validate the user establishing the FTP session, if required.
Directory
The user home directory or subdirectory under the FTP location where the files will be stored. You can use '.' as a directory name to copy files directly to the home directory. Although not recommended, you can enter a soft link path that points to a remote directory; you must have the minimum permissions necessary to access the directory.
Port
The port the destination server uses for FTP traffic. The port number is supplied by the administrator of the destination server.
Retry Attempts
The maximum number of times (0-16) an attempt will be made after the first FTP transfer fails.
Retry Frequency
The number of minutes the Cisco MXE 3500 will wait after a failed FTP connection attempt before trying again.
SFTP
Check the box to use the Secure FTP protocol.
Passive
Check this box to request passive mode from the host. In passive mode, the FTP host server opens a random port and tells the Cisco MXE 3500 the address and port on which it is listening.
Use Temp File
Check this box to use a temporary remote filename and rename after the transfer completes. This option helps prevent an external system from ingesting the remote file that failed to completely transfer. For example, if the FTP connection was dropped during the transfer, a partial file could be left at the destination. Only after a completed transfer will the delivered file be renamed to its desired name.
See also: Understanding the FTP .tmp File Extension.
HTTP
Check this box to enable HTTP delivery, and complete the following fields, if needed: Destination URL, Username, Password, Retry Attempts, and Retry Frequency.
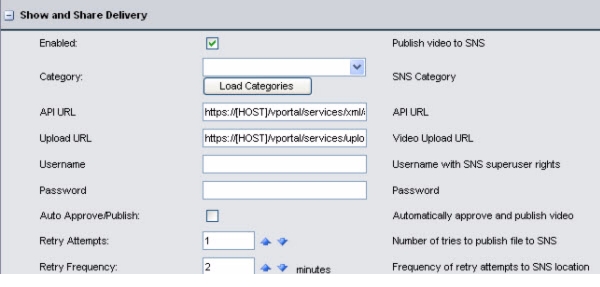
Show and Share Delivery (Delivery Profile)
Enable Show and Share Delivery to deliver the encoded content to Cisco Show and Share. Figure 9-4 shows the configuration options.
Figure 9-4 Show and Share Delivery Profile
Table 9-2 describes the settings.
Streaming URL (Delivery Profile)
The Cisco MXE 3500 reports the value in the Streaming URL in the fileman task accounting data as the output-stream-name. This accounting data is accessible via the MXE REST API.
The streaming URL is the base playable URL of the video once the video has been uploaded to the streaming server (i.e. Wowza or Windows Media Streaming Server). The video file name is appended to the URL.
If streaming is enabled in the SUI Admin page, the Job Status page in the Video Conversion Interface displays the watch link using the streaming URL for any output formats that have this (streaming server) delivery profile enabled. The watch link URL is also included in the SUI email notification.
Figure 9-5 shows the streaming URL delivery profile.
Figure 9-5 Streaming URL Delivery Profile
See also Configuring a Wowza or Windows Media Streaming Server , page 3-40.
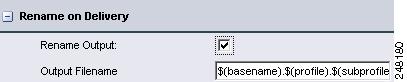
Rename on Delivery (Delivery Profile)
Figure 9-6 shows the Rename on Delivery section.
Figure 9-6 Delivery Profile: Rename on Delivery Section
Table 9-3 describes the settings.
Table 9-3 Delivery Profile: Rename on Delivery Settings and Descriptions
Rename Output
Check this box to enable file renaming, as determined by the Output Filename box. If this box is not checked, the files retain the same names they have in the normal output folders.
Output Filename
The text and/or pattern of variables used to build the names of output files. Variables can be used to replace the default file name structure with one that reflects the unique Job Profile requirements.
See also: Variables Used for File and Directory Naming.
Understanding the FTP .tmp File Extension
After the encoding process, the newly generated file is transferred through file transfer protocol (FTP) from the Cisco MXE 3500 file system to the target server. The transfer takes place one chunk at a time until the file is completely copied.
A problem can occur if there is an interruption in the transfer (i.e., lost connection or remote FTP server down), and the file is not completely copied over. FTP does not provide guaranteed delivery of the complete files, and valid but incomplete files could result. A validation mechanism is needed to ensure that content is fully uploaded before the watch folder agent begins to ingest the file.
This section includes the following topics:
•
Addition of .tmp Extension
The Cisco MXE 3500 File Manager (FM) adds a .tmp extension to the target file name during transfer. After the upload is complete, FM removes the .tmp extension from the target file name. If the transfer is incomplete, the .tmp extension remains. Therefore, the watch folder agent can be configured to ignore files with a .tmp file extension to ensure complete transfers.
Example: Target file thefile.bmp is uploaded as thefile.bmp.tmp then renamed to thefile.bmp.
Note
How to Enable the .tmp File Extension
•
Figure 9-7 Enabling the Temp File Extension
•
Figure 9-8 Example XML
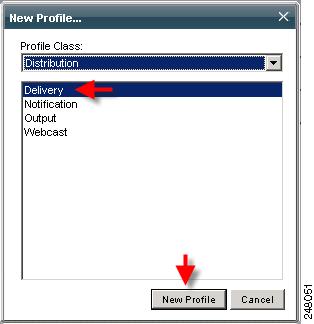
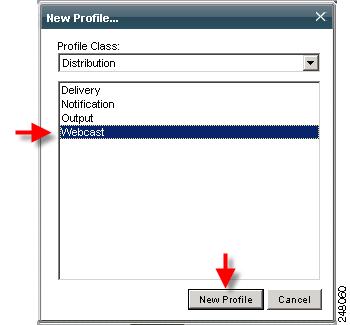
Creating a Delivery Profile
Use this procedure to create a Delivery Profile.
Procedure
Step 1
Step 2
Figure 9-9 Creating a New Delivery Profile
Step 3
Step 4
Adding a Delivery Profile to a Job Profile
Profile
Step 1
Step 2
Step 3
Figure 9-10 Creating a New Delivery Profile
Step 4
Step 5
Variables Used for File and Directory Naming
Table 9-4 describes the variables for file and directory naming.
Notification Profile
This section includes the following topics:
•
•
•
•
•
Introduction to the Notification Profile
Notification Profiles enable the Cisco MXE 3500 to send messages regarding job success or failure. The following forms of notification are available:
•
•
•
•
You can use any of the notification types separately or together. You may add multiple Notification Profiles to one Job Profile to implement complex notification scenarios.
When to Use the Notification Feature
Add a Notification Profile to a Job Profile if you want to be notified of a job's completion or if you need metadata from the job to be sent to another location. For example, you may elect to receive an e-mail alert whenever a job fails or a list of output file names for every successful encode. In another example, watermarking (a licensed Cisco MXE 3500 option) associates metadata items with an embedded watermark payload, and these metadata are included in the notification, which can be forwarded to a central database via HTTP post.
See also: Adding a Notification Profile to a Job Profile.
Understanding Notification Settings
Each Notification Profile is made up of the following sections that are used to define when and how notification will take place:
•
•
•
•
•
•
Common (Notification Profile)
Check the Profile Enabled box, shown in Figure 9-11, to enable this profile for job processing.
Figure 9-11 Notification Profile: Common Section
Notification Criteria (Notification Profile)
Select the status, shown in Figure 9-12, at which a notification is sent:
•
•
•
•
Figure 9-12 Notification Profile: Notification Criteria Section
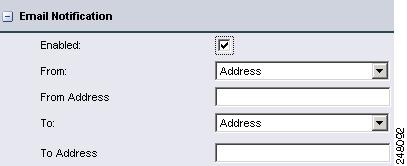
Email Notification (Notification Profile)
Figure 9-13 shows the Email Notification section.
Figure 9-13 Notification Profile: Email Notification Section
Table 9-5 describes the settings.
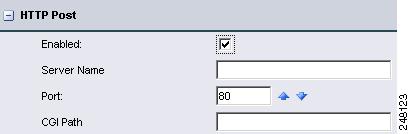
HTTP Post (Notification Profile)
Figure 9-14 shows the HTTP Post section.
Figure 9-14 HTTP Post Section
Table 9-6 describes the settings.
TCP Post (Notification Profile)
Figure 9-15 shows the TCP Post section.
Figure 9-15 TCP Post Section
Table 9-7 describes the settings.
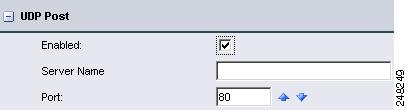
UDP Post (Notification Profile)
Figure 9-16 shows the UDP Post section.
Figure 9-16 UDP Post Section
Table 9-8 describes the settings.
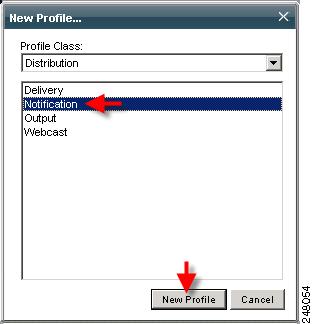
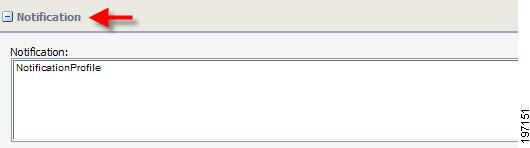
Creating a Notification Profile
Use this procedure to create a Notification Profile.
Procedure
Step 1
Step 2
Figure 9-17 Creating New Notification Profile
Step 3
Step 4
Adding a Notification Profile to a Job Profile
Use this procedure to add a Notification Profile to a Job Profile.
Procedure
Step 1
Step 2
Step 3
Step 4
Step 5
Figure 9-18 Adding a Notification Profile to a Job Profile
Output
This section includes the following topics:
•
•
•
•
Introduction to the Output Profile
Use this profile to identify encoder types for which the output files should be saved locally.
The output file locations are defined during system setup. The locations may be changed on the System Administration page. The name assigned to each output file is determined on the System Administration page or by the Output File Name defined in the Output Profile. See also: System Administration.
Output files that are not saved are automatically removed from the local machine as the last step of an encoding job. When the Cisco MXE 3500 file delivery method is used, there may be no reason to keep the local files. The automatic file removal keeps the local machine clean for high-volume users. See also: Delivery Profile.
Understanding Output Settings
Each Output Profile is made up of the following sections:
•
Common (Output Profile)
Check the Profile Enabled box, shown in Figure 9-19, to enable this profile for job processing.
Figure 9-19 Output Profile: Common Section
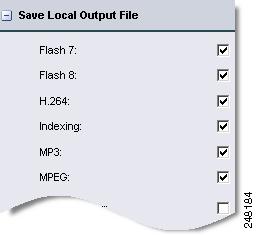
Save Local Output File (Output Profile)
Check the boxes, shown in Figure 9-20, to specify output for certain encoded formats. There is a checkbox for each encoding format licensed on the Cisco MXE 3500.
Checking a particular format type will specify that all the encodes for that encoder will be saved in the output folder. Unchecked formats are not saved.
Figure 9-20 Save Local Output File Section
Output (Output Profile)
Figure 9-21 shows the Output section.
Figure 9-21 Output Section
Table 9-9 describes the settings.
Table 9-9 Output Settings and Descriptions
Output Name Enabled
Check this box to allow output files to be renamed according to the Output File Name box below. If unchecked, the files are named according to the default format defined on the System Administration page. See also: System Administration.
Output Filename
This field defines the new name for encoded output files.
You may use the Cisco MXE 3500 substitution macros, which allow this single entry to specify the names of multiple encoded outputs. By default, the box holds: $(basename).$(profile).$(subprofile)., which ensures that each encoded file will receive a distinct name.
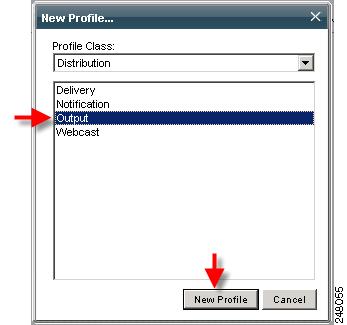
Creating an Output Profile
Use this procedure to create an Output Profile.
Procedure
Step 1
Step 2
Figure 9-22 Creating New Output Profile
Step 3
Step 4
Adding an Output Profile to a Job Profile
Use this procedure to add an Output Profile to a Job Profile.
Procedure
Step 1
Step 2
Step 3
Step 4
Step 5
Figure 9-23 Adding an Output Profile to a Job Profile
Variables Used for File and Directory Naming (Output Profile)
See the "Variables Used for File and Directory Naming" section.
Webcast Profile
Activation
This section includes the following topics:
•
•
•
Introduction to the Webcast Profile
Webcast Profiles are used to define the parameters for streaming encoded output live to the Internet or to an intranet. Currently, only Windows Media, Flash 8, and H.264 support Webcasts.
Note
A Webcast Profile is optional and may be added to a Job Profile.
Understanding Webcast Settings
The Webcast Profile defines all of the necessary parameters for the Live Streaming feature. A Webcast Profile is required when encoded output will be delivered as a Live stream or to define whether or not Video on Demand (VOD) archive files will be saved. The Webcast Profile is divided into the following sections:
•
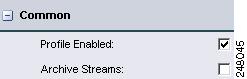
Common (Webcast Profile)
Figure 9-24 shows the Common section.
Figure 9-24 Common Section
Table 9-10 describes the settings.
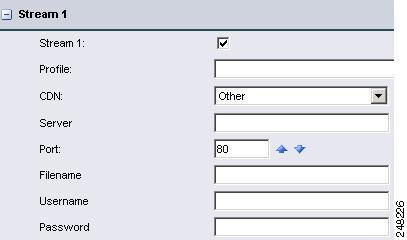
Streams 1-10 (Webcast Profile)
Figure 9-25 shows the Streams 1-10 section.
Figure 9-25 Webcast Profile: Streams 1 - 10 Section
Table 9-11 describes the settings.
Table 9-11 Webcast Profile: Streams Settings and Descriptions
Profile
Click the browse button and choose the encoder Profile for which you will be entering access information. The drop-down displays only encoder Profile(s) that correspond to the selected encoder.
•
•
CDN
Defaults to other.
Server
Enter the name of the streaming server that will receive the encoded output and stream it to the end user.
•
•
TipPort
Enter the port number for the server configured to receive streams from the Cisco MXE 3500. The correct port is supplied by the streaming server administrator.
•
•
Filename
Enter the name of the file being streamed. Because this setting is used to generate the name of the file that is streamed, enter a meaningful filename, such as CNNStream for example.
Note
Username
Enter a valid User ID for logging into and establishing a connection with the streaming server.
Note
Password
Enter the password used to validate a secure connection to the streaming server.
Note
Creating a Webcast Profile
Use this procedure to create a Webcast Profile.
Procedure
Step 1
Step 2
Figure 9-26 Creating a New Webcast Profile
Step 3
Step 4
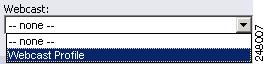
Adding a Webcast Profile to a Job Profile
Use this procedure to add a Webcast Profile to a Job Profile.
Procedure
Step 1
Step 2
Step 3
Step 4
Figure 9-27 Adding a Webcast Profile to a Job Profile
IP Stream Profile
Activation
This section includes the following topics:
•
•
•
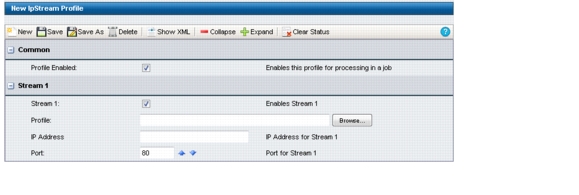
Understanding the IP Stream Profile
The IP Stream profile defines all the parameters for enabling live H.264 MPEG-2 Transport Stream UDP multicast streaming. An IP Stream profile is optional and can be added to a Job profile. Currently. only H.264 encoders support IP streaming. See the "H.264 Encoder" section for IP streaming requirements.
Common (IP Stream Profile)
Figure 9-28 shows the Common section.
Figure 9-28 IP Stream Common Settings
Table 9-12 describes the settings.
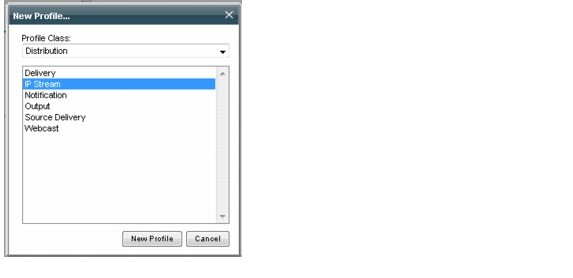
Creating an IP Stream Profile
Step 1
Step 2
Figure 9-29 Creating a New IP Stream Profile
Step 3
Step 4
Step 5
Step 6
Step 7
Step 8
Step 9
Step 10
Adding an IP Stream Profile to a Job Profile
Step 1
Step 2
Step 3
Figure 9-30 Adding the IP Stream Profile to The Job Profile
Step 4