-
Basic Dial NMS Implementation Guide
-
Preface
-
Overview of Basic SNMP Building Blocks
-
Network Design for a Dial NMS Case Study
-
Task 1--Enabling SNMP in a Cisco IOS Device
-
Task 2-- Exploring SNMP Capabilities by Using UCD-SNMP
-
Task 3--Using MRTG to Monitor and Graph Traffic Loads
-
Task 4--Using Syslog, NTP, and Modem Call Records to Troubleshoot Faults
-
Task 5--Setting Up a Web Portal for the Dial NMS
-
Task 6--Managing IP Addresses by Using DNS
-
Task 7--Using HP OpenView to Create the SNMP Framework
-
Task 8--Using CiscoWorks 2000 Resource Manager Essentials
-
Dial MIBs and OIDs Used in the Case Study
-
Index
-
 Feedback
Table Of Contents
Task 8—Using CiscoWorks 2000 Resource Manager Essentials
Importing Devices from HPOV and Populating the Databases
Verifying that Device Polling is Turned On
Backing up Cisco IOS Configurations
Task 8—Using CiscoWorks 2000 Resource Manager Essentials
About CiscoWorks 2000 RME
Cisco Works 2000 Resource Manager Essentials (CW2000 RME) is an element manager used to routinely manage Cisco equipment.
In this case study, CW2000 RME is used for the following tasks:
•
Inspecting syslogs to isolate faults and device problems.
•
•
•
The following installation assumptions are made in this case study:
•
•
•
Importing Devices from HPOV and Populating the Databases
In this case study, CW2000 RME relies on the automatic-discovery mechanism in HPOV to discover devices in the network. CW2000 RME extracts the following information from the HPOV database after HPOV discovers the devices:
•
•
•
Device information is stored in the following database locations:
•
•
Note
To import the list of devices and SNMP community strings from HPOV into CW2000 RME, follow these steps:
Step 1
Incorrect SNMP community strings prevent polling cycles. For basic verification steps, see the
"Task 7—Using HP OpenView to Create the SNMP Framework" section on page 101.Step 2
aurora:/ ->ovstatus ovwdbobject manager name: ovwdbstate: RUNNINGPID: 442last message: Initialization complete.exit status: -aurora:/ ->
Note
Step 3
Step 4
Step 5
Step 6
•
•
•
The SNMP community strings are automatically set during the import operation.
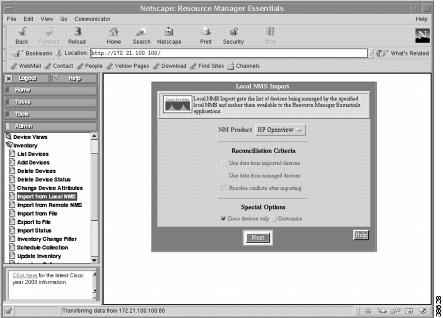
Figure 33
Devices Imported from HP OpenView
Step 7
The devices are imported and a status summary appears.
Step 8
A constant pending or conflicting state indicates a problem that requires resolution:
•
•
Verifying that Device Polling is Turned On
To verify that polling is enabled or to alter any polling settings, follow these steps.
Step 1
Step 2
Figure 34
Polling Setup
Step 3
Step 4
Polling the Devices
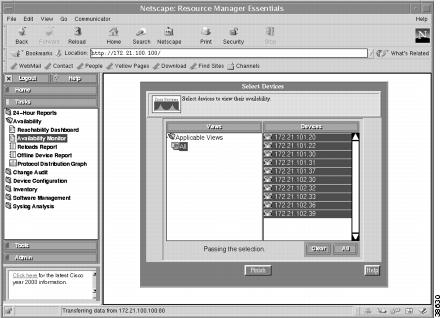
To inspect the status and availability of the devices, follow these steps.
Step 1
Figure 35
The Status of the Devices
Step 2
Step 3
Step 4
Figure 36
Devices Listed in the Availability Monitor
Step 5
Step 6
Step 7
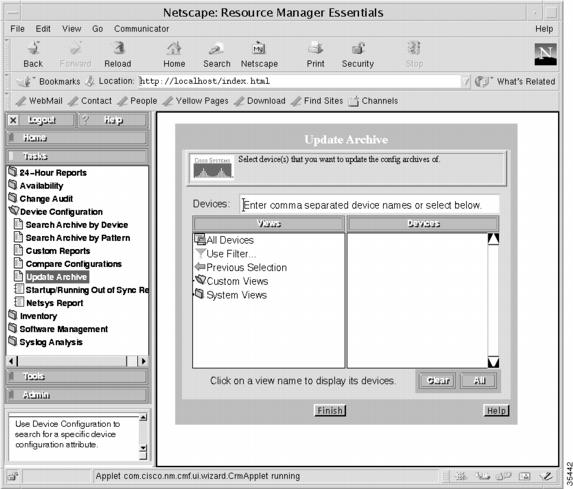
Backing up Cisco IOS Configurations
Having quick access to archived configuration files reduces network downtime when problems occur.
Note
To back up the Cisco IOS start-up configuration files for devices within the network, follow these steps:
Step 1
Figure 37
The Update Archive Screen
Step 2
Step 3
Step 4
The Cisco IOS start-up configuration file is copied from the router to the Unix workstation.
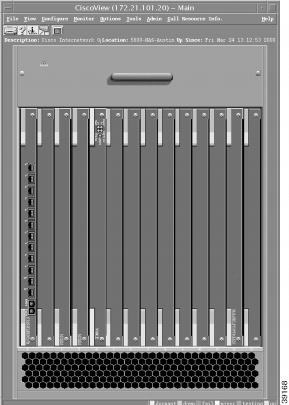
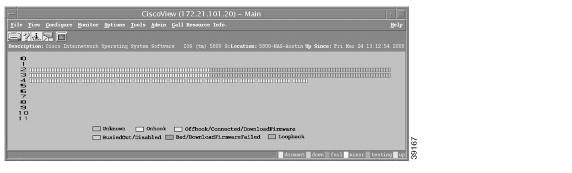
Using CiscoView
CiscoView is a GUI-based device management software application that lets you access dynamic status, statistics, and comprehensive configuration information for Cisco products.
To inspect device-specific characteristics on different Cisco devices, follow these steps:
Step 1
Step 2
Step 3
Figure 38
Card Positions in the Cisco AS5800 Dial Shelf
Figure 39
Available Modems in the Cisco AS5800 Dial Shelf