-
Cisco IP Solution Center Infrastructure Reference, 4.0
-
Index
-
About This Guide
-
Getting Started
-
WatchDog Commands
-
Service Inventory > Inventory and Connection Manager
-
Service Inventory > Inventory and Connection Manager > Inventory Manager
-
Service Inventory > Device Console
-
Service Design
-
Monitoring
-
Administration
-
Cisco CNS IE2100 Appliances
-
Property Settings
-
Glossary
-
 Feedback
Table Of Contents
Creating a Cisco CNS IE2100 Appliance
Creating a Cisco IOS Device Using the Cisco CNS Device Access Protocol
Cisco CNS IE2100 Appliances
Cisco IP Solution Center (ISC) supports the Cisco CNS IE2100 Device Access Protocol for communication with any Cisco IOS device, such as uploading a configuration file from a device, downloading a configlet to a device, or executing a command on a device and obtaining a result. ISC also supports CNS Plug-and-Play.
To use the Cisco CNS IE2100 functionality on ISC, you must first set up the Cisco CNS IE2100 appliance and the ISC workstation as explained in an appendix in Cisco IP Solution Center Installation Guide, 4.0.
This appendix includes the following sections. Implement these sections in sequence:
Note
The "Using Plug-and-Play" section is optional.
1.
2.
Creating a Cisco CNS IE2100 Appliance
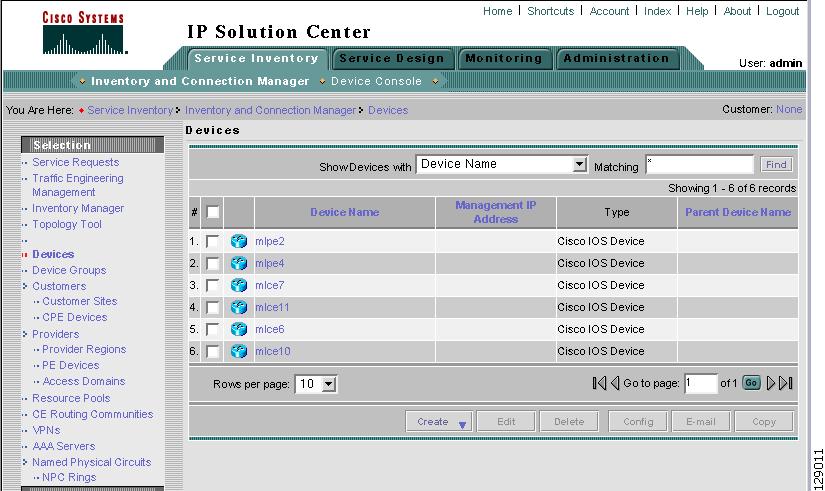
ISC supports multiple Cisco CNS IE2100 appliances. To create a Cisco CNS IE2100 appliance, follow these steps:
Note
Step 1
Step 2
Figure A-1 Devices Window
Step 3
Step 4
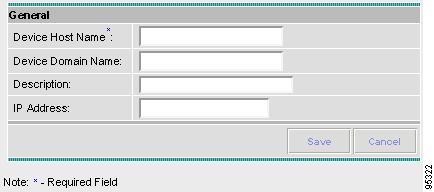
A window appears as shown in Figure A-2, "Create IE2100 Device Window".
Figure A-2 Create IE2100 Device Window
Step 5
Figure A-1 reappears with the IE2100 listed as a device.
Creating a Cisco IOS Device Using the Cisco CNS Device Access Protocol
Each Cisco CNS IE2100 appliance can serve multiple Cisco IOS devices. A Cisco IOS device can only be served by one Cisco CNS IE2100 appliance.To create a Cisco IOS device using the Cisco CNS Device Access Protocol, follow these steps:
Note
Step 1
Step 2
Step 3
Step 4
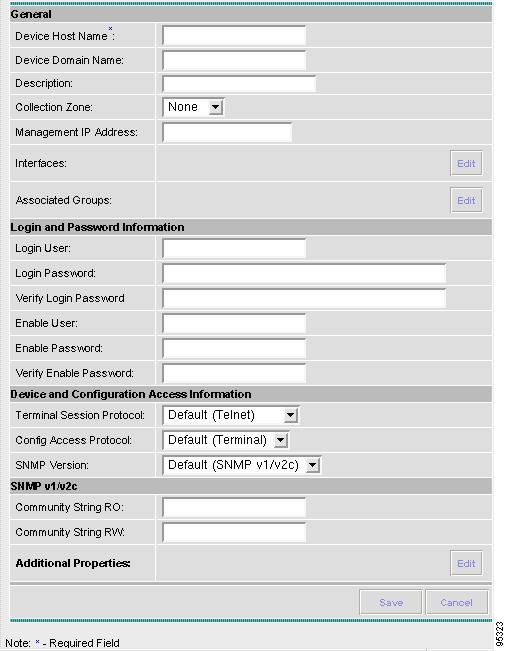
A window appears as shown in Figure A-3, "Create Cisco IOS Device Window."
Figure A-3 Create Cisco IOS Device Window
Step 5
For CNS Device Access Protocol, you do not need to define the parameters in the Login User and Login Password sections.
For the Device and Configuration Access Information section, you must select CNS for the Terminal Session Protocol. Defining Cisco IOS Device Properties
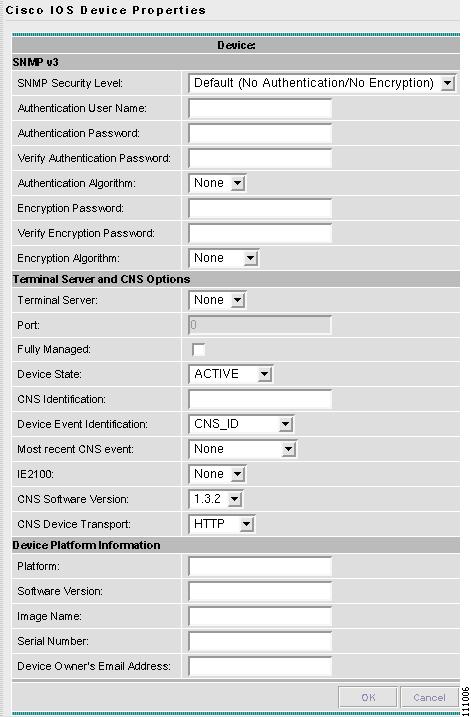
Step 6
Figure A-4 Cisco IOS Device Additional Properties
Step 7
Step 8
Note
Note
Step 9
•
•
Step 10
•
•
•
Note
Step 11
Step 12
Step 13
Step 14
Using Plug-and-Play
ISC supports the Plug-and-Play device configuration through a Cisco CNS IE2100 appliance. ISC supports devices not physically present on the network.
The procedures for using Plug-and-Play when the Cisco IOS device is not physically present on the network vary depending on whether there is an initial configuration file for the device.
Follow these steps if the Cisco IOS device does not have an initial configuration file:
Step 1
Step 2
Be sure to specify the Device State as INACTIVE because the device is not physically present on the network
Step 3
A Cisco IOS Device entry is created in the ISC repository and in the corresponding Cisco CNS IE2100 appliance repository.
Follow this step if the Cisco IOS device does have an initial configuration file:
Step 1
Be sure to specify the Device State as INACTIVE because the device is not physically present on the network.
The Inventory Manager create a Cisco IOS Device entry in the ISC repository. Also, it creates an entry in the corresponding Cisco CNS IE2100 repository, and associates the specified initial configuration file with this new device in the Cisco CNS IE2100 repository.
You can provision the newly created inactive Cisco IOS Device for different services. Because the device is not physically present on the network, ISC saves the configlets associated with these services in its repository and tries to download them to the device only after the device has come up. Until the device is physically present on the network, the service request goes into the WAIT_DEPLOY state. The service requests are explained in the user guides for each of the services.
After the device comes up and connects to its corresponding Cisco CNS IE2100 appliance, the device retrieves and applies its initial configuration if there is one waiting for it in the Cisco CNS IE2100 repository.
ISC detects that the device has come onto the network and performs the following actions:
•
ISC performs a collect config of the IOS device and stores it in the ISC repository.
•