Feedback
Table Of Contents
H.264 / MPEG-4 Protocol Options
Assigning Functions to Joystick Buttons
Client Settings
This chapter describes how to select the stream transmission mode and saving options on the local computer, and it contains the following sections:
Accessing Client Settings
To access client settings, click Client settings on the encoder user interface home window. For information about configuring client settings, see the "Managing Client Settings" section.
When you have finished configuring client settings, click Save at the bottom of the Client settings window.
Managing Client Settings
You can configure the following client settings on the Client settings window:
•
H.264 / MPEG-4 Protocol Options
H.264 / MPEG-4 Media Options
These options are enabled only when the video mode is set to H.264 or MPEG-4. For more information, see the "Video Settings" section.
Table 4-1 describes the H.264/MPEG-4 media options.
H.264 / MPEG-4 Protocol Options
Depending on your network environment, you can choose one of four transmission modes of H.264 or MPEG-4 streaming.
Table 4-2 describes the transmission mode options.
Table 4-2 H.264/MPEG-4 Protocol Options
UDP unicast
A protocol that allows for more real-time audio and video streams. Network packets may be lost, however, due to network burst traffic and images may be broken. Activate UDP connection when occasions require time-sensitive responses and the video quality is less important. Note that each unicast client connecting to the encoder takes up additional bandwidth and the encoder allows up to ten simultaneous accesses.
UDP multicast
A protocol that allows multicast-enabled routers to forward network packets to all clients requesting streaming media. This helps to reduce the network transmission load of the encoder while serving multiple clients at the same time. Note that to use this feature, the encoder must be configured to enable multicast streaming. For more information, see the "RTSP Streaming Settings" section.
TCP
A protocol that guarantees the complete delivery of streaming data and thus provides better video quality. The downside of this protocol is that its real-time effect is not as good as that of the UDP protocol.
HTTP
A protocol that allows the same quality as the TCP protocol without the need to open specific ports for streaming under some network environments. Users inside a firewall can use this protocol to allow streaming data through.
MP4 Saving Options
To record live video as you are watching it, click the start MP4 recording button
on the home window. You can specify the storage destination and file name prefix for recorded videos on the Client settings window.
Table 4-3 describes the MP4 Saving Options.
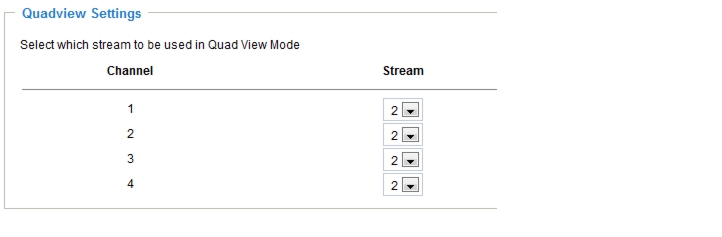
Quadview Settings
These settings are available on the 4 port model (CIVS-SENC-4P) only.
The CIVS-SENC-4P encoder can support four analog cameras via its four channels. Each of the four channels supports a primary stream and a secondary stream. In Quadview, the user views four streams simultaneously, and for each channel the stream chosen can be either the primary or the secondary one. You can configure which video streams are displayed in the Quadview settings area (see Figure 4-1). The default is stream 2 with a lower resolution.
Figure 4-1 Quadview Settings
Local Streaming Buffer Time
Due to unsteady bandwidth flow, live streaming may sometimes lack smoothness. If you enable the local streaming buffer time option, live streaming is stored on the camera buffer area for a specified period before playing in the live viewing window. This can improve streaming smoothness. The streaming delay value must be entered in milliseconds, so, for example, to set a 3 second streaming delay, enter 3000 Milliseconds.
Joystick Settings
Make sure a joystick is already attached to your COM port or USB port on your client computer.
Table 4-4 describes the Joystick Setup options.
Table 4-4 Joystick Setup Options
Selected joystick
Choose the joystick you want to set up in the drop-down list.
Calibrate
Click this button to start Windows Game Controller function. If properly connected, your operating system should detect the joystick automatically. Follow the onscreen instructions to calibrate your joystick.
Configure buttons
Click this button to open a configuration dialog box and assign functions to individual joystick buttons. For more information about assigning functions to joystick buttons, see the "Assigning Functions to Joystick Buttons" section.
Assigning Functions to Joystick Buttons
To assign functions to joystick buttons, perform the following procedure:
Note
Procedure
Step 1
Step 2
Step 3
Step 4