Feedback
Table Of Contents
Provisioning a Dial Plan with the Command Line Interface
International Dial Plan Profile
Provisioning a Dial Plan with the Extensible Provisioning and Operations Manager
Adding a Dial Plan to the Cisco BTS 10200 Softswitch Configuration
Applying an EPOM Template to a Selected Dial Plan
Editing a Dial Plan in the Cisco BTS 10200 Softswitch Configuration
Deleting a Dial Plan from the Cisco BTS 10200 Softswitch Configuration
Adding Multiple Dial Plans to a Cisco BTS 10200 Softswitch Configuration
Editing Multiple Dial Plans in the Cisco BTS 10200 Softswitch Configuration
Deleting Multiple Dial Plans in the Cisco BTS 10200 Softswitch Configuration
Provisioning Dial Plans
Revised: December 9, 2008, OL-8001-10Introduction
This chapter provides detailed instructions for configuring Cisco BTS 10200 Softswitch configuration dial plans using the Command Line Interface (CLI) and the Cisco Extensible Provisioning and Operations Manager (EPOM). The following subjects are discussed:
•
Provisioning a Dial Plan with the Command Line Interface
•
Provisioning a Dial Plan with the Command Line Interface
This section provides the detailed instructions for managing dial plans in the Cisco BTS 10200 Softswitch configuration using the CLI. The CLI also allows you to perform show, add, change, and delete dial plans. The following subjects are discussed:
•
Dial Plan
Dial plans analyze, screen, and route calls based on dialed digits. The Dial Plan (dial-plan) table holds dial plan information for a specific type of call. It defines valid dialing patterns and determines call routing. All records that share a common dial-plan-profile id are considered a dial plan. For additional Dial Plan table information, refer to the "Dial Plan" section on page 1-45.
Dial Plan Profile
The Dial Plan Profile (dial-plan-profile) table creates dial-plan-profile ids before they are assigned to subscribers or trunk groups. The dial-plan-profile id links digit-string entries in the Dial Plan table within a dial plan. Different dial-plan-profile ids are assigned to subscribers and trunk groups. A dial-plan-id must be created in this table before entries can be added to the Dial Plan table. For additional Dial Plan Profile information, refer to the "Dial Plan Profile" section on page 1-37.
International Dial Plan
The International Dial Plan (intl-dial-plan) table holds international dial plan information for calls to regions outside the North American Numbering Plan (NANP). It contains the country code, minimum and maximum digits, the country name, and the route-grp-id. For additional International Dial Plan table information, refer to the "International Dial Plan" section on page 1-50.
International Dial Plan Profile
The International Dial Plan Profile (intl-dial-plan-profile) table is used to create unique IDs for international dial plans. This ID must be created before provisioning the International Dial Plan table. For additional International Dial Plan Profile table information, refer to the "International Dial Plan Profile" section on page 1-42.
Custom Dial Plan
The Custom Dial Plan (custom-dial-plan) table translates Centrex calls. If the result of a custom dial plan (CDP) is a POTS access code, call processing uses the POTS Dial Plan table to translate the digits dialed after the POTS access code. Speed call codes are provisioned in this table as nod=speed-call and fname=SC1D (or SC2D). Screening does not apply to speed dialing.
Table Name: CUSTOM_DIAL_PLAN
Table Containment Area: EMS, FSPTC
Command Types
add, audit, change, delete, help, show, sync
Caution
Examples
show custom-dial-plan id=cisco plan; digit-string=4xx;add custom-dial-plan id=cisco plan; digit-string=9; nod=pots-access; cat-string=1111111111;change custom-dial-plan id=cisco plan; digit-string=4xx; nod=vsc; fname=CFUA;delete custom-dial-plan id=cisco plan; digit-string=*72;Usage Guidelines
Primary Key Token(s): ID, DIGIT_STRING
Foreign Key Token(s): id, fname
Related Commands
Custom Dial Plan Profile
The Custom Dial Plan Profile (custom-dial-plan-profile) table defines custom dial plan IDs (CDP IDs) assigned to Centrex groups.
Table Name: CUSTOM_DIAL_PLAN_PROFILE
Table Containment Area: EMS
Command Types
add, change, delete, help, show
Examples
show custom-dial-plan-profile id=cisco plan;add custom-dial-plan-profile id=cisco plan;change custom-dial-plan-profile id=cisco plan; description=main dialing plan for cisco;delete custom-dial-plan-profile id=cisco plan;Usage Guidelines
Primary Key Token(s): ID
Delete Rules: ID does not exist in any custom-dial-plan::id
Syntax Description
Provisioning a Dial Plan with the Extensible Provisioning and Operations Manager
This section provides the detailed instructions for adding a dial plan to the Cisco BTS 10200 Softswitch configuration using the Extensible Provisioning and Operations Manager (EPOM). Additionally, detailed instructions are provided for using EPOM to manage configured dial plans. The EPOM also allows you to perform add, delete, and edit commands on multiple dial plans with a single operation. The following subjects are discussed:
•
•
•
•
•
•
•
For additional details on using the EPOM, refer to the Cisco Extensible Provisioning and Operations Manager Getting Started Guide.
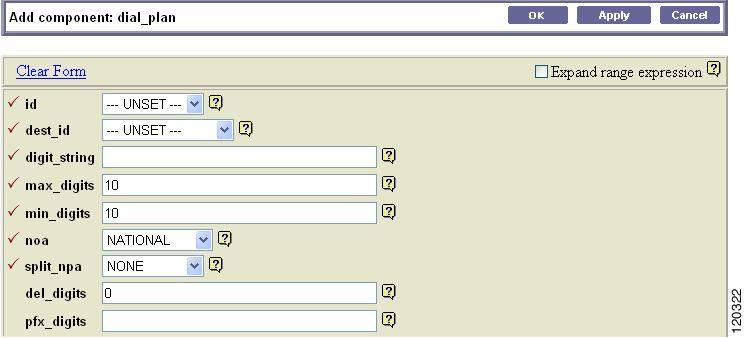
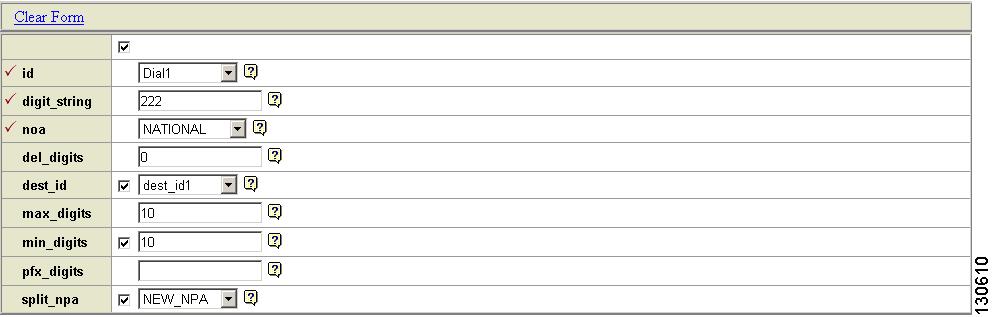
Adding a Dial Plan to the Cisco BTS 10200 Softswitch Configuration
Tip
Add components to the Cisco EPOM inventory to build a managed network. The device information includes static and dynamic selections to other parts of the configuration. Follow this example to add a dial plan.
Step 1
Step 2
The Cisco BTS 10200 Softswitch Component Status window opens.
Step 3
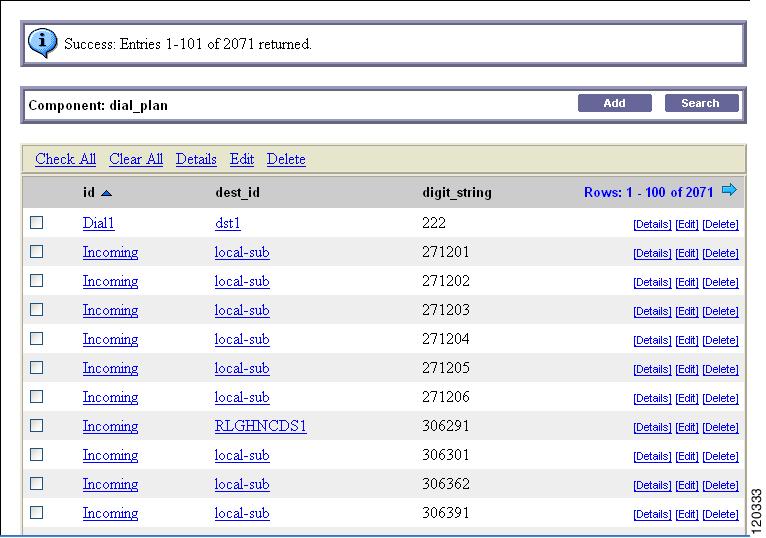
The Cisco BTS 10200 Softswitch Component window opens showing a list of dial plans. If this is the first dial plan (or device of this type) that you are adding, the list is empty.
Step 4
The Cisco BTS 10200 Softswitch Component Add window opens.
Step 5
Step 6
•
•
You return to the Cisco BTS 10200 Softswitch Component window. The new dial plan is added to the list.
To edit a single component, see the ""Editing a Dial Plan in the Cisco BTS 10200 Softswitch Configuration" section; to delete a single component, see the ""Deleting a Dial Plan from the Cisco BTS 10200 Softswitch Configuration" section.
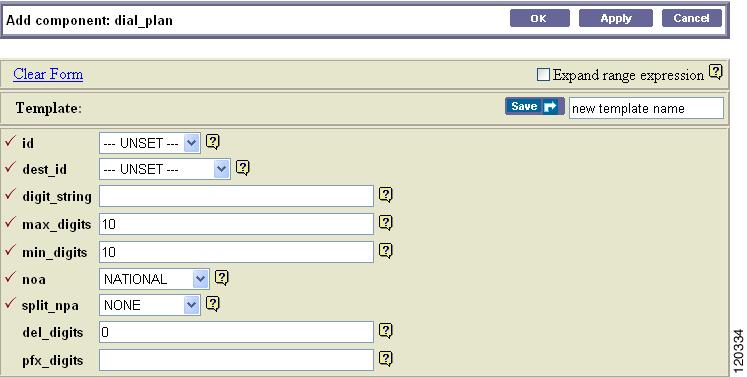
Applying an EPOM Template to a Selected Dial Plan
Step 1
Step 2
Step 3
Step 4
Step 5
Step 6
Click OK or Apply.
•
•
Note
To create a new template from this screen, make changes to the existing component details and save the resulting dial plan as a template by entering a template name and clicking Save.
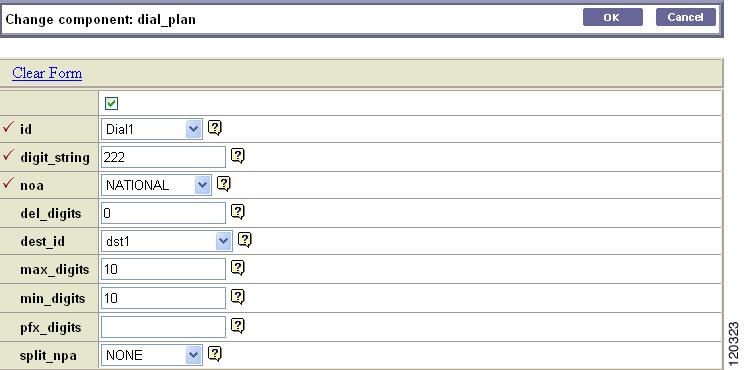
Editing a Dial Plan in the Cisco BTS 10200 Softswitch Configuration
Step 1
Step 2
The Cisco BTS 10200 Softswitch Component Status window opens.
Step 3
The Cisco BTS 10200 Softswitch Component window shows a list of currently configured dial plans.
Step 4
The Change component window appears.
Note
Step 5
a.
b.
Note
Caution
Step 6
Note
Step 7
You return to the Cisco BTS 10200 Softswitch Component window. The edited dial plan appears in the list.
To add a single component, see the ""Adding a Dial Plan to the Cisco BTS 10200 Softswitch Configuration" section; to delete a single component, see the ""Deleting a Dial Plan from the Cisco BTS 10200 Softswitch Configuration" section.
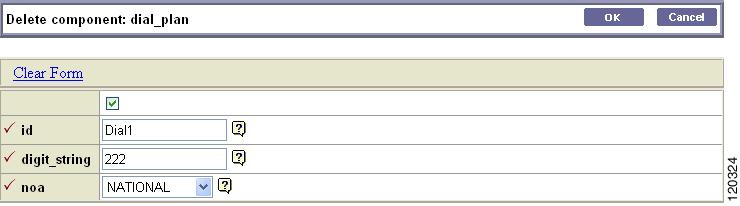
Deleting a Dial Plan from the Cisco BTS 10200 Softswitch Configuration
Step 1
Step 2
The Cisco BTS 10200 Softswitch Component Status window opens.
Step 3
The Cisco BTS 10200 Softswitch Component window shows a list of currently configured dial plans.
Step 4
Step 5
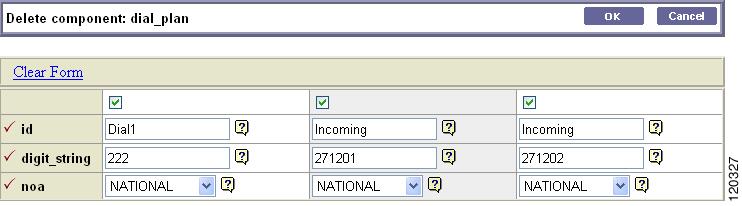
The Delete component window with the requested deletion appears.
Note
Step 6
To add a single component, see the ""Adding a Dial Plan to the Cisco BTS 10200 Softswitch Configuration" section; to edit a single component, see the ""Editing a Dial Plan in the Cisco BTS 10200 Softswitch Configuration" section.
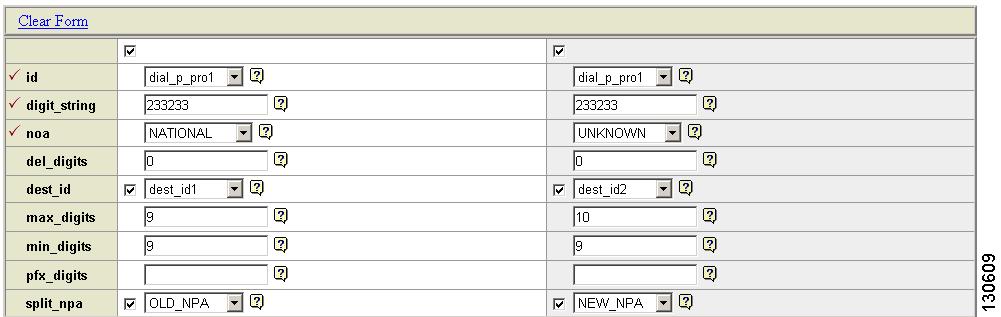
Adding Multiple Dial Plans to a Cisco BTS 10200 Softswitch Configuration
Step 1
The Component: name window appears.
Step 2
The Add component window appears.
Step 3
If you fail to select this check box, you get an error message when you enter a range expression.
Tip
Step 4
For example, to add a group of 10 dial plans with the id prefix dp001_new, enter dp001_new[01-10]. Doing so adds dial plans dp001_new01, dp001_new02, through dp001_new10.
Step 5
Step 6
•
•
You have now added multiple dial plans to the Cisco BTS 10200 Softswitch EMS network.
Editing Multiple Dial Plans in the Cisco BTS 10200 Softswitch Configuration
Step 1
The Component: name window appears.
Step 2
Step 3
The Change component window appears.
Note
Step 4
Step 5
Step 6
Deleting Multiple Dial Plans in the Cisco BTS 10200 Softswitch Configuration
Step 1
The Component: name window appears.
Step 2
Step 3
The Delete component window appears with the requested deletions.
The first (blank) row with the checked box indicates that this component was selected for displaying details, editing, or deletion.
Step 4
You have now deleted multiple dial plans in the Cisco BTS 10200 Softswitch EMS network.