Feedback
Table Of Contents
Configuring the Features of the Access Point
Configuring the Wireless LAN Controller IP Address on the Access Point
Configuring Radio Channels on the Access Point
Configuring Personal Wireless LANs
Using the Split Tunneling Feature for Local Printing
Prerequisites for Adding a Local Printer
Adding the Local Printer in Windows
Adding the Local Printer in Mac OS
Configuring the Features of the Access Point
This chapter provides the following information:
•
Configuring the Wireless LAN Controller IP Address on the Access Point
•
•
•
Configuring the Wireless LAN Controller IP Address on the Access Point
Follow these steps to configure the IP address of the Wireless LAN Controller on your Cisco Aironet 600 Series OfficeExtend access point.
Step 1
Step 2
Step 3
The Configuration page is dispalyed.
Step 4
The WAN page is displayed.
Step 5
Step 6
Step 7
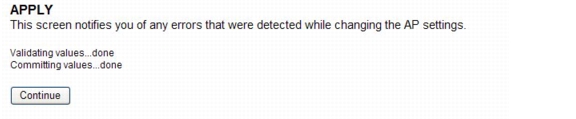
A verification screen that is similar to the following, is displayed.
Step 8
The 600 Series OfficeExtend Access point will connect to the controller and download the current software image. Allow the device 5 minutes to download and reboot with the new code and configuration.
Configuring Radio Channels on the Access Point
Follow these steps to configure a radio channel for your 600 Series OfficeExtend access point.
Step 1
Step 2
The Configuration-System page is displayed.
Step 3
Step 4
Step 5
Note
Step 6
Configuring Personal Wireless LANs
Step 1
Step 2
The Configuration-System page is displayed.
Step 3
The Configuration-SSID page is displayed.
Step 4
Step 5
Step 6
Step 7
Note
Step 8
Step 9
A verification screen that is similar to the following, is displayed.
Step 10
Troubleshooting
Using the Split Tunneling Feature for Local Printing
The Split Tunneling feature of the Cisco Aironet 600 Series OfficeExtend Access Point allows you to use a local printer that is on your personal network, while being connected to a corporate VPN.
Any printer installed as your local printer can utilize the Split Tunneling feature if all these conditions are met:
•
•
For information on configuring the Split Tunneling feature for a WLAN or a Remote LAN, see the Cisco Wireless LAN Controller Configuration Guide.
Prerequisites for Adding a Local Printer
Before adding a local printer to your personal network, ensure that:
•
–
–
–
–
–
–
•
Adding the Local Printer in Windows
If you are a Microsoft Windows user, follow these steps to add a local printer to your personal network.
Step 1
If the printer does not have a GUI for configuration, access http://<Printer-IP>:<Port>/ to find out the name from the Printer Details page.
Step 2
Step 3
a.
b.
The Windows Features dialog box is displayed.
c.
Then, follow these steps to add the local printer:
a.
b.
c.
d.
e.
f.
http://<Printer-IP>:631/<share-path>/<Printer-Name>
If you do not have the printer's name with URL, enter http://xxxxxxx:631, and click Browse to browse for and select the printer.
g.
Step 4
Note
Step 5
The printer configuration is complete.
Adding the Local Printer in Mac OS
If you are an Apple Mac OS user, follow these steps to add a local printer to your personal network.
Step 1
Step 2
The System Preferences dialog box is displayed.
Step 3
Step 4
The Print & Fax dialog box is displayed.
Step 5
The Add Printer dialog box is displayed.
Step 6
Step 7
Of the printing protocols supported by the Split Tunneling feature, the Mac OS X operating system supports only the following:
•
•
Step 8
Step 9
Step 10
Step 11
The added printer appears in the Printers list on the Print & Fax dialog box.