Feedback Feedback
|
Table Of Contents
Release Notes for Cisco Media Experience Engine 3000 Release 2.0
Installation and Upgrade Requirements
Updates for the CLUI Online Help
Standard Cisco MXE 3000 Job Profiles
Understanding Real Encoder Settings: Encoder Properties
Understanding Flash 8 Encoder Settings: Video
Creating a New Job Profile from an Existing Job Profile
Editing an Existing Job Profile
When to Add a Distribution Tab to a Job Profile
Understanding H.264 Encoder Settings: Multiplexing
Understanding Notification Settings
Updates for the Folder Attendant Online Help
Release Notes for Cisco Media Experience Engine 3000 Release 2.0
Revised: June 10, 2009, OL-17000-01
These release notes provide information about the features and caveats for Cisco Media Experience Engine 3000 (Cisco MXE 3000) Release 2.0.
•
Installation and Upgrade Requirements
Introduction
Cisco MXE 3000 is an appliance that provides comprehensive transcoding services and integrates into the network to deliver the following media processing capabilities:
•
•
•
The Cisco MXE 3000 Resource Manager augments the capabilities of the Cisco MXE 3000 by intelligently load balancing job processing across multiple Cisco MXE 3000 devices and by delivering fault tolerance to a Cisco MXE 3000 deployment.
Browser Requirements
You must use one of following web browsers to access the Folder Attendant UI or WebUI:
•
•
Note
For information about the Cisco MXE 3000 components and user interfaces, see the User Guide for Cisco Media Experience Engine 3000 at the following URL:
http://www.cisco.com/en/US/products/ps9892/products_user_guide_list.html
Installation and Upgrade Requirements
The Cisco MXE 3000 is an appliance on which the Cisco MXE 3000 software comes preinstalled.
You can deploy Cisco MXE 3000 in the following two configurations:
•
•
–
–
–
–
For details about obtaining a license file to enable the software for your deployment, see the Deployment and Administration Guide for Cisco Media Experience Engine 3000. This guide also provides information about installing a license, configuring the Cisco MXE 3000, upgrading from a standalone to a Resource Manager deployment, and troubleshooting deployments. You can access the guide at the following URL:
http://www.cisco.com/en/US/products/ps9892/prod_maintenance_guides_list.html
Note
Important Notes
Cisco.com Registration Website (Licenses)
•
•
Standalone and Resource Manager Deployments
•
•
File Formats
•
•
Job Profiles
•
Caution
User Interface
•
•
•
1.
2.
You can now open the QuickTime video settings dialog box from the QuickTime player.
Caveats
This section includes the following topics:
Using the Bug Toolkit
You can search for problems by using the Cisco Software Bug Toolkit. Known problems (bugs) are graded according to severity level.
Before You Begin
To access Bug Toolkit, you need the following:
•
•
•
Procedure
Step 1
Step 2
Step 3
Tip
Open Caveats
Table 1 describes possible unexpected behavior by Cisco MXE 3000 and includes severity 1, severity 2, and select severity 3 and 4 open caveats. The table is sorted by severity and then by identifier in alphanumeric order.
Because defect status continually changes, this table provides a snapshot of the defects that were open at the time of the release. For an updated list of open defects, access the Bug Toolkit. For details, see the "Using the Bug Toolkit" section.
Troubleshooting
The following Cisco MXE 3000 documents provide troubleshooting information:
•
•
•
To access these documents and the Cisco MXE 3000 documentation set, see the Guide to Documentation for Cisco Media Experience Engine 3000 at the following URL:
http://www.cisco.com/en/US/products/ps9892/products_documentation_roadmaps_list.html
Documentation Updates
This section includes the following topics:
•
•
Updates for the CLUI Online Help
The following changes apply to the CLUI online help in Release 2.0. You can access the latest Cisco MXE 3000 documentation on Cisco.com.
•
•
•
•
•
•
•
•
Standard Cisco MXE 3000 Job Profiles
This section now includes information for 55 standard Job Profiles, as opposed to the 20 that are documented in the online help. See the User Guide for Cisco Media Experience Engine 3000 on Cisco.com for more information.
Understanding Real Encoder Settings: Encoder Properties
The description for the Max. Keyframe Spacing setting in the Real Encoder: Encoder Properties Settings, Descriptions, and Values table now states:
Understanding Flash 8 Encoder Settings: Video
The description for the Keyframe Interval in the Flash 8 Encoder: Video Settings and Descriptions table now states:
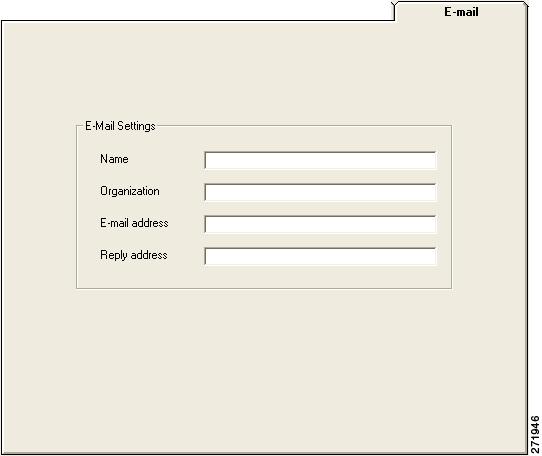
E-mail Preferences
The E-mail tab, shown in Figure 1, is accessed from the main menu by selecting Tools > Preferences > E-mail Preferences. At this time, the E-mail tab is used to enter information that appears in the job submission metadata only.
Figure 1 E-mail Preferences Tab
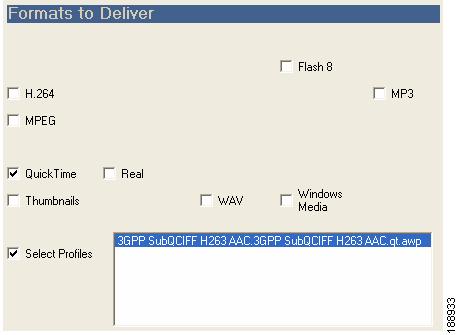
Formats to Deliver
Note
Select file types to be delivered to the location defined in the Delivery Method section.
Checking a particular format type will specify that all the encodes for that encoder will be delivered. Unchecked formats are not delivered.
Figure 2 Delivery Tab: Formats to Deliver
Select Profiles
In addition to checking one or more format boxes, check the Select Profiles box, shown in Figure 3, to specify a distribution method limited to certain profiles within the encoder types.
Checking this box allows profiles to be picked from the adjacent list.
Figure 3 Delivery Tab: Select Profiles Checkbox
The Select Profiles box lists the profiles used in the current job. Select only the profiles for which you want to set delivery.
Click on a profile name to select it (or select multiple profiles using the Shift or Ctrl keys). The encoded files generated from the selected profiles are then subject to the delivery method specified on this tab.
If the Select Profiles box is not checked, individual profiles cannot be selected and are grayed out.
Note
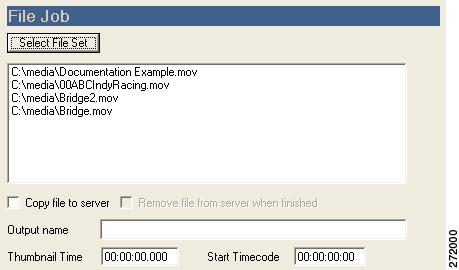
File Job
The File Job section, shown in Figure 4, is used to select the file or files to be encoded and to set other job parameters, including whether the file needs to be copied to the server before preprocessing and encoding begins, the output name, thumbnail time, and start timecode.
Note
Figure 4 File Job Section
Table 2 describes the settings.
Creating a New Job Profile
Procedure
Step 1
Figure 5 Cisco MXE 3000 Main Window
Step 2
Step 3
Step 4
Step 5
Step 6
Step 7
Note
Creating a New Job Profile from an Existing Job Profile
Use this procedure to create a new master profile with all the settings of the existing profile and to link the two profiles so that changes to one are reflected in both profiles. The link between the profiles is indicated by the parenthesis on the type tab in the Main Window, for example MPEG (Joost).
Tip
Procedure
Step 1
Step 2
Step 3
Step 4
Step 5
Note
Editing an Existing Job Profile
Jobs in the Job Log window (unsubmitted jobs) that use a particular profile will be affected by any changes to that profile. Jobs in the Job Status window (submitted jobs) will not be affected. See also: Job Log Window: Managing Jobs Before Submission and Job Status Window: Managing Submitted Jobs.
Procedure
Step 1
Step 2
Step 3
Step 4
Step 5
or
Click Save Job Profile As to save the updated Job Profile under a new name without changing the original file. See also: Creating a New Job Profile from an Existing Job Profile for information about linked profiles.
Note
When to Add a Distribution Tab to a Job Profile
Distribution tabs allow users and administrators to save encoded output according to their specific business needs in addition to or instead of the default location.
Distribution tabs are not a required component of Job Profiles. By default, output files will be saved to the system default locations. When any type of distribution tab is added to a job or Job Profile, the system default will be overridden. When any type of distribution tab is added to a job or Job Profile, the output file is sent to the location specified on the distribution tab in addition to the default distribution location.
Likewise, distribution tabs are used to automate portions of the encoding workflow. For example, if encoded clips must be reviewed before they are moved to a streaming server, you can add a Delivery tab to automatically send the media to the reviewer's server using FTP, eliminating the need to manually FTP files. Or, if encoding files for an external customer, you can use the Notification tab to automatically post job statuses (via HTTP Post or e-mail) to a site for client reference.
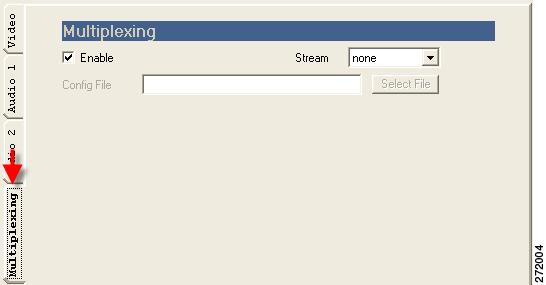
Understanding H.264 Encoder Settings: Multiplexing
Figure 6 shows the Multiplexing tab.
Figure 6 H.264 Encoder: Multiplexing Tab
Table 3 describes the settings.
Understanding Notification Settings
Each Notification tab is made up of five sections used to define when and how notification will take place.
Send Notification
Select the status at which a notification is sent.
•
•
•
Note
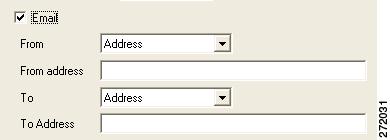
Check this box, shown in Figure 7, to enable e-mail notification. Notifications are forwarded to the server name previously configured at the time of your system deployment. The server must be running the Simple Mail Transport Protocol (SMTP) service to process the e-mail transmission.
Figure 7 Notification Tab: Email
From and To Options
•
•
Note
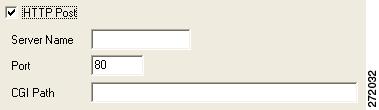
HTTP Post
Check this box, shown in Figure 8, to define parameters used to post notification messages to web servers using HTTP Post.
Figure 8 Notification Tab: HTTP Post
HTTP Post Fields
•
•
•
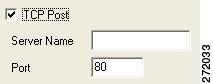
TCP Post
Check this box, shown in Figure 9, to enable Transmission Control Protocol (TCP) post notifications.
Figure 9 Notification Tab: TCP Post
TCP Post Fields
•
•
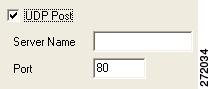
UDP Post
Check this box, shown in Figure 10, to enable User Datagram Protocol (UDP) post notifications.
Figure 10 Notification Tab: UDP Post
UDP Post Fields
•
•
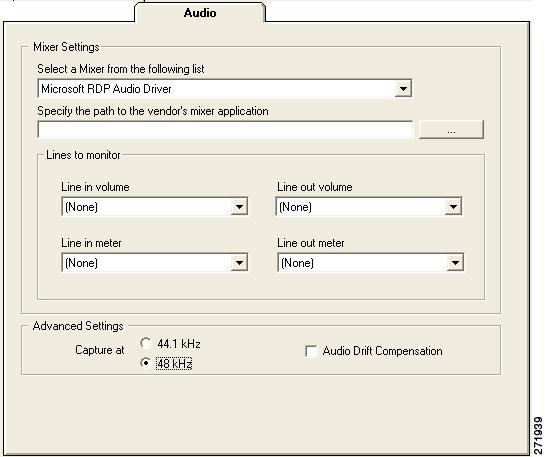
Audio Preferences
The Audio tab, shown in Figure 11, is accessed from the main menu by selecting Tools > Preferences > Audio Preferences and is used to set audio mixer preferences (or defaults).
Figure 11 Audio Preferences Tab
Table 4 describes the settings.
Indexing
This section includes the following topics:
•
•
•
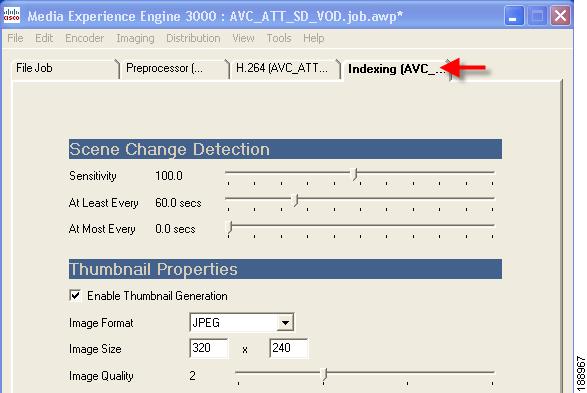
Introduction to the Indexing Tab
Indexing tabs, shown in Figure 12, are added to a job or a job profile from the main menu, by selecting Imaging > Add Indexing. Adding indexing settings to a job or Job Profile is optional.
The Indexing tab is used to define parameters that specify how to perform scene change detection, whether to capture thumbnail images as representative samples of the scene changes, as well as the format, size, and quality of the thumbnail image(s). See also: Introduction to the Thumbnails Tab.
See also: Understanding Indexing Settings, for a description of each of the settings.
Figure 12 Indexing Tab
Understanding Indexing Settings
The Indexing tab is made up of the following two sections:
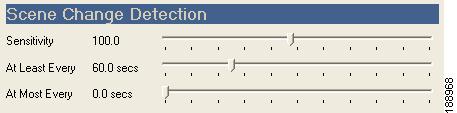
Scene Change Detection
Figure 13 shows the Scene Change Detection section.
Figure 13 Indexing Tab: Scene Change Detection Section
Table 5 describes the settings.
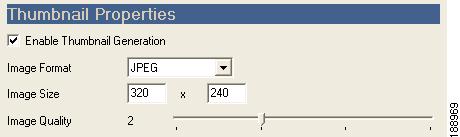
Thumbnail Properties
Figure 14 shows the Thumbnail Properties section.
Figure 14 Indexing Tab: Thumbnail Properties Section
See also: Understanding Thumbnail Settings for a description of each field.
Adding an Indexing Tab to a Profile
Procedure
Step 1
Step 2
Step 3
Step 4
Updates for the Folder Attendant Online Help
The following changes apply to the Folder Attendant online help in Release 2.0. You can access the latest Cisco MXE 3000 documentation on Cisco.com.
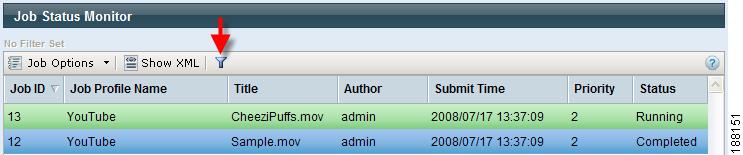
Filtering Jobs
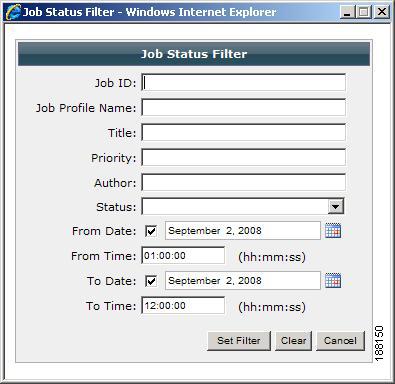
The Filter button on the Job Status Monitor page allows you to display a subset of all the jobs. Filter jobs using any of the following parameters (or any combination of these parameters):
•
•
•
•
•
•
•
Note
Procedure
Step 1
Figure 15 Jobs Before Filters Have Been Applied
Step 2
Figure 16 Job Status Filter Pop-Up
Step 3
For example, if you enter All Streaming in the Job Profile Name field, that means that only the jobs that have the All Streaming Job Profile are displayed.
Step 4
Override System Settings
In the Folder Attendant, when you add a Watch to a Directory, one can opt to override the default system settings per watch for where the output files will be delivered. There are two listings for Quicktime.
One is called QuickTime Output Directory and the other is called QuickTime Temp Directory.
•
•
Related Documentation
For a complete list of Cisco MXE 3000 documentation, see the Guide to Documentation for Cisco Media Experience Engine 3000 at the following URL:
http://www.cisco.com/en/US/products/ps9892/products_documentation_roadmaps_list.html
Documentation Feedback
To provide feedback on this Cisco MXE 3000 document, or to report an error or omission, you can use the online, Embedded Feedback form that appears on the left side of the screen at the following URL:
http://www.cisco.com/en/US/docs/video/mxe/2_x/release/notes/mxe20rn.html
Alternatively, you can send feedback to mxe-doc@cisco.com.
.
CCDE, CCSI, CCENT, Cisco Eos, Cisco HealthPresence, the Cisco logo, Cisco Lumin, Cisco Nexus, Cisco Nurse Connect, Cisco Stackpower, Cisco StadiumVision, Cisco TelePresence, Cisco WebEx, DCE, and Welcome to the Human Network are trademarks; Changing the Way We Work, Live, Play, and Learn and Cisco Store are service marks; and Access Registrar, Aironet, AsyncOS, Bringing the Meeting To You, Catalyst, CCDA, CCDP, CCIE, CCIP, CCNA, CCNP, CCSP, CCVP, Cisco, the Cisco Certified Internetwork Expert logo, Cisco IOS, Cisco Press, Cisco Systems, Cisco Systems Capital, the Cisco Systems logo, Cisco Unity, Collaboration Without Limitation, EtherFast, EtherSwitch, Event Center, Fast Step, Follow Me Browsing, FormShare, GigaDrive, HomeLink, Internet Quotient, IOS, iPhone, iQuick Study, IronPort, the IronPort logo, LightStream, Linksys, MediaTone, MeetingPlace, MeetingPlace Chime Sound, MGX, Networkers, Networking Academy, Network Registrar, PCNow, PIX, PowerPanels, ProConnect, ScriptShare, SenderBase, SMARTnet, Spectrum Expert, StackWise, The Fastest Way to Increase Your Internet Quotient, TransPath, WebEx, and the WebEx logo are registered trademarks of Cisco Systems, Inc. and/or its affiliates in the United States and certain other countries.
All other trademarks mentioned in this document or website are the property of their respective owners. The use of the word partner does not imply a partnership relationship between Cisco and any other company. (0903R)
Any Internet Protocol (IP) addresses used in this document are not intended to be actual addresses. Any examples, command display output, and figures included in the document are shown for illustrative purposes only. Any use of actual IP addresses in illustrative content is unintentional and coincidental.
© 2008-2009 Cisco Systems, Inc. All rights reserved.