
Table Of Contents
Configuring an IP Address for a Cisco SFS 7000D Server Switch Using DHCP
Configuring a Static IP Address
Configuring an IP Address Dynamically on a Device for which DHCP is not the Default
Enabling HTTP or HTTPS Services
Launching Chassis Manager without SSL
Launching Chassis Manager with SSL
Logging Out of Chassis Manager
Understanding Access Privileges
Getting Started
This chapter describes how to get started using Chassis Manager and contains these sections:
•
Understanding Access Privileges
Preparing Your Device
To launch Chassis Manager on your server switch, you must complete the following tasks:
•
Configure an IP address on the Ethernet management port.
•
Configure an IP gateway on the Ethernet management port.
•
Enable HTTP and/or HTTPS services.
Note
Chassis Manager optionally supports Secure Sockets Layer (SSL) secure connections.
If your device meets these requirements, proceed to the "Launching Chassis Manager" section. Otherwise, the steps required to prepare your device are platform dependent.
Configuring an IP address can be done statically or dynamically using a Dynamic Host Configuration Protocol (DHCP) server. On Cisco SFS 7000D Server Switches, DHCP is enabled by default. Static configuration is the default on all other server switches.
These topics describe how to prepare your device:
•
Configuring an IP Address for a Cisco SFS 7000D Server Switch Using DHCP
•
Configuring a Static IP Address
•
Configuring an IP Address Dynamically on a Device for which DHCP is not the Default
•
Enabling HTTP or HTTPS Services
Note
Consult your network administrator for an IP address, subnet mask, and gateway address before you begin this process.
Configuring an IP Address for a Cisco SFS 7000D Server Switch Using DHCP
By default, the Cisco SFS 7000D Server Switch obtains an IP address and gateway automatically and dynamically from a DHCP server. The DHCP server must be configured to the MAC address of your server switch, which is printed on top of the server switch chassis.
You can override the default and configure a static IP address for your Cisco SFS 7000D Server switch as described in "Configuring a Static IP Address".
Configuring a Static IP Address
To configure a static IP address for your server switch, follow these steps:
Step 1
Use the Serial Console port to open a CLI session to your device, and then log in as a user with administrative access.
Step 2
Enter the enable command to enter privileged EXEC mode.
SFS-7000> enableSFS-7000#Step 3
Enter the configure terminal command to enter global configuration mode.
SFS-7000# configure terminalSFS-7000(config)#Step 4
Enter the interface mgmt-ethernet command to enter Ethernet management interface configuration submode.
SFS-7000(config)# interface mgmt-ethernetSFS-7000(config-if-mgmt-ethernet)#Step 5
On Cisco SFS 7000D Server Switches, enable the static address option, which turns off the default-enabled DHCP. Omit this step for all other server switches.
SFS-7000D(config)# address-option staticStep 6
Enter the ip address command and an address and subnet mask. Consult your network administrator for an IP address. You will use this address in your web browser to launch Chassis Manager.
SFS-7000(config-if-mgmt-ethernet)# ip address 10.3.102.66 255.255.0.0Step 7
Enter the gateway command and then a default IP gateway. Consult your network administrator for a gateway address.
SFS-7000(config-if-mgmt-ethernet)# gateway 10.3.0.1Step 8
Enter the no shutdown command to enable the Ethernet Management port.
SFS-7000(config-if-mgmt-ethernet)# no shutdownStep 9
Enter the exit command to return to global configuration mode.
SFS-7000(config-if-mgmt-ethernet)# exit
Configuring an IP Address Dynamically on a Device for which DHCP is not the Default
To use a DHCP server to configure a dynamic IP address for a device other than a Cisco SFS 7000D Server Switch, follow these steps:
Step 1
Enter the enable command.
SFS-3012R> enableSFS-3012R#Step 2
Enter the configure command.
SFS-3012R# configureSFS-3012R(config)#Step 3
Enter the interface mgmt-ethernet command.
SFS-3012R(config)# interface mgmt-ethernetStep 4
Enter the addr-option dhcp command to configure the chassis to obtain the IP address from the DHCP server.
SFS-3012R(config-if-mgmt-ethernet)# addr-option dhcpStep 5
Enable the management port with the no shutdown command.
SFS-3012R(config-if-mgmt-ethernet)# no shutdownStep 6
Save the configuration to preserve it between reboots.
SFS-3012R(config-if-mgmt-ethernet)# exitSFS-3012R(config)# exitSFS-3012R# copy running-config startup-configStep 7
Enter the show interface mgmt-ethernet command to determine your IP address, as shown in the following example:
SFS-3012R# show interface mgmt-ethernet================================================================================Mgmt-Ethernet Information================================================================================mac-address : 00:05:ad:00:1e:1cauto-negotiate : enabledadmin-status : upoper-status : upip-addr : 172.29.230.60mask : 255.255.0.0gateway-addr : 172.29.230.1addr-option : static
Enabling HTTP or HTTPS Services
To enable HTTP or STTPS services, follow these steps:
Step 1
(Optional) Enter the ip http server command to enable HTTP services on your device to permit unsecured access to your server switch.
SFS-7000(config)# ip http serverStep 2
(Optional) Enter the ip http secure-server command to enable HTTPS services on your device to permit SSL-secured access to your server switch.
SFS-7000(config)# ip http secure-server
Launching Chassis Manager
Chassis Manager without SSL requires no additional setup. Chassis Manager with SSL requires additional steps based on your browser. These topics describe how to complete these procedures:
•
Launching Chassis Manager without SSL
•
Launching Chassis Manager with SSL
•
Logging Out of Chassis Manager
Launching Chassis Manager without SSL
To launch Chassis Manager without SSL, follow these steps:
Step 1
Launch your web browser.
Step 2
Type the IP address of your server switch in the address field of your browser, and press Enter. (You configured the IP address in the Step 6 of "Preparing Your Device" section.)
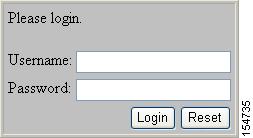
A login window opens. Figure 2-1 displays the login window.
Figure 2-1 Chassis Manager Login Window
Step 3
Enter your server switch username and password in the login window, and click Login.
Chassis Manager loads in your browser window.
Launching Chassis Manager with SSL
SSL setups vary by browser types. These topics explain how to launch Chassis Manager with SSL using particular browsers:
Netscape/Mozilla
To launch a secure Chassis Manager connection using the Netscape/Mozilla browser, follow these steps:
Step 1
Launch your web browser.
Step 2
Type https:// and the IP address of your server switch in the address field of your browser, and press Enter. (You configured the IP address in Step 6 of the "Preparing Your Device" section.)
A login window opens.
Step 3
Click Yes or OK to close any browser messages.
Mozilla dynamically manages your certificate.
Step 4
Enter your server switch username and password in the login window, and click Login.
Chassis Manager loads in your browser window.
Internet Explorer
To launch a secure Chassis Manager connection using the Internet Explorer browser, follow these steps:
Step 1
Launch your web browser.
Step 2
Type https:// and the IP address of your server switch in the address field of your browser.
(You configured the IP address in Step 6 of "Preparing Your Device" section.)
Step 3
Press Enter.
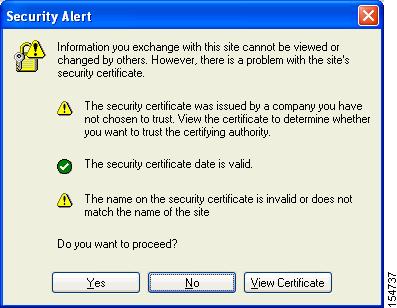
A Security Alert window opens.
Figure 2-2 Security Alert Window
Step 4
Click View Certificate.
The Certificate window opens.
Step 5
Click the Certification Path tab.
Step 6
Click the root certificate in the tree.
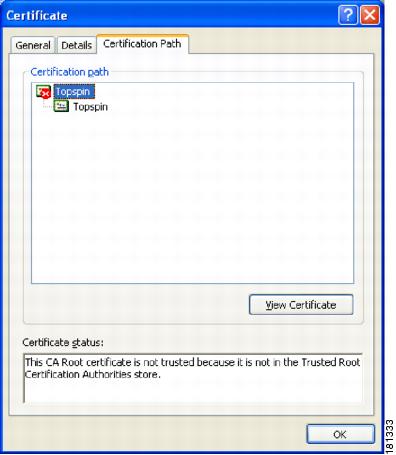
You see the tab in Figure 2-3.
Step 7
Click View Certificate.
Step 8
Click Install Certificate.
Step 9
Click Next.
Step 10
Choose Place all certificates in the following store.
Step 11
Click Browse.
The Select Certificate Store window opens.
Step 12
Click Trusted Root Certification Authorities, and then click OK.
Step 13
Click Next, and then click Finish.
Figure 2-3 Certification Path
Avoiding Error Messages
By default, SSL certificates map to the IP address of the Ethernet Management port of a server switch. If you enter the system name of your host (that you configure with the hostname command) or the IP address of the InfiniBand Management Port of your server switch to launch Chassis Manager, your browser displays an alert. The alert cautions you that the name on the certificate does not match the name of the site. This hostname mismatch message reappears after you log in and the java applet begins to load. To avoid this message entirely, configure your server switch to use the identifier that you enter in the browser to verify certificates.
To configure the certificate name to use the system name, follow these steps:
Step 1
Establish a Telnet session to your server switch, and log in as a user with administrative privileges.
Login: superPassword: xxxxxStep 2
Enter the enable command to enter privileged EXEC mode.
SFS-7000D> enableSFS-7000D#Step 3
Enter the configure terminal command to enter global configuration mode.
SFS-7000D# configure terminalSFS-7000D(config)#Step 4
Enter the ip http command with the secure-cert-common-name keyword and the system name (hostname) of the server switch to configure your certificates to use the system name of your server switch.
SFS-7000D(config)# ip http secure-cert-common-name useSysNameWhen you open Chassis Manager with the system name of your server switch, error messages will not repeatedly appear.
Logging Out of Chassis Manager
To log out of Chassis Manager, close the web browser window that displays the GUI. If you have multiple windows open (such as the main window and a properties window), close all of the windows.
Navigating Chassis Manager
The Tree frame of the web-based interface provides a high-level map of Chassis Manager. As you move from display to display in Chassis Manager, the View frame constantly reminds you where you are in the system.
When you click a branch in the Tree frame, the title of the display that appears in the View frame matches the name of the branch. Directly below the display title appears a tiered locator that details the level of the current display in relation to other elements of Chassis Manager. For instance, when you click the Cards branch of the Chassis icon, the following locator string appears:
A.B.C.D > Chassis > Cards
In this instance, A.B.C.D represents the IP address of your server switch. The tiered locator indicates that your current display is the Cards display, which is a branch of the Chassis icon on the device with an IP address of A.B.C.D.
When you further filter your display, the View frame indicates the new level of granularity. For instance, if you view the ports on a particular gateway card instead of all ports on the device, a tiered locator appears, followed by a filter indicator. If you view only external ports on an Ethernet gateway in slot 4, the following identifiers appear:
A.B.C.D > Chassis > Ports
Filter : Card = 4
The second identifier indicates that the display shows only the ports on Card 4.
These topics provide more information about navigating Chassis Manager:
Moving Backward
Because no formal "move backward" function exists in Chassis Manager, use one of the following options to return to a previous display:
•
Click Back on your web browser.
•
Right-click in the View frame, and choose Back from the drop-down menu.
•
Navigate to the desired display with the Tree frame.
Note
When you use the Back function of your web browser, your browser may not cache selections that you made for a particular view. For instance, if you view the gateway ports of a card and then click a branch in the Tree frame, your previous display may not appear correctly when you click the Back button.
Refreshing Views
Chassis Manager lets you update most displays to reflect changes that occurred since you opened the display. To refresh your view, click the Refresh button in your display.
Understanding Access Privileges
The functionality available to you from Chassis Manager varies based on the access privileges of your username. If you do not have read access to a particular technology, the icon and branches for that technology do not appear in your GUI. If you do not have write access to a particular technology, the configuration options for that technology do not appear in your GUI.
Viewing the Device Status
Chassis Manager provides an overview of the status of the components of your server switch.
Note
To view the status summary of your device, click the IP address at the top of the Tree frame.
Items that appear in green are active. Items that appear in gray are not active. Items that appear in red are faulty or administratively down.

 Feedback


