Feedback
Table Of Contents
SESM Solutions for Subscriber Self-Care
Subscriber Self-Care Solution Description
Subscriber Experiences in Self-Care Solutions
Security in Self-Care Solutions
Deployment Requirements for Self-Care Solutions
Cisco Service Selection Gateway
Cisco Distributed Administration Tool
Portal Customizations for Self-Care Solutions
Supported Data Fields in a Self-Care Solution
Subscriber Profile Requirements for Self-Care Solutions
Demonstrating Personal Firewalls
SESM Solutions for Subscriber Self-Care
This chapter describes SESM features that support subscriber self-care solutions. It includes the following topics:
•
Subscriber Self-Care Solution Description
Subscriber Self-Care Solution Description
This section describes the common characteristics of SESM self-care solutions. Topics are:
•
•
•
•
•
•
Subscriber Experiences in Self-Care Solutions
The SESM self-care solutions allow subscribers to make on-demand updates to their personal information at any time and see those changes take effect within minutes of submitting the change, with no involvement from the deployer. Subscribers can submit updates using the SESM portal. The self-care portal pages can be branded, personalized, and customized using any SESM web development features.
The NWSP portal contains pages that illustrate the following types of self-care activities:
•
•
•
•
See the "Supported Data Fields in a Self-Care Solution" section for ways to extend the self-care examples shown in NWSP.
Security in Self-Care Solutions
The following features provide security in SESM self-care solutions:
•
•
•
•
Deployment Requirements for Self-Care Solutions
This section lists the required components for self-care solutions.
Cisco Service Selection Gateway
The Cisco Service Selection Gateway (SSG) is required in the self-care solutions described in this chapter. These solutions require SSG for the following services:
•
•
SSG configuration details for self-care solutions are the same as those for service selection and connection solutions. The SESM portal and RDP must be running on the SSG default network and configured to communicate with the SSG. For more information about how SESM, SSG, and RDP work together, see the "Request Processing in SESM SPE Mode Deployments" section.
SESM Portal
The SESM self-care solutions require that SESM portals are deployed in LDAP mode.
RADIUS Data Proxy
The RADIUS Data Proxy (RDP) is a required component in self-care solutions.
The RDP cache refresh time is directly related to the length of time subscribers must wait to see their updates take effect. Due to the possibility of just having missed a refresh, the minimum guaranteed time is double the cache refresh time. The installed default for cache refresh is 10 minutes.
LDAP Directory
The profile data that you want subscribers to update must reside in profiles on an LDAP directory. The LDAP protocol provides the features that allow for on-demand updates to profile data.
We recommend deploying a primary and a secondary directory and using the LDAP directory failover features.
Cisco Distributed Administration Tool
The Cisco Distributed Administration Tool (CDAT) is the tool for administrators to use in adding and maintaining subscriber profiles in the LDAP directory.
CDAT must have access to the LDAP directory. Multiple instances of CDAT can be installed on different systems, giving distributed administrative access to the directory.
Portal Customizations for Self-Care Solutions
The SESM portal is the subscriber interface to self-care activity. You can integrate a self-care solution with a service selection and connection solution or deploy it as a standalone solution. The NWSP application illustrates several self-care solutions as different pages in the same application:
•
•
•
•
Service provider developers can use the SESM web developer kit to customize the portal page on which subscribers can enter or update the account information. Customizations related to self-care features might include:
•
•
Supported Data Fields in a Self-Care Solution
SESM 3.1(5) supports the following categories of data in a subscriber profile. Developers can add any field from these categories to an SESM portal page and optionally provide access to them for on-demand updates by subscribers:
•
http://www.cisco.com/univercd/cc/td/doc/solution/sesm/sesm_315/instconf/cradius.htm#xtocid5
•
http://www.cisco.com/univercd/cc/td/doc/solution/sesm/sesm_313/toolguid/appb_sch.htm#xtocid0
Subscriber Profile Requirements for Self-Care Solutions
The following requirements apply to subscriber profiles in SESM self-care solutions:
•
•
Service provider administrators use the Cisco Distributed Administration Tool (CDAT) to add subscriber profiles to the LDAP directory. Administrators use CDAT to:
•
•
•
Personal Account Maintenance
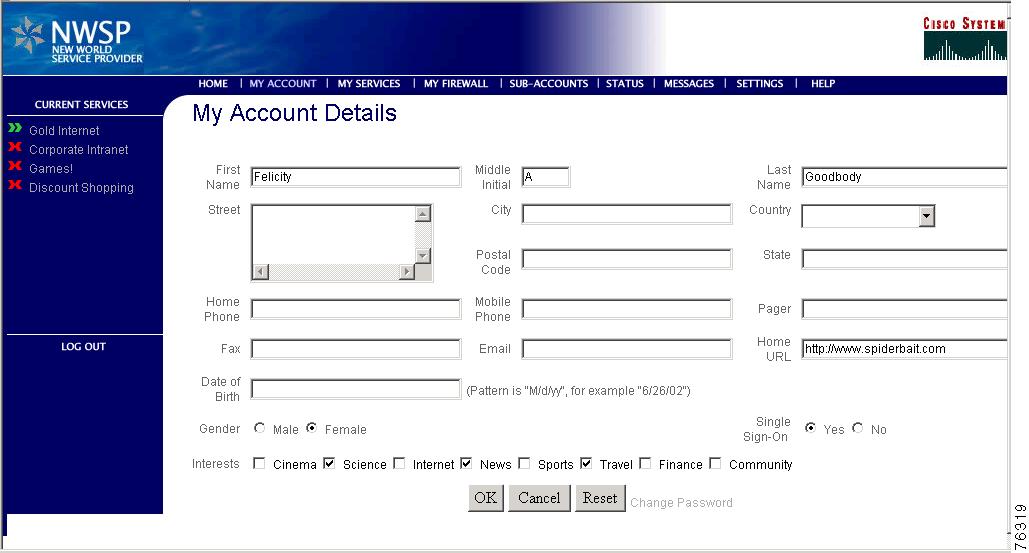
Figure 4-1 shows the My Account Page in NWSP. See the "Supported Data Fields in a Self-Care Solution" section for other supported fields that you might want to add to a personal account maintenance page.
Figure 4-1 NWSP My Account Page
The initial display of the My Account Details page reflects the contents of the subscriber profile. After subscribers enter or update their personal details, they can go back to the My Account Details page in about 20 minutes to see the changes. In Demo mode, the changes are not recorded in the profile.
Personal Firewalls
The SESM personal firewall feature provides a way for subscribers to restrict or permit traffic to and from their connection by making choices on a web portal page. The portal page presents a list of applications that are available for firewall protection. The SESM deployer configures the list of applications using the Firewall MBean.
Deployers can also configure firewall controls for subscribers which cannot be changed by the subscriber. Administrators use CDAT to configure these controls.
The underlying technology for the SESM personal firewall feature is extended access control lists (ACLs) added as attributes in subscriber profiles in an LDAP directory.
The ACLs are stored in the subscriber profiles as standard RADIUS attribute with number 26 (vendor specific attribute), subattribute number 1 (Cisco AV-pair). A subscriber profile might have many ACL entries, which together determine which traffic is permitted and denied on the connection.
The ACLs are added to the profile in two ways:
•
•
SESM and SSG implement the firewall as follows:
•
•
•
•
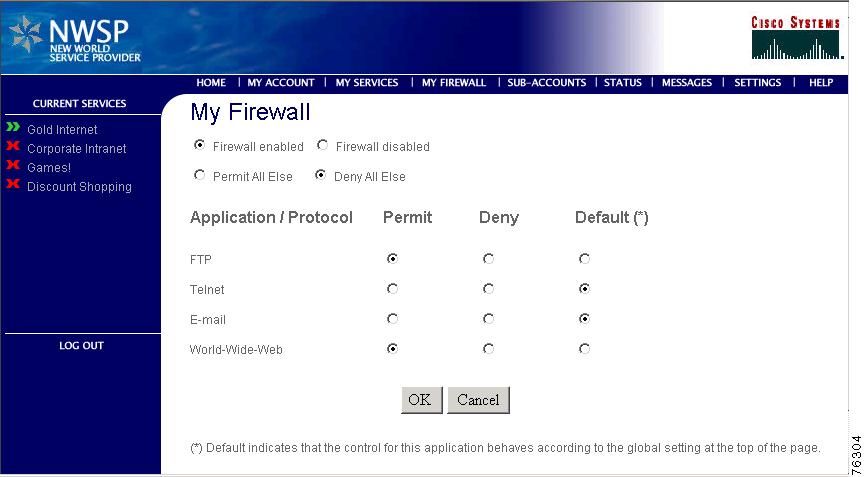
Figure 4-2 shows the My Firewall page in NWSP.
Figure 4-2 NWSP My Firewall Page
By clicking the Permit, Deny, and Default radio buttons on this page, subscribers can control the upstream and downstream traffic to their IP address.
For each application, the initial displayed state of the Permit, Deny, and Default radio buttons depends upon the ACLs that exist in the subscriber profile. The SESM portal analyzes the ACLs to determine the appropriate settings to display.
The Application/Protocol column is configurable by the deployer:
•
•
Subaccount Creation
Subscriber subaccount creation and management allows a subscriber with a main account to create subaccounts, with different services and access information in each subaccount. For example, a family might have subaccounts for each family member, with a different set of authorized services within each subaccount. The main account can create and delete subaccounts and subscribe to services for the subaccounts, and control whether the subaccounts can subscribe to services themselves.
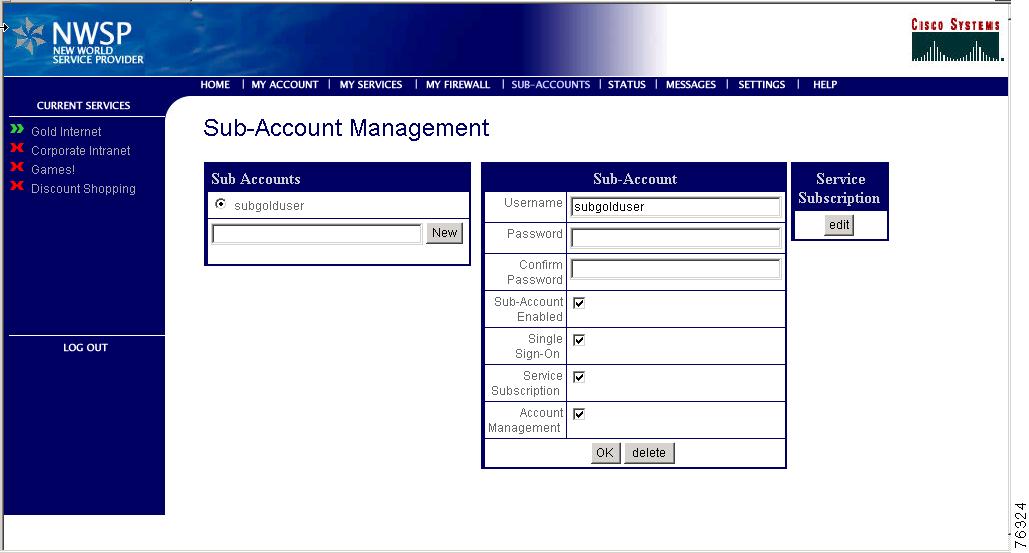
Figure 4-3 shows the NWSP Subaccounts page.
Figure 4-3 NWSP Subaccounts Page
From this page, a subscriber can:
•
•
•
–
–
•
–
–
–
–
Service Self-Subscription
Service self-subscription allows subscribers to sign up for new services and have immediate access to those services. This feature relieves the service provider from time-consuming service enrollment tasks. It also benefits the subscriber because there is no delay in receiving access to a new service. Subscribers can also unsubscribe from a service.
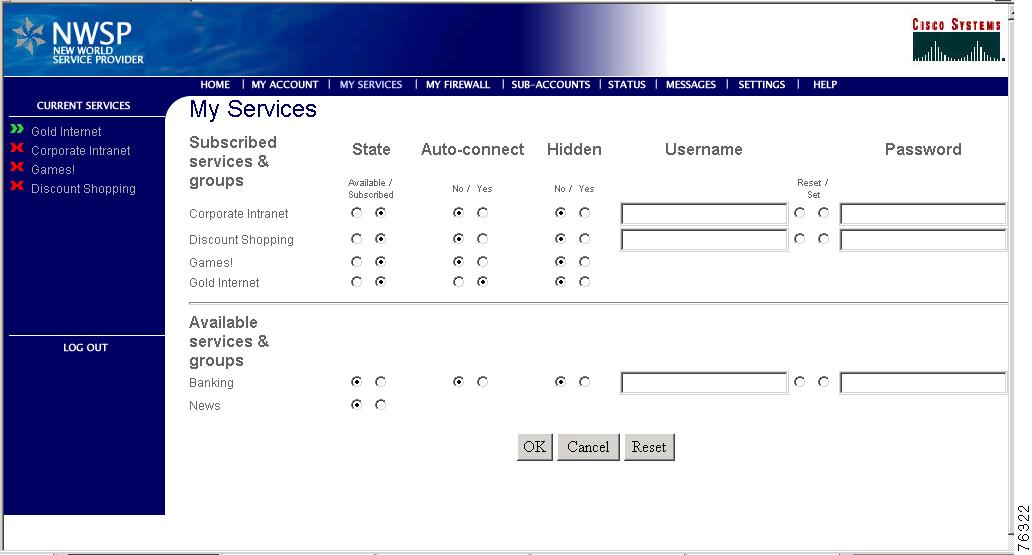
Figure 4-4 shows the My Services page from the NWSP application.
Figure 4-4 NWSP My Services Page
The page shows:
•
•
•
•
•
SESM Self-Care Demo
To demonstrate SESM self-care features using Demo mode, follow this procedure:
Step 1
Step 2
jettybinstartNWSPSee the "Starting a Demo" section for more information.
Step 3
If the web browser is on the same system where NWSP is running, and you accepted the default port during installation, you can use the following URL:
http://localhost:8080Otherwise, the URL is:
http://NWSPhostName:NWSPportNumberStep 4
User: golduser
Password: cisco
Note
Step 5
Step 6
The My Services page initially displays information as recorded in the profiles in the demo.txt file.
You can change the service information on the My Services page to demonstrate self-management features. In Demo mode, the changes you make are not propagated into the demo.txt file.
Step 7
Note
After a confirmation prompt, the My Services page reappears, showing the new service in the Subscribed list. In Demo mode, the new service is not changed to subscribed in the subscriber profile.
Step 8
The status of the new service changes to active.
Step 9
1.
2.
3.
4.
5.
6.
7.
Step 10
After a confirmation prompt, the My Services page reappears, showing the service in the Available list. If the service was running at the time you unsubscribed, the service is now stopped.
Step 11
Step 12
The page initially displays information as recorded in the profile in the demo.txt file. You can change the subscriber information on the My Account page to demonstrate self-management features. In Demo mode, the changes you make are not propagated into the demo.txt file.
Step 13
The installed demo.txt file contains a profile for one subaccount user (subgolduser) under the main golduser account.
Step 14
1.
2.
3.
4.
5.
6.
7.
In Demo mode, the subaccount profile is not added to the demo.txt file. Therefore, you cannot log in using the new subaccount.
Demonstrating Personal Firewalls
You can use the My Firewall page in Demo mode to simulate firewall changes. To see the effects of the changes, you must use a fully configured system running in LDAP mode. In a fully configured system, the effects of changes made on the My Firewall page are visible in these ways:
•
•
•