-
Cisco Prime Provisioning 6.4 User Guide
-
Preface
-
Using the Prime Provisioning Graphical User Interface
-
Setting Up Prime Provisioning Services
-
Managing Carrier Ethernet and L2VPN Services
-
Working with CEM TDM Services
-
Working with ATM Services
-
Managing MPLS VPN Services
-
Managing MPLS Transport Profile Services
-
Managing MPLS Traffic Engineering Services
-
Managing Service Requests
-
Managing Templates and Data Files
-
Monitoring
-
Performing Diagnostics
-
Using the Topology Tool
-
Using Inventory Manager
-
Cisco Configuration Engine Server
-
XML Reference
-
Terminating an Access Ring on Two N-PEs
-
Repository Views
-
Inventory - Discovery
-
Adding Additional Information to Services
-
 Feedback
Table Of Contents
Import Prime Network certificate into Prime Provisioning Trust Store
Single Device Import during Device Creation
Bulk Import using Inventory Manager
Changing a Node to Unmanaged State
Using Inventory Manager
This chapter explains how Inventory Manager provides a method of managing mass changes to inventory and service model data in the Prime Provisioning provisioning process. In this process, Inventory Manager enables an operator to import network-specific data into the Prime Provisioning Repository (Repository) in bulk mode. Prime Provisioning now supports the import of inventory from Prime Network. The inventory that can be imported are device credentials, software version, and SNMP details. All other physical and logical inventory is retrieved from the device using collect configuration. It contains the following sections:
•
Changing a Node to Unmanaged State
Inventory - Device Console
Note
Inventory - Device Console is the starting point for many operations. Inventory Manager performs three primary functions:
•
•
•
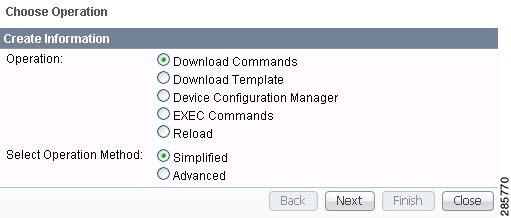
To navigate through Device Console, follow these steps:
Step 1
Note
Figure 14-1 Device Console window
Step 2
Note
•
•
•
•
•
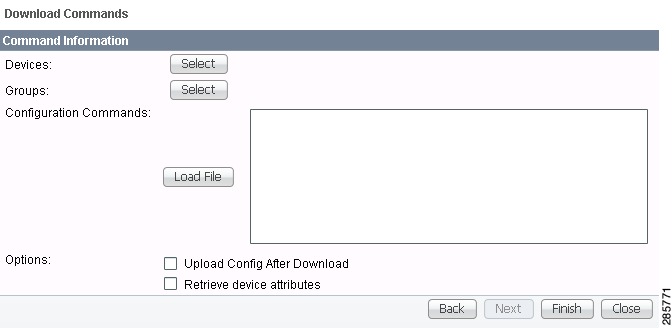
Download Commands
To download commands, follow these steps:
Step 1
Step 2
Step 3
A window appears as shown in Figure 14-2.
Figure 14-2 Device Console—Download Commands: Select Devices
Step 4
Step 5
Step 6
If you leave the Upload Config After Download check box unchecked, you do not upload the configuration file after the download.
If you leave the Retrieve device attributes check box unchecked, you do not retrieve any device attributes. If you check the Retrieve device attributes check box, after the template is downloaded, SNMP is used to retrieve interface information and issue additional show commands, such as show version.
Step 7
Step 8
Step 9
Download Template
Note
To download a template, follow these steps:
Step 1
Step 2
A window appears as shown in Figure 14-3.
Figure 14-3 Device Console—Download Template: Select Devices
Step 3
Step 4
Step 5
Step 6
Step 7
Step 8
Step 9
Step 10
Step 11
Step 12
Figure 14-4 Device Group Selection
Step 13
You return to Figure 14-4 with the added device groups. You can repeat Step 12 to Step 13 to add more device groups, you can delete device groups, as explained in Step 14, or you can proceed by going to Step 15.
Step 14
Step 15
Step 16
Figure 14-5 Select Download Template
Step 17
A window appears as shown in Figure 14-6.
Step 18
When you click Add you get a Template Datafile Chooser window with the template choices in the tree. Click + to open the folders and subfolders in the tree, until you get the property you want to choose. Click on that property and it is added to your list. Repeat this until all the templates you want are in your list. In each added property, you can click View and you receive the configlet for that data file. To return, click OK. In Figure 14-6, check the check box(es) for the template(s) you want. In each template row, click the Action drop-down list and choose APPEND or PREPEND to add information after or before, respectively; check or uncheck the Active check box; and then click OK.
Figure 14-6 Add/Remove Templates
Step 19
Step 20
Step 21
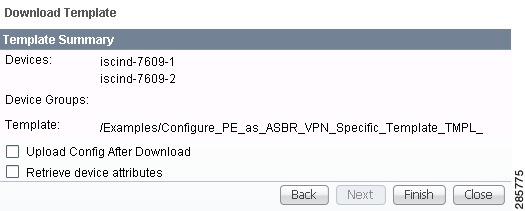
Figure 14-7 Download Template Summary
Step 22
Step 23
Step 24
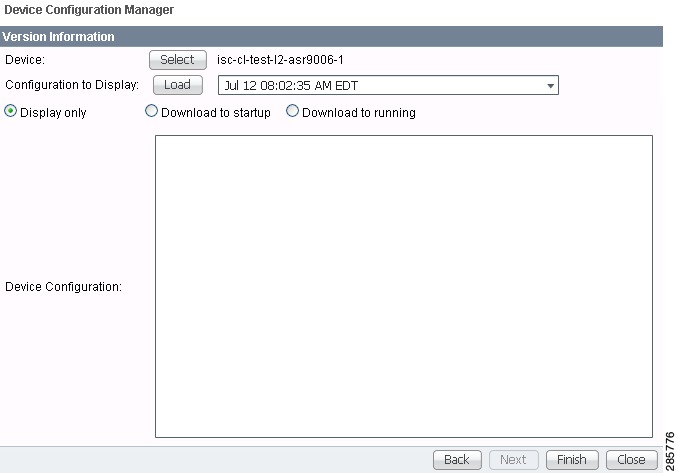
Device Configuration Manager
To display the configuration, download the configuration to the startup configuration on the device, or download the configuration to the running configuration on the device, follow these steps:
Step 1
Step 2
A window appears as shown in Figure 14-8.
Figure 14-8 Device Configuration Manager
Step 3
Step 4
Step 5
Step 6
Step 7
•
•
Note
•
Note
Step 8
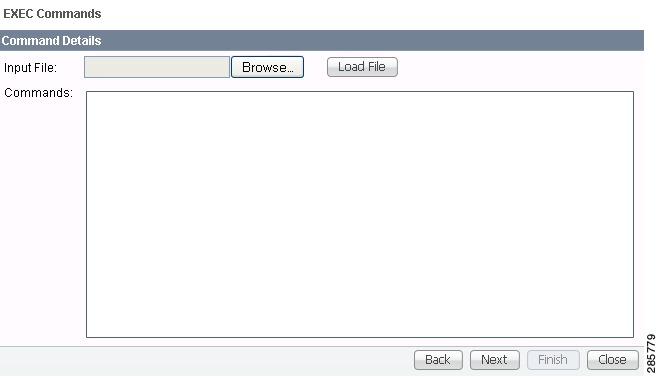
EXEC Commands
EXEC Commands allows you to send to target devices any Cisco IOS commands that can be executed in enable mode. You can only view the router information. You cannot edit or delete the information.
To execute EXEC Commands, follow these steps:
Step 1
Step 2
A window appears as shown in Figure 14-9.
Figure 14-9 Device Console—EXEC Commands: Select Devices
Step 3
Step 4
Step 5
Step 6
Step 7
Step 8
You proceed to 3. Select Device Groups, starting in Step 9.
Step 9
Step 10
Figure 14-10 Device Group Selection
Step 11
Step 12
Step 13
Step 14
Step 15
Figure 14-11 Operation Commands
Step 16
Step 17
Step 18
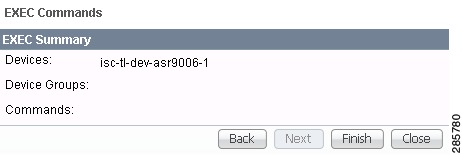
Figure 14-12 EXEC Commands Summary
Step 19
Step 20
Step 21
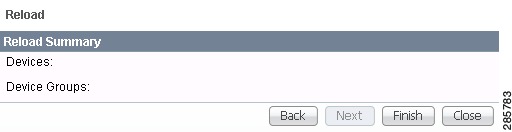
Reload
To reload (reboot) the router, follow these steps:
Step 1
Step 2
A window appears as shown in Figure 14-13.
Figure 14-13 Device Console—Reload: Select Devices
Step 3
Step 4
Step 5
Step 6
Step 7
Step 8
Step 9
Step 10
Figure 14-14 Device Group Selection
Step 11
Step 12
Step 13
Step 14
Step 15
Figure 14-15 Reload Summary
Step 16
Step 17
Prime Network Device Import
Prime Provisioning now supports the import of inventory from Prime Network. The inventory that can be imported are device credentials, software version, and SNMP details. All other physical and logical inventory is retrieved from the device using collect configuration. Set the DCPL property from InventoryImport before importing Prime Network Device. For more information on setting DCPL properties, see Cisco Prime Provisioning 6.4 Administration Guide.
Note
This feature allows you to perform:
•
•
•
•
Cisco IOS routers that function as N-PE, U-PE, or PE-AGG are defined as devices from which Prime Provisioning collects information. Every network element that Prime Provisioning manages is defined as a device in the system.
The two ways to import devices from Prime Network are:
–
–
Device Import Prerequisite
You can import devices from Prime Network to Prime Provisioning both in Standalone mode and Suite mode.
In Suite mode, it is required to import the Prime Network certificate to Prime Provisioning trust store to import devices from Prime Network to Prime Provisioning. Please refer to the steps mentioned in the below procedure to import Prime Network certificate.
Import Prime Network certificate into Prime Provisioning Trust Store
Step 1
Step 2
Step 3
Step 4
./prime.sh shellStep 5
Note
Step 6
keytool -import -file <certificate-name>.cer -keystore <keystore-name> -alias
<alias-name>
<certificate-name> - must be the name of the Prime Network certificate.<keystore-name> - must be prime.keystore<alias-name> - unique name to identify the certificate.Example: keytool -import -file sheer.cer -keystore prime.keystore -alias anacer
Note
Step 7
Enter Yes to import. The message Certificate was imported successfully appears.
Step 8
keytool -list -v -keystore prime.keystoreRestart the server to reflect the changes.
Single Device Import during Device Creation
To navigate through Devices and import a device manually, follow these steps:
Step 1
The Device List window appears. Click the Create button.
Step 2
The Create Cisco Device window appears.
See the following sections for descriptions of the fields:
•
•
Step 3
Enter the region name for the Provider that you are creating. To enter the provider region name follow these steps:
a.
A list of provider region names appears.
b.
Select the device role from the Role Type drop-down menu.
Note
Step 4
Configuration Collection is performed at the device creation and device import stages. You can also navigate to Operate > Task Manager > Task to create a config task and select the devices created.
Step 5
–
–
Step 6
Step 7
The Additional Properties window appears.
See the following sections for descriptions of the Additional Properties fields:
•
•
Step 8
Step 9
Step 10
Bulk Import using Inventory Manager
Devices which already exist in Prime Network can be imported directly into Prime Provisioning using the option available on the Inventory Manager window.
To perform bulk import of Cisco devices, follow these steps:
Step 1
The Device List window appears.
Step 2
Step 3
a.
–
–
–
–
–
b.
Step 4
Step 5
–
–
–
–
–
Step 6
The Devices window reappears with the new devices added.
Changing a Node to Unmanaged State
In some situations, it can be advantageous to make a node unmanaged. For example, if a node has to be removed, service requests that included this node can fail. To avoid this, one solution is to make the node unmanaged.
To make a node unmanaged, perform the following steps:
Step 1
Step 2
Step 3
Step 4
Step 5
Step 6
Step 7
Step 8
The value of the Managed column appears as NO for the chosen device.