This document provides configuration guidance for users of Cisco IOS® SSL VPN. This feature is designed to terminate SSL VPN connections on Cisco IOS Software-based routers (1800, 2800, 3700, 3800, 7200, and 7301). SSL VPN is comparable to and complements the popular IP Security (IPsec) remote-access VPN.
The testing was performed at the NSITE lab in Research Triangle Park, North Carolina (RTP) on the devices defined above. The objective of the testing was to configure and test SSL VPN portal customization. Typically, service providers will sell SSL VPN service to an enterprise customer. When an enterprise purchases the SSL VPN service, it is important for users to feel that they are logging directly into their company's secure gateway. This can be accomplished by enhancing the user interface of the SSL VPN login and portal pages by adding coloration and the enterprise's logo, especially when using clientless mode.
Advantage: The primary advantage of customizing the SSL VPN portal is to enhance the user experience. End users see a customized portal page that includes only the features that you enable. The SSL VPN portal page is the VPN interface for users of clientless mode. In addition, this immediately lets users know they are in the correct login page.
This document discusses the configuration of the features that are offered to customize the SSL VPN portal and login pages.
Note: All Cisco IOS SSL VPN/WebVPN features are included in a single, cost-effective license that would be purchased separately. You can purchase the feature license in packs of 10, 25, or 100 simultaneous users directly from the Cisco.com configuration tool. If you already have a router, use the following SKUs to order the license: FL-WEBVPN-10-K9= FL-WEBVPN-25-K9= FL-WEBVPN-100-K9=. Check the Data Sheet to find the maximum supported users for your platform.
2. Audience
This configuration guide is intended for customers and partners working to provide configuration guidelines and best practices for smaller SSL VPN deployments.
3. SSL VPN Customization
For all the descriptions below, we will use the following configuration as an example:
The above configuration is a sample for a simple portal, customized for the NSITE SSL VPN router. In addition to understanding the commands, it is important to understand the basics of designing the portal. The logo image and the colors are key to designing an effective and attractive portal. Text can be changed from the default strings as well for some of the fields.
A program such as Adobe Photoshop® is recommended to match colors with the logo image. With Photoshop, you can use the eye dropper tool to select complementary colors. Another advantage is that the color picker will show you a selected color's hex equivalent. This is the color code that can be entered in the WebVPN context configuration indication the "#RRBBGG" color to use. So, once you pick the logo image, and choose the colors you want to use for the title and secondary colors, you can configure the color selections on the WebVPN context.
Next, you can change the text. The main text to be concerned with is the title text. This should coincide with the customer and the logo. If the title color is a light color, you can set the primary text color to black. The converse is true for the secondary color. There are few limitations to the possibilities and creativity.
Functionally, you can add toolbars with some commands. These will take on the same design that is configured for the rest of the WebVPN context.
3.1 Context Portal Commands
The commands described below are configured in the main context configuration mode.
3.1.1 Login Message
This command specifies the text that prompts the end user to log in. This message will appear over the login fields for the username and password. The string is limited to 255 characters and defaults to the string "Please enter your username and password."
3.1.2 Title
This command specifies the title string at the top of the login and portal pages. It also appears on the title bar of the window. The string is limited to 255 characters, and the default string is "WebVPN Service." Typically, this string will be the enterprise customer's name.
3.1.3 Logo
This command specifies the custom logo image that is displayed on the login and portal pages. The filename is a file that must exist on the file system. It is typically an image file uploaded by the administrator to the security gateway.
In the example, we see the logo image nsitelogo.gif is located in the flash: filesystem. The default logo is the Cisco Systems logo.
3.1.4 Title Color
This command specifies the color of the title bars on the login, home, and file-access portal pages. The default color is a shade of purple. For information on valid color values, see Color Names and RGB Color Values.
3.1.5 Secondary Color
This command specifies the color of the secondary title bars on the login, home, and file-access portal pages. The default color is a light shade of purple. For information on valid color values, see Color Names and RGB Color Values.
3.1.6 Text Color
This command specifies the color of the text of the title bars on the login and portal page. The default value is white.
3.1.7 Secondary Text Color
This command specifies the color of the text of the secondary bars on the login and portal page. The default value is black.
3.2 Policy Group Portal Commands
The commands below are configured under the policy group, and will apply to any user that uses this policy group. The URL list and NBNS list under the policy group will change the portal page appearance when using clientless and thin-client modes. These add additional toolbars, and are explained at the NSITE SSL VPN test page in the Related Documents section.
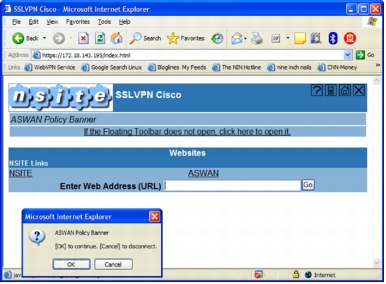
3.2.1 Banner
This command specifies the banner string for the portal page. The string value may contain 7-bit ASCII values, HTML tags, and escape sequences. This string is also presented to the user after successful login.
Note: The banner string can be pushed down to the user session via RADIUS attributes. See Appendix A.
Figure 1. SSL VPN Portal with Policy Group Banner Set
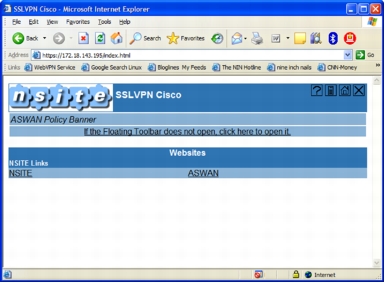
3.2.2 Hide-url-bar
This command disables the URL bar on the portal page. It is still possible for the user to use the links that are provided via the URL-list. This command is used to restrict the user from entering any Website in the URL bar.
Note: This command applies only to clientless mode. The hide-url-bar flag can be set or cleared via RADIUS attributes. See Appendix A.
Figure 2. SSL VPN Portal with Policy Group Hiding URL Bar
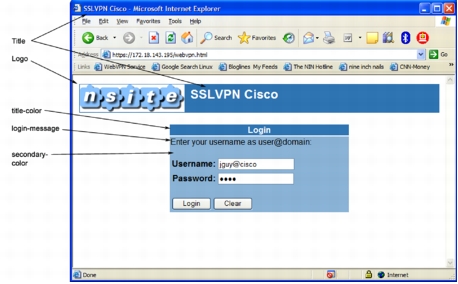
3.3 SSL VPN Login Page
The login page is the first page a user sees when they enter the URL of the WebVPN gateway into the Web browser. If the gateway has multiple contexts associated, be sure to specify the /domain.
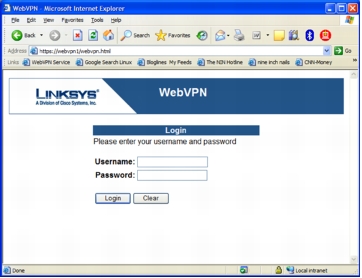
Figure 3 shows an example of the SSL VPN login page.
Figure 3. SSL VPN Login Page Customized
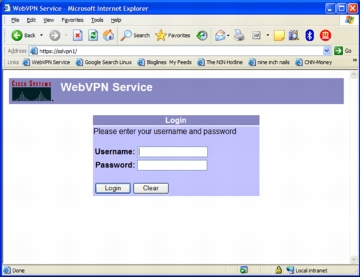
3.4 SSL VPN Portal Page
The portal page is used as the SSL VPN interface for clientless and thin-client modes. This page will take on the same customization as the login page when in terms of the colors and logo image.
The portal is also influenced by the policy group configuration. As described above, the banner string, hiding the URL bar, using URL lists, and NBNS lists all add to and change the appearance of the portal page.
Using RADIUS attributes and policy groups, the portal page can be customized to work well for a group of users. It is possible to alter some things on a per-user basis, but that would require more management of the RADIUS server.
Figure 4 shows all the customizations.
Figure 4. SSL VPN Portal Page Customized
4. Limitations, Caveats, Integration Issues, and Guidelines
• There are no known bugs with the customization commands.
• There is a mistake in the configuration guide listed on Cisco.com. There are three extra commands listed that do not exist for the customization.