Feedback
Table Of Contents
Installing and Logging In to ISC
Initial Configuration—Creating the ISC Owner
Installing ISC Using the Graphical User Interface
Installing ISC Using the Command Line Installer
Upgrading ISC Repositories to ISC 5.0
Upgrading ISC 3.2.2 or Later Repositories to ISC 5.0
Installing and Logging In to ISC
Use the information described in this chapter in the following order:
Note
See Chapter 1, "System Recommendations," before installing ISC.
•
•
•
•
•
Packages Included with ISC
The ISC installer includes the following third party software:
•
•
•
•
•
•
•
•
•
•
Initial Configuration—Creating the ISC Owner
Note
The first time you install ISC, create a UNIX user to own the software. This user is the default username when you log in to ISC. Create the user and group using Solaris commands or the Solaris Admintool. This user must have a valid group ID and read and write permissions to the install directory.
To add a user to your server using the standard Solaris commands, follow these steps:
Step 1
Step 2
useradd -d /users/<username> -m -s /bin/<shell_type> <username>passwd <username>where:
-m creates the directory specified in -d
<shell_type> is sh for the Bourne Shell, ksh for the Korn Shell, or csh for the C Shell
iscadm is recommended as the <username>.
Step 3
Installing ISC Overview
To add ISC to your system, either as a new ISC customer or a customer upgrading from an existing ISC release, you can choose one of the following two ways to install:
•
•
Note
Cisco recommends you install ISC using the Graphical User Interface (GUI) installer. This option provides more configuration options.
The installer checks for two kinds of disk space:
•
•
See Chapter 1, "System Recommendations" for more information about disk space and planning.
The complete installation for the ISC software requires 1.2 GB of free disk.
Installing ISC Using the Graphical User Interface
After reviewing the information in the "Installing ISC Overview" section, you can follow these steps to install the ISC software using the Graphical User Interface (GUI):
Note
Step 1
Caution
Note
Step 2
Step 3
$ cd /cdrom/cdrom0Step 4
Step 5
cdrom> ./install.shThe ISC software is installed by default in the /opt/isc-5.0 directory or a directory set up as follows.
If you are upgrading ISC from an existing version, make sure the existing ISC is shut down completely. Then do one of the following:
a.
–
tar cvf <directory_name>.tar /opt/<directory_name>
–
-or-
b.
For example, if you are upgrading from ISC 4.2 to ISC 5.0 and the ISC installation is under the directory /opt/isc-4.2, then install ISC 5.0 in the same directory and rename it to /opt/isc-5.0, with steps like the following:
–
tar cvf isc-4.2.tar /opt/isc-4.2
–
mv /opt/isc-4.2 /opt/isc-5.0
–
-or-
c.
For example, if you are upgrading from ISC 4.2 to ISC 5.0and the ISC 4.2 installation is under the directory /opt/isc-4.2, then install ISC 5.0 in a new directory /opt/isc-5.0, with steps like the following.
–
mkdir /opt/isc-5.0
–
cp -r /opt/isc-4.2/Repository /opt/isc-5.0
–
Step 6
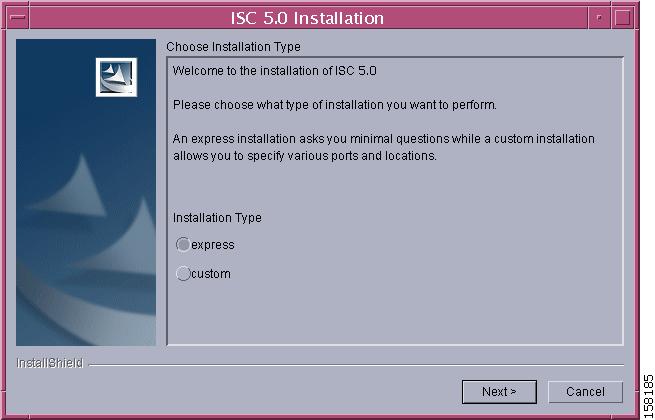
When you click express, you have a minimal number of choices to make. When you click custom, you can specify various ports and locations and you can change the watermark level for available disk space.
Figure 2-1 Choose Installation Type
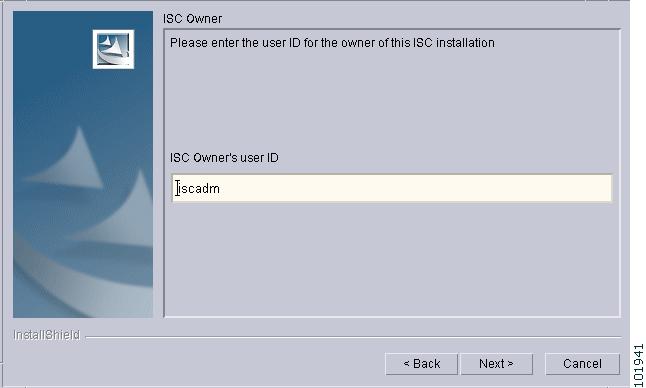
Step 7
Note
Figure 2-2 Choose ISC Owner
Note
Step 8
Note
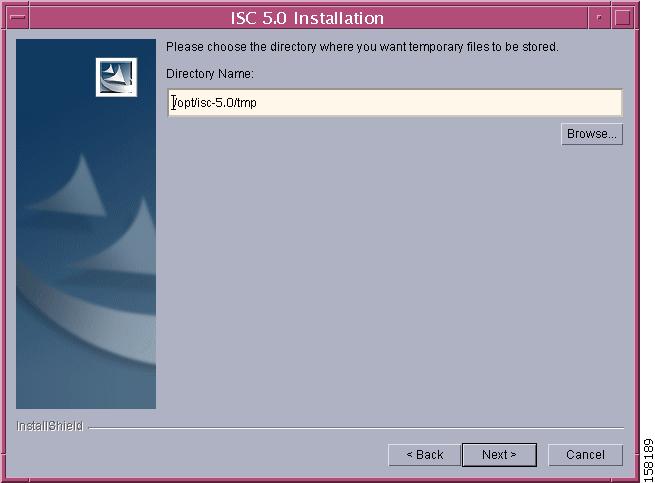
Note
In the database directory, you need 1 GB free. For large systems, you should have 4 to 5 GB of space. If the directory has less than 1.2 GB free, you can still install ISC, but you might run out of space.Figure 2-3 Specify Directory Location
Step 9
In Figure 2-4, "Confirm Directory Removal," if the directory you chose already exists and you must click the default radio button Disapprove, you cannot proceed. You must click Back and return to Step 8.
Be very careful. If you click the radio button Approve, you will overwrite the contents in the existing directory. Click Next.
Figure 2-4 Confirm Directory Removal
Step 10
Note
In the database directory, you need 1 GB free. For large systems, you should have 4 to 5 GB of space. If the directory has less than 1.2 GB free, you can still install ISC, but you might run out of space.Figure 2-5 Choosing the Directory for Temporary Files
Step 11
Figure 2-6 Where to Store Database Files
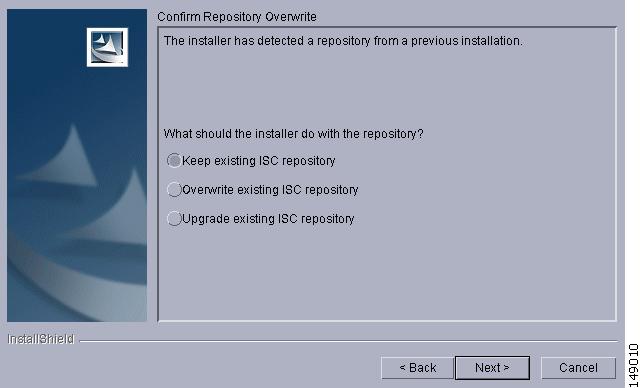
Step 12
When you click Keep existing ISC repository, proceed to Step 13.
When you click Overwrite existing ISC repository, proceed to Step 14.
When you click Upgrade existing ISC repository, proceed to Step 15.
Figure 2-7 Repository Choices
Step 13
Note
Note
Click Next and proceed to Step 18.
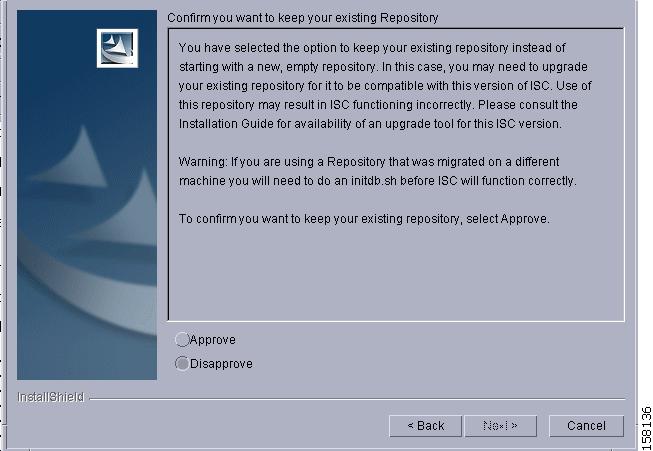
Figure 2-8 Confirmation of Keeping Existing ISC Repository
Step 14
Click Next and proceed to Step 18.
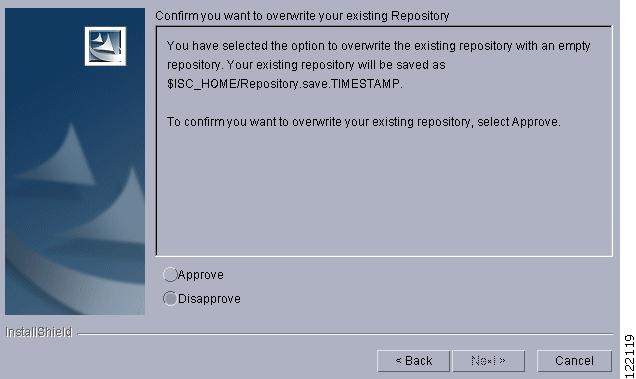
Figure 2-9 Confirmation of Overwriting Existing ISC Repository
Step 15
Click Next and proceed to Step 18.
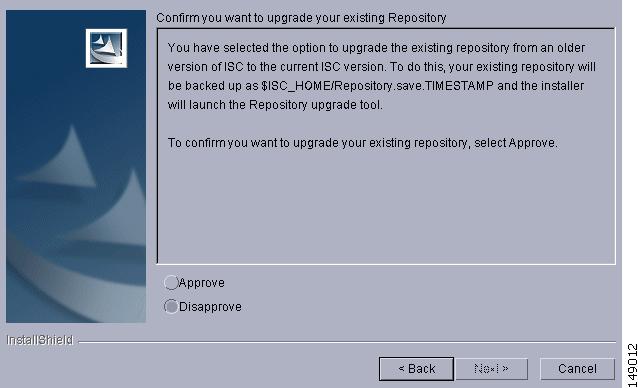
Figure 2-10 Confirmation of Upgrading Your ISC Repository After Installation
Step 16
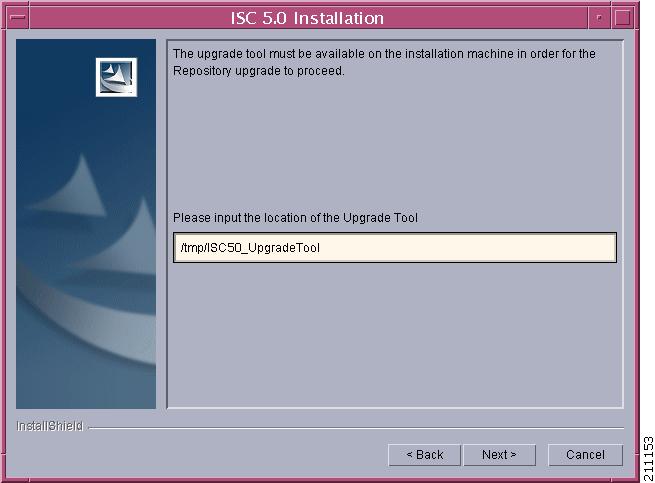
Figure 2-11 Location of Upgrade Tool
Step 17
Figure 2-12 Invalid location of Upgrade Tool
Step 18
Note
Note
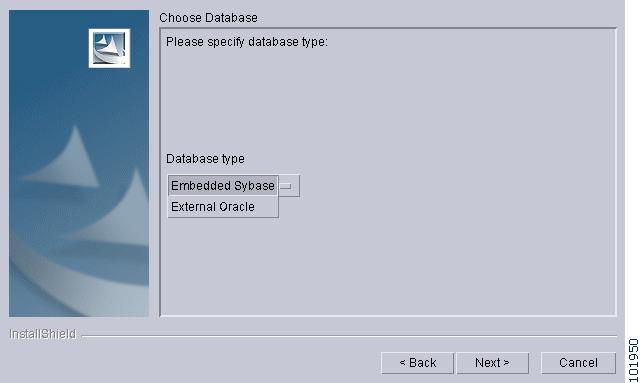
Figure 2-13 Choosing a Database
Step 19
If you chose External Oracle in Step 13, proceed to Step 20.
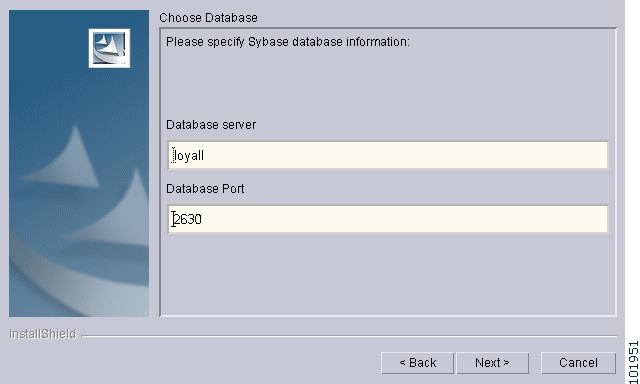
Figure 2-14 Choosing a Database—Sybase
Step 20
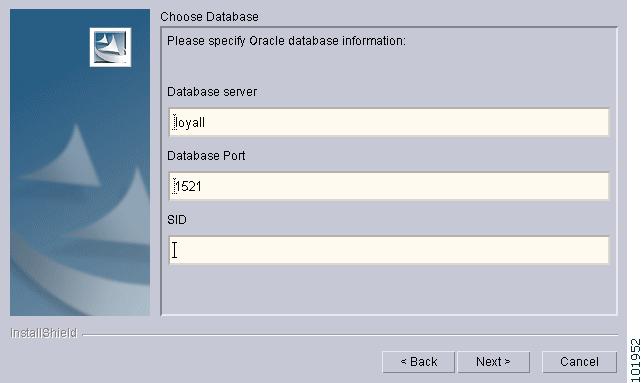
Note
Figure 2-15 Choosing a Database—Oracle
Step 21
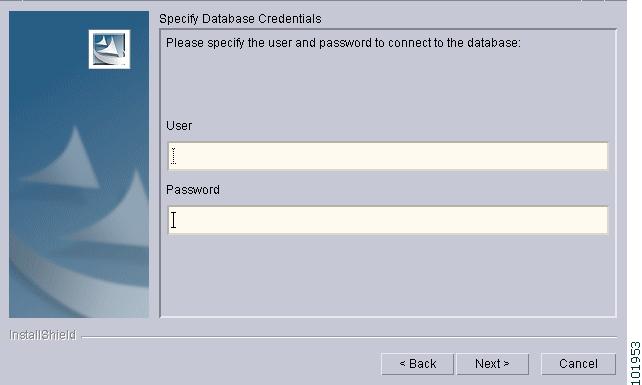
Figure 2-16 Specifying Database Credentials
Step 22
Note
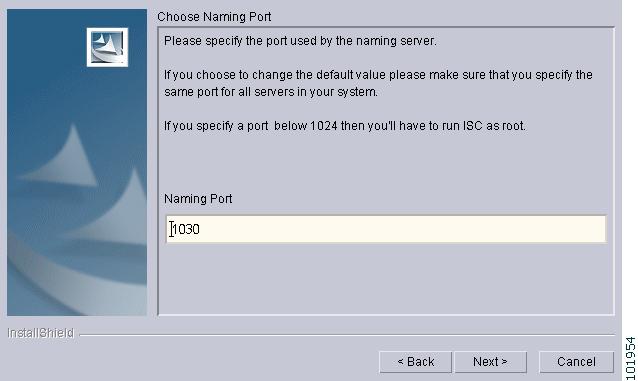
Figure 2-17 Specify the Port Used by the Naming Server
Step 23
Note
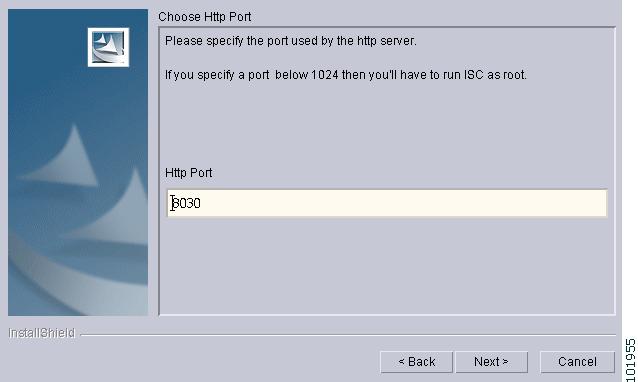
Figure 2-18 Choose HTTP Port
Step 24
Note
Note
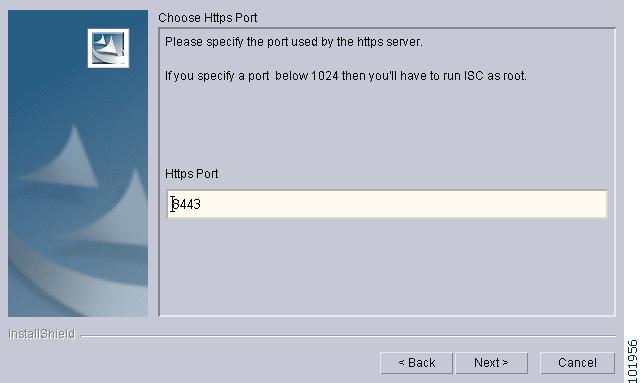
Figure 2-19 Choose HTTPS Port
Step 25
Note
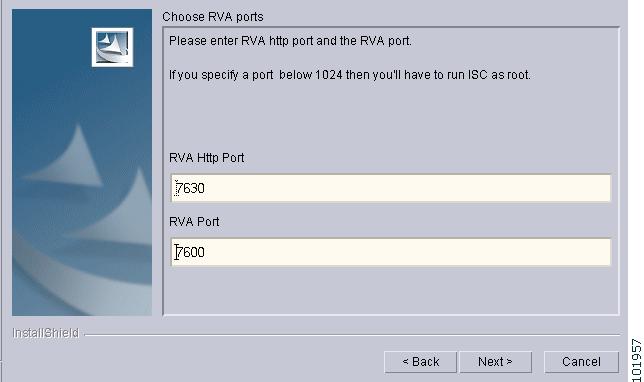
Figure 2-20 Choose RVA Ports
Step 26
Note
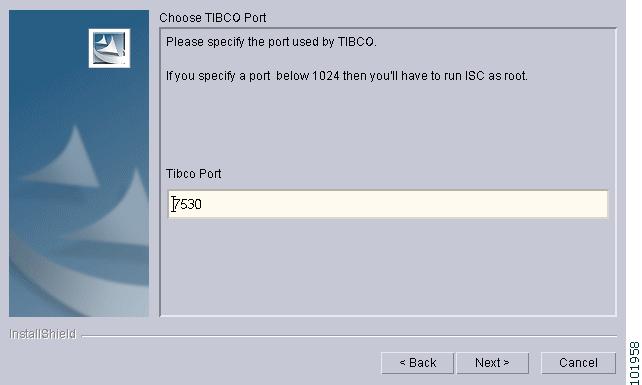
Figure 2-21 Choose TIBCO Port
Step 27
Step 28
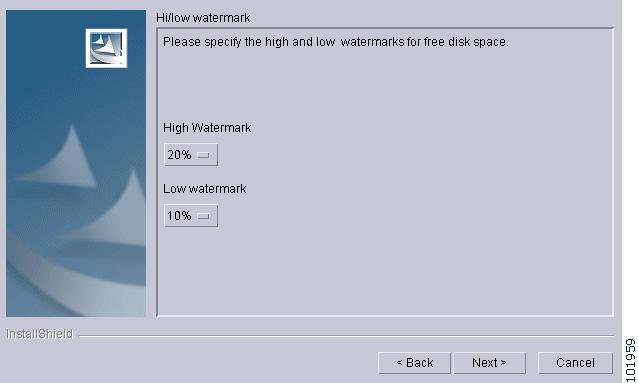
Figure 2-22 Setting Watermarks for Available Disk Space
Step 29
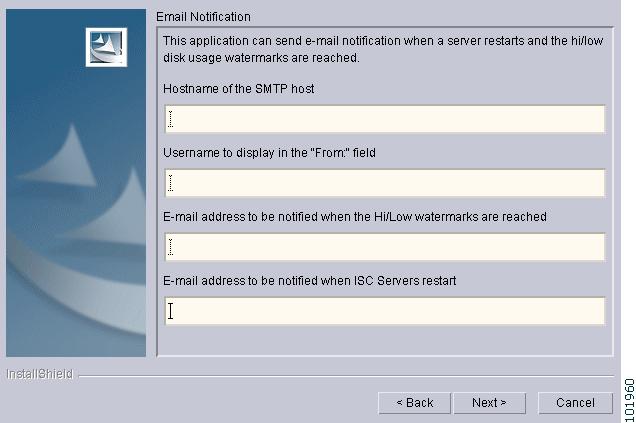
•
•
•
•
Then click Next.
Figure 2-23 Setting E-mail Address for Receiving Watermark Information
Step 30
Step 31
To review the log message, click Back.
If there was truncation of data, reinstall and add two spaces at the end of each field for which you have modified the entry.
Step 32
Step 33
Step 34
a.
If sh or ksh shell: . $ISC_HOME/bin/vpnenv.sh
If csh shell: source $ISC_HOME/bin/vpnenv.csh
b.
wdclient status
For more information about WatchDog commands, see the Cisco IP Solution Center Infrastructure Reference, 5.0.
Step 35
Step 36
Step 37
Step 38
Note
Step 39
Step 40
Note
Installing ISC Using the Command Line Installer
Note
After reviewing the information in the "Installing ISC Overview" section, you can follow these steps to install the ISC software using the Command Line Installer:
Note
Step 1
Note
Note
Step 2
Step 3
$ cd /cdrom/cdrom0
Step 4
Step 5
Caution
Step 6
cdrom> ./install.sh <target_dir> <owner>
where:
<target_dir> Specify the location of the directory where you want to install ISC. If you are upgrading an existing ISC installation, see the options in this step.
<owner> Enter the username you created in Step 2 of the "Initial Configuration—Creating the ISC Owner" section.
If you are upgrading an existing ISC installation, use one of the following options to specify the target directory:
a.
For example, if you are upgrading from ISC 4.2 to ISC 5.0 and the existing ISC 4.2 installation is under the directory /opt/isc-4.2, then install ISC 5.0 in the same directory, with steps like the following:
–
tar cvf isc-4.2.tar /opt/isc-4.2
–
cdrom> ./install.sh /opt/isc-4.2 <owner>
-or-
b.
For example, if you are upgrading from ISC 4.2 to ISC 5.0 and the existing ISC 4.2 installation is under the directory /opt/isc-4.2, rename this directory to /opt/isc-5.0 then install ISC 5.0 in the same directory, with steps like the following:
–
tar cvf isc-4.2.tar /opt/isc-4.2
–
mv /opt/isc-4.2 /opt/isc-5.0
–
cdrom> ./install.sh /opt/isc-5.0 <owner>
-or-
c.
For example, if you are upgrading from ISC 4.2 to ISC 5.0 and the existing ISC 4.2 installation is under the directory /opt/isc-4.2, then install ISC 5.0 in a new directory /opt/isc-5.0, with steps like the following:
–
tar cvf isc-4.2.tar /opt/isc-4.2
–
cdrom> ./install.sh /opt/isc-5.0 <owner>
Step 7
a.
mv $ISC_HOME/Repository $ISC_HOME/Repository.empty
b.
mv $ISC_HOME/Repository.save.<timestamp> $ISC_HOME.Repository
c.
cp -R /opt/isc-4.2/Repository /opt/isc-5.0/Repository
Step 8
Configuring HTTPS
To configure the secure web access to ISC, set up the Hypertext Transfer Protocol (HTTP) Over Secure Socket Layer (SSL) (HTTPS) port, as follows:
Note
Step 1
For K shell: . $ISC_HOME/bin/vpnenv.sh
For C shell: source $ISC_HOME/bin/vpnenv.csh
Step 2
where:
<isc_home> is the home directory for ISC, for example: /opt/isc-5.0
<https_port> is the secure HTTPS port you want to use, for example: 8443.
<hostname> is the name of the machine that ISC is installed on, for example: machinename.cisco.com
Step 3
Note
Note
Logging In for the First Time
To log in to ISC for the first time, follow these steps:
Step 1
http://server:port/isc/
Note
See the "Installing ISC Overview" section for information about setting the port number.
Step 2
This default user provides administrative access to ISC. You cannot delete this user.
Step 3
The window, as shown in Figure 2-24, "Changing the Password for Security Reasons" appears.
Step 4
Figure 2-24 Changing the Password for Security Reasons
Installing License Keys
To install license keys, do the following:
Note
Step 1
Step 2
Step 3
Step 4
Step 5
Upgrading ISC Repositories to ISC 5.0
If you have an existing ISC repository, you must upgrade it to be able to use it with ISC 5.0, as follows:
Note
•
Note
•
•
Upgrading ISC 3.2.2 or Later Repositories to ISC 5.0
If you have an ISC 3.2.2 or later Repository, you use the same upgrade procedure steps independent of whether your repository is a Sybase or Oracle repository.
Note
Note
Upgrade your ISC 3.2.2 or later repository as follows:
Step 1
Step 2
gzip -d < ISC50_UpgradeTool.tar.gz | tar xvf -
Step 3
If sh or ksh shell: . $ISC_HOME/bin/vpnenv.sh
If csh shell: source $ISC_HOME/bin/vpnenv.csh
Step 4
stopall
Step 5
cd ISC50_UpgradeTool
./upgradeISCSchema.sh <ISC home>
where: <ISC home> is the full pathname of the ISC home directory.
Step 6
Note
Launching Topology Tool
ISC provides a downloadable version of Version 1.4.2_04 of Java Runtime Environment (JRE) for various operating systems when you launch Topology Tool. If you choose to install JRE Version 1.4.2_04, you must quit the browser, uninstall the existing JRE version, install the new 1.4.2_04 version, and log in again.
Specific instructions to launch the Topology Tool are explained in the Cisco IP Solution Center Infrastructure Reference, 5.0.
Uninstalling ISC
To uninstall the server, as follows:
Step 1
Step 2
Step 3
Step 4
For a sh or ksh shell:
. bin/vpnenv.shFor a csh shell:
source bin/vpnenv.cshStep 5
uninstall.shThis command removes all files from the installation directory. This command also removes the database and its contents. Database backups are not removed if they reside in a different directory from the installation directory.