Table Of Contents
Setting Up Cisco CNS IE2100 Appliances Running Cisco CNS Configuration Engine 1.3.x Software with ISC
Overview
SetUp Steps
Set Up Cisco CNS IE2100 Appliance
Configure a TIBCO Rendezvous Routing Daemon
Configuring the rvrd Daemon on the ISC Master Machine
Configuring the rvrd Daemon on a Cisco CNS IE2100 Appliance
Testing rv Connectivity Between ISC and Cisco CNS IE2100
Checking Router Configurations Overview
Setting Up Cisco CNS IE2100 Appliances Running Cisco CNS Configuration Engine 1.3.x Software with ISC
Overview
Cisco IP Solution Center (ISC) supports the Device Access Protocol (DAP) of CNS for communication with any Cisco IOS device. The DAP includes:
•
uploading a configuration file from a device
•
downloading a configlet to a device
•
executing a command on a device and obtaining the result (all communications).
ISC supports CNS Plug-and-Play.
In addition to this Overview section, this chapter contains the following major sections:
•
SetUp Steps
•
Checking Router Configurations Overview
SetUp Steps
To enable the Cisco CNS Intelligence Engine 2100 (IE2100) Series Configuration Engine functionality on ISC, set up in the following order:
1.
Set up the Cisco CNS IE2100 device, as shown in "Set Up Cisco CNS IE2100 Appliance."
2.
Configure a TIBCO Rendezvous Routing Daemon (rvrd), as shown in "Configure a TIBCO Rendezvous Routing Daemon."
Set Up Cisco CNS IE2100 Appliance
ISC supports the integration with Cisco CNS IE2100 appliances running Cisco CNS Configuration Engine 1.3.x software.
For the Cisco CNS Configuration Engine 1.3.x software installation and setup, refer to the Cisco CNS Configuration Engine 1.3.x documentation set at: http://www.cisco.com/univercd/cc/td/doc/product/rtrmgmt/cns/ce/rel13/index.htm.
On a freshly set up Cisco CNS IE2100 appliance, remove Pluto protection, as follows.
Step 1
Log in as root.
Step 2
Enter:
plutosetup.
Step 3
A warning appears:
"plutosetup will open some class files to public access. It is a security risk."
Continue (y/n):
Answer y for yes to the above warning.
Note
Because the Cisco CNS IE2100 appliance and the ISC Master server are behind a secure barrier, we can safely answer y for yes to the security risk warning message above. This removal of Pluto protection exposes some files in Cisco CNS IE2100 that allows ISC to create, delete, and edit devices in the IE2100 repository. This is needed for proper ISC to Cisco CNS Configuration Engine 1.3.x integration. Removal of Pluto protection only needs to occur when a particular Cisco CNS IE2100 appliance is first used and every time the file /opt/CSCOcnsie/bin/pluto is deleted for any reason.
Configure a TIBCO Rendezvous Routing Daemon
In this section, do the following:
1.
Configuring the rvrd Daemon on the ISC Master Machine
2.
Configuring the rvrd Daemon on a Cisco CNS IE2100 Appliance
3.
Testing rv Connectivity Between ISC and Cisco CNS IE2100
Configuring the rvrd Daemon on the ISC Master Machine
To configure an rvrd daemon on an ISC Master server, do the following:
Step 1
ISC uses TIBCO Rendezvous Daemon (rvd) by default. To start TIBCO Rendezvous Routing Daemon (rvrd) and before starting the WatchDog:
a.
Go to the ISC installation directory/bin:
cd /<isc_install_directory>/bin
b.
Source the environment:
If sh or ksh: .vpnenv.sh
If csh: source vpnenv.csh
c.
Stop ISC:
stopall
d.
Check to see if the TIBCO software is already running.
ps -A | grep rv
e.
If any rvd or rvrd processes are running, kill them.
f.
Start the Tibco Rendezvous Routing daemon:
Note
If you have installed ISC as root, you need to create an empty rvrd.store file with 777 permissions in the <isc_install_directory>/bin directory prior to issuing the command rvrd -store rvrd.store.
rvrd -store rvrd.store
Step 2
To configure an rvrd daemon on an ISC Master server, start an ISC-supported browser and go to the following URL: http://<isc_hostname>:7580 or http://<isc_ip_address>:7580
Step 3
Restart ISC:
startwd
Then on your browser log back into ISC.
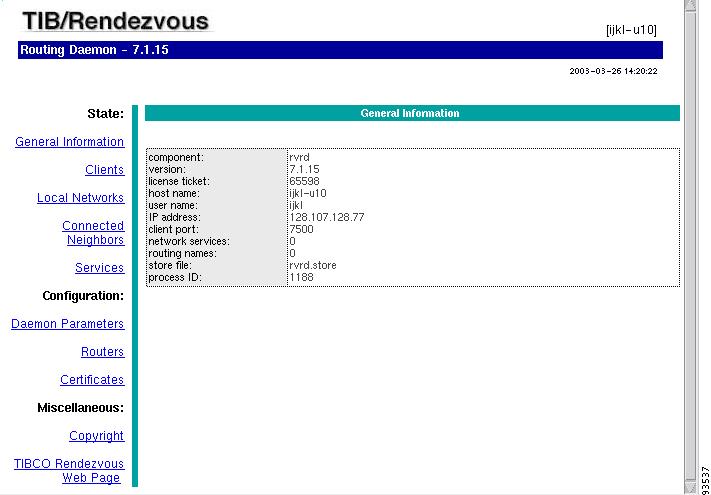
Step 4
Look at the component field under the General Information link to verify that rvrd is running. It should say rvrd, as shown in Figure B-1, "ISC rvrd Verification."
Figure B-1 ISC rvrd Verification
Step 5
Click on the Routers link in the left column.
Step 6
A security alert window appears, asking you if you want to proceed. Answer Yes or Next, depending on your browser, to continue.
Step 7
In the Router Name field in the lower part of the window, enter the name of the ISC Master server, followed by -isc. Any unique name works, but this recommendation is synchronized with this example.
Example: isc_hostname-isc.
Step 8
Click Add Router to create an entry with the new router name.
The chosen name appears in the Router Name column in the upper part of the window.
Step 9
In the Local Network column, click the current entry in the field (this number indicates the number of local networks currently defined).
Step 10
Specify the local ISC network with the following values:
a.
In the Local Network Name field, enter a unique name, for example isc.
b.
In the Service field, add the TIBCO port number for the ISC installation (default: 7530).
c.
The Network Specification field is optional. You can enter a description.
d.
Do not change the value in the Cost field.
Step 11
Click Add Local Network Interface. The entered values appear in the corresponding columns in the upper section of the page.
Note
If you encountered any error, place a check in the checkbox for the row of information you want to remove, then click Remove Selected Local Network Interface(s).
Step 12
Click on the entry just created in the Local Network Name column.
Step 13
In the Subject field in the lower part of the window, enter cisco.cns.>.
Step 14
Click Import and Export. The entered values appear in the Import Subjects and Export Subjects columns in the upper part of the window.
Step 15
If you are using Cisco CNS Configuration Engine 1.3.2, in the Subject field in the lower part of the window, enter cisco.mgmt.cns.>, repeat Step 14, and then proceed to Step 16. If you are using Cisco CNS Configuration Engine 1.3 or 1.3.1, just proceed to Step 16.
Step 16
Again, click on the Routers link in the left column.
Step 17
In the Neighbor column, click the current entry in the field (this number indicates the number of neighbors currently defined).
Step 18
In the Local Endpoint section, if you choose a port number other than the default, be sure the Port for Local Endpoint defined on the ISC Master server equals the Port for Remote Endpoint defined on the Cisco CNS IE2100 appliance (defined in Step 22c. of the section "Configuring the rvrd Daemon on a Cisco CNS IE2100 Appliance").
Step 19
Add the following in the Remote Endpoint section:
a.
In the Host field, add the IP address or hostname of the Cisco CNS IE2100 appliance.
b.
If you choose a port number other than the default, the Port for Remote Endpoint defined on the ISC Master server must equal the Port for Local Endpoint defined on the Cisco CNS IE2100 appliance (defined in Step 22d. of the section "Configuring the rvrd Daemon on a Cisco CNS IE2100 Appliance").
c.
In the Router Name field, enter the name of the Cisco CNS IE2100 appliance followed by -ie2100. Any unique name works, but this recommendation is synchronized with this example.
Example: <ie2100_hostname>-ie2100
Note
It is very important that the Neighbor Name is the same as the router name configured on the Cisco CNS IE2100 appliance.
d.
Click Add Neighbor Interface. The entered values appear in the corresponding columns in the upper section of the page.
Note
If you encountered any error, place a check in the checkbox for the row of information you want to remove, then click Remove Selected Neighbor Interface(s).
Configuring the rvrd Daemon on a Cisco CNS IE2100 Appliance
To configure an rvrd daemon on a Cisco CNS IE2100 appliance, do the following:
Step 1
The TIBCO Rendezvous Routing Daemon (rvrd) is the default daemon on the Cisco CNS IE2100 appliance.
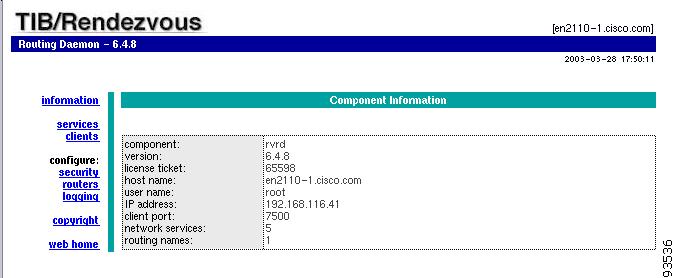
To configure an rvrd daemon on a Cisco CNS IE2100 appliance, start an ISC-supported browser and go to the following URL: http://<ie2100_hostname>:7580 or http://<ie2100_ip_address>:7580.
Step 2
Look at the component field under the information link to verify that rvrd is running. It should say rvrd, as shown in Figure B-2, "Cisco CNS IE2100 rvrd Verification."
Figure B-2 Cisco CNS IE2100 rvrd Verification
Step 3
Click on the routers link in the left column.
Step 4
In the Add Router Name field in the upper part of the window, enter the name of the Cisco CNS IE2100 appliance, followed by -ie2100. Any unique name works, but this recommendation is synchronized with this example.
Example: <ie2100_hostname>-ie2100
Step 5
Click Add to create an entry with the new router name.
The chosen name appears in the Router Name column in the lower part of the window.
Step 6
In the Local Networks column, click the current entry in the field (this number indicates the number of local networks currently defined).
Step 7
Specify the local Cisco CNS IE2100 network with the following values:
a.
In the Local Network Name field, enter the unique name entered in Step 10a. of the section "Configuring the rvrd Daemon on the ISC Master Machine". In the example, this is isc.
b.
In the Service field, add the TIBCO port number for the ISC installation (default: 7530).
c.
The Network Specification field is optional. You can enter a description.
Step 8
Click Add Local Network. The entered values appear in the corresponding columns in the lower section of the page.
Step 9
Click on the entry just created. In this example, it is isc.
Step 10
In the Add Subject field, enter cisco.cns.>.
Step 11
Click Add for Import and Export. The entered values appear in the Imported Subjects and Exported Subjects columns in the lower part of the window.
Step 12
If you are using Cisco CNS Configuration Engine 1.3.2, in the Subject field in the lower part of the window, enter cisco.mgmt.cns.>, repeat Step 11, and then proceed to Step 13. If you are using Cisco CNS Configuration Engine 1.3 or 1.3.1, just proceed to Step 13.
Step 13
Click the routers link in the left column.
Step 14
In the Local Networks column, click the current entry in the field (this is at least 1 now, because you already added one local network).
Step 15
Specify the local Cisco CNS IE2100 network with the following values:
a.
In the Local Network Name field, add a unique name. For example: ie2100-eventBus.
b.
In the Service field, add the CNS Event Bus Service Parameter value defined in the setup of the Cisco CNS IE2100 appliance (default: 7500).
c.
In the Network Specification field, leave it blank or enter the name of the Cisco CNS IE2100 appliance.
Note
If you encountered any error, place a check in the checkbox for the row of information you want to remove, then click Remove Marked Items.
Step 16
Click on the entry just created in the Local Network Name column.
Step 17
In the Add Subject field in the upper part of the window, enter cisco.cns.>.
Step 18
Click Add for Import and Export. The entered values appear in the Imported Subjects and Exported Subjects columns in the upper part of the window.
Step 19
If you are using Cisco CNS Configuration Engine 1.3.2, in the Subject field in the lower part of the window, enter cisco.mgmt.cns.>, repeat Step 18, and then proceed to Step 20. If you are using Cisco CNS Configuration Engine 1.3 or 1.3.1, just proceed to Step 20.
Step 20
Click the routers link in the left column.
Step 21
In the Neighbors column, click the current entry in the field (this number indicates the number of neighbors currently defined).
Step 22
Add the following in the Neighbors Configuration window:
a.
In the Neighbor Name column, add the router name as configured on the ISC Master server, defined in Step 7 of the section "Configuring the rvrd Daemon on the ISC Master Machine."
Example: <isc_hostname>-isc
Note
It is very important that the Neighbor Name is the same as the router name configured on the ISC Master server.
b.
In the Hostname or IP addr column, add the host name or IP address of the ISC Master server.
c.
In the Remote column, add the Port number for the Local Endpoint defined on the ISC Master server in Step 18 of the section "Configuring the rvrd Daemon on the ISC Master Machine."
d.
In the Local column, add the Port number for Remote Endpoint defined on the ISC Master server, in Step 19b. of the section "Configuring the rvrd Daemon on the ISC Master Machine."
Step 23
Click Add Active [all].
A good indication that the connection is established is when the new name in the Neighbor Name column appears as a hyperlink in the bottom of the window. It takes a few seconds for this to occur. Also, it is recommended to click Refresh a few times to see the hyperlink.
Note
If you encountered any error, place a check in the checkbox for the row of information you want to remove, then click Remove Marked Items.
Testing rv Connectivity Between ISC and Cisco CNS IE2100
Test that the rvrd setup has been successful, by testing the following:
•
Connectivity from ISC Master Server to Cisco CNS IE2100 Appliance
•
Connectivity from Cisco CNS IE2100 Appliance to ISC Master Server.
Connectivity from ISC Master Server to Cisco CNS IE2100 Appliance
Test the successful setup of connectivity from an ISC Master server to a Cisco CNS IE2100 appliance:
Step 1
Telnet to the Cisco CNS IE2100 appliance.
Step 2
Go to the following directory:
cd /opt/CSCOcnsie/tools
Step 3
Set up a TIBCO Listener to the TIBCO port the ISC installation is running and as configured above (default: 7530):
./cns-listen -service <tibco_port_number> "cisco.cns.>"
Leave the Listener running in this window.
Step 4
In a separate window, navigate to the following directory:
cd /<isc_install_directory>/thirdparty/rv/bin
Step 5
Send a TIBCO message to the Cisco CNS IE2100 appliance on the configured TIBCO port number (default: 7530):
/tibrvsend -service <tibco_port_number> "cisco.cns.config-changed" "<variable_message>"
Step 6
If the message is seen in the Listener window on the Cisco CNS IE2100 appliance, connectivity is established correctly from the ISC Master server to the Cisco CNS IE2100 appliance for the TIBCO subject "cisco.cns.>".
Step 7
If you are using Cisco CNS Configuration Engine Release 1.3.2, proceed with Step 8 to Step 12. Otherwise, proceed to the "Connectivity from Cisco CNS IE2100 Appliance to ISC Master Server" section."
Step 8
Telnet to the Cisco CNS IE2100 appliance.
Step 9
Go to the following directory:
cd /opt/CSCOcnsie/tools
Step 10
Set up a TIBCO Listener to the TIBCO port the ISC installation is running and as configured above (default: 7530):
./cns-listen -service <tibco_port_number> "cisco.mgmt.cns.>"
Leave the Listener running in this window.
Step 11
In the window created in Step 4, send a TIBCO message to the Cisco CNS IE2100 appliance on the configured TIBCO port number (default: 7530):
/tibrvsend -service <tibco_port_number> "cisco.mgmt.cns.config-changed" "<variable_message>"
Step 12
If the message is seen in the Listener window on the Cisco CNS IE2100 appliance, connectivity is established correctly from the ISC Master server to the Cisco CNS IE2100 appliance for the TIBCO subject "cisco.mgmt.cns.>".
Connectivity from Cisco CNS IE2100 Appliance to ISC Master Server
Test the successful setup of connectivity from a Cisco CNS IE2100 appliance to an ISC Master Server, as follows:
Step 1
On the ISC device, go to the following directory:
cd /<isc_install_directory>/thirdparty/rv/bin
Step 2
Set up a TIBCO Listener to the TIBCO port that isc installation is running and as configured above (default: 7530):
./tibrvlisten -service <tibco_port_number> "cisco.cns.>"
Leave the Listener running in this window.
Step 3
In a separate window, telnet to the Cisco CNS IE2100 appliance.
Step 4
Go to the following directory:
cd /opt/CSCOcnsie/tools
Step 5
Send a TIBCO message to the ISC Master server on the configured ISC installation port (default: 7530):
./cns-send -service <tibco_port_number> "cisco.cns.config-changed" "<variable_message>"
Step 6
If the message is seen in the Listener window on the ISC Master server, connectivity is established correctly from the Cisco CNS IE2100 appliance to the ISC Master server for the TIBCO subject "cisco.cns.>".
Step 7
If you are using Cisco CNS Configuration Engine Release 1.3.2, proceed with Step 8 to Step 12. Otherwise, proceed to the "Checking Router Configurations Overview" section."
Step 8
In the window created in Step 1, set up a TIBCO Listener to the TIBCO port that isc installation is running and as configured above (default: 7530):
./tibrvlisten -service <tibco_port_number> "cisco.mgmt.cns.>"
Leave the Listener running in this window.
Step 9
In a separate window, telnet to the Cisco CNS IE2100 appliance.
Step 10
Go to the following directory:
cd /opt/CSCOcnsie/tools
Step 11
Send a TIBCO message to the ISC Master server on the configured ISC installation port (default: 7530):
./cns-send -service <tibco_port_number> "cisco.mgmt.cns.config-changed" "<variable_message>"
Step 12
If the message is seen in the Listener window on the ISC Master server, connectivity is established correctly from the Cisco CNS IE2100 appliance to the ISC Master server for the TIBCO subject "cisco.mgmt.cns.>".
Checking Router Configurations Overview
The Cisco IOS image is needed for the routers used with the Cisco CNS IE2100 functionality (that is, the CNS transport mechanism and/or the CNS Plug-and-Play feature). For Cisco CNS Configuration Engine Release 1.3, the recommended Cisco IOS release is 12.2(8)T or later; for Cisco CNS Configuration Engine Release 1.3.1 or 1.3.2, the recommended Cisco IOS release is 12.2(11)T or later. Cisco IOS releases 12.3(1)T or later are supported only by Cisco CNS Configuration Engine Release 1.3.2.
Additionally, the router running a configuration must contain the following two CNS commands:
1.
cns config partial <IE2100 address> 80
2.
cns event <ie2100 address> 11011
or
cns event <ie2100 address> 11011 keepalive <num. of seconds> <num. of trials>
Note
The keepalive option makes sure the TCP connection between the Cisco CNS IE2100 appliance and the router is alive at all times. It sends keepalive messages at <num. of seconds> intervals with <num. of trials> retries.
Also, the router startup configuration must contain the following two CNS commands:
1.
cns config initial <ie2100 address> event
The cns config initial command should be configured in the startup configuration of the Cisco IOS device or router. It triggers the router to pick up and apply any initial configuration that might be waiting for it on the Cisco CNS IE2100 appliance. Once the cns config initial command is executed, this command is automatically removed. The recommendation is to include the cns config partial command in the initial configuration that is waiting on the Cisco CNS IE2100 appliance. If a no persist option is used, the router does not perform a write-mem, thus keeping the startup configuration from being overwritten.
2.
cns event <ie2100 address> 11011
or
cns event <ie2100 address> 11011 keepalive <num. of seconds> <num. of trials>
Note
The keepalive option makes sure the TCP connection between the Cisco CNS IE2100 appliance and the router is alive at all times. It sends keepalive messages at <num. of seconds> intervals with <num. of trials> retries.
Refer to the CNS software documentation for more details on the other possible CNS commands and their options.