Cisco Prime Optical User Guide, 9.6
Chapter 7: Provisioning Services and Connections

Table Of Contents

Provisioning Services and Connections

7.1  Overview

7.2  Managing Circuits

7.2.1  Circuit Table Launch Points

7.2.2  Viewing the Circuit Table

7.2.3  Creating Circuits Using the Circuit Wizard

7.2.4  Modifying Circuits on CTC-Based NEs

7.2.5  Modifying Circuits on ONS 15530 or ONS 15540 NEs

7.2.6  Summary of Edit Circuit Options

7.2.7  Updating Circuits

7.2.8  Merging Circuits

7.2.9  Reconfiguring Circuits

7.2.10  Repairing Circuits

7.2.11  Deleting Circuits

7.2.12  Viewing Circuit Spans

7.2.13  Viewing VLAN Information

7.2.14  Viewing the ONS 15530 and ONS 15540 Circuit Table

7.2.15  Viewing Circuits in the Circuit Path Table—ONS 15530 and ONS 15540

7.2.16  Viewing Circuits in the Circuit Path Span Table—ONS 15530 and ONS 15540

7.2.17  Viewing VCAT Member Circuits

7.2.18  Creating VCAT Member Circuits

7.2.19  Filtering the Circuit Table

7.2.20  Tracing Circuits

7.2.21  Modifying Traces

7.2.22  Managing Circuit Notes

7.2.23  Managing Circuit Rolls

7.2.24  Circuit Promotion of GMPLS Circuits

7.2.25  Validation of GMPLS Circuits

7.2.26  Reroute Wavelength of GMPLS Circuits

7.2.27  L1 Circuit Report

7.3  Managing BLSRs

7.3.1  Viewing the BLSR Table

7.3.2  Creating a BLSR for an Individual Node

7.3.3  Creating BLSRs for Multiple Nodes Simultaneously

7.3.4  Viewing the BLSR Ring Map Table

7.3.5  Viewing the BLSR Squelch Table

7.3.6  Editing BLSRs

7.3.7  Switching BLSRs

7.3.8  Changing the BLSR Switch Interval

7.3.9  Using the BLSR Upgrade Table

7.3.10  Upgrading BLSRs

7.3.11  Filtering the BLSR Table

7.3.12  Deleting BLSRs

7.4  Managing MS-SPRings

7.4.1  Viewing the MS-SPRing Table

7.4.2  Creating an MS-SPRing for an Individual Node

7.4.3  Creating MS-SPRings for Multiple Nodes Simultaneously

7.4.4  Editing MS-SPRings

7.4.5  Using the MS-SPRing Upgrade Table

7.4.6  Upgrading MS-SPRings

7.4.7  Viewing the MS-SPRing Ring Map Table

7.4.8  Viewing the MS-SPRing Squelch Table

7.4.9  Switching MS-SPRings

7.4.10  Changing the MS-SPRing Switch Interval

7.4.11  Filtering the MS-SPRing Table

7.4.12  Deleting MS-SPRings

7.5  Managing VLANs for E-Series Cards

7.5.1  Creating VLANs

7.5.2  Tracing VLANs

7.5.3  Deleting VLANs

7.6  Managing VLANs (ML-Series Cards)

7.7  Managing SVLAN Profiles

7.8  Managing the SVLAN Database

7.9  Managing SVLANs

7.9.1  Viewing the SVLAN Table

7.9.2  Filtering the SVLAN Table

7.9.3  Creating an SVLAN

7.9.4  Modifying an SVLAN

7.9.5  Deleting an SVLAN

7.9.6  Adding an SVLAN Drop

7.9.7  Deleting an SVLAN Drop

7.9.8  Tracing an SVLAN

7.10  Provisioning Data Services

7.10.1  Initializing Layer 2 Cards

7.10.2  Backing Up and Restoring ML Configuration Files on Layer 2 Cards

7.10.3  Naming Convention for Discovered Layer 2 Topologies

7.10.4  Provisioning Layer 2 Topologies

7.10.5  Viewing the Layer 2 Topology Table

7.10.6  Creating Layer 2 Topologies

7.10.7  Deleting Layer 2 Topologies

7.10.8  Enabling Layer 2 Services

7.10.9  Modifying Layer 2 Topologies

7.10.10  Filtering the Layer 2 Topology Table

7.10.11  Modifying Ports in Layer 2 Topologies

7.10.12  Inserting or Deleting a Card on an RPR Topology

7.10.13  Layer 2 Service Management Tasks

7.10.14  Resynchronizing Layer 2 Topologies

7.10.15  Discovering Layer 2 Topologies

7.10.16  Changing the Framing Mode for ML-Series Cards

7.10.17  Provisioning ML-Series Cards to Receive SNMP Traps

7.10.18  Initializing ML-Series Cards

7.10.19  Managing Port Channel Link Aggregation on ML-Series Cards

7.11  Managing QoS Profiles

7.11.1  QoS Profile Management Tasks

7.11.2  Viewing the QoS Profile Table

7.11.3  Creating QoS Profiles

7.11.4  Modifying QoS Profiles

7.11.5  Duplicating QoS Profiles

7.11.6  Deleting QoS Profiles

7.11.7  Viewing the QoS Classes Table

7.12  Managing DWDM Nodes

7.12.1  Calculating DWDM Connections—ONS 15454 SONET and ONS 15454 SDH R7.2 and Earlier

7.12.2  Calculating Internal Patchcord Connections—ONS 15454 SONET and ONS 15454 SDH R8.0 and R9.0

7.12.3  Creating DWDM Connections—ONS 15454 SONET and ONS 15454 SDH R7.2 and Earlier

7.12.4  Creating Internal Patchcords—ONS 15454 SONET and ONS 15454 SDH R8.0 and Later

7.12.5  Deleting DWDM Connections or Internal Patchcords

7.12.6  Importing Cisco MetroPlanner Configuration Files—ONS 15454 SONET and ONS 15454 SDH R6.0 and Earlier

7.12.7  Provisioning DWDM Nodes Manually

7.12.8  Provisioning the Power Level of DWDM Nodes

7.12.9  Checking the Span Loss Between DWDM Nodes

7.12.10  Managing APC Domains

7.12.11  Configuring Automatic Node Setup

7.12.12  Creating Side Objects

7.12.13  Modifying Side Objects

7.12.14  Deleting Side Objects

7.12.15  Creating Alien Wavelength

7.12.16  Editing Alien Wavelength


Provisioning Services and Connections


This chapter describes how to use Cisco Prime Optical to provision network services. It also explains the tasks required to create new connections, and display, modify, and delete existing connections.

This chapter includes the following sections:

Overview

Managing Circuits

Managing BLSRs

Managing MS-SPRings

Managing VLANs for E-Series Cards

Managing VLANs (ML-Series Cards)

Managing SVLAN Profiles

Managing SVLANs

Provisioning Data Services

Managing QoS Profiles

Managing DWDM Nodes

7.1  Overview

A metro network is a network that aggregates customer traffic and connects customers to services. The metro network is responsible for receiving network traffic from long-haul transport networks and routing this traffic to and from enterprises and end users.

The service point-of-presence (POP) performs service adaptation and packet switching. This layer performs the following functions:

Grooming of traffic from the metro network

Edge packet switching, where IP services are enabled

Core packet switching, where POPs are interconnected over the IP backbone

The service POP is the hub of high-value Internet services. The core network, where optical technologies predominate, is the domain of the long-haul carrier. This high-speed transport fabric interconnects service POPs and has traditionally been built as SONET ring architectures.

Prime Optical simplifies operations support system (OSS) integration for service providers for the end-to-end management of transport networks.

7.2  Managing Circuits

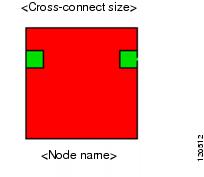
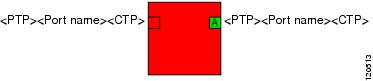
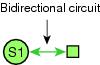
A circuit represents an end-to-end connection between two or more connection termination points (CTPs). A circuit consists of an alternating series of cross-connections and link connections. In its simplest form, a circuit consists of a single cross-connection (if the circuit is defined between two CTPs on the same NE). A circuit can be bidirectional or unidirectional, point-to-point (PTP) or point-to-multipoint, and protected or unprotected.

Prime Optical allows you to create unidirectional and bidirectional circuits for CTC-based NEs. For unidirectional path switched ring (UPSR) circuits, you can create revertive or nonrevertive circuits. Prime Optical can route the circuits automatically, or you can route them manually. For CTC-based NEs (including the ONS 15305 R3.0), circuits can be viewed, created, modified, traced, and deleted. For the ONS 15530 or ONS 15540, a circuit is an end-to-end connection between two ports on ONS 15530 or ONS 15540 NEs in terms of lambda (wavelength). For the ONS 155xx, circuit services provide the following major capabilities:

Finding all end-to-end connections between NEs in terms of client ports, provided the entire path was traversed within ONS 15530 and ONS 15540 NEs.

Displaying the protection information associated with each circuit.

Displaying all directional-based paths that have been configured and are in use for a protected circuit.

Displaying the active and standby paths that have been configured and are in use for a protected circuit.


Note Circuit information is not available for the ONS 15216. For the ONS 15305, circuits can be created through CEC (Configuration > ONS 15305 > Launch Cisco Edge Craft).

For ONS 15305 NE releases 3.0 and later, circuits can be created in Prime Optical, CTC, and CEC. Circuits that are created in Prime Optical or CTC can be managed in Prime Optical, CTC, and CEC. But circuits that are created in CEC show unpredictable and erroneous behavior in Prime Optical and CTC.

For ONS 15305 NE releases earlier than R3.0, the circuit information is not available in Prime Optical. Circuits can be created in CEC but cannot be managed in Prime Optical.


Note Circuit management performance depends on an efficient DCN network. See the ONS 15454 user documentation for details.


The following table defines the circuit terms and options that are used throughout this chapter.

Table 7-1 Circuit Terms and Options 

Circuit Option
Description

Link

Represents a topological relationship between two physical termination points (PTPs) for a particular layer rate. The possible set of layer rates is determined by the layer rates terminated by the PTP. For example, an OC-N port will terminate a physical layer rate and a SONET layer rate.

Circuit

Represents an end-to-end connection between two or more CTPs.

Cross-connection

A (normally flexible) connection between two CTPs within the same NE.

Link connection

An inflexible (or fixed) connection between two CTPs that are contained by two PTPs connected by a link. It represents a portion of the transport capacity of a link, such as an STS-1 channel within an OC-N link.

PTP

A termination point that is the actual or potential endpoint of a link that might be abstracted as a PTP. It is the representation of a physical port.

CTP

Represents the actual or potential endpoint of a cross-connection, link connection, or circuit. A CTP is contained within a PTP. In some cases, there is a single CTP associated with a PTP, such as with a DS-1 PTP. There could also be multiple CTPs, such as with STS-1 or STS-Nc CTPs contained within an OC-N PTP.

Source

The circuit source is where the circuit enters the network.

Destination

The circuit destination is where the circuit exits the network.

Automatic circuit routing

Prime Optical routes the circuit automatically on the shortest available path based on routing parameters and bandwidth availability.

Manual circuit routing

Manual routing allows you to choose a specific path, not just the shortest path chosen by automatic routing. You can choose a specific STS or VT for each circuit segment for SONET nodes, or a specific VC4, VC3, or VC12 for each circuit segment for SDH nodes. You can also create circuits from work orders prepared by an OSS such as the Telcordia TIRKS system.

Low-order tunnel

Low-order tunnels allow VC3 and VC12 circuits to pass through an SDH node without using cross-connect card (XC10G and XCVXL) resources. Low-order circuits using tunnels use cross-connect capacity only at the source and destination nodes. One low-order tunnel can carry three VC3s, and each VC3 can carry 21 VC12s. One tunnel can carry one VC3 circuit span and 42 VC12 circuit spans, and each VC3 is a separate container that can contain a VC3 circuit span or 21 VC12 circuit spans.

Low-order aggregation point

Low-order aggregation points (LAPs) allow low-order VC12 and VC3 circuits to be aggregated into a VC4 for handoff to non-ONS networks or equipment, such as interoffice facilities (IOFs), switches, or digital access cross-connect systems. The VC4 grooming end of the LAP requires an STM-N card. LAPs can be created on MS-SPRings, 1-1, or unprotected nodes, but cannot be created on subnetwork connection protection (SNCP) nodes.

VT tunnel

VT tunnels allow VT1.5 circuits to pass through a SONET node without using cross-connect resources. VT circuits using VT tunnels use cross-connect capacity only at the source and destination nodes. One VT tunnel can carry 28 VT1.5 circuits.

VT aggregation point

VT aggregation points (VAPs) allow VT circuits to be aggregated into an STS for handoff to non-ONS networks or equipment, such as IOFs, switches, or digital access cross-connect systems. VAPs reduce VT matrix resource utilization at the node where the VT1.5s are aggregated onto the STS. This node is called the STS grooming end. The STS grooming end requires an OC-N, EC-1, or DS3XM-6 card. VT aggregation points can be created on BLSR, 1+1, or unprotected nodes, but cannot be created on UPSR nodes.


7.2.1  Circuit Table Launch Points

The following table describes the various launch points and the expected behavior for the Circuit table.

Table 7-2 Circuit Table Launch Points and Expected Behavior 

Selection
Circuit Table

The top-level root node or group nodes in the Domain Explorer

All circuits that have NEs in the domain as source/destination or pass-through NEs.

The top-level root node or subnetwork nodes in the Subnetwork Explorer

All circuits that have NEs in the subnetwork as source/destination or pass-through NEs.

A group or subnetwork in the Network Map

All circuits that have NEs in the Network Map as source/destination or pass-through NEs.

A link in the Network Map

All circuits that pass through the specified link as well as circuits that have termination points on the specified link's endpoints.

A group of links in the Network Map

All circuits that pass through the specified link as well as circuits that have termination points on the specified link's endpoints.

A link in the Link table

All circuits that pass through the specified link as well as circuits that have termination points on the specified link's endpoints.

Note You cannot launch the Circuit table from the Link table for Layer 2 links.

An NE node in the Domain Explorer, Subnetwork Explorer, or Network Map

All circuits that have the selected NE node as the source/destination or pass-through NE.

An NE node in the NE Explorer

All circuits that have the selected NE node as the source/destination or pass-through NE.

NE Explorer > Configuration > Circuit Table

Can be launched by selecting the node, a slot, or a port.

Link Table > Configuration > Circuit Table

All circuits that pass through the specified link as well as circuits that have termination points on the specified link's endpoints.

A SONET/SDH link in the Network Map

Right-click a SONET/SDH link in the Network Map and choose Circuit Table from the right-click menu.


7.2.2  Viewing the Circuit Table

The Circuit table shows circuit information for all circuits that make up a topology. A circuit describes a fixed-size bandwidth pipe that is fully cross-connected from one user-defined source point (node, slot, or port) to a second user-defined destination point across some number of node-to-node optical spans (zero if the circuit is local to a single NE).

An endpoint can be an actual physical drop port (DS-1, DS-3, and so on) or an STS-n or VT1.5 channel in an optical line. A multicast circuit consists of circuit spans that have one source endpoint and a sequence of destination endpoints.


Note See "Icons and Menus Displayed in Prime Optical" for details of all the icons displayed in this window.


To launch the Circuit table, do any of the following:

Select a node in the Domain Explorer tree or Network Map and choose Configuration > CTC-Based SONET NEs or CTC-Based SDH NEs > Circuit Table.

Right-click a node in the Domain Explorer tree and choose Circuit Table.

(For CTC-based NEs) Open the Layer 2 Topology table and choose Configuration > Circuits.


Note When launching the Circuit table in a large or high-end network setup and on a larger scope (for example, for the Domain Explorer), a database timeout can occur due to the high volume of data being retrieved. As a workaround, launch the Circuit table on a smaller scope.


The following table describes the fields in the Circuit table.

Table 7-3 Field Descriptions for the Circuit Table 

Column Name
Description

Circuit Name

Displays the name of the selected circuit.

Note If there are multiple circuits with the same name displayed in the Circuit table, the label Duplicate appears in this column.

Note

Displays comments that have been entered for the selected circuit, and allows you to add additional comments.

Source NE: Module Type/Physical Loc/Interface

Displays the NE ID and module type at the span source, the slot and port name and numbers (physical location), and the STS number (interface). You can sort this column in ascending or descending order. The sort order is based on the NE ID and physical location.

Destination NE: Module Type/Physical Loc/Interface

Displays the NE ID, the module type at the destination, the slot and port name and numbers (physical location), and the STS number (interface). You can sort this column in ascending or descending order. The sort order is based on the NE ID and physical location.

Circuit Type

Displays the type of circuit selected. SONET circuit types are STS, VT, VT Aggregation, VT Tunnel, VT VCAT (shown as VT-v), STS VCAT (shown as STS-v), DWDM optical channel network connection (OCHNC), DWDM optical channel client connection (OCHCC), optical channel trail (OCHTRAIL), and OCHNC DCN.

SDH circuit types are HOP, LOP, LOPA, LOPT, HOV (HO VCAT), LOV (LO VCAT), OCHNC, OCHCC, OCHTRAIL, and OCHNC DCN.

Acpt Threshold

Displays the optical validation acceptance threshold value set for the GMPLS circuit.

Optical Value

Displays the optical validation result for the GMPLS circuit.

Circuit Size

Displays the size of the circuit:

SONET circuit sizes are VT1.5, VT2, STS 1, STS 3c, STS 6c, STS 9c, STS 12c, STS 24c, STS 48c, STS 96c, STS 192c, STS-1-nv, STS-3c-nv, STS-12c-nv, and VT1.5-nv.

SDH circuit sizes are VC11, VC12, VC3, VC4, VC4-2c, VC4-3c, VC4-4c, VC4-8c, VC4-16c, VC4-32c, VC4-64c, VC4-nv, VC4-4c-nv, and VC3-nv.

Note n can be any value from 0 through 256 (0 is valid when all members of a VCAT circuit are deleted).

FC/FICON circuit sizes are 10GFC, 4GFC, 2GFC, 1GFC, 4GFiCon, 2GFiCon, and 1GFiCon.

Data/Storage circuit sizes are ESCON, ETR-CLO, ISC-PEER, ISC3-PEER-1G, ISC-PEER-2G, ISC-COMPACT, ISC-CHANNEL1, and InfiniBand.

Video circuit sizes are HVDT, SD1/D1, DV6000, and DVB-ASI.

OCHNC circuit size is fixed as Equipment Not Specific.

OCHCC circuit sizes are STM1, STM4, STM16, STM64, OC3, OC12, OC48, OC192, 10GE, 1GE, 10GFC, 4GFC, 2GFC, 1GFC, 4GFiCon, 2GFiCon, 1GFiCon, ESCON, ETR-CLO, ISC-PEER, ISC3-PEER-1G, ISC-PEER-2G, ISC-COMPACT, HDVT, SD1/D1, DV6000, or Pass Through.

Note Not all circuit sizes are supported on all NE releases.

Circuit Direction

Indicates whether the circuit carries unidirectional (one-way) or bidirectional (two-way) traffic.

Customer ID

Optional text field that displays the customer ID of the circuit.

Service ID

Optional text field that displays the service ID of the selected circuit.

Circuit Status

Displays the status of the selected optical circuit:

Discovered—The circuit is completely configured in the network; all components are in place and a complete path exists from the circuit source to the circuit destination.

Partial—The circuit is not complete; one or more cross-connections are not in place or one of the spans is missing.

Creating—Prime Optical is creating the circuit.

Deleting—Prime Optical is deleting the circuit.

Discovered_TL1—A TL1-created circuit or a TL1-like Prime Optical-created circuit is complete and has upgradable cross-connects. A complete path from source to destination(s) exists.

Partial_TL1—A TL1-created circuit or a TL1-like Prime Optical-created circuit with upgradable cross-connects is missing a cross-connect, and a complete path from source to destination(s) does not exist. The circuit cannot be upgraded until the missing cross-connects are in place.

Partial (Split)—The circuit involves NEs that belongs to different network partitions and cannot be fully discovered by Prime Optical.

Circuit Service State

The circuit service state is an aggregate of the cross-connect states within the circuit. SONET, SDH, and DWDM circuits have different values.

For SONET circuits, values are:

In Service (IS)—All cross-connects in a circuit are in the In Service and Normal (IS-NR) service state.

Out of Service (OOS)—All cross-connects in a circuit are in an Out of Service (OOS) service state, such as Out of Service and Management, Maintenance (OOS-MA,MT); Out of Service and Management, Disabled (OOS-MA,DSBLD); or Out of Service and Autonomous, Automatic In Service (OOS-AU,AINS).

OOS-PARTIAL—PARTIAL is appended to the OOS circuit service state when circuit cross-connect states are mixed and not all in IS-NR. The OOS-PARTIAL state can occur during automatic or manual transitions between states. For example, OOS-PARTIAL appears if you assign the IS,AINS administrative state to a circuit with DS-1 or DS3XM cards as the source or destination. Some cross-connects transition to the IS-NR service state, while others transition to OOS-AU,AINS. OOS-PARTIAL can appear during a manual transition caused by an abnormal event such as a CTC crash or communication error, or if one of the cross-connects could not be changed. The OOS-PARTIAL circuit state does not apply to OCHNC circuit types.

For SDH circuits, values are:

Unlocked—All cross-connects in a circuit are in the Unlocked-enabled service state.

Locked—All cross-connects in a circuit are in a Locked state (such as Locked-enabled,maintenance; Unlocked-disabled,automaticInService; or Locked-enabled,disabled).

Locked-partial—Partial is appended to the Locked circuit service state when circuit cross-connect states are mixed and not all in the Unlocked-enabled service state. The Locked-partial state can occur during automatic or manual transitions between states. The Locked-partial service state can appear during a manual transition caused by an abnormal event such as a CTC crash or communication error, or if one of the cross-connects could not be changed. The Locked-partial circuit state does not apply to OCHNC circuit types.

Circuit Service State (continued)

For DWDM circuits, OCHCCs, OCH trails, and OCHNCs occupy three different optical layers. Each OCH circuit has its own administrative and service states:

The OCHCC service state is the sum of the OCHCC service state and the OCH trail service state. When creating an OCHCC circuit, you can specify an initial state for both the OCHCC and the OCH trail layers, including the source and destination port states. The ANSI/ETSI administrative states for the OCHCC circuits and connections are:

IS/Unlocked

IS,AINS/Unlocked,AutomaticInService

OOS,DSBLD/Locked,disabled

OCH trail ANSI/ETSI administrative states include:

IS/Unlocked

IS,AINS/Unlocked,automaticInService

OOS,DSBLD/Locked,disabled

The OCHNC circuit states are not linked to the OCHCC circuit states. The administrative states for the OCHNC circuit layer are:

IS,AINS/Unlocked,AutomaticInService

OOS,DSBLD/Locked,disabled

Is Monitor

A value of True means that the circuit is a monitor circuit. A value of False means that the circuit is not a monitor circuit.

Circuit Protection Type

Indicates the circuit protection scheme. Values are:

2F BLSR—The circuit is protected by a 2-fiber bidirectional line switch ring (BLSR).

4F BLSR—The circuit is protected by a 4-fiber BLSR.

BLSR—The circuit is protected by both 2-fiber and 4-fiber BLSR.

UPSR—The circuit is protected by UPSR.

DRI—The circuit is protected by a UPSR dual ring interconnection (DRI).

1+1—The circuit is protected by a 1+1 protection group.

Y-Cable—The circuit is protected by a transponder or muxponder card Y-cable protection group.

Protected—The circuit is protected by diverse SONET topologies; for example, a BLSR and a UPSR, or a UPSR and 1+1.

Unprotected—The circuit is not protected.

2F-PCA—The circuit is routed on a protection channel access (PCA) path on a 2-fiber BLSR. PCA circuits are unprotected.

4F-PCA—The circuit is routed on a PCA path on a 4-fiber BLSR. PCA circuits are unprotected.

PCA—The circuit is routed on a PCA path on both 2-fiber and 4-fiber BLSRs. PCA circuits are unprotected.

SPLITTER—The circuit is protected by a splitter protected transponder (TXPP_MR_2.5G or 2.5G_DMP).

Unknown—Circuit protection types appear in the Circuit Protection Type column of the Circuit table when the circuit status is Discovered. If the circuit is not discovered, the protection type is Unknown.

Lost—The circuit was protected, but the protection has been lost due to changes in the network.

Description

Displays a description of the selected circuit.

No. of VLANs

Displays the number of VLANs associated with the circuit.

No. of SPANs

Displays the number of spans for each contiguous concatenation (CCAT) circuit. For VCAT circuits, N/A is displayed. You must launch the member table for the parent VCAT to see the number of spans per member VCAT.

Is VCAT or Member Circuit

A value of True means that the circuit is a VCAT circuit. A value of False means that the circuit is a normal CCAT circuit.

OCHNC Wavelength

Indicates the wavelength provisioned for the OCHNC, in nanometers (nm).

OCHNC Direction

Indicates the direction of the OCHNC. Values are east-to-west, west-to-east, or N/A.

VCAT Member State

For VCAT members, indicates whether the members are enabled and active or temporarily disabled. When VCAT members are enabled and active, the value is In Group. If any of the members are disabled temporarily, the value changes to Out of Group.

For non-VCAT members, the value of this field is always N/A.

Circuit Alias Name

Displays the alias name of the circuit.


Note If a card is upgraded or changed on an NE and an existing circuit terminates on the changed card, the Circuit table display does not reflect the new card type for the circuit until Prime Optical next reads the circuit information from the network. You can force all circuits involved with the upgraded card in the Circuit table to update by marking the NE as Out of Service and then In Service.


Caution For TL1 circuits, if you simultaneously mark all of the NEs involved in the circuit as Out of Service, Prime Optical loses the EMS attributes (such as circuit alias, customer ID, and service ID). If you later mark all of the NEs involved in the TL1 circuit as In Service, the circuits are discovered, but the EMS attributes remain missing. To retain EMS attributes, you must upgrade the TL1 circuits to regular CTC circuits before adding EMS attributes and marking the NEs as Out of Service. To do this, select the TL1 circuit in the Circuit table and choose Configuration > Reconfigure Circuit(s).


Note Circuit names are obtained from:

The source NE (for circuits created in Prime Optical or CTC)

Cross-connection names (for circuits created via TL1, or if the source NE is not discovered)

However, some NE versions do not support cross-connection names. For these NEs, circuits created in CTC are always discovered with the name "Unknown" in Prime Optical. Also, if the source NE is not connected, and if the only NEs available in Prime Optical are those NE versions that do not support cross-connection names, circuits created with CTC or Prime Optical have the name "Unknown" until the source NE is discovered.


7.2.3  Creating Circuits Using the Circuit Wizard

The Create Circuit wizard (Configuration > Create Circuit) allows you to create circuits on CTC-based NEs. Use the Create Circuit wizard to create an end-to-end circuit through a subnetwork. A subnetwork is defined as a set of NEs that are interconnected directly or indirectly through links known by Prime Optical. Prime Optical supports circuit provisioning across a heterogeneous network. Establish a circuit by specifying the A and Z termination points (TPs). You can create multiple circuits using the Create Circuit wizard; however, for VT tunnel circuits, the number you can create is limited by the bandwidth available on the VT tunnel being used. The maximum number of VT circuits that can be routed through a VT tunnel is 28.


Caution When adding CTC-based circuits, examine the links in the network to ensure correct operation. If any links are down, verify that the ports are not data communications channel (DCC) enabled. For information about viewing links, see Viewing the Link Table.


Note You can create new circuits across subnetworks. To do so, you must first disable automatic grouping of NEs in the Control Panel. See Configuring Application-Specific Parameters for more information.


Note In earlier CTM releases, circuit creation failed if you tried to use automatic routing to create a circuit with 20 or more spans. In CTM R9.1 and later, you can use SQL to configure the circuit-autorouting-creation-timeout property in the Prime Optical database. This property increases the reply timeout for CORBA requests when you use automatic routing to create a complex circuit that uses 20 or more spans. You cannot configure the circuit-autorouting-creation-timeout property in the Prime Optical GUI; rather, you must use SQL to configure the value in the CTM_CONFIG_TABLE in the Prime Optical database. The range is from 0 to 600 seconds; the default is 150 seconds. Note that you can configure the value as high as 2,147,483,647 seconds; however, Prime Optical considers anything higher than 600 seconds as invalid. Also, a value of 0 (zero) indicates no timeout (or an instantaneous reply from the server), which is impossible in an actual application. Therefore, Prime Optical ignores a zero value or anything higher than 600 seconds and uses the default value of 150 seconds instead. Configuring the circuit-autorouting-creation-timeout property is helpful in large, complex network topologies when circuits involve 20 or more spans. For more information, see the Cisco Prime Optical 9.6 Database Schema.


The following table describes the launch points and the expected behavior for the Create Circuit wizard.

Table 7-4 Create Circuit Wizard Launch Points and Expected Behavior 

Launch Point
Expected Behavior

Source and destination NE nodes in the Domain Explorer or Subnetwork Explorer

Select the source NE in the Domain Explorer or Subnetwork Explorer and choose Configuration > Create Circuit (or right-click the NE and choose Create Circuit). The pointer changes to a plus (+) symbol; select the destination NE. The destination NE must be in the same network partition as the source. The Create Circuit wizard opens. Source and destination NEs are preset to the selected source and destination.

Note If the Esc key is pressed while the plus symbol is enabled, the operation is canceled and the plus symbol returns to a pointer.

Source and destination NE nodes in the Network Map

Select the source NE in the Network Map and choose Configuration > Create Circuit (or right-click the NE and choose Create Circuit). The pointer displays a line extending from the source NE; select the destination NE. The Create Circuit wizard opens. Source and destination NEs in the Create Circuit wizard are preset to the selected source and destination NE nodes in the Network Map.

Configuration > Create Circuit in the Circuit table

Choose Configuration > Create Circuit in the Circuit table. The Create Circuit wizard opens. Select source and destination nodes. Destination nodes are filtered based on the source node. Source and destination nodes must be in the same network partition.

Configuration > Create Circuit in the NE Explorer

Choose Configuration > Create Circuit in the NE Explorer for CTC-based NEs. The Create Circuit wizard opens with the selected NE as the source node. Source and destination nodes must be in the same subnetwork.


The following table describes the various types of circuits that can be created. The type of circuit that you can create depends on the NEs that you select as the source and destination.

Table 7-5 Circuit Types that Can Be Created Using the Create Circuit Wizard 

Task
Description
See

Create an STS (including Ethernet), VT, VT tunnel, or VT aggregation circuit

Creating an STS (Including Ethernet), STS-V, VT, VT-V, VT Tunnel, or VT Aggregation Circuit

Create a VCAT circuit

You can create regular or open-ended VCAT circuits (STS-v, VT-v, VC_HO_PATH_VCAT_CIRCUIT, or VC_LO_PATH_VCAT_CIRCUIT).

Creating a Regular or Open-Ended VCAT Circuit

Create a VC_HO_path circuit

You can create unidirectional or bidirectional, revertive or nonrevertive, high-order path circuits.

Creating a VC_HO_Path_Circuit

Create a VC_LO_path circuit

You can create unidirectional or bidirectional, revertive or nonrevertive, low-order path circuits.

Creating a VC_LO_Path_Circuit

Create a VC low path tunnel connection

Creating a VC_LO_Path_Tunnel

Create a VC low path aggregation connection

Creating a VC_LO_Path_Aggregation Circuit

Create a DWDM optical channel connection

Creating a DWDM OCHNC—ONS 15454 MSTP

Create a DWDM optical channel client connection

Creating a DWDM OCHCC—ONS 15454 MSTP

Create a DWDM optical channel trail

Creating a DWDM OCH Trail Circuit—ONS 15454 MSTP

Create a monitor circuit

Use the Circuit table to create new circuits from the Prime Optical database and the associated cross-connections between NEs.

Creating a Monitor Circuit—CTC-Based NEs

Create a unidirectional drop circuit

Use the Create Drop wizard to create a new protected or unprotected unidirectional circuit drop.

Creating a Unidirectional Drop Circuit—CTC-Based NEs

Create a G1000-4 circuit

Provision G1000-4 point-to-point circuits and Ethernet manual cross-connects.

Creating G1000-4 Circuits

Create an E-series circuit

Create these configurations and Ethernet manual cross-connects.

Creating E-Series Circuits

Create a BLSR DRI or MS-SPRing DRI circuit

Creating a BLSR DRI or MS-SPRing DRI Circuit Automatically

Creating a BLSR DRI or MS-SPRing DRI Circuit Manually


Note Low-order (LO) circuit options are not available for LO_VCAT circuits. Routing a LO_VCAT circuit, by selecting LO routing options to create a LAP/VC tunnel automatically, is not supported. If the LAP/VC tunnel already exists, and bandwidth is available, the LAP/VC tunnel is used to route LO_VCAT circuits.


Note When you create a low-order circuit and choose to create a tunnel automatically (by selecting the VT Tunnel on Transit Nodes option), the alias for the tunnel circuit will be the same as that provided for the low-order circuit. When you create multiple low-order circuits, the alias for the tunnel will be the same as the alias of the first low-order circuit.


The following table describes the fields in the Create Circuit wizard for optical devices.

Table 7-6 Field Descriptions for the Create Circuit Wizard—Optical Devices 

Field
Description
Navigation Pane

The navigation pane on the left side of the Create Circuit wizard tells you where you are in the process of creating the circuit. The list of tasks shown initially is the default list of all possible tasks. As you move through the circuit creation, you are taken to the appropriate task. You can use the navigation pane to jump quickly from one task to the next, or to an already visited task.

Using the navigation pane is faster than using the Back and Next buttons, because you can jump over multiple panes in one step versus clicking Back or Next and moving through the panes sequentially.

Tip As you proceed through the wizard, the panes you have visited are highlighted in white and identified by a number. Panes that are not applicable to the current circuit creation sequence are shown in strikethrough italics.
Tip Click the Maximize button to expand the Create Circuit wizard. After you expand the Create Circuit wizard, the Maximize button changes to the Reset Size button. Click the Reset Size button to reduce the Create Circuit wizard to its original size.
Type

Type

Select the type of circuit to create from the Type field.

Note The circuit type selected is displayed (dimmed) in other panes in the Create Circuit wizard. To change the circuit type you must return to the Type pane and make a new selection.

SONET and SDH circuits have different types. For SONET circuits, values are:

OCHCC; see Creating a DWDM OCHCC—ONS 15454 MSTP

OCHNC; see Creating a DWDM OCHNC—ONS 15454 MSTP

OCHTRAIL

STS (including Ethernet circuits)

STS-v

VT

VT Aggregation

VT Tunnel

VT-v

For SDH circuits, values are:

OCHCC

OCHNC

OCHTRAIL

VC_HO_PATH_CIRCUIT

VC_HO_PATH_VCAT_CIRCUIT

VC_LO_PATH_AGGREGATION

VC_LO_PATH_CIRCUIT

VC_LO_PATH_TUNNEL

VC_LO_PATH_VCAT_CIRCUIT

Note The available circuit types are based on the types selected for the user during user creation.

Number of Circuits

Enter the number of circuits that you want to create.

Auto-Ranged

If you are creating multiple circuits with the same slot and sequential port numbers, you can use Auto-Ranged to create the circuits automatically. The Auto-Ranged check box is checked automatically for multiple circuits.

For VC3 Port Grouping Only

(For SDH tunnel circuits only) Check this check box to create VC low-order path tunnels for port grouping. Using these circuits, VC4 tunnels can transport VC3 signal rates. Three ports form a port group. For example, in one E3 or one DS3i card, there are four port groups: Ports 1-3 = PG1, ports 4-6 = PG2, ports 7-9 = PG3, and ports 10-12 = PG4.

Attributes

(fields depend on the circuit type)

Circuit

Name

Enter a unique name for the new circuit. The circuit name is a free-format string, up to 80 ASCII characters. In earlier Prime Optical releases, the maximum circuit length was 48 ASCII characters. For VCAT circuits, the maximum circuit name length is 44 ASCII characters. If you leave the field blank, Prime Optical assigns a default name to the circuit.

Note This field is mandatory if the GMPLS (for OCHxx circuits only) check box is checked. If you enter a character that is not supported by a specific router, a warning dialog box appears before you proceed to the Source tab.

Circuit Alias

Enter a unique alias name for the new circuit. The alias name can contain alphanumeric characters. International character sets are also supported.

Description

Enter a description for the new circuit, up to 256 ASCII characters.

Type

Display only. Indicates the type of circuit that you selected in the Type pane.

Note To change the circuit type you must return to the Type pane and make a new selection.

Size Group

Choose a size for the group that you want to provision. The following options are available:

SONET

SDH

Ethernet

FC/FICON

Data/Storage

Video

Other

Size

Specify the size of the circuit. SONET circuit sizes are VT 1.5, VT2, STS-1, STS-3c, STS-6c, STS-9c, STS-12c, STS-18c, STS-24c, STS-36c, STS-48c, STS-96c, and STS-192c.

SDH circuit sizes are VC11, VC12, VC3, VC4, VC4-2c, VC4-3c, VC4-4c, VC4-6c, VC4-8c, VC4-12c, VC4-16c, VC4-32c, and VC4-64c.

If OCHNC is selected in Type, the OCHNC circuit size is Equipment Not Specific.

OCHCC circuit sizes are STM1, STM4, STM16, STM64, OC3, OC12, OC48, OC192, 10GE, 1GE, 10GFC, 4GFC, 2GFC, 1GFC, 4GFiCon, 2GFiCon, 1GFiCon, ESCON, ETR-CLO, ISC-PEER, ISC3-PEER-1G, ISC-PEER-2G, ISC-COMPACT, HDVT, SD1/D1, DV6000, or Pass Through.

For supported circuit sizes on Ethernet cards, see the Cisco ONS 15454 Reference Manual.

For single-card EtherSwitch, only STS-1, STS-3c, STS-6c, and STS-12c apply. For multicard EtherSwitch, only STS-1, STS-3c, and STS-6c apply.

FC/FICON circuit sizes are 10GFC, 4GFC, 2GFC, 1GFC, 4GFiCon, 2GFiCon, and 1GFiCon.

Data/Storage circuit sizes are ESCON, ETR-CLO, ISC-PEER, ISC3-PEER-1G, ISC-PEER-2G, ISC-COMPACT, ISC-CHANNEL1, and InfiniBand.

Video circuit sizes are HVDT, SD1/D1, DV6000, and DVB-ASI.

Note The available circuit sizes are based on the size limitation imposed on the user during user creation.

OCHNC Wavelength

If OCHNC is selected in Type, the wavelength of the OCHNC is selected here. If OCHNC is not selected in Type, this option is not available.

Band

(OCHNC circuits only) Choose the band that you want to provision.

Use OCHNC Direction

Choose whether or not to specify the OCHNC direction. Select the check box to allow you to specify the circuit direction (for NEs up to and including R6.0) in the OCHNC Direction drop-down list. If the check box is unchecked (for R7.0 NEs) the OCHNC Direction drop-down list is disabled.

Channel Group

Choose the channel group that you want to provision.

OCHCC Wavelength

If OCHCC is selected in Type, the wavelength of the OCHCC is selected here. If OCHCC is not selected in Type, this option is not available.

OCHNC Direction

If OCHNC is selected in Type, the east-to-west or west-to-east direction of the OCHNC is selected here. If OCHNC is not selected in Type, this option is not available.

Bidirectional

Check this check box to create a two-way circuit; uncheck it to create a one-way circuit.

State

Select an administrative state for the new circuit. SONET and SDH circuits have different values. For SONET circuits, values are:

IS (In Service)—The circuit is in service and able to carry traffic.

IS AINS (In Service-Auto In Service)—Alarm reporting is suppressed, but the circuit is able to carry traffic.

OOS DSBLD (Out of Service-Disabled)—The circuit is out of service and unable to carry traffic.

OOS_MT (Out of Service-Maintenance)—The circuit is in maintenance state. The maintenance state does not interrupt traffic flow; it suppresses alarms and conditions and allows loopbacks to be performed on the circuit.

For SDH circuits, corresponding values are:

Unlocked

Unlocked,autoInService

Locked,disabled

Locked,maintenance

Apply to Source/Destination Ports, If Allowed

Check this check box to apply the selected state to the source and destination ports.

Trunk Filtering

(available for OCHCC circuit type only)

G.709 OTN

Disables or enables the G.709 OTN feature. Check this check box to filter the list of circuits to display only G.709 OTN-compatible circuits.

FEC

Disables or enables forward error correction.

OTN must be enabled before you can enable FEC.

SF BER

Allows you to enter the signal fail bit error rate.

SD BER

Allows you to select the signal degrade bit error rate.

Mapping

The card can perform multiplexing per ITU-T G.709. The ODUk (client SONET/SDH payload) can be mapped to the Optical Channel (OTUk) either asynchronously (asynch mapping) or synchronously (synch mapping) with this setting.

Proactive Protection Attributes

Proactive Protection

Allows you to enable or disable the proactive protection that informs the CRS-1 routers of incoming Forward Error Correction (FEC) errors. By default, proactive protection is disabled.

Trigger Threshold

The maximum BER above which the Fast Re Route (FRR) is triggered. The default value for Enhanced FEC (EFEC) and FEC is 1E-3.

Revert Threshold

The BER value below which the FRR indication is switched off. The default value for EFEC and FEC is 1E-4.

Note The revert threshold value cannot be higher than the trigger threshold value.

Trigger Window

The time period for which the BER value is monitored to check whether it is higher than the trigger threshold. If the BER value is higher than the trigger threshold, an FRR request is triggered. The default value for EFEC and FEC is 30 ms. The valid trigger window range is from 1 to 10000.

Revert Window

The time period for which the BER value is monitored to check whether it is less than the revert threshold. If the BER value is below the revert threshold, the FRR indication given to the routers is removed. The default value for EFEC and FEC is 2000 ms. The valid revert window range is from 1 to 10000.

Protection

Protected

If checked, protection is enabled for OCHNC circuits.

Note The protected OCHNC must be bidirectional; the Bidirectional check box in the Circuit area must be checked. If the Use OCHNC Direction check box is checked, the Protected check box is dimmed.

Customer Information

Customer ID

Optional text field that displays the customer ID of the circuit. The customer ID can contain 0 to 256 alphanumeric and special characters.

Service ID

Optional text field that displays the service ID of the selected circuit. The service ID can contain 0 to 256 alphanumeric and special characters.

VCAT

Symmetric

Display only. Provisions the same number of members in both directions. For STS VCAT circuits, this check box is checked by default. Members use the same set of time slots but in opposite directions.

Open VCAT

Check this check box to create an open-ended VCAT circuit.

Note You cannot use open-ended VCAT circuits to create L2 topologies.

Member Size

Select a size for each VCAT member.

Number of Members

Specify the number of members to be configured for the VCAT circuit.

Mode

Choose the protection mode for the VCAT circuit:

None—Provides no protection. A failure on one member causes the entire VCAT circuit to fail.

SW-LCAS—Allows the VCAT circuit to adapt to member failures and keep traffic flowing after failures at a reduced bandwidth.

LCAS—Uses a signaling protocol where the members in a virtual concatenation group (VCG) can be dynamically changed without interrupting the operation of uninvolved members. If implemented correctly, there are no errors. LCAS allows the source and destination nodes of a VCG to signal to each other so that the addition or deletion of a member from the VCG can be synchronized without errors.

Protection

Protected

Check this check box to specify that circuit endpoints have to be selected only from cards that have embedded splitter-type protection.

Protected Drops (Non-Ethernet)

Specify whether protected drops are indicated. If selected, this option restricts the set of displayed source or destination termination points to those in 1:1, 1:n, or 1+1 protection groups.

Provision Working Go and Return on Primary Path

Check this check box to provision SNCP/UPSR protection routes in a Go and Return fashion as detailed in ITU-T G.841, to avoid too long a delay on another direction of traffic. This feature applies only to bidirectional UPSR/SNCP circuits. Unidirectional UPSR/SNCP circuits are not affected and the shortest path to the destination is always used as the working path.

Revertive

Specify whether traffic is reverted back to its original path when the conditions that diverted the circuit to the protect path are repaired. If you do not choose Revertive, traffic remains on the protect path.

Reversion Time

Specify the amount of time (in minutes) after which traffic reverts back to the original working path when conditions that caused the switch are cleared. The range is from 0.5 to 12.0 minutes. The Cisco default is 5 minutes.

SF Threshold (for SONET circuits only)

Set the UPSR path-level signal failure (SF) threshold.

Note This field is visible only for point-to-point topologies.

SD Threshold (for SONET circuits only)

Set the UPSR path-level signal degrade (SD) threshold.

Note This field is visible only for point-to-point topologies.

Switch on PDI-P (for SONET circuits only)

Specify whether traffic should switch based on a received STS payload defect indication.

Note This field is visible only for point-to-point topologies.

Source

(fields depend on the NE selected and the circuit type)

Use Secondary Source

(For DRI, open UPSR, and open-ended SNCP circuits) Check this check box to define a secondary source. Then, specify the slot, port, STS, DS-1, or VT for the secondary source.

Note The Use Secondary Source check box is disabled when OCH-NC is selected as the circuit type.

NE ID

Select from the list of available NE IDs to specify the source NE ID.

Subnetwork ID

Display only. Displays the ID of the subnetwork associated with the circuit source.

Slot

Specify the source slot (only for SONET/SDH circuits).

Port

Specify the source port (only for SONET/SDH circuits).

STS

(For SONET circuits) Specify the source STS.

VT

(For SONET circuits) Specify the source VT.

DS1

(For SONET circuits) Specify the source DS-1.

VC4

(For SDH circuits) Specify the source VC4.

VC3

(For SDH circuits) Specify the source VC3.

VC11

(For SDH circuits) Specify the source VC11.

VC12

(For SDH circuits) Specify the source VC12.

TUG3

(For SDH circuits) Specify the source TUG3.

TUG2

(For SDH circuits) Specify the source TUG2.

Destination

(fields depend on the NE selected and the circuit type)

Use Secondary Destination

(For DRI, open UPSR, and open-ended SNCP circuits) Check this check box to define a secondary destination. Then, specify the slot, port, STS, DS-1, or VT for the secondary destination.

Note The Use Secondary Destination check box is disabled when OCH-NC is selected as the circuit type.

NE ID

Select from the list of available TPs to specify the destination TP.

Subnetwork ID

Display only. Displays the ID of the subnetwork associated with the circuit destination.

Slot

(For SONET and SDH circuits) Specify the destination slot.

Port

(For SONET and SDH circuits) Specify the destination port.

STS

(For SONET circuits) Specify the destination STS.

VT

(For SONET circuits) Specify the destination VT.

DS1

(For SONET circuits) Specify the destination DS-1.

VC4

(For SDH circuits) Specify the destination VC4.

VC3

(For SDH circuits) Specify the destination VC3.

VC11

(For SDH circuits) Specify the destination VC11.

VC12

(For SDH circuits) Specify the destination VC12.

TUG3

(For SDH circuits) Specify the destination TUG3.

TUG2

(For SDH circuits) Specify the destination TUG2.

OCHxx Options

G.709 OTN

Disable or enable the G.709 OTN feature. Check this check box to filter the list of circuits to display only G.709 OTN-compatible circuits.

FEC

Disable or enable forward error correction. G.709 OTN must be enabled before you can enable FEC.

SD BER

Set the signal degrade bit error rate.

Mapping

The card can perform multiplexing per ITU-T G.709. The ODUk (client SONET/SDH payload) can be mapped to the optical channel (OTUk) either asynchronously (asynch mapping) or synchronously (synch mapping) with this setting.

Revert/Reversion Time

(For protected circuits) Select the splitter-type protection.

Members Destination

(available only for open-ended VCAT circuits)

Autoranged

Check this check box if you want to specify only the first member destination, and Prime Optical will automatically choose the remaining destinations. (Note that you will lose previous selections if you switch to Autoranged.) When Autoranged is enabled, available consecutive endpoints are returned, starting from the endpoint that you selected. The destination endpoints can be on different ports only if the source endpoint supports split routing.

If you want to specify all of the destinations, leave the Autoranged check box unchecked.

VCAT Member Number

Select the member number to create.

Use Secondary Destination

Check this check box if you want to create a secondary destination. Then, specify the NE ID, subnetwork ID, slot, port, STS, VC, and VT for the primary and secondary destinations.

Note The Use Secondary Destination check box is dimmed if the source endpoint does not support split routing.

NE ID

Select from the list of available NE IDs to specify the destination NE ID (and secondary NE ID, if applicable).

Subnetwork ID

Display only. Displays the ID of the subnetwork associated with the circuit destination (and secondary subnetwork ID, if applicable).

Slot

Specify the destination slot (and secondary slot, if applicable).

Port

Specify the destination port (and secondary port, if applicable).

STS

Specify the destination STS (and secondary STS, if applicable).

VC

Specify the destination VC (and secondary VC, if applicable).

VT

Specify the destination VT (and secondary VT, if applicable).

Add Destination button

Click this button to save the selected endpoint for the member number shown in the VCAT Member Number list box.

Note An error message warns you if duplicate endpoints are selected.

Show Destinations button

Click this button to launch a table that shows all of the open-ended VCAT primary and secondary destinations by VCAT member number.

Routing Preferences

Route Automatically

Enable or disable automatic route selection. If enabled, Prime Optical automatically determines the route for the circuit. Alternatively, you can disable automatic route selection and manually route the circuit where you specify all the intermediate hops on a hop-by-hop basis (up to 64 hops per circuit). You can manually route the circuit using either one of the following views:

Graphical—Provides a map view that displays the nodes and links you can use to create the circuits. You can select the nodes and links that you need for your circuit from the map view.

Graphical Enhanced—Provides an enhanced map view that includes top-level and detailed views. Top-level view types are subnetworks or groups to which the nodes belong. Each subnetwork or group view type contains a detailed view that displays the nodes and links that belong to the specific subnetwork or group. From the detailed view, you can select the nodes and links that you need for creating the circuit.

Textual—Provides a text view that lists the nodes and links you can use to create the circuits.

Note If the source and destination of the circuit are on the same node, automatic routing is enabled.

Using Required Nodes/Links

(Available only if Route Automatically is checked) If checked, Prime Optical automatically routes the circuit through the required nodes and/or links. There are several ways you can specify the required nodes and links. Choose one of the following:

Graphical

Graphical Enhanced

Textual

Review Route Before Creation

(Available only if Route Automatically is checked) Check this check box to review the route before it is created. You can review the route in one of the following ways:

Graphical

Graphical Enhanced

VT-DS3 Mapped Conversion

(Available only if Route Automatically is checked) If checked, you can route the circuit using the DS3XM12 card. Not applicable for data cards (ML-series and CE-100T-8 cards). VT-DS3 mapped conversion is for VAP circuits and is automatically selected while creating a VAP circuit using a DS3 port.

Time Slot Restriction

If checked, you can enter an STS/VC4 value (to be used end-to-end) that Prime Optical will use to automatically determine the route for the circuit. Circuit creation fails if the same STS/VC4 is not available end-to-end. If circuit creation fails, you can try again using different values. The valid range is from 1 to 192 for SONET, or from 1 to 64 for SDH networks.

Note Time Slot Restriction is not available for OCHCC and OCHNC circuit types.

Note For VCAT circuits, you must enter multiple STS/VC4 values in the Time Slot Restriction field, in the Member Preferences table. The STS/VC4 values you enter in the Time Slot Restriction field cannot be identical, or circuit creation will fail with an error message.

Common Fiber Routing

(For VCAT circuits) Click this radio button to route each member circuit on the same fiber.

Split Routing

(For VCAT circuits) Click this radio button to route member circuits on separate paths.

Member Preferences

(For VCAT circuits) Specify the following information for member circuits:

Number—Enter a number between 1 and 256 to identify the member.

Name—Enter a unique name to identify the member. The name can contain up to 48 alphanumeric characters, including spaces.

Protection—Specify the member circuit protection type (Fully Protected, PCA, DRI, or Unprotected).

Node Diverse—Specify the node diversity for each member circuit:

Required—Ensures that the primary and alternate paths are node-diverse.

Desired—Prime Optical attempts node diversity. If node diversity is impossible, Prime Optical uses primary and alternate paths that are link-diverse.

Don't Care: Link Diverse Only—Prime Optical creates primary and alternate paths that are link-diverse. The paths might be node-diverse, but Prime Optical does not check for node diversity.

Set Protection for All—Allows you to choose the same protection type for all members.

Set Node Diversity for All—Allows you to specify the same node diversity for all members.

Fully Protected Path

If selected, Prime Optical ensures that the circuit is fully protected. You can provision the circuit in a UPSR DRI topology by checking the Dual Ring Interconnect check box. Alternatively, if the circuit must pass across unprotected links, Prime Optical creates a primary and alternate circuit route (virtual UPSR) based on the following node diversity specifications:

Required—Ensures that the primary and alternate paths of the UPSR portions of the complete circuit path are node-diverse.

Desired—Prime Optical attempts node diversity. If node diversity is impossible, Prime Optical uses primary and alternate paths that are link-diverse for the UPSR portions of the complete circuit path.

Don't Care: Link Diverse Only—Prime Optical creates primary and alternate paths that are link-diverse for the UPSR portions of the complete circuit path. The paths might be node-diverse, but Prime Optical does not check for node diversity.

Protection Channel Access

To route the circuit on a BLSR protection channel, if available, uncheck the Fully Protected Path check box, and check the Protection Channel Access check box.

Dual Ring Interconnect

If you selected Fully Protected Path and the circuit will be routed on a DRI, check the Dual Ring Interconnect check box.

Note For DRI and iDRI manually created circuits, you must double-click the DRI span for it to become DRI. A single-click does not enable the DRI span.

Diverse Shared Risk Link Group (SRLG)

If checked, fully protected circuits are routed through working and protected links that do not share risk groups.

Overlay Ring

Check this check box if your configuration uses multiple cross-connections per node, and you want to provision the circuit across multiple rings. An overlay ring circuit traverses at least one node more than once and results in multiple cross-connections per node, per circuit. An overlay ring circuit can be protected or unprotected. Note that Prime Optical does not support a configuration where the source or destination node requires multiple cross-connections.

Conversion Route Constraints

(available only if VT-DS3 Mapped Conversion is checked)

NE ID

Select from the list of available NE IDs to specify the source NE ID.

Subnetwork ID

Display only. Displays the ID of the subnetwork associated with the circuit source.

Slot

Specify the source slot that contains the DS3XM12 card.

DS3 Mapped STS

Choose Circuit Source or Circuit Dest.

VT/VC LO Circuit Options

(available only for VT and VC LO path circuits)

VT/VC LO Tunnel on Transit Nodes

This option is available if the VT or VC circuit passes through a node that does not have a low-order tunnel, or if an existing low-order tunnel is full. Low-order tunnels allow VT/VC circuits to pass through NEs without consuming low-order cross-connect card resources. In general, creating tunnels is a good idea if you are creating many low-order circuits from the same source and destination.

Note For VCAT circuits, the VC LO Tunnel on Transit Nodes check box is disabled if you selected Split Routing as the routing preference and you specified any route constraints in the Route Constraints pane.

VT Aggregation Point (VAP)/VC LO Aggregation Point (LAP)

(For SONET) This option is available if you are creating a VT1.5 circuit to a DS-1, EC-1, DS3XM-6; or an OC-N port on a BLSR, 1+1, or Unprotected node. A VAP allows VT1.5 circuits to be routed through a node using one STS connection on the cross-connect card matrix rather than multiple connections on the VT1.5 matrix.

(For SDH) This option is available if you are creating a VC12 circuit to an STM-N port for handoff to non-SDH networks or equipment, such as an IOF, switch, or DACS. A LAP allows low-order circuits to be routed through a node using one VC4 connection on the cross-connect card high-order matrix rather than multiple connections on the low-order matrix.

Circuit Source is STS/VC4 Grooming Node

Creates the VAP or LAP on the VT or VC circuit source node. This option is available only if the VT circuit originates on a DS-1, EC-1, DS3XM-6, or OC-N card, or if the VC circuit originates on an STM-N card.

Circuit Destination is STS/VC4 Grooming Node

Creates the VAP or LAP on the VT or VC circuit destination node. This option is available only if the VT circuit terminates on a DS-1, EC-1, DS3XM-6, or OC-N card, or if the VC circuit terminates on an STM-N card.

None

Choose this option if you do not want to create a low-order tunnel or a VAP/LAP. This is the only available option if Prime Optical cannot create a low-order tunnel or VAP/LAP.

VLAN Selection

(available only for Ethernet cards or EtherGroups)

VLANs

Select from the list of available VLANs to associate an existing VLAN to the circuit. If the Circuit VLANs list is empty, Prime Optical assigns the default VLAN.

To create a new VLAN, click the New VLAN button. Enter a unique VLAN name and ID. The VLAN ID must be an integer greater than 1 but less than 4093. Click OK; then, click OK in the Successfully created VLAN confirmation dialog box. The new VLAN appears in the list of VLANs. The list is ordered alphanumerically by VLAN name, where numbers precede letters and uppercase letters precede lowercase ones.

Note Gigabit Ethernet G-series, ML-series, and E-series cards that are configured in port ML-series mode do not support VLAN assignment.

Enable Spanning Tree

Check this check box to enable spanning tree protection for the circuit. This option is disabled for intranode and multicard Ethernet circuits.

VT/VC LO Grooming Node Selection

Map view

Allows you to tag a node in the map view as a VT or VC LO grooming node. By clicking a node icon, the node is automatically tagged as a VT or VC LO grooming node.

Manual Provisioning

(available if the Route Automatically check box is unchecked and the Graphical or Graphical Enhanced radio button is selected)

VCAT Member Number

(For VCAT circuits) Use the drop-down list to select route constraints for each member circuit.

Map view

Displays the NEs that are available in the subnetwork for circuit creation. Map view also indicates the source and destination NEs (and secondary source and destination NEs, if applicable) selected for circuit creation. The map view is used to manually route the circuit from the source to the destination specified by the addition of the links selected.

When you position your mouse cursor over a link, the tooltip displays ring information.

Use the right-click menu options to navigate within the map view:

Find Node—Opens the Find Node dialog box, which lists all of the nodes displayed in the map view. Select a node from the drop-down list and click OK. The selection context in the map view changes to show the selected node highlighted in the visible map area.

Zoom In—Allows you to zoom in on an object in the map view.

Zoom Out—Allows you to zoom out on the map view.

Reset Zoom—Resets the current zoom level to the default.

Add—Allows you to add the selected span. Right-click a link and choose Add in the right-click menu. The selected link is added to the Include list with the default STS or VC4 value. The Add option applies to manual provisioning across all circuit types.

Operation in progress

(Available if the Graphical Enhanced radio button is selected) Shows the percentage of the operation that is complete during the calculation of the graphic objects.

Selected view type

(Available if the Graphical Enhanced radio button is selected) Select one of the following top-level view types:

Subnetwork—Allows you to view the subnetwork(s) to which the NEs belong. This is the default view type.

Group—Allows you to view the group(s) to which the NEs belong.

Current view

(Display only and available if the Graphical Enhanced radio button is selected) Displays the detailed view type that you selected.

Available view

(Available if the Graphical Enhanced radio button is selected) Allows you to select a detailed view type.

Top view button

(Available if the Graphical Enhanced radio button is selected) Click this button to change the top-level view type at any time.

Available Spans

Select a link on the map view (related to the selected node) and its corresponding details are displayed in the Available Spans pane. Click Add to move the spans to the Selected Spans field. The newly added link appears in blue on the map view.

Selected Spans

Select one or more spans and click Remove to remove them from the Selected Spans field. The removed link appears in green to indicate its unselected state.

Note To specify a DRI link, double-click the link on the map. The map view displays the link as bidirectional.

Links/Nodes tab

Select the links/nodes in the graphic to populate the selected node field.

BLSR DRI Nodes or MS-SPRing DRI Nodes tab

(For BLSR DRI or MS-SPRing DRI circuits) Click the Add button to open the BLSR/MS-SPRing DRI dialog box, which allows you to provide primary and secondary pairs for traditional and nontraditional DRI circuits. Also specify ring and path options for the first and second rings. Click Remove to remove a DRI node from the list.

Manual Provisioning

(available if the Route Automatically check box is unchecked and the Textual radio button is selected)

Src NE ID

Displays the circuit source NE.

Dest NE ID

Displays the circuit destination NE.

Current NE ID

Displays the currently selected NE.

Adj NE ID

Displays all the NEs that are adjacent to the currently selected NE.

Available Links

Lists all links between the currently selected and adjacent NEs. Select a link from the drop-down list.

Available Spans

After you select a link from the Available Links drop-down list, its corresponding details are displayed in the Available Spans pane. Click Add to move the spans to the Selected Spans field.

Selected Spans

Select one or more spans and click Remove to remove them from the Selected Spans field.

Next Hop

Click Next Hop to specify the next intermediate hop.

Reset

Click Reset to reset all hop information to the default values.

Alternate Route

Click Alternate Route to specify hop information for the alternate circuit route.

Route Constraints

(applicable only if the Using Required Nodes/Links check box is checked)

VCAT Member Number

(For VCAT circuits) Use the drop-down list to select route constraints for each member circuit.

Map view

Displays the NEs that are available in the subnetwork for circuit creation. This pane also indicates the source and destination NEs (and secondary source and destination NEs, if applicable) selected for circuit creation. The map view is used for the inclusion and exclusion of links or nodes during the specification of route constraints. The included nodes are shown in blue and the excluded links are shown in magenta.

Use the right-click menu options to navigate within the map view:

Find Node—Opens the Find Node dialog box, which lists all of the nodes displayed in the map view. Select a node from the drop-down list and click OK. The selection context in the map view changes to show the selected node highlighted in the visible map area.

Zoom In—Allows you to zoom in on an object in the map view.

Zoom Out—Allows you to zoom out on the map view.

Reset Zoom—Resets the current zoom level to the default.

Exclude All Nodes—Allows you to exclude all nodes associated with the source and destination nodes. This reduces the time required to calculate the best route. The excluded nodes are dimmed, and are listed in the Excluded Links/Nodes pane. All nodes that are not listed in the Excluded Links/Nodes pane are accounted for while calculating the best route. To include a node again for a route-constraint calculation, select the link from the list and click Remove.

If you are using the Graphical Enhanced view, to exclude a node while calculating the route constraints, select the node and click Exclude. The excluded nodes are dimmed, and are listed in the Excluded Links/Nodes pane. To include a node again for a route-constraint calculation, select the link from the list and click Remove.

Right-click a link or link bundle and choose Expand or Collapse from the shortcut menu. If you choose Collapse, the links are hidden and the link bundle is displayed. If you choose Expand, the link bundle is hidden and the links are displayed.

The color of the link bundle represents the link selection status, which has the following order of priority (from highest to lowest):

Magenta—The link bundle contains at least one excluded link.

Blue—The link bundle contains at least one selected link.

White—The link bundle contains at least one selecting link.

Green—All links in the link bundle are selectable.

Red—The link bundle contains at least one unselectable link.

The link bundle tooltip reports the number of links in the bundle and the name of each link. The background color of each link name in the tooltip represents the link selection status.

Src NE ID

(For textual manual provisioning) Displays the circuit source NE.

Dest NE ID

(For textual manual provisioning) Displays the circuit destination NE.

Nodes

(For textual manual provisioning) Select Nodes if you want to add nodes to your circuit route.

Links

(For textual manual provisioning) Select Links if you want to add links to your circuit route.

Current NE ID

(For textual manual provisioning) Displays the currently selected NE.

Adj NE ID

(For textual manual provisioning) Displays all the NEs that are adjacent to the currently selected NE.

Available Links

(For textual manual provisioning) Lists all links between the currently selected and adjacent NEs. Select a link from the drop-down list.

Select Nodes

(For textual manual provisioning) Lists all nodes related to the currently selected NE. Select a node from the list.

Selected Node/Link

Displays the currently selected NE or link.

Included Links/Nodes

Displays the list of links or nodes that are included in the route. All links and nodes listed in this pane are considered while calculating route constraints.

Excluded Links/Nodes

Displays the list of links or nodes that are excluded from the route.

To remove the links and nodes from the list (to include the nodes to calculate route constraints), select the node and click Remove.

Review Route

(applicable only if the Review Route before creation check box is checked)

VCAT Member Number

(For VCAT circuits) Use the drop-down list to view the route chosen for each member circuit.

Map view

Displays the NEs that are available in the subnetwork for circuit creation. This pane also indicates the source and destination NEs (and secondary source and destination NEs, if applicable) selected for circuit creation. The map view is used for the inclusion and exclusion of links or nodes during the specification of route constraints. The included nodes are shown in blue and the excluded links are shown in magenta.

Use the right-click menu options to navigate within the map view:

Find Node—Opens the Find Node dialog box, which lists all of the nodes displayed in the map view. Select a node from the drop-down list and click OK. The selection context in the map view changes to show the selected node highlighted in the visible map area.

Zoom In—Allows you to zoom in on an object in the map view.

Zoom Out—Allows you to zoom out on the map view.

Reset Zoom—Resets the current zoom level to the default.

Review Route

Displays the NEs that are available in the subnetwork for circuit creation. This pane also indicates the source and destination NEs (and secondary source and destination NEs, if applicable) selected for circuit creation. The map view displays information about the spans selected during autorouting in the subnetwork. The selected spans are shown in blue. When you select a span, its corresponding details are displayed in the Selected Span pane. The circuit summary displays the total hops and the cost for working and protect paths for the routed circuit.

Source NE ID

Displays the ID of the NE selected as the source node.

Destination NE ID

Displays the ID of the NE selected as the destination node.

Included Spans

If you enabled automatic route selection in the Routing Preferences pane, Prime Optical automatically selects spans to route the circuit. This field lists all the spans that the Prime Optical server selected automatically.

Selected Span

Displays detailed information about the span selected in the Included Spans list.

Add and Remove buttons

You can review and modify the automatic route that is selected for circuit creation. Click Add to change the automatically selected route by adding a route to the Selected Spans list. Click Remove to remove a route from the list.

This functionality is similar to manual routing, except that the route from the source to the destination is preselected.

Note You can modify the review route only for the following circuit types: STS_CIRCUIT, VT_CIRCUIT, VT_TUNNEL, VT_AGGREGATION, STS_VCAT_CIRCUIT, VT_VCAT_CIRCUIT, VC_HO_PATH_CIRCUIT, VC_LO_PATH_CIRCUIT, VC_LO_PATH_TUNNEL, VC_LO_PATH_AGGREGATION, VC_HO_VCAT_CIRCUIT, and VC_LO_VCAT_CIRCUIT.

Circuit Summary

Circuit Summary

Summarizes the selections you made in the wizard panes. To change the circuit summary, click Back and change your selection(s).


7.2.3.1  Creating an STS (Including Ethernet), STS-V, VT, VT-V, VT Tunnel, or VT Aggregation Circuit


Step 1 Select a node for which to create a circuit, and open the Create Circuit wizard. For an explanation of wizard launch points, see Table 7-4.

Step 2 In the Type pane, choose STS (including Ethernet circuits), STS-v, VT, VT-v, VT Tunnel, or VT Aggregation. (Choose STS for ML-series circuits. For ONS 15454, choose STS for circuits starting and ending at a fiber channel [FCMR] card). In the Number of Circuits field, enter the number of circuits you want to create. The Cisco default is 1. If you enter a number higher than 1, you can use autoranging to create the additional circuits automatically. You can create only one circuit for the following circuit types:

ML-series

VT-v

STS-v

VT aggregation

VT tunnel

Step 3 Click Next.

Step 4 In the Attributes pane, enter the following information; then, click Next:

Name—Enter a unique name for the new circuit. The circuit name is a free-format string of up to 48 ASCII characters. If you leave the field blank, Prime Optical assigns a default name to the circuit.

Circuit Alias—Enter a unique alias name for the new circuit. The alias name can contain alphanumeric characters. International character sets are also supported.

Description—Enter a circuit description of up to 256 characters.

Size (STS circuits only)—Specify STS-1, STS-9c, STS-12c, STS-24c, STS-48c, STS-96c, or STS-192c. The valid size for circuits involving the DS3i card is STS-3c. Valid sizes for circuits involving the FC_MR-4 card are STS-1, STS-3c, STS-24c, and STS-48c.

For a single-card EtherSwitch, only STS-1, STS-3c, STS-6c, and STS-12c apply. For a multicard EtherSwitch, only STS-1, STS-3c, and STS-6c apply.

Valid circuit sizes for an ML-series circuit are STS-1, STS-3c, STS6c, STS-9c, STS-12c, STS-24c, and STS-96c.

Bidirectional—Check this check box to create a two-way circuit; uncheck it to create a one-way circuit. (For STS and VT circuits only; E-series circuits, G-series circuits, ML-series circuits, VAP circuits, and VT tunnels are bidirectional.)

State—Choose an administrative state to apply to the circuit:

IS—The circuit is in service.

OOS—The circuit is out of service. Traffic is not passed on the circuit.

OOS-AINS—The circuit is out of service until it receives a valid signal, at which time the circuit state automatically changes to in service.

OOS-MT—The circuit is in maintenance state. The maintenance state does not interrupt traffic flow; it suppresses alarms and conditions and allows loopbacks to be performed on the circuit.

Apply to source/destination ports—Check this check box to apply the selected state in the State field to the circuit source and destination ports. Uncheck this check box for ML-series circuits.

Protected Drops (Non-Ethernet)—Check this check box if you want the circuit routed on protected drops only. If selected, this option restricts the set of displayed source or destination termination points to those in 1:1, 1:N, or 1+1 protection groups. Uncheck this check box for ML-series circuits.

Provision working go and return on primary path (bidirectional UPSR/SNCP protection only)—Check this check box to provision the working path to go or return to the primary path.


Note Prime Optical currently provisions unidirectional SNCP/UPSR circuits following the GR-1400 standard. For bidirectional SNCP/UPSR circuits, you can check the Provision working go and return on primary path check box to route the working and protect paths in one direction following the ITU-T G.841 standard. Unidirectional UPSR/SNCP circuits are not affected by this new routing, and the shortest path is always used as the working path.


Path Selectors (UPSR protection only)—If the circuit will be routed on a UPSR, set the UPSR path selectors as follows:

Revertive—Check this check box if you want traffic to revert to the working path when the conditions that diverted it to the protect path are repaired. If you do not choose Revertive, traffic remains on the protect path.

Reversion Time—If Revertive is checked, specify the amount of time (in minutes) after which traffic reverts back to the original working path when the conditions that caused the switch are cleared.

SF Threshold (for STS circuits only)—Set the UPSR path-level SF bit error rate (BER) threshold. This field is visible only for point-to-point topologies.

SD Threshold (for STS circuits only)—Set the UPSR path-level SD BER threshold. This field is visible only for point-to-point topologies.

Switch on PDI-P (for STS circuits only)—Specify whether or not traffic should switch based on a received STS payload defect indication. This field is visible only for point-to-point topologies.

(Optional) Specify the customer information:

Customer ID—Identify the end user of the circuit.

Service ID—Enter the service ID of the circuit.

Step 5 In the Source pane, enter the following information; then, click Next:

NE ID—Select from the list of available TPs to specify the source TP.

Source—Specify the source slot, port, STS, DS1-14, and VT.

Use Secondary Source—Check this check box to create a secondary source. Then, specify the NE ID, slot, port, STS, DS1-14, and VT for the secondary source.


Note The secondary source is applied to open-ended UPSR and DRI.


Step 6 In the Destination pane, enter the following information; then, click Next:

NE ID—Select from the list of available TPs to specify the destination TP.

Destination—Specify the destination slot, port, STS, DS1-14, and VT.

Use Secondary Destination—Check this check box to create a secondary destination. Then, specify the slot, port, STS, DS1-14, and VT for the secondary destination.


Note The secondary destination is applied to open-ended UPSR and DRI.


Step 7 In the VLAN Selection pane (available only if an E-series Ethernet card or EtherGroup is chosen as the source or destination slot), do the following; then, click Next:

a. Select from the list of available VLANs to associate an existing VLAN to the circuit. If the Circuit VLANs list is empty, Prime Optical assigns the default VLAN.


Note Gigabit Ethernet G-series, ML-series, and E-series cards that are configured in Port Mapped mode do not support VLAN assignment.


b. To create a new VLAN, click the New VLAN button. Enter a unique VLAN name and ID. The VLAN ID must be an integer greater than 1 but less than 4093. Click OK; then, click OK in the Successfully created VLAN confirmation dialog box. The new VLAN appears in the list of VLANs. The list is arranged alphanumerically by VLAN name, where numbers precede letters and uppercase letters precede lowercase ones.

c. Check the Enable Spanning Tree check box to enable spanning tree protection for the circuit. This option is disabled for intranode and multicard Ethernet circuits.

Step 8 In the Routing Preferences pane, do the following; then, click Next.

a. Route Automatically—Enable or disable automatic route selection. If enabled, Prime Optical automatically determines the route for the circuit. If the source and destination of the circuit are on the same node, automatic routing is enabled. If disabled, you can specify the spans associated with the circuit. You can manually provision the circuit using one of the following views:

Graphical

Graphical Enhanced

Textual

b. Using Required Nodes/Links—(Available only if Route Automatically is checked) Check this check box to let Prime Optical automatically route the circuit through the required nodes and/or links. You can specify the required nodes and links using one of the following views:

Graphical

Graphical Enhanced

Textual

c. Review Route Before Creation—(Available only if Route Automatically is checked) Check this check box to review the route before it is created. You can review the route using one of the following views:

Graphical

Graphical Enhanced

d. VT-DS3 Mapped Conversion—(Available only if Route Automatically is checked) If checked, you can route the circuit using the DS3XM12 card. Not applicable for data cards (ML-series and CE-100T-8 cards). VT-DS3 mapped conversion is for VAP circuits and is automatically selected while creating a VAP circuit using a DS3 port.

e. Time Slot Restriction—If checked, you can enter an STS/VC4 value (to be used end-to-end) that Prime Optical uses to automatically determine the route for the circuit. Circuit creation fails if the same STS/VC4 is not available end-to-end. If circuit creation fails, you can try again using different values. The valid range is from 1 to 192 for SONET, or from 1 to 64 for SDH networks.


Note For VCAT circuits, you must enter multiple STS/VC4 values in the Time Slot Restriction field, in the Member Preferences table. The STS/VC4 values you enter in the Time Slot Restriction field cannot be identical or circuit creation will fail with an error message.


f. Fully Protected Path—If not selected, choose Protection Channel Access to route the circuit on a BLSR protection channel.

g. Fully Protected Path—If selected, Prime Optical ensures that the circuit is fully protected. You can provision the circuit in a UPSR DRI topology by checking Dual Ring Interconnect. Alternatively, if the circuit must pass across unprotected links, Prime Optical creates a primary and alternate circuit route (virtual UPSR) based on the following node diversity specifications:

Required—Prime Optical ensures that the primary and alternate paths within the UPSR portions of the complete circuit path are node-diverse.

Desired—Prime Optical attempts node diversity. If node diversity is impossible, Prime Optical uses primary and alternate paths that are link-diverse for the UPSR portions of the complete circuit path.

Don't Care: Link Diverse Only—Prime Optical creates primary and alternate paths that are link-diverse for the UPSR portions of the complete circuit path. The paths might be node-diverse, but Prime Optical does not check for node diversity.

Dual Ring Interconnect—If selected, the other node specifications (Required, Desired, and Don't Care: Link Diverse Only) are disabled.

h. Overlay Ring—(For STS high-order circuits only) Check this check box if your configuration uses multiple cross-connections per node, and you want to provision the circuit across multiple rings. An overlay ring circuit traverses at least one node more than once and results in multiple cross-connections per node, per circuit. An overlay ring circuit can be protected or unprotected. Note that Prime Optical does not support a configuration where the source or destination node requires multiple cross-connections.

Step 9 In the VT Options pane (available only if you are creating a VT circuit and automatic routing is selected), choose one of the following radio buttons; then, click Next:

VT Tunnel on Transit Nodes

VAP

None

Step 10 If you created a VAP, in the VT Grooming pane, select the following:

STS Grooming Node

VT Grooming Node

Step 11 In the Manual Provisioning pane (available when Route Automatically is unchecked and the Graphical or Graphical Enhanced radio button is selected), do the following; then, click Next:

a. (Applicable if the Graphical Enhanced radio button is selected) Select one of the following top-level view types from the Selected View Type list:

Subnetwork—Allows you to view the subnetwork(s) to which the NEs belong. This is the default view type.

Group—Allows you to view the group(s) to which the NEs belong.

The Current View field is set to Top.

b. (Applicable if the Graphical Enhanced radio button is selected) Select a detailed view type from the Available Views list, or right-click a subnetwork or group and choose View. The Current View field is set to the detailed view type that you selected.

In a complex network, it might take several minutes or longer to calculate and display the graphic objects in the map view. The progress bar at the top of the map tracks the percentage of completion while the map is updated.

c. Use the map view to manually route the circuit from the source to the destination specified by the addition of the links selected. Use the right-click menu options to navigate within the map view:

Find Node—Opens the Find Node dialog box, which lists all of the nodes displayed in the map view. Select a node from the drop-down list and click OK. The selection context in the map view changes to show the selected node highlighted in the visible map area.

Zoom In—Allows you to zoom in on an object in the map view.

Zoom Out—Allows you to zoom out on the map view.

Reset Zoom—Resets the current zoom level to the default.

Add—Allows you to add the selected span. Right-click a link and choose Add in the right-click menu. The selected link is added to the Available Spans list with the default STS or VC4 value. The Add option applies to manual provisioning across all circuit types.

d. Select a link on the map view (related to the selected node) and its corresponding details are displayed in the Available Spans pane. Click Add to move the spans to the Selected Spans field. The newly added link appears in blue on the map view.

e. Select one or more spans and click Remove to remove them from the Selected Spans field. The removed link appears in green to indicate its unselected state.


Note To specify a DRI link, double-click the link on the map. The map view displays the link as bidirectional.


f. (For BLSR DRI or MS-SPRing DRI circuits) In the BLSR DRI Nodes or MS-SPRing DRI Nodes tab, click the Add button to open the BLSR/MS-SPRing DRI dialog box, which allows you to provide primary and secondary pairs for traditional and nontraditional DRI circuits. Also specify ring and path options for the first and second rings. Click Remove to remove a DRI node from the list.


Note If the Graphical Enhanced radio button is selected and you want to change the top-level view type at any time, click Top View. The map view reverts to the default Subnetwork view type.


Step 12 In the Manual Provisioning pane (available when Route Automatically is unchecked and the Textual radio button is selected), do the following; then, click Next:

a. Specify the following:

Src NE ID—Display only.

Dest NE ID—Display only.

Current NE ID—Display only.

Adj NE ID—Display only.

Available Links—Lists all links between the currently selected and adjacent NEs. Select a link from the drop-down list.

Available Spans—After you select a link from the Available Links drop-down list, its corresponding details are displayed in the Available Spans pane. Click Add to move the spans to the Selected Spans field.

Selected Spans—Select one or more spans and click Remove to remove them from the Selected Spans field.

b. Click Next Hop to specify the next intermediate hop; then, repeat substep a.

c. Click Reset to reset all hop information to the default values.

d. Click Alternate Route to specify hop information for the alternate circuit route.

Step 13 In the Route Constraints pane (available when Route Automatically and Using Required Nodes/Links are enabled and the Graphical or Graphical Enhanced radio button is selected), a graphical representation of the circuit is displayed, including source and destination nodes. Specify the nodes or links to include in the circuit route. Complete the following substeps:

a. (Applicable if the Graphical Enhanced radio button is selected) Select one of the following top-level view types from the Selected View Type list:

Subnetwork—Allows you to view the subnetwork(s) to which the NEs belong. This is the default view type.

Group—Allows you to view the group(s) to which the NEs belong.

The Current View field is set to Top.

b. (Applicable if the Graphical Enhanced radio button is selected) Select a detailed view type from the Available Views list, or right-click a subnetwork or group and choose View. The Current View field is set to the detailed view type that you selected.

In a complex network, it might take several minutes or longer to calculate and display the graphic objects in the map view. The progress bar at the top of the map tracks the percentage of completion while the map is updated.

c. In the circuit display, select the node or link. The NE ID or link ID is displayed in the Selected Node/Link field.

d. Click Include to include the selected node or link in the route. The node or link appears in the Included Links/Nodes list.

e. Click Exclude to exclude the selected node or link from the route. The node or link appears in the Excluded Links/Nodes list.

f. Click Remove to remove the selected node or link from the Included Links/Nodes or Excluded Links/Nodes lists.

g. Click Up or Down to set the sequence of the nodes and spans included in the circuit.

h. Repeat substeps c to g for each node or link that you want to include in the circuit route.

i. Click Finish, or, if Review Route Before Creation is checked in the Routing Preferences pane, click Next.


Note If the Graphical Enhanced radio button is selected and you want to change the top-level view type at any time, click Top View. The map view reverts to the default Subnetwork view type.


Step 14 In the Route Constraints pane (available when Route Automatically and Using Required Nodes/Links are enabled and the Textual radio button is selected), specify the nodes or links to include in each hop of the circuit route. Complete the following substeps:

a. Select Nodes in the Select Nodes/Links area if you want to add nodes to your circuit route; then, specify the node information in the Select Nodes area.

b. Select Links in the Select Nodes/Links area if you want to add links to your circuit route; then, specify the link information in the Select Links area.

c. Click Add to add a BLSR-DRI or MS-SPring-DRI to the circuit route.

d. Click Include to include the selected node or link in the route. The node or link appears in the Included Links/Nodes list.

e. Click Exclude to exclude the selected node or link from the route. The node or link appears in the Excluded Links/Nodes list.

f. Click Remove to remove the selected node or link from the Included Links/Nodes or Excluded Links/Nodes lists.

g. Click Up or Down to set the sequence of the nodes and spans included in the circuit.

h. Repeat these substeps for each node or link that you want to include in the circuit route.

i. Click Finish, or, if Review Route Before Creation is checked in the Routing Preferences pane, click Next.

Step 15 In the Review Route pane (available only if Review Route Before Creation is checked), do the following:

a. In the circuit display, review the ID of the source and destination NEs.

b. Included Spans—Because automatic route selection is enabled in the Routing Preferences pane, Prime Optical automatically selects spans to route the circuit. This field lists all the spans that the Prime Optical server selected automatically.

c. Selected Span—Displays the following information about the span selected in the Included Spans list:

From—Span source

To—Span destination

Source STS—STS value

VT—VT time slot


Note If you selected VT as the circuit type in the Attributes pane, chose Review Route Before Creation in the Routing Preferences pane, and selected VT Tunnel on Transit Nodes in the VT Options pane, the VT tunnel is created regardless of whether or not you are finished provisioning the circuit. Even if you click the Back button in the Review Route pane and change the VT circuit options, the newly created VT tunnel will not be deleted.


d. (Optional) You can review and modify the automatic route that is selected for circuit creation. Click Add to change the automatically selected route by adding a route to the Selected Spans list. Click Remove to remove a route from the list.

e. Click Finish.

Step 16 In the message box, click OK.


Caution It takes several seconds to create a circuit. During that interval, if a new circuit is added with the same name, both circuits might be identified as duplicates. Therefore, be careful not to add a duplicate circuit during the creation of the first circuit.


7.2.3.2  Creating a Regular or Open-Ended VCAT Circuit

This section describes how to create regular and open-ended VCAT circuits (STS-v, VT-v, VC_HO_PATH_VCAT_CIRCUIT, or VC_LO_PATH_VCAT_CIRCUIT).

Prime Optical supports open-ended VCAT circuits that originate on Ethernet or ML-series cards. The destination can be OC-n or STM-n cards. You can route open-ended VCAT circuits to or from any of the cards or ports where VCAT circuits originate or terminate. Compared to a standard VCAT circuit, an open-ended VCAT circuit has only one VCG.

VCAT and open-ended VCAT circuits are supported on the following cards:

CE-100T-8—Supported on ONS 15454 SONET NEs

CE-MR-6—Supported on ONS 15310 MA SONET and ONS 15310 MA SDH NEs

CE-MR-10—Supported on ONS 15454 SONET and ONS 15454 SDH NEs

E100-WAN-8, GigE-WAN-2, STM-1-1-8-LC—Regular VCAT circuits are supported on ONS 15305 CTC NEs


Note Open-ended VCAT circuits are not supported on ONS 15305 CTC NEs.


FCMR—Supported on ONS 15454 SONET and ONS 15454 SDH NEs

ML1000, ML100T, ML-MR-10—Supported on ONS 15454 SONET and ONS 15454 SDH NEs

ML-100T-8—Supported on ONS 15310 CL, ONS 15310 MA SONET, and ONS 15310 MA SDH NEs


Note Each card supports a different number of members. You can create only bidirectional, revertive/nonrevertive, high-order/low-order path circuits. Prime Optical can route the circuits automatically, or you can route them manually. Also, all members can be routed through a single fiber, or you can specify a split-fiber routing preference. You must choose a destination for each member.


Complete the following steps to create a VCAT or open-ended VCAT circuit:


Step 1 Select a node for which to create a circuit, and open the Create Circuit wizard. For an explanation of wizard launch points, see Table 7-4.

Step 2 In the Type pane, select STS-v, VT-v, VC_HO_PATH_VCAT_CIRCUIT, or VC_LO_PATH_VCAT_CIRCUIT.

For SDH nodes:

LO_VCAT circuits from an ONS 15454 SDH CE-100T-8 card to a 15305 E-100 card, and a CE-MR-10 card to another CE-MR-10, ML-series, G1000, or OCn card are supported for VCAT circuits

LO_VCAT (VC3) circuits between a GigE-WAN-2 and ML1000 card (number of members = 2), and between a GigE-WAN-2 card and CE-100T-8 card (number of members = 1) are supported for VCAT circuits

Step 3 In the Number of Circuits field, enter the number of circuits you want to create. The Cisco default is 1. If you enter a number higher than 1, you can use autoranging to create the additional circuits automatically.


Note You can create only one VCAT circuit at a time.


Step 4 In the Attributes pane, enter the following information; then, click Next:

Name—Enter a unique name for the new circuit. For VCAT circuits, the circuit name is a free-format string, up to 44 ASCII characters. If you leave the field blank, Prime Optical assigns a default name to the circuit.

Circuit Alias—Enter a unique alias name for the new circuit. The alias name can contain alphanumeric characters. International character sets are also supported.

Description—Enter a circuit description of up to 256 characters.

Type—Displays the circuit type.

Bidirectional—In this release, only bidirectional VCAT circuits are supported.

State—Specify IS, OOS_DSBLD, OOS_MT, IS_AINS, or OOS_OOG (Out of Service-Out of Group).

Apply to source/destination ports—Check this check box to apply the selected state to the source and destination ports.

Symmetric—Display only.

Open VCAT—Check this check box to create an open-ended VCAT circuit. You cannot use open-ended VCAT circuits to create L2 topologies.

Member Size—Select the size of the member for the VCAT circuit. This is the unit for VCAT circuit size.

Number of Members—Select the number of members (for the member size previously selected). Different cards support different numbers of members with different sizes.

Mode—Select the LCAS mode (None, Sw-LCAS, or LCAS) for the VCAT circuit. If you select a mode other than None, only the cards supporting the LCAS mode selected are listed for the source and destination selection.

Protected Drops—Check this check box if you want the circuit routed to protected drops only; that is, to cards that are in 1:1, 1:N, or 1+1 protection.

Provision working go and return on primary path (bidirectional UPSR/SNCP protection only)—Check this check box to provision the working path to go and return to the primary path.

Path Selectors—If the circuit will be routed on an SNCP node, set the defaults as follows:

Revertive—Check this check box if you want traffic to revert to the working path when the conditions that diverted it to the protect path are repaired. If Revertive is not chosen, traffic remains on the protect path.

Reversion time—If Revertive is checked, set the reversion time. This is the amount of time that elapses before the traffic reverts to the working path. Traffic can revert when conditions causing the switch are cleared. (The Cisco default reversion time is 5 minutes.)

SF threshold—Choose from 1 E-3, 1 E-4, or 1 E-5.

SD threshold—Choose from 1 E-5, 1 E-6, 1 E-7, 1 E-8, or 1 E-9.

Switch on PDI-P—Not applicable.

Customer ID (optional)—Identify the end user of the circuit.

Service ID (optional)—Enter the service ID of the circuit.


Note The customer ID and service ID for the VCAT circuit are applied to all member circuits.


Step 5 In the Source pane, set the circuit source. The options displayed depend on the circuit type, the circuit properties selected in the Attributes pane, and the cards installed on the node. Enter the following information; then, click Next:

NE ID—Select from the list of available TPs to specify the source TP.

Source—Specify the following:

Source slot.

Port.

Member—Available only if the source slot is a CE-MR-10 card in Manual mode. Click Edit Members to add or remove member CTP(s) of the source TP. In the Member Selection dialog box, you can use the Add button to move the CTP(s) to the Selected CTPs list, use the Remove button to move the CTP(s) to the Available CTPs list, or click Up or Down to reorder the Selected CTPs list. Click OK to close the Member Selection dialog box.

Step 6 In the Destination pane (available for regular VCAT circuits), set the circuit destination. The options displayed depend on the circuit type, the circuit properties selected in the Attributes pane, and the cards installed on the node. Enter the following information; then, click Next:

NE ID—Select from the list of available TPs to specify the destination TP.

Source—Specify the following:

Destination slot.

Port.

Member—Available only if the source slot is a CE-MR-10 card in Manual mode. Click Edit Members to add or remove member CTP(s) of the source TP. In the Member Selection dialog box, you can use the Add button to move the CTP(s) to the Selected CTPs list, use the Remove button to move the CTP(s) to the Available CTPs list, or click Up or Down to reorder the Selected CTPs list. Click OK to close the Member Selection dialog box.

Step 7 In the Members Destination pane (available for open-ended VCAT circuits), do the following; then, click Next:

a. Specify the destinations:

To specify only the first member destination, check the Autoranged check box; Prime Optical will automatically choose the remaining destinations. (Note that you will lose previous selections if you switch to Autoranged.) When Autoranged is enabled, available consecutive endpoints are returned, starting from the endpoint that you selected. The destination endpoints can be on different ports only if the source endpoint supports split routing.

To specify all of the destinations, leave the Autoranged check box unchecked.

b. In the VCAT Member Number list box, select the member number to create.

c. If you want to create a secondary destination, check the Use Secondary Destination check box. Then, specify the NE ID, subnetwork ID, slot, port, STS, VC, and VT for the primary and secondary destinations.


Note The Use Secondary Destination check box is dimmed if the source endpoint does not support split routing.


d. Click the Add Destination button to save the selected endpoint for the member number shown in the VCAT Member Number list box.

e. Click the Show Destinations button to launch a table that shows all of the open-ended VCAT primary and secondary destinations by VCAT member number.

Step 8 In the Routing Preferences pane, do the following; then, click Next:

a. Route Automatically—Enable or disable automatic route selection. If enabled, Prime Optical automatically determines the route for the circuit. If the source and destination of the circuit are on the same node, automatic routing is enabled. If disabled, you can specify the spans associated with the circuit. You can manually provision the circuit using one of the following views:

Graphical

Graphical Enhanced

Textual

b. Using Required Nodes/Links—(Available only if Route Automatically is checked) Check this check box to let Prime Optical automatically route the circuit through the required nodes and/or links. You can specify the required nodes and links using one of the following views:

Graphical

Graphical Enhanced

Textual

c. Review Route Before Creation—(Available only if Route Automatically is checked) Check this check box to review the route before it is created. You can review the route using one of the following views:

Graphical

Graphical Enhanced

d. Time Slot Restriction—If checked, you can enter an STS/VC4 value (to be used end-to-end) that Prime Optical uses to automatically determine the route for the circuit. Circuit creation fails if the same STS/VC4 is not available end-to-end. If circuit creation fails, you can try again using different values. The valid range is from 1 to 192 for SONET, or from 1 to 64 for SDH networks.


Note For VCAT circuits, you must enter multiple STS/VC4 values in the Member Preferences table > Time Slot Restriction field. The STS/VC4 values that you enter in the Time Slot Restriction field cannot be identical, or circuit creation will fail with an error message.


e. Select the routing preference for VCAT members. If all members are to be routed on a single fiber, choose Common Fiber Routing. If members are to be routed through different fibers in case one fiber does not have sufficient bandwidth, choose Split Routing.

f. Specify the following member preferences:

Number—Select the member number, a unique number from 1 to 256.

Name—Edit the name for the member circuit. By default, VCAT-NAME_Default MemberNumber is the member name, where VCAT-NAME is the parent VCAT circuit name being created.

Protection—Select the protection mechanism for member circuits:

Fully Protected—To route the circuit on a protected path, choose Fully Protected (default). A fully protected circuit route is created based on the diversity option you choose. Fully protected paths might or might not have UPSR/SNCP path segments with primary and alternate paths. The path diversity options apply only to UPSR/SNCP path segments, if any exist.

Unprotected—To create an unprotected circuit, choose Unprotected.

PCA—To route the circuit on a PCA route, choose PCA. PCA circuits are unprotected. Once you enable PCA, a label reading PCA will appear on the link.

DRI—To configure dual ring interconnect protection on a VCAT circuit, choose DRI. All VCAT members must share the same DRI protection type. You cannot assign DRI protection when textual manual provisioning is enabled.

Node Diversity—Select node diversity for each member circuit.

Diverse SRLG—Select True if fully protected circuits will be routed through working or protected links that do not share risk groups.

g. If you selected Fully Protected Path, choose one of the following options:

Required—Ensures that the primary and alternate paths within the extended UPSR/SNCP mesh network portions of the complete circuit path are nodally diverse.

Desired—Specifies that node diversity is preferred; however, if node diversity is not possible, link-diverse paths are created for the extended UPSR/SNCP mesh network portion of the complete circuit path.

Link Diverse Only—Specifies that only link-diverse primary and alternate paths for extended UPSR/SNCP mesh network portions of the complete circuit path are needed.

N/A (Not Applicable)—Prime Optical does not support Dual Ring Interconnect.


Note Node diversity can be set for each member when Fully Protected is selected and Split Fiber Routing is selected.


Step 9 In the Manual Provisioning pane (available when Route Automatically is unchecked and the Graphical or Graphical Enhanced radio button is selected), do the following; then, click Next:

a. (Applicable if the Graphical Enhanced radio button is selected) Select one of the following top-level view types from the Selected View Type list:

Subnetwork—Allows you to view the subnetwork(s) to which the NEs belong. This is the default view type.

Group—Allows you to view the group(s) to which the NEs belong.

The Current View field is set to Top.

b. (Applicable if the Graphical Enhanced radio button is selected) Select a detailed view type from the Available Views list, or right-click a subnetwork or group and choose View. The Current View field is set to the detailed view type that you selected.

In a complex network, it might take several minutes or longer to calculate and display the graphic objects in the map view. The progress bar at the top of the map tracks the percentage of completion while the map is updated.

c. Use the map view to manually route the circuit from the source to the destination specified by the addition of the links selected. Use the right-click menu options to navigate within the map view:

Find Node—Opens the Find Node dialog box, which lists all of the nodes displayed in the map view. Select a node from the drop-down list and click OK. The selection context in the map view changes to show the selected node highlighted in the visible map area.

Zoom In—Allows you to zoom in on an object in the map view.

Zoom Out—Allows you to zoom out on the map view.

Reset Zoom—Resets the current zoom level to the default.

Add—Allows you to add the selected span. Right-click a link and choose Add in the right-click menu. The selected link is added to the Available Spans list. The Add option applies to manual provisioning across all circuit types.

d. In the VCAT Member Number list box, select the member for which the route is to be selected.

e. In the circuit display, select the span to use for the next hop.

f. In the Available Spans area, complete the following information:

From—Displays the source of the span

To—Displays the destination of the span

g. Click Add. The span is added to the Selected Spans list.

h. Repeat substeps d to f for each intermediate NE until the destination NE is reached.

i. Repeat substeps c to g for each member until all members are routed.

j. To delete a span from the Selected Spans area, select a span from the Selected Spans list and click Remove.


Note To specify a DRI link, double-click the link on the map. The map view displays the link as bidirectional.


k. (For BLSR DRI or MS-SPRing DRI circuits) In the BLSR DRI Nodes or MS-SPRing DRI Nodes tab, click the Add button to open the BLSR/MS-SPRing DRI dialog box, which allows you to provide primary and secondary pairs for traditional and nontraditional DRI circuits. Also specify ring and path options for the first and second rings. Click Remove to remove a DRI node from the list.


Note If the Graphical Enhanced radio button is selected and you want to change the top-level view type at any time, click Top View. The map view reverts to the default Subnetwork view type.


Step 10 In the Manual Provisioning pane (available when Route Automatically is unchecked and the Textual radio button is selected), do the following; then, click Next:

a. Specify the following:

Src NE ID—Display only.

Dest NE ID—Display only.

Current NE ID—Display only.

Adj NE ID—Display only.

Available Links—Lists all links between the currently selected and adjacent NEs. Select a link from the drop-down list.

Available Spans—After you select a link from the Available Links drop-down list, its corresponding details are displayed in the Available Spans pane. Click Add to move the spans to the Selected Spans field.

Selected Spans—Select one or more spans and click Remove to remove them from the Selected Spans field.

b. Click Next Hop to specify the next intermediate hop; then, repeat substep a.

c. Click Reset to reset all hop information to the default values.

d. Click Alternate Route to specify hop information for the alternate circuit route.

Step 11 In the Route Constraints pane (available when Route Automatically and Using Required Nodes/Links are enabled and the Graphical or Graphical Enhanced radio button is selected), a graphical representation of the circuit is displayed, including source and destination nodes. Select the member from the Member list box at the top of the pane. For common fiber routing, there is no Member list box, because constraints are applied to all the members. In split fiber routing, you can select different constraints for different members by selecting a member and then selecting spans or NEs to be included or excluded for routing the circuit. Specify the nodes or links to include in the circuit route. Complete the following substeps:

a. (Applicable if the Graphical Enhanced radio button is selected) Select one of the following top-level view types from the Selected View Type list:

Subnetwork—Allows you to view the subnetwork(s) to which the NEs belong. This is the default view type.

Group—Allows you to view the group(s) to which the NEs belong.

The Current View field is set to Top.

b. (Applicable if the Graphical Enhanced radio button is selected) Select a detailed view type from the Available Views list, or right-click a subnetwork or group and choose View. The Current View field is set to the detailed view type that you selected.

In a complex network, it might take several minutes or longer to calculate and display the graphic objects in the map view. The progress bar at the top of the map tracks the percentage of completion while the map is updated.

c. In the VCAT Member Number list box, select the member for which constraints are to be selected.

d. In the circuit display, select the node or link. The NE ID or link ID is displayed in the Selected Node/Link field.

e. Click Include to include the selected node or link in the route. The node or link appears in the Included Links/Nodes list.

f. Click Exclude to exclude the selected node or link from the route. The node or link appears in the Excluded Links/Nodes list.

g. Click Remove to remove the selected node or link from the Included Links/Nodes or Excluded Links/Nodes lists.

h. Click Up or Down to set the sequence of the nodes and spans included in the circuit.

i. Repeat substeps d to h for each node or link that you want to include in the circuit route.

j. (Optional) Repeat substeps c to i for each member.

k. Click Finish, or, if Review Route Before Creation is checked in the Routing Preferences pane, click Next.


Note If the Graphical Enhanced radio button is selected and you want to change the top-level view type at any time, click Top View. The map view reverts to the default Subnetwork view type.


Step 12 In the Route Constraints pane (available when Route Automatically and Using Required Nodes/Links are enabled and the Textual radio button is selected), specify the nodes or links to include in each hop of the circuit route. Complete the following substeps:

a. Select Nodes in the Select Nodes/Links area if you want to add nodes to your circuit route; then, specify the node information in the Select Nodes area.

b. Select Links in the Select Nodes/Links area if you want to add links to your circuit route; then, specify the link information in the Select Links area.

c. Click Add to add a BLSR-DRI or MS-SPring-DRI to the circuit route.

d. Click Include to include the selected node or link in the route. The node or link appears in the Included Links/Nodes list.

e. Click Exclude to exclude the selected node or link from the route. The node or link appears in the Excluded Links/Nodes list.

f. Click Remove to remove the selected node or link from the Included Links/Nodes or Excluded Links/Nodes lists.

g. Click Up or Down to set the sequence of the nodes and spans included in the circuit.

h. Repeat substeps a to e for each node or link that you want to include in the circuit route.

i. Click Finish, or, if Review Route Before Creation is checked in the Routing Preferences pane, click Next.

Step 13 In the Review Route pane (available only if Review Route Before Creation is checked), do the following:


Note Member routing information is displayed when a particular member is selected from the list box.


a. In the VCAT Member Number list box, select the member.

b. In the circuit display, review the ID of the source and destination NEs.

c. Included Spans—Because automatic route selection is enabled in the Routing Preferences pane, Prime Optical automatically selects spans to route the circuit. This field lists all the spans that the Prime Optical server selected automatically.

d. Selected Span—Review the span information.

e. (Optional) You can review and modify the automatic route that is selected for circuit creation. Click Add to change the automatically selected route by adding a route to the Selected Spans list. Click Remove to remove a route from the list.

f. Click Finish.

Step 14 In the message box, click OK. The VCAT or open-ended VCAT circuit is displayed in the Circuit table.


7.2.3.3  Creating a VC_HO_Path_Circuit

The E1-N-14 card, STM-N cards, and Ethernet cards all use high-order path circuits. You can create unidirectional or bidirectional, revertive or nonrevertive, high-order path circuits. Prime Optical can route the circuits automatically, or you can route them manually. The E3-12 and DS3i-N-12 cards use VC low-order path tunnels.


Step 1 Select a node for which to create a circuit, and open the Create Circuit wizard. For an explanation of wizard launch points, see Table 7-4.

Step 2 In the Type pane, choose VC_HO_Path_Circuit. The circuit type determines the provisioning options that are displayed. In the Number of Circuits field, enter the number of circuits you want to create. The Cisco default is 1. If you enter a number higher than 1, you can use autoranging to create the additional circuits automatically.

Step 3 Click Next.

Step 4 In the Attributes pane, enter the following information; then, click Next:

Name—Enter a unique name for the new circuit. The circuit name is a free-format string of up to 48 ASCII characters. If you leave the field blank, Prime Optical assigns a default name to the circuit.

Circuit Alias—Enter a unique alias name for the new circuit. The alias name can contain alphanumeric characters. International character sets are also supported.

Description—Enter a circuit description of up to 256 characters.

Size—Select the circuit size. VC high-order path circuits can be VC4, VC4-2c, VC4-3c, VC4-4c, VC4-8c, VC4-16c, or VC4-64c for optical cards and for some Ethernet cards (depending on the card type). Of the Ethernet cards, only the G-1000 can use VC4-3c, VC4-8c, and VC4-16c. The "c" indicates concatenated VC4s.

Bidirectional—Check this check box to create a two-way circuit; uncheck it to create a one-way circuit.

State—Specify the circuit state. Options vary depending on the type of circuit selected.

Apply to source/destination ports—Check this check box to apply the selected state to the source and destination ports.

Protected Drops—Check this check box if you want the circuit routed to protected drops only; that is, to cards that are in 1:1, 1:N, or 1+1 protection.

Provision working go and return on primary path (bidirectional UPSR/SNCP protection only)—Check this check box to provision the working path to go and return to the primary path.


Note Prime Optical currently provisions unidirectional SNCP/UPSR circuits following the GR-1400 standard. For bidirectional SNCP/UPSR circuits, you can check the Provision working go and return on primary path check box to route the working and protect paths in one direction following the ITU-T G.841 standard. Unidirectional UPSR/SNCP circuits are not affected by this new routing, and the shortest path is always used as the working path.


Path Selectors (SNCP Protection Only)—If the circuit will be routed on an SNCP node, set the defaults as follows:

Revertive—Check this check box if you want traffic to revert to the working path when the conditions that diverted it to the protect path are repaired. If Revertive is not chosen, traffic remains on the protect path.

Reversion time—If Revertive is checked, set the reversion time. This is the amount of time that elapses before the traffic reverts to the working path. Traffic can revert when conditions causing the switch are cleared. (The Cisco default reversion time is 5 minutes.)

SF threshold—Choose from 1 E-3, 1 E-4, or 1 E-5.

SD threshold—Choose from 1 E-5, 1 E-6, 1 E-7, 1 E-8, or 1 E-9.

Switch on PDI-P—Not applicable.

Customer ID (optional)—Identify the end user of the circuit.

Service ID (optional)—Enter the service ID of the circuit.

Step 5 In the Source pane, set the circuit source. The options displayed depend on the circuit type, the circuit properties selected in the Attributes pane, and the cards installed in the node. Click Use Secondary Source if you want to create an SNCP bridge/selector circuit entry point in a multivendor SNCP.

Step 6 Click Next.

Step 7 In the Destination pane, set the circuit destination. The options displayed depend on the circuit type, the circuit properties selected in the Attributes pane, and the cards installed in the node. Click Use Secondary Destination if you want to create a circuit destination point for unidirectional/bidirectional circuits.

Step 8 Click Next.

Step 9 In the Routing Preferences pane, do the following; then, click Next:

a. Route Automatically—Enable or disable automatic route selection. If enabled, Prime Optical automatically determines the route for the circuit. If the source and destination of the circuit are on the same node, automatic routing is enabled. If disabled, you can specify the spans associated with the circuit. You can manually provision the circuit using one of the following views:

Graphical

Graphical Enhanced

Textual

b. Using Required Nodes/Links—(Available only if Route Automatically is checked) Check this check box to let Prime Optical automatically route the circuit through the required nodes and/or links. You can specify the required nodes and links using one of the following views:

Graphical

Graphical Enhanced

Textual

c. Review Route Before Creation—(Available only if Route Automatically is checked) Check this check box to review the route before it is created. You can review the route using one of the following views:

Graphical

Graphical Enhanced

d. Time Slot Restriction—If checked, you can enter an STS/VC4 value (to be used end-to-end) that Prime Optical uses to automatically determine the route for the circuit. Circuit creation fails if the same STS/VC4 is not available end-to-end. If circuit creation fails, you can try again using different values. The valid range is from 1 to 192 for SONET, or from 1 to 64 for SDH networks.


Note For VCAT circuits, you must enter multiple STS/VC4 values in the Member Preferences table > Time Slot Restriction field. The STS/VC4 values that you enter in the Time Slot Restriction field cannot be identical, or circuit creation will fail with an error message.


e. Set the circuit path protection as follows:

To route the circuit on a protected path, leave the Fully Protected Path check box checked (default) and proceed to the next substep. A fully protected circuit route is created based on the path diversity option you choose. Fully protected paths might or might not have SNCP path segments with primary and alternate paths. The path diversity options apply only to SNCP path segments, if any exist.

To create an unprotected circuit, uncheck Fully Protected Path and go to Step 10.

To route the circuit on an MS-SPRing protection channel, uncheck Fully Protected Path, check Protection Channel Access, and go to Step 10.

f. If you selected Fully Protected Path, choose one of the following options:

Required—Ensures that the primary and alternate paths within the extended SNCP mesh network portions of the complete circuit path are nodally diverse.

Desired—Specifies that node diversity is preferred; however, if node diversity is not possible, link-diverse paths are created for the extended SNCP mesh network portion of the complete circuit path.

Don't Care: Link Diverse Only—Specifies that only link-diverse primary and alternate paths for extended SNCP mesh network portions of the complete circuit path are needed.

Dual Ring Interconnect—Provisions the circuit in a DRI topology. If selected, the other node specifications (Required, Desired, and Don't Care: Link Diverse Only) are disabled.

Diverse Shared Risk Link Group—If checked, fully protected circuits are routed through working and protected links that do not share risk groups.

g. Overlay Ring—Check this check box if your configuration uses multiple cross-connections per node, and you want to provision the circuit across multiple rings. An overlay ring circuit traverses at least one node more than once and results in multiple cross-connections per node, per circuit. An overlay ring circuit can be protected or unprotected. Note that Prime Optical does not support a configuration where the source or destination node requires multiple cross-connections.

Step 10 In the Manual Provisioning pane (available when Route Automatically is unchecked and the Graphical or Graphical Enhanced radio button is selected), do the following; then, click Next:

a. (Applicable if the Graphical Enhanced radio button is selected) Select one of the following top-level view types from the Selected View Type list:

Subnetwork—Allows you to view the subnetwork(s) to which the NEs belong. This is the default view type.

Group—Allows you to view the group(s) to which the NEs belong.

The Current View field is set to Top.

b. (Applicable if the Graphical Enhanced radio button is selected) Select a detailed view type from the Available Views list, or right-click a subnetwork or group and choose View. The Current View field is set to the detailed view type that you selected.

In a complex network, it might take several minutes or longer to calculate and display the graphic objects in the map view. The progress bar at the top of the map tracks the percentage of completion while the map is updated.

c. Use the map view to manually route the circuit from the source to the destination specified by the addition of the links selected. Use the right-click menu options to navigate within the map view:

Find Node—Opens the Find Node dialog box, which lists all of the nodes displayed in the map view. Select a node from the drop-down list and click OK. The selection context in the map view changes to show the selected node highlighted in the visible map area.

Zoom In—Allows you to zoom in on an object in the map view.

Zoom Out—Allows you to zoom out on the map view.

Reset Zoom—Resets the current zoom level to the default.

Add—Allows you to add the selected span. Right-click a link and choose Add in the right-click menu. The selected link is added to the Available Spans list. The Add option applies to manual provisioning across all circuit types.

d. In the VCAT Member Number list box, select the member for which the route is to be selected.

e. In the circuit display, select the span to use for the next hop.

f. In the Available Spans area, complete the following information:

From—Displays the source of the span

To—Displays the destination of the span

g. Click Add. The span is added to the Selected Spans list.

h. Repeat substeps d to f for each intermediate NE until the destination NE is reached.

i. Repeat substeps c to g for each member until all members are routed.

j. To delete a span from the Selected Spans area, select a span from the Selected Spans list and click Remove.


Note To specify a DRI link, double-click the link on the map. The map view displays the link as bidirectional.


k. (For BLSR DRI or MS-SPRing DRI circuits) In the BLSR DRI Nodes or MS-SPRing DRI Nodes tab, click the Add button to open the BLSR/MS-SPRing DRI dialog box, which allows you to provide primary and secondary pairs for traditional and nontraditional DRI circuits. Also specify ring and path options for the first and second rings. Click Remove to remove a DRI node from the list.


Note To specify a DRI link, double-click the link on the map. The map view displays the link as bidirectional.


l. (For BLSR DRI or MS-SPRing DRI circuits) In the BLSR DRI Nodes or MS-SPRing DRI Nodes tab, click the Add button to open the BLSR/MS-SPRing DRI dialog box, which allows you to provide primary and secondary pairs for traditional and nontraditional DRI circuits. Also specify ring and path options for the first and second rings. Click Remove to remove a DRI node from the list.


Note If the Graphical Enhanced radio button is selected and you want to change the top-level view type at any time, click Top View. The map view reverts to the default Subnetwork view type.


Step 11 In the Manual Provisioning pane (available when Route Automatically is unchecked and the Textual radio button is selected), do the following; then, click Next:

a. Specify the following:

Src NE ID—Display only.

Dest NE ID—Display only.

Current NE ID—Display only.

Adj NE ID—Display only.

Available Links—Lists all links between the currently selected and adjacent NEs. Select a link from the drop-down list.

Available Spans—After you select a link from the Available Links drop-down list, its corresponding details are displayed in the Available Spans pane. Click Add to move the spans to the Selected Spans field.

Selected Spans—Select one or more spans and click Remove to remove them from the Selected Spans field.

b. Click Next Hop to specify the next intermediate hop; then, repeat substep a.

c. Click Reset to reset all hop information to the default values.

d. Click Alternate Route to specify hop information for the alternate circuit route.

Step 12 In the Route Constraints pane (available when Route Automatically and Using Required Nodes/Links are enabled and the Graphical or Graphical Enhanced radio button is selected), a graphical representation of the circuit is displayed, including source and destination nodes. Specify the spans that will route to the circuit. Prime Optical starts at the source node. The next NE associated with each span is also displayed. Complete the following substeps:

a. (Applicable if the Graphical Enhanced radio button is selected) Select one of the following top-level view types from the Selected View Type list:

Subnetwork—Allows you to view the subnetwork(s) to which the NEs belong. This is the default view type.

Group—Allows you to view the group(s) to which the NEs belong.

The Current View field is set to Top.

b. (Applicable if the Graphical Enhanced radio button is selected) Select a detailed view type from the Available Views list, or right-click a subnetwork or group and choose View. The Current View field is set to the detailed view type that you selected.

In a complex network, it might take several minutes or longer to calculate and display the graphic objects in the map view. The progress bar at the top of the map tracks the percentage of completion while the map is updated.

c. In the circuit display, select the node or link. The NE ID or link ID is displayed in the Selected Node/Link field.

d. Click Include to include the selected node or link in the route. The node or link appears in the Included Links/Nodes list.

e. Click Exclude to exclude the selected node or link from the route. The node or link appears in the Excluded Links/Nodes list.

f. Click Remove to remove the selected node or link from the Included Links/Nodes or Excluded Links/Nodes lists.

g. Click Up or Down to set the sequence of the nodes and spans included in the circuit.

h. Repeat substeps c to g for each node or link that you want to include in the circuit route.

i. (Optional) Repeat substeps c to h for each intermediate NE until the destination NE is reached.

j. Click Finish, or, if Review Route Before Creation is checked in the Routing Preferences pane, click Next.


Note If the Graphical Enhanced radio button is selected and you want to change the top-level view type at any time, click Top View. The map view reverts to the default Subnetwork view type.


Step 13 In the Route Constraints pane (available when Route Automatically and Using Required Nodes/Links are enabled and the Textual radio button is selected), specify the nodes or links to include in each hop of the circuit route. Complete the following substeps:

a. Select Nodes in the Select Nodes/Links area if you want to add nodes to your circuit route; then, specify the node information in the Select Nodes area.

b. Select Links in the Select Nodes/Links area if you want to add links to your circuit route; then, specify the link information in the Select Links area.

c. Click Add to add a BLSR-DRI or MS-SPring-DRI to the circuit route.

d. Click Include to include the selected node or link in the route. The node or link appears in the Included Links/Nodes list.

e. Click Exclude to exclude the selected node or link from the route. The node or link appears in the Excluded Links/Nodes list.

f. Click Remove to remove the selected node or link from the Included Links/Nodes or Excluded Links/Nodes lists.

g. Click Up or Down to set the sequence of the nodes and spans included in the circuit.

h. Repeat substeps a to e for each node or link that you want to include in the circuit route.

i. Click Finish, or, if Review Route Before Creation is checked in the Routing Preferences pane, click Next.

Step 14 In the Review Route pane (available only if Review Route Before Creation is checked), review the following information; then, click Finish:

a. In the circuit display, review the ID of the source and destination NEs.

b. Included Spans—Because automatic route selection is enabled in the Routing Preferences pane, Prime Optical automatically selects spans to route the circuit. This field lists all the spans that the Prime Optical server selected automatically.

c. Selected Span—Review the span information.

Step 15 In the message box, click OK.


7.2.3.4  Creating a VC_LO_Path_Circuit


Step 1 Select a node for which to create a circuit, and open the Create Circuit wizard. For an explanation of wizard launch points, see Table 7-4.

Step 2 In the Type pane, choose VC_LO_Path_Circuit. The circuit type determines the provisioning options that are displayed. In the Number of Circuits field, enter the number of circuits you want to create. The Cisco default is 1. If you enter a number higher than 1, you can use autoranging to create the additional circuits automatically.

Step 3 Click Next.

Step 4 In the Attributes pane, enter the following information; then, click Next:

Name—Enter a unique name for the new circuit. The circuit name is a free-format string of up to 48 ASCII characters. If you leave the field blank, Prime Optical assigns a default name to the circuit.

Circuit Alias—Enter a unique alias name for the new circuit. The alias name can contain alphanumeric characters. International character sets are also supported.

Description—Enter a circuit description of up to 256 characters.

Size—Select VC3, VC11, or VC12.

Bidirectional—Check this check box to create a two-way circuit; uncheck it to create a one-way circuit.

State—Specify the circuit state. Options vary depending on the type of circuit selected.

Apply to source/destination ports—Check this check box to apply the selected state to the source and destination ports.

Protected Drops—Check this check box if you want the circuit routed to protected drops only; that is, to cards that are in 1:1, 1:N, or 1+1 protection.

Provision working go and return on primary path (bidirectional UPSR/SNCP protection only)—Check this check box to provision the working path to go and return to the primary path.


Note Prime Optical currently provisions unidirectional SNCP/UPSR circuits following the GR-1400 standard. For bidirectional SNCP/UPSR circuits, you can check the Provision working go and return on primary path check box to route the working and protect paths in one direction following the ITU-T G.841 standard. Unidirectional UPSR/SNCP circuits are not affected by this new routing, and the shortest path is always used as the working path.


SNCP path selector defaults—If the circuit will be routed on an SNCP node, set the defaults as follows:

Revertive—Check this check box if you want traffic to revert to the working path when the conditions that diverted it to the protect path are repaired. If Revertive is not chosen, traffic remains on the protect path.

Reversion time—If Revertive is checked, set the reversion time. This is the amount of time that elapses before the traffic reverts to the working path. Traffic can revert when conditions causing the switch are cleared. (The Cisco default reversion time is 5 minutes.)

SF threshold.

SD threshold.

Switch on PDI-P—Not applicable.

Customer ID (optional)—Identify the end user of the circuit.

Service ID (optional)—Enter the service ID of the circuit.

Step 5 In the Source pane, set the circuit source. The options displayed depend on the circuit type, the circuit properties selected in the Attributes pane, and the cards installed in the node. Click Use Secondary Source if you want to create an SNCP bridge/selector circuit entry point in a multivendor SNCP.

Step 6 Click Next.

Step 7 In the Destination pane, set the circuit destination. The options displayed depend on the circuit type, the circuit properties selected in the Attributes pane, and the cards installed in the node. Click Use Secondary Destination if you want to create a circuit destination point for unidirectional/bidirectional and VC_LO_Path_Circuits.

Step 8 Click Next.

Step 9 In the Routing Preferences pane, do the following; then, click Next:

a. Route Automatically—Enable or disable automatic route selection. If enabled, Prime Optical automatically determines the route for the circuit. If the source and destination of the circuit are on the same node, automatic routing is enabled. If disabled, you can specify the spans associated with the circuit. You can manually provision the circuit using one of the following views:

Graphical

Graphical Enhanced

Textual

b. Using Required Nodes/Links—(Available only if Route Automatically is checked) Check this check box to let Prime Optical automatically route the circuit through the required nodes and/or links. You can specify the required nodes and links using one of the following views:

Graphical

Graphical Enhanced

Textual

c. Review Route Before Creation—(Available only if Route Automatically is checked) Check this check box to review the route before it is created. You can review the route using one of the following views:

Graphical

Graphical Enhanced

d. Time Slot Restriction—If checked, you can enter an STS/VC4 value (to be used end-to-end) that Prime Optical uses to automatically determine the route for the circuit. Circuit creation fails if the same STS/VC4 is not available end-to-end. If circuit creation fails, you can try again using different values. The valid range is from 1 to 192 for SONET, or from 1 to 64 for SDH networks.


Note For VCAT circuits, you must enter multiple STS/VC4 values in the Member Preferences table > Time Slot Restriction field. The STS/VC4 values that you enter in the Time Slot Restriction field cannot be identical, or circuit creation will fail with an error message.


e. Set the circuit path protection as follows:

To route the circuit on a protected path, leave the Fully Protected Path check box checked (default) and proceed to the next substep. A fully protected circuit route is created based on the path diversity option you choose. Fully protected paths might or might not have SNCP path segments with primary and alternate paths. The path diversity options apply only to SNCP path segments, if any exist.

To create an unprotected circuit, uncheck Fully Protected Path and go to Step 10.

To route the circuit on an MS-SPRing protection channel, uncheck Fully Protected Path, check Protection Channel Access, and go to Step 10.

f. If you selected Fully Protected Path, choose one of the following options:

Required—Ensures that the primary and alternate paths within the extended SNCP mesh network portions of the complete circuit path are nodally diverse.

Desired—Specifies that node diversity is preferred; however, if node diversity is not possible, link-diverse paths are created for the extended SNCP mesh network portion of the complete circuit path.

Don't Care: Link Diverse Only—Specifies that only link-diverse primary and alternate paths for extended SNCP mesh network portions of the complete circuit path are needed.

Dual Ring Interconnect—Provisions the circuit in a DRI topology. If selected, the other node specifications (Required, Desired, and Don't Care: Link Diverse Only) are disabled.

Step 10 If you did not select Using Required Nodes/Links in Step 9, specify VC-LO circuit options. In the VC LO Options pane, choose one of the following radio buttons; then, click Finish (if you did not check Review Route Before Creation in Step 9) or Next (to view the spans included in the route in the Review Route pane):

a. VC LO Tunnel on transit nodes

b. VC LAP

Circuit source is VC4 grooming node

Circuit destination is VC4 grooming node

c. None

Step 11 If you created a VC LAP, in the VC LO Options pane, select the following; then, click Finish (if you did not check Review Route Before Creation in Step 9) or Next (to view the spans included in the route in the Review Route pane).

VC4 Grooming Node

VC LO Grooming Node

Step 12 In the Manual Provisioning pane (available when Route Automatically is unchecked and the Graphical or Graphical Enhanced radio button is selected), do the following; then, click Next:

a. (Applicable if the Graphical Enhanced radio button is selected) Select one of the following top-level view types from the Selected View Type list:

Subnetwork—Allows you to view the subnetwork(s) to which the NEs belong. This is the default view type.

Group—Allows you to view the group(s) to which the NEs belong.

The Current View field is set to Top.

b. (Applicable if the Graphical Enhanced radio button is selected) Select a detailed view type from the Available Views list, or right-click a subnetwork or group and choose View. The Current View field is set to the detailed view type that you selected.

In a complex network, it might take several minutes or longer to calculate and display the graphic objects in the map view. The progress bar at the top of the map tracks the percentage of completion while the map is updated.

c. Use the map view to manually route the circuit from the source to the destination specified by the addition of the links selected. Use the right-click menu options to navigate within the map view:

Find Node—Opens the Find Node dialog box, which lists all of the nodes displayed in the map view. Select a node from the drop-down list and click OK. The selection context in the map view changes to show the selected node highlighted in the visible map area.

Zoom In—Allows you to zoom in on an object in the map view.

Zoom Out—Allows you to zoom out on the map view.

Reset Zoom—Resets the current zoom level to the default.

Add—Allows you to add the selected span. Right-click a link and choose Add in the right-click menu. The selected link is added to the Available Spans list. The Add option applies to manual provisioning across all circuit types.

d. In the VCAT Member Number list box, select the member for which the route is to be selected.

e. In the circuit display, select the span to use for the next hop.

f. In the Available Spans area, complete the following information:

From—Displays the source of the span

To—Displays the destination of the span

g. Click Add. The span is added to the Selected Spans list.

h. Repeat substeps d to f for each intermediate NE until the destination NE is reached.

i. Repeat substeps c to g for each member until all members are routed.

j. To delete a span from the Selected Spans area, select a span from the Selected Spans list and click Remove.


Note To specify a DRI link, double-click the link on the map. The map view displays the link as bidirectional.


k. (For BLSR DRI or MS-SPRing DRI circuits) In the BLSR DRI Nodes or MS-SPRing DRI Nodes tab, click the Add button to open the BLSR/MS-SPRing DRI dialog box, which allows you to provide primary and secondary pairs for traditional and nontraditional DRI circuits. Also specify ring and path options for the first and second rings. Click Remove to remove a DRI node from the list.


Note If the Graphical Enhanced radio button is selected and you want to change the top-level view type at any time, click Top View. The map view reverts to the default Subnetwork view type.


Step 13 In the Manual Provisioning pane (available when Route Automatically is unchecked and the Textual radio button is selected), do the following; then, click Next:

a. Specify the following:

Src NE ID—Display only.

Dest NE ID—Display only.

Current NE ID—Display only.

Adj NE ID—Display only.

Available Links—Lists all links between the currently selected and adjacent NEs. Select a link from the drop-down list.

Available Spans—After you select a link from the Available Links drop-down list, its corresponding details are displayed in the Available Spans pane. Click Add to move the spans to the Selected Spans field.

Selected Spans—Select one or more spans and click Remove to remove them from the Selected Spans field.

b. Click Next Hop to specify the next intermediate hop; then, repeat substep a.

c. Click Reset to reset all hop information to the default values.

d. Click Alternate Route to specify hop information for the alternate circuit route.

Step 14 In the Route Constraints pane (available when Route Automatically and Using Required Nodes/Links are enabled and the Graphical or Graphical Enhanced radio button is selected), a graphical representation of the circuit is displayed, including source and destination nodes. Specify the spans that will route to the circuit. Prime Optical starts at the source node. The next NE associated with each span is also displayed. Complete the following substeps:

a. (Applicable if the Graphical Enhanced radio button is selected) Select one of the following top-level view types from the Selected View Type list:

Subnetwork—Allows you to view the subnetwork(s) to which the NEs belong. This is the default view type.

Group—Allows you to view the group(s) to which the NEs belong.

The Current View field is set to Top.

b. (Applicable if the Graphical Enhanced radio button is selected) Select a detailed view type from the Available Views list, or right-click a subnetwork or group and choose View. The Current View field is set to the detailed view type that you selected.

In a complex network, it might take several minutes or longer to calculate and display the graphic objects in the map view. The progress bar at the top of the map tracks the percentage of completion while the map is updated.

c. In the circuit display, select the node or link. The NE ID or link ID is displayed in the Selected Node/Link field.

d. Click Include to include the selected node or link in the route. The node or link appears in the Included Links/Nodes list.

e. Click Exclude to exclude the selected node or link from the route. The node or link appears in the Excluded Links/Nodes list.

f. Click Remove to remove the selected node or link from the Included Links/Nodes or Excluded Links/Nodes lists.

g. Click Up or Down to set the sequence of the nodes and spans included in the circuit.

h. Repeat substeps c to g for each node or link that you want to include in the circuit route.

i. (Optional) Repeat substeps c to h for each intermediate NE until the destination NE is reached.

j. Click Finish, or, if Review Route Before Creation is checked in the Routing Preferences pane, click Next.


Note If the Graphical Enhanced radio button is selected and you want to change the top-level view type at any time, click Top View. The map view reverts to the default Subnetwork view type.


Step 15 In the Route Constraints pane (available when Route Automatically and Using Required Nodes/Links are enabled and the Textual radio button is selected), specify the nodes or links to include in each hop of the circuit route. Complete the following substeps:

a. Select Nodes in the Select Nodes/Links area if you want to add nodes to your circuit route; then, specify the node information in the Select Nodes area.

b. Select Links in the Select Nodes/Links area if you want to add links to your circuit route; then, specify the link information in the Select Links area.

c. Click Add to add a BLSR-DRI or MS-SPring-DRI to the circuit route.

d. Click Include to include the selected node or link in the route. The node or link appears in the Included Links/Nodes list.

e. Click Exclude to exclude the selected node or link from the route. The node or link appears in the Excluded Links/Nodes list.

f. Click Remove to remove the selected node or link from the Included Links/Nodes or Excluded Links/Nodes lists.

g. Click Up or Down to set the sequence of the nodes and spans included in the circuit.

h. Repeat substeps a to e for each node or link that you want to include in the circuit route.

i. Click Finish, or, if Review Route Before Creation is checked in the Routing Preferences pane, click Next.

Step 16 In the Review Route pane (available only if Review Route Before Creation is checked), do the following:

a. In the circuit display, review the ID of the source and destination NEs.

b. Included Spans—Because automatic route selection is enabled in the Routing Preferences pane, Prime Optical automatically chooses spans to route the circuit. This field lists all the spans that the Prime Optical server selected automatically.

c. Selected Span—Review the span information.

d. (Optional) You can review and modify the automatic route that is selected for circuit creation. Click Add to change the automatically selected route by adding a route to the Selected Spans list. Click Remove to remove a route from the list.

e. Click Finish.

Step 17 In the message box, click OK.


7.2.3.5  Creating a VC_LO_Path_Tunnel


Step 1 Select a node for which to create a circuit, and open the Create Circuit wizard. For an explanation of wizard launch points, see Table 7-4.

Step 2 In the Type pane, choose VC_LO_Path_Tunnel. The circuit type determines the provisioning options that are displayed. The E3-12 and DS3i-N-12 cards must use VC low-order path tunnels. In the Number of Circuits field, enter the number of circuits you want to create. The Cisco default is 1. If you enter a number higher than 1, you can use autoranging to create the additional circuits automatically. Check the For VC3 Port Grouping Only check box to create VC low-order path tunnels for port grouping.

Step 3 Click Next.

Step 4 In the Attributes pane, enter the following information; then, click Next:

Name—Enter a unique name for the new circuit. The circuit name is a free-format string of up to 48 ASCII characters. If you leave the field blank, Prime Optical assigns a default name to the circuit.

Circuit Alias—Enter a unique alias name for the new circuit. The alias name can contain alphanumeric characters. International character sets are also supported.

Description—Enter a circuit description of up to 256 characters.

Size—For VC_LO_Path_Tunnel, VC4 is the default setting.

Bidirectional—For VC_LO_Path_Tunnel, Bidirectional is the default setting.

State—Specify the circuit state. Options vary depending on the type of circuit selected.

Apply to source/destination ports—Check this check box to apply the selected state to the source and destination ports.

Protected Drops—Check this check box if you want the circuit routed to protected drops only; that is, to cards that are in 1:1, 1:N, or 1+1 protection.

Provision working go and return on primary path—Check this check box to provision the working path to go and return to the primary path.

SNCP path selector defaults—If the circuit will be routed on an SNCP node, set the defaults as follows:

Revertive—Check this check box if you want traffic to revert to the working path when the conditions that diverted it to the protect path are repaired. If Revertive is not chosen, traffic remains on the protect path.

Reversion time—If Revertive is checked, set the reversion time. This is the amount of time that elapses before the traffic reverts to the working path. Traffic can revert when conditions causing the switch are cleared. (The Cisco default reversion time is 5 minutes.)

SF threshold—Choose from 1 E-3, 1 E-4, or 1 E-5.

SD threshold—Choose from 1 E-5, 1 E-6, 1 E-7, 1 E-8, or 1 E-9.

Switch on PDI-P—Not applicable.

Customer ID (optional)—Identify the end user of the circuit.

Service ID (optional)—Enter the service ID of the circuit.

Step 5 In the Source pane, set the circuit source. The options displayed depend on the circuit type, the circuit properties selected in the Attributes pane, and the cards installed in the node. Click Use Secondary Source if you want to create an SNCP bridge/selector circuit entry point in a multivendor SNCP.

Step 6 Click Next.

Step 7 In the Destination pane, set the circuit destination. The options displayed depend on the circuit type, the circuit properties selected in the Attributes pane, and the cards installed in the node. Click Use Secondary Destination if you want to create a circuit destination point for unidirectional/bidirectional.

Step 8 Click Next.

Step 9 If port grouping is disabled, do the following in the Routing Preferences pane; then, click Next:

a. Route Automatically—Enable or disable automatic route selection. If enabled, Prime Optical automatically determines the route for the circuit. If the source and destination of the circuit are on the same node, automatic routing is enabled. If disabled, you can specify the spans associated with the circuit. You can manually provision the circuit using one of the following views:

Graphical

Graphical Enhanced

Textual


Note Route Automatically is disabled if port grouping is enabled.


b. Using Required Nodes/Links—(Available only if Route Automatically is checked) Check this check box to let Prime Optical automatically route the circuit through the required nodes and/or links. You can specify the required nodes and links using one of the following views:

Graphical

Graphical Enhanced

Textual

c. Review Route Before Creation—(Available only if Route Automatically is checked) Check this check box to review the route before it is created. You can review the route using one of the following views:

Graphical

Graphical Enhanced

d. Time Slot Restriction—If checked, you can enter an STS/VC4 value (to be used end-to-end) that Prime Optical uses to automatically determine the route for the circuit. Circuit creation fails if the same STS/VC4 is not available end-to-end. If circuit creation fails, you can try again using different values. The valid range is from 1 to 192 for SONET, or from 1 to 64 for SDH networks.

Step 10 Set the circuit path protection as follows:

To route the circuit on a protected path, leave the Fully Protected Path check box checked (default) and go to Step 11. A fully protected circuit route is created based on the path diversity option you choose. Fully protected paths might or might not have SNCP path segments with primary and alternate paths. The path diversity options apply only to SNCP path segments, if any exist.

To create an unprotected circuit, uncheck Fully Protected Path and go to Step 12.

To route the circuit on an MS-SPRing protection channel, uncheck Fully Protected Path, check Protection Channel Access, and go to Step 12.

Step 11 If you selected Fully Protected Path, choose one of the following options:

Required—Ensures that the primary and alternate paths within the extended SNCP mesh network portions of the complete circuit path are nodally diverse.

Desired—Specifies that node diversity is preferred; however, if node diversity is not possible, link-diverse paths are created for the extended SNCP mesh network portion of the complete circuit path.

Don't Care: Link Diverse Only—Specifies that only link-diverse primary and alternate paths for extended SNCP mesh network portions of the complete circuit path are needed.

Step 12 In the Manual Provisioning pane (available when Route Automatically is unchecked and the Graphical or Graphical Enhanced radio button is selected), do the following; then, click Next:

a. (Applicable if the Graphical Enhanced radio button is selected) Select one of the following top-level view types from the Selected View Type list:

Subnetwork—Allows you to view the subnetwork(s) to which the NEs belong. This is the default view type.

Group—Allows you to view the group(s) to which the NEs belong.

The Current View field is set to Top.

b. (Applicable if the Graphical Enhanced radio button is selected) Select a detailed view type from the Available Views list, or right-click a subnetwork or group and choose View. The Current View field is set to the detailed view type that you selected.

In a complex network, it might take several minutes or longer to calculate and display the graphic objects in the map view. The progress bar at the top of the map tracks the percentage of completion while the map is updated.

c. Use the map view to manually route the circuit from the source to the destination specified by the addition of the links selected. Use the right-click menu options to navigate within the map view:

Find Node—Opens the Find Node dialog box, which lists all of the nodes displayed in the map view. Select a node from the drop-down list and click OK. The selection context in the map view changes to show the selected node highlighted in the visible map area.

Zoom In—Allows you to zoom in on an object in the map view.

Zoom Out—Allows you to zoom out on the map view.

Reset Zoom—Resets the current zoom level to the default.

Add—Allows you to add the selected span. Right-click a link and choose Add in the right-click menu. The selected link is added to the Available Spans list. The Add option applies to manual provisioning across all circuit types.

d. In the VCAT Member Number list box, select the member for which the route is to be selected.

e. In the circuit display, select the span to use for the next hop.

f. In the Available Spans area, complete the following information:

From—Displays the source of the span

To—Displays the destination of the span

g. Click Add. The span is added to the Selected Spans list.

h. Repeat substeps d to f for each intermediate NE until the destination NE is reached.

i. Repeat substeps c to g for each member until all members are routed.

j. To delete a span from the Selected Spans area, select a span from the Selected Spans list and click Remove.


Note To specify a DRI link, double-click the link on the map. The map view displays the link as bidirectional.


k. (For BLSR DRI or MS-SPRing DRI circuits) In the BLSR DRI Nodes or MS-SPRing DRI Nodes tab, click the Add button to open the BLSR/MS-SPRing DRI dialog box, which allows you to provide primary and secondary pairs for traditional and nontraditional DRI circuits. Also specify ring and path options for the first and second rings. Click Remove to remove a DRI node from the list.


Note If the Graphical Enhanced radio button is selected and you want to change the top-level view type at any time, click Top View. The map view reverts to the default Subnetwork view type.


Step 13 In the Manual Provisioning pane (available when Route Automatically is unchecked and the Textual radio button is selected), do the following; then, click Next:

a. Specify the following:

Src NE ID—Display only.

Dest NE ID—Display only.

Current NE ID—Display only.

Adj NE ID—Display only.

Available Links—Lists all links between the currently selected and adjacent NEs. Select a link from the drop-down list.

Available Spans—After you select a link from the Available Links drop-down list, its corresponding details are displayed in the Available Spans pane. Click Add to move the spans to the Selected Spans field.

Selected Spans—Select one or more spans and click Remove to remove them from the Selected Spans field.

b. Click Next Hop to specify the next intermediate hop; then, repeat substep a.

c. Click Reset to reset all hop information to the default values.

d. Click Alternate Route to specify hop information for the alternate circuit route.

Step 14 In the Route Constraints pane (available when Route Automatically and Using Required Nodes/Links are enabled and the Graphical or Graphical Enhanced radio button is selected), a graphical representation of the circuit is displayed, including source and destination nodes. Specify the spans that will route to the circuit. Prime Optical starts at the source node. The next NE associated with each span is also displayed. Complete the following substeps:

a. (Applicable if the Graphical Enhanced radio button is selected) Select one of the following top-level view types from the Selected View Type list:

Subnetwork—Allows you to view the subnetwork(s) to which the NEs belong. This is the default view type.

Group—Allows you to view the group(s) to which the NEs belong.

The Current View field is set to Top.

b. (Applicable if the Graphical Enhanced radio button is selected) Select a detailed view type from the Available Views list, or right-click a subnetwork or group and choose View. The Current View field is set to the detailed view type that you selected.

In a complex network, it might take several minutes or longer to calculate and display the graphic objects in the map view. The progress bar at the top of the map tracks the percentage of completion while the map is updated.

c. In the circuit display, select the node or link. The NE ID or link ID is displayed in the Selected Node/Link field.

d. Click Include to include the selected node or link in the route. The node or link appears in the Included Links/Nodes list.

e. Click Exclude to exclude the selected node or link from the route. The node or link appears in the Excluded Links/Nodes list.

f. Click Remove to remove the selected node or link from the Included Links/Nodes or Excluded Links/Nodes lists.

g. Click Up or Down to set the sequence of the nodes and spans included in the circuit.

h. Repeat substeps c to g for each node or link that you want to include in the circuit route.

i. (Optional) Repeat substeps c to h for each intermediate NE until the destination NE is reached.

j. Click Finish, or, if Review Route Before Creation is checked in the Routing Preferences pane, click Next.


Note If the Graphical Enhanced radio button is selected and you want to change the top-level view type at any time, click Top View. The map view reverts to the default Subnetwork view type.


Step 15 In the Route Constraints pane (available when Route Automatically and Using Required Nodes/Links are enabled and the Textual radio button is selected), specify the nodes or links to include in each hop of the circuit route. Complete the following substeps:

a. Select Nodes in the Select Nodes/Links area if you want to add nodes to your circuit route; then, specify the node information in the Select Nodes area.

b. Select Links in the Select Nodes/Links area if you want to add links to your circuit route; then, specify the link information in the Select Links area.

c. Click Add to add a BLSR-DRI or MS-SPring-DRI to the circuit route.

d. Click Include to include the selected node or link in the route. The node or link appears in the Included Links/Nodes list.

e. Click Exclude to exclude the selected node or link from the route. The node or link appears in the Excluded Links/Nodes list.

f. Click Remove to remove the selected node or link from the Included Links/Nodes or Excluded Links/Nodes lists.

g. Click Up or Down to set the sequence of the nodes and spans included in the circuit.

h. Repeat substeps a to e for each node or link that you want to include in the circuit route.

i. Click Finish, or, if Review Route Before Creation is checked in the Routing Preferences pane, click Next.

Step 16 In the Review Route pane (available only if Review Route Before Creation is checked), do the following:

a. In the circuit display, review the ID of the source and destination NEs.

b. Included Spans—Because automatic route selection is enabled in the Routing Preferences pane, Prime Optical automatically chooses spans to route the circuit. This field lists all the spans that the Prime Optical server selected automatically.

c. Selected Span—Review the span information.

d. (Optional) You can review and modify the automatic route that is selected for circuit creation. Click Add to change the automatically selected route by adding a route to the Selected Spans list. Click Remove to remove a route from the list.

e. Click Finish.

Step 17 In the message box, click OK.


7.2.3.6  Creating a VC_LO_Path_Aggregation Circuit


Step 1 Select a node for which to create a circuit, and open the Create Circuit wizard. For an explanation of wizard launch points, see Table 7-4.


Note VC_LO_path_aggregation circuits are not supported by the ONS 15305 CTC.


Step 2 In the Type pane, choose VC_LO_Path_Aggregation. The circuit type determines the provisioning options that are displayed. In the Number of Circuits field, enter the number of circuits you want to create. The Cisco default is 1. If you enter a number higher than 1, you can use autoranging to create the additional circuits automatically.

Step 3 Click Next.

Step 4 In the Attributes pane, enter the following information; then, click Next:

Name—Enter a unique name for the new circuit. The circuit name is a free-format string of up to 48 ASCII characters. If you leave the field blank, Prime Optical assigns a default name to the circuit.

Circuit Alias—Enter a unique alias name for the new circuit. The alias name can contain alphanumeric characters. International character sets are also supported.

Description—Enter a circuit description of up to 256 characters.

Size—For VC_LO_Path_Aggregation, VC4 is the default setting.

Bidirectional—For VC_LO_Path_Aggregation, Bidirectional is the default setting.

State—Specify the circuit state. Options vary depending on the type of circuit selected.

Apply to source/destination ports—Check this check box to apply the selected state to the source and destination ports.

Protected Drops—Check this check box if you want the circuit routed to protected drops only; that is, to cards that are in 1:1, 1:N, or 1+1 protection.

SNCP path selector defaults—If the circuit will be routed on an SNCP node, set the defaults as follows:

Revertive—Check this check box if you want traffic to revert to the working path when the conditions that diverted it to the protect path are repaired. If Revertive is not chosen, traffic remains on the protect path.

Reversion time—If Revertive is checked, set the reversion time. This is the amount of time that elapses before the traffic reverts to the working path. Traffic can revert when conditions causing the switch are cleared. (The Cisco reversion time is 5 minutes.)

SF threshold—Choose from 1 E-3, 1 E-4, or 1 E-5.

SD threshold—Choose from 1 E-5, 1 E-6, 1 E-7, 1 E-8, or 1 E-9.

Switch on PDI-P—Not applicable.

Customer ID (optional)—Identify the end user of the circuit.

Service ID (optional)—Enter the service ID of the circuit.

Step 5 In the Source pane, set the circuit source. The options displayed depend on the circuit type, the circuit properties selected in the Attributes pane, and the cards installed in the node.

Step 6 Click Next.

Step 7 In the Destination pane, enter the appropriate information for the circuit destination.

Step 8 Click Next.

Step 9 In the Routing Preferences pane, do the following; then, click Next:

a. Route Automatically—Enable or disable automatic route selection. If enabled, Prime Optical automatically determines the route for the circuit. If the source and destination of the circuit are on the same node, automatic routing is enabled. If disabled, you can specify the spans associated with the circuit. You can manually provision the circuit using one of the following views:

Graphical

Graphical Enhanced

Textual

b. Using Required Nodes/Links—(Available only if Route Automatically is checked) Check this check box to let Prime Optical automatically route the circuit through the required nodes and/or links. You can specify the required nodes and links using one of the following views:

Graphical

Graphical Enhanced

Textual

c. Review Route Before Creation—(Available only if Route Automatically is checked) Check this check box to review the route before it is created. You can review the route using one of the following views:

Graphical

Graphical Enhanced

d. Time Slot Restriction—If checked, you can enter an STS/VC4 value (to be used end-to-end) that Prime Optical uses to automatically determine the route for the circuit. Circuit creation fails if the same STS/VC4 is not available end-to-end. If circuit creation fails, you can try again using different values. The valid range is from 1 to 192 for SONET, or from 1 to 64 for SDH networks.


Note For VCAT circuits, you must enter multiple STS/VC4 values in the Member Preferences table > Time Slot Restriction field. The STS/VC4 values that you enter in the Time Slot Restriction field cannot be identical, or circuit creation will fail with an error message.


e. Set the circuit path protection as follows:

To route the circuit on a protected path, leave the Fully Protected Path check box checked (default) and proceed to the next substep. A fully protected circuit route is created based on the path diversity option you choose. Fully protected paths might or might not have SNCP path segments with primary and alternate paths. The path diversity options apply only to SNCP path segments, if any exist.

To create an unprotected circuit, uncheck Fully Protected Path and go to Step 10.

To route the circuit on an MS-SPRing protection channel, uncheck Fully Protected Path, check Protection Channel Access, and go to Step 10.

f. If you selected Fully Protected Path, choose one of the following options:

Required—Ensures that the primary and alternate paths within the extended SNCP mesh network portions of the complete circuit path are nodally diverse.

Desired—Specifies that node diversity is preferred; however, if node diversity is not possible, link-diverse paths are created for the extended SNCP mesh network portion of the complete circuit path.

Don't Care: Link Diverse Only—Specifies that only link-diverse primary and alternate paths for extended SNCP mesh network portions of the complete circuit path are needed.

Dual Ring Interconnect—Provisions the circuit in a DRI topology. If selected, the other node specifications (Required, Desired, and Don't Care: Link Diverse Only) are disabled.

Step 10 In the Manual Provisioning pane (available when Route Automatically is unchecked and the Graphical or Graphical Enhanced radio button is selected), do the following; then, click Next:

a. (Applicable if the Graphical Enhanced radio button is selected) Select one of the following top-level view types from the Selected View Type list:

Subnetwork—Allows you to view the subnetwork(s) to which the NEs belong. This is the default view type.

Group—Allows you to view the group(s) to which the NEs belong.

The Current View field is set to Top.

b. (Applicable if the Graphical Enhanced radio button is selected) Select a detailed view type from the Available Views list, or right-click a subnetwork or group and choose View. The Current View field is set to the detailed view type that you selected.

In a complex network, it might take several minutes or longer to calculate and display the graphic objects in the map view. The progress bar at the top of the map tracks the percentage of completion while the map is updated.

c. Use the map view to manually route the circuit from the source to the destination specified by the addition of the links selected. Use the right-click menu options to navigate within the map view:

Find Node—Opens the Find Node dialog box, which lists all of the nodes displayed in the map view. Select a node from the drop-down list and click OK. The selection context in the map view changes to show the selected node highlighted in the visible map area.

Zoom In—Allows you to zoom in on an object in the map view.

Zoom Out—Allows you to zoom out on the map view.

Reset Zoom—Resets the current zoom level to the default.

Add—Allows you to add the selected span. Right-click a link and choose Add in the right-click menu. The selected link is added to the Available Spans list. The Add option applies to manual provisioning across all circuit types.

d. In the VCAT Member Number list box, select the member for which the route is to be selected.

e. In the circuit display, select the span to use for the next hop.

f. In the Available Spans area, complete the following information:

From—Displays the source of the span

To—Displays the destination of the span

g. Click Add. The span is added to the Selected Spans list.

h. Repeat substeps d to f for each intermediate NE until the destination NE is reached.

i. Repeat substeps c to g for each member until all members are routed.

j. To delete a span from the Selected Spans area, select a span from the Selected Spans list and click Remove.


Note To specify a DRI link, double-click the link on the map. The map view displays the link as bidirectional.


k. (For BLSR DRI or MS-SPRing DRI circuits) In the BLSR DRI Nodes or MS-SPRing DRI Nodes tab, click the Add button to open the BLSR/MS-SPRing DRI dialog box, which allows you to provide primary and secondary pairs for traditional and nontraditional DRI circuits. Also specify ring and path options for the first and second rings. Click Remove to remove a DRI node from the list.


Note If the Graphical Enhanced radio button is selected and you want to change the top-level view type at any time, click Top View. The map view reverts to the default Subnetwork view type.


Step 11 In the Manual Provisioning pane (available when Route Automatically is unchecked and the Textual radio button is selected), do the following; then, click Next:

a. Specify the following:

Src NE ID—Display only.

Dest NE ID—Display only.

Current NE ID—Display only.

Adj NE ID—Display only.

Available Links—Lists all links between the currently selected and adjacent NEs. Select a link from the drop-down list.

Available Spans—After you select a link from the Available Links drop-down list, its corresponding details are displayed in the Available Spans pane. Click Add to move the spans to the Selected Spans field.

Selected Spans—Select one or more spans and click Remove to remove them from the Selected Spans field.

b. Click Next Hop to specify the next intermediate hop; then, repeat substep a.

c. Click Reset to reset all hop information to the default values.

d. Click Alternate Route to specify hop information for the alternate circuit route.

Step 12 In the Route Constraints pane (available when Route Automatically and Using Required Nodes/Links are enabled and the Graphical or Graphical Enhanced radio button is selected), a graphical representation of the circuit is displayed, including source and destination nodes. Specify the spans that will route to the circuit. Prime Optical starts at the source node. The next NE associated with each span is also displayed. Complete the following substeps:

a. (Applicable if the Graphical Enhanced radio button is selected) Select one of the following top-level view types from the Selected View Type list:

Subnetwork—Allows you to view the subnetwork(s) to which the NEs belong. This is the default view type.

Group—Allows you to view the group(s) to which the NEs belong.

The Current View field is set to Top.

b. (Applicable if the Graphical Enhanced radio button is selected) Select a detailed view type from the Available Views list, or right-click a subnetwork or group and choose View. The Current View field is set to the detailed view type that you selected.

In a complex network, it might take several minutes or longer to calculate and display the graphic objects in the map view. The progress bar at the top of the map tracks the percentage of completion while the map is updated.

c. In the circuit display, select the node or link. The NE ID or link ID is displayed in the Selected Node/Link field.

d. Click Include to include the selected node or link in the route. The node or link appears in the Included Links/Nodes list.

e. Click Exclude to exclude the selected node or link from the route. The node or link appears in the Excluded Links/Nodes list.

f. Click Remove to remove the selected node or link from the Included Links/Nodes or Excluded Links/Nodes lists.

g. Click Up or Down to set the sequence of the nodes and spans included in the circuit.

h. Repeat substeps c to g for each node or link that you want to include in the circuit route.

i. (Optional) Repeat substeps c to h for each intermediate NE until the destination NE is reached.

j. Click Finish, or, if Review Route Before Creation is checked in the Routing Preferences pane, click Next.


Note If the Graphical Enhanced radio button is selected and you want to change the top-level view type at any time, click Top View. The map view reverts to the default Subnetwork view type.


Step 13 In the Route Constraints pane (available when Route Automatically and Using Required Nodes/Links are enabled and the Textual radio button is selected), specify the nodes or links to include in each hop of the circuit route. Complete the following substeps:

a. Select Nodes in the Select Nodes/Links area if you want to add nodes to your circuit route; then, specify the node information in the Select Nodes area.

b. Select Links in the Select Nodes/Links area if you want to add links to your circuit route; then, specify the link information in the Select Links area.

c. Click Add to add a BLSR-DRI or MS-SPring-DRI to the circuit route.

d. Click Include to include the selected node or link in the route. The node or link appears in the Included Links/Nodes list.

e. Click Exclude to exclude the selected node or link from the route. The node or link appears in the Excluded Links/Nodes list.

f. Click Remove to remove the selected node or link from the Included Links/Nodes or Excluded Links/Nodes lists.

g. Click Up or Down to set the sequence of the nodes and spans included in the circuit.

h. Repeat substeps a to e for each node or link that you want to include in the circuit route.

i. Click Finish, or, if Review Route Before Creation is checked in the Routing Preferences pane, click Next.

Step 14 In the Review Route pane (available only if Review Route Before Creation is checked), do the following:

a. In the circuit display, review the ID of the source and destination NEs.

b. Included Spans—Because automatic route selection is enabled in the Routing Preferences pane, Prime Optical automatically selects spans to route the circuit. This field lists all the spans that the Prime Optical server selected automatically.

c. Selected Span—Review the span information.

d. (Optional) You can review and modify the automatic route that is selected for circuit creation. Click Add to change the automatically selected route by adding a route to the Selected Spans list. Click Remove to remove a route from the list.

e. Click Finish.

Step 15 In the message box, click OK.


7.2.3.7  Creating a DWDM OCHNC—ONS 15454 MSTP

Prime Optical creates an OCHNC between two optical nodes upon a specified C-band wavelength through the ports residing on the 32WSS, 40-WSS-C, 40-WSS-CE, 32DMX, 40-DMX-C, 40-DMX-CE, 40-SMR1-C, 40-SMR2-C, 80-WXC-C, 15216-MD-40-EVEN, and 15216-MD-40-ODD wavelength selective switches, multiplexers, demultiplexers, and add/drop cards.


Note You cannot create an OCHNC DCN circuit from Prime Optical. You must use CTC to create OCHNC DCN circuits.


Step 1 Select a node for which to create a circuit, and open the Create Circuit wizard. For an explanation of wizard launch points, see Table 7-4.

Step 2 In the Type pane, choose OCHNC. The circuit type determines the provisioning options that are displayed.

Step 3 Check the Generalized Multiprotocol Label Switching (GMPLS) check box (only if you require GMPLS provisioning) and click Next.

Step 4 In the Attributes pane, enter the following information; then, click Next:

Name—Enter a unique name for the new circuit. The circuit name is a free-format string of up to 48 ASCII characters. If you leave the field blank, Prime Optical assigns a default name to the circuit.


Note This field is mandatory if the GMPLS check box (for OCHxx circuits only) is checked.


Circuit Alias—Enter a unique alias name for the new circuit. The alias name can contain alphanumeric characters. International character sets are also supported.

Description—Enter a circuit description of up to 256 characters.

Size—Display only. Displays Equipment Not Specific.

OCHNC Wavelength—Choose the OCHNC wavelength that you want to provision. The Wavelength column lists the correct wavelengths, depending on the type of card and the band selected.

Channel Group—Choose the channel group that you want to provision.

Use OCHNC Direction—Choose whether or not to specify the OCHNC direction. Select the check box to allow you to specify the circuit direction (for NEs up to and including R6.0) in the OCHNC Direction drop-down list. If the check box is unchecked (for R7.0 NEs and later releases), the OCHNC Direction drop-down list is disabled.

OCHNC Direction—Choose whether the OCHNC direction is east-to-west to west-to-east.

Bidirectional—Check this check box to create a bidirectional OCHNC, or uncheck it to create a unidirectional OCHNC. Bidirectional circuits have been supported since CTM R5.0.

State—Specify the circuit state.

Protection—Check to create a protected OCHNC. There are two possible scenarios, depending on whether the GMPLS check box is unchecked or checked.

When the GMPLS check box is unchecked:

Protected—Check this check box to select source/destination ports from protected cards only (TXPP/MXPP).

When the GMPLS check box is checked:

GMPLS Protection Type—Set the protection type. Values are:

- Not Defined—For unprotected services.

- PSM—When a PSM card is connected to a TXP card.

Optical Validation—Set the validation mode:

- Validation—Set the validation mode. See Table 7-7 for a listing of validation modes.

- Required—Set the optical validation threshold value for the GMPLS circuit for the working path. The circuit is created if the actual optical validation result is greater than or equal to the value set in this field. See Table 7-8 for a listing of validation threshold values.

- Required (protect)—Set the optical validation threshold value for the protected GMPLS circuit for the protected path.

Table 7-7 Validation Modes 

Validation Mode
Description

Full

The circuit is created when the circuit validation result is greater than or equal to the acceptance threshold value.

None

The circuit is created without considering the acceptance threshold value. The Opt Valid column in the Circuits tab displays the value "No Valid."


The GMPLS control plane validates the optical feasibility of an OCH circuit to ensure that the circuit is operational after provisioning. Optical feasibility is determined based on optical impairments. Table 7-8 describes the validation thresholds.

Table 7-8 Validation Thresholds 

Color
Description

Green

Indicates that the channel failure risk is 0%.

Yellow

Indicates that the channel failure risk is between 0% and 16%.

Orange

Indicates that the channel failure risk is between 16% and 50%.

Red

Indicates that the channel failure risk is greater that 50%.


Customer ID (optional)—Identify the end user of the circuit.

Service ID (optional)—Enter the service ID of the circuit.


Note The remaining fields in the Attributes pane are unavailable.


Step 5 In the Source pane, set the circuit source (shelf, slot, or port; shelf only in the case of NEs configured as multishelf); then, click Next.

When you select OCHNC as the circuit type, you can also select a local drop endpoint along with the circuit source when the OCHNC is bidirectional.


NoteIf the Use OCHNC Direction check box was unchecked (for R7.0 NEs and later) in Step 4, you must select a shelf, slot, and port. If the Use OCHNC Direction check box was checked (for R6.0 NEs and earlier), you need only select the source NE.

The OCHNC circuit endpoints must be selected on channel ports, express add/drop ports, or add/drop ports. If other ports are selected, a warning is displayed, prompting you to change the circuit type.


The Circuit Wizard can manage the alien wavelength for the source and destination panels. After the ports are selected, if the GMPLS check box is checked, the Alien Wavelength Selection pane is displayed, showing options for the RX and TX channels at the endpoints of the circuit.

To add an alien wavelength to the circuit wizard in the Alien Wavelength Selection pane:

a. From the Alien Wavelength drop-down list, choose Alien Wavelength.

b. From the FEC drop-down list, choose the Forward Error Correction (FEC) mode.

c. Click Add to add the alien wavelength for both the RX and TX channels. See Creating Alien Wavelength and Editing Alien Wavelength for more information.

The alien wavelength is added and displayed in the circuit wizard.

d. Click Apply in the Alien Wavelength Selection pane to save the settings.


Note The Alien Wavelength is applicable only for OCHNC services. An OCHNC GMPLS service can be provisioned only if the corresponding alien wavelength has been configured.


Step 6 For R6.0 NEs and earlier, click Finish. For R7.0 NEs and later, proceed to Step 7.

Step 7 In the Destination pane, enter the circuit destination information; then, click Next.

When you select OCHNC as the circuit type, you can also select a local source endpoint along with the circuit destination when the circuit is bidirectional.


Note In the Routing Preferences pane, some check boxes are checked and cannot be unchecked.


Step 8 In the Routing Preferences pane, the Route Automatically check box is checked by default. You can finish circuit creation at this point by clicking Finish. Alternatively, you can do the following; then, click Next:

a. Using Required Nodes/Links—Check this check box to let Prime Optical automatically route the circuit through the required nodes and/or links. You can specify the required nodes and links using one of the following views:

Graphical

Graphical Enhanced

Textual

b. Review Route Before Creation—Check this check box to review the route before it is created. You can review the route using one of the following views:

Graphical

Graphical Enhanced

Step 9 In the Route Constraints pane (available when Route Automatically and Using Required Nodes/Links are enabled and the Graphical or Graphical Enhanced radio button is selected), a graphical representation of the network is displayed, including source and destination nodes. You can add route constraints in this pane. Complete the following substeps:

a. (Applicable if the Graphical Enhanced radio button is selected) Select one of the following top-level view types from the Selected View Type list:

Subnetwork—Allows you to view the subnetwork(s) to which the NEs belong. This is the default view type.

Group—Allows you to view the group(s) to which the NEs belong.

The Current View field is set to Top.

b. (Applicable if the Graphical Enhanced radio button is selected) Select a detailed view type from the Available Views list, or right-click a subnetwork or group and choose View. The Current View field is set to the detailed view type that you selected.

In a complex network, it might take several minutes or longer to calculate and display the graphic objects in the map view. The progress bar at the top of the map tracks the percentage of completion while the map is updated.

c. In the circuit display, select the node or link. The NE ID or link ID is displayed in the Selected Node/Link field.

d. Click Include to include the selected node in the route. The node appears in the Included Nodes list.

e. Click Exclude to exclude the selected node from the route. The node appears in the Excluded Nodes list.

f. Click Remove to remove the selected node from the Included Nodes or Excluded Nodes lists.

g. Click Up or Down to set the sequence of the nodes and spans included in the circuit.

h. (Optional) Select an NE from the Included Nodes list and click Side. Specify the in/out sides to be included in the route and click OK.

i. Repeat substeps c to h for each node or link that you want to include in the circuit route.

j. Click Finish, or, if Review Route Before Creation is checked in the Routing Preferences pane, proceed to Step 11.


Note If the Graphical Enhanced radio button is selected and you want to change the top-level view type at any time, click Top View. The map view reverts to the default Subnetwork view type.


Step 10 In the Route Constraints pane (available when Route Automatically and Using Required Nodes/Links are enabled and the Textual radio button is selected), specify the nodes or links to include in each hop of the circuit route. Complete the following substeps:

a. Select Nodes in the Select Nodes/Links area if you want to add nodes to your circuit route; then, specify the node information in the Select Nodes area.

b. Select Links in the Select Nodes/Links area if you want to add links to your circuit route; then, specify the link information in the Select Links area.

c. Click Add to add a BLSR-DRI or MS-SPring-DRI to the circuit route.

d. Click Include to include the selected node or link in the route. The node or link appears in the Included Links/Nodes list.

e. Click Exclude to exclude the selected node or link from the route. The node or link appears in the Excluded Links/Nodes list.

f. Click Remove to remove the selected node or link from the Included Links/Nodes or Excluded Links/Nodes lists.

g. Click Up or Down to set the sequence of the nodes and spans included in the circuit.

h. Repeat substeps a to e for each node or link that you want to include in the circuit route.

i. Click Finish, or, if Review Route Before Creation is checked in the Routing Preferences pane, proceed to Step 11.

Step 11 Click Next. The routing for the OCHNC circuit is calculated.

Step 12 In the Review Route pane, review the following information; then, click Finish:

a. In the circuit display, review the ID of the source and destination NEs.

b. Included Spans—Because automatic route selection is enabled in the Routing Preferences pane, Prime Optical automatically selects spans to route the circuit. This field lists all of the spans that the Prime Optical server selected automatically.

c. Selected Span—Review the span information.

Step 13 In the message box, click OK.

After the circuit status has been verified, the DISCOVERED status appears in the Status column of the circuit table.


Caution It takes several seconds to create a circuit. During that interval, if a new circuit is added with the same name, both circuits might be identified as duplicates. Therefore, be careful not to add a duplicate circuit during the creation of the first circuit.


7.2.3.8  Creating a DWDM OCHCC—ONS 15454 MSTP

Prime Optical allows you to create OCHCC circuits between two ONS 15454 MSTP NEs. OCHCC increases ONS 15454 MSTP platform functionalities, allowing you to create a new end-to-end circuit layer with transponder/muxponder client ports or ITU-T line card trunk ports as endpoints.

OCHCC can be created in a peer-to-peer setup, where the trunk ports are directly connected by a routable virtual link, or in an MSTP setup, where the circuit is routed through a tunnel circuit, which is created between the trunk ports (OCH trail tunnel), and which contains an OCHNC-type circuit.


Step 1 Select the source and destination nodes for which to create a circuit and open the Create Circuit wizard. For an explanation of wizard launch points, see Table 7-4.

Step 2 In the Type pane, choose OCHCC. The circuit type determines the provisioning options that are displayed.

Step 3 If you require GMPLS provisioning, check the GMPLS check box; then, click Next.

Step 4 In the Attributes pane, enter the following information; then, click Next:

Name—Enter a unique name for the new circuit. The circuit name is a free-format string of up to 48 ASCII characters. If you leave the field blank, Prime Optical assigns a default name to the circuit.


Note This field is mandatory if the GMPLS check box (for OCHxx circuits only) is checked.


Circuit Alias—Enter a unique alias name for the new circuit. The alias name can contain alphanumeric characters. International character sets are also supported.

Description—Enter a circuit description of up to 256 characters.

Type—Display only. Displays the circuit type.

Size Group—Choose the type of interface that you want to provision. Size Group and Size are used together to select the circuit size. (Because there are many possible sizes, they have been grouped.)

Size—Choose the layer rate.

OCHCC Wavelength—Choose the OCHCC wavelength that you want to provision.

Channel Group—Choose the channel group that you want to provision.

Bidirectional—Display only. OCHCC circuits are always bidirectional.

State—Specify the circuit state.

Apply to source/destination ports, if allowed—Check this check box to apply the status value indicated for the circuit to the client/trunk ports that are involved in the circuit.

Protection—Check to create a protected OCHCC. There are two possible scenarios, depending on whether the GMPLS check box is unchecked or checked.

When the GMPLS check box is unchecked:

Protected—Check this check box to select source/destination ports from protected cards only (TXPP/MXPP).

When GMPLS check box is checked:

GMPLS Protection Type—Set the protection type. Values are:

- Not Defined—For unprotected services.

- PSM—When a PSM card is connected to a TXP card.

- Y CABLE—The circuit is protected by a transponder or muxponder card in a Y-cable protection group.

- SPLITTER—When a MXPP/TXPP card is used. The circuit source and destination are on MXPP_MR_2.5G and TXPP_MR_2.5G cards. These cards provides splitter (line-level) protection (trunk protection typically on TXPP or MXPP transponder cards).

Optical Validation—Set the validation mode.

- Validation—Set the validation mode. See Table 7-7 for a listing of validation modes.

- Required—Set the optical validation threshold value for the GMPLS circuit for the working path. The circuit is created if the actual optical validation result is greater than or equal to the value set in this field. See Table 7-8 for a listing of validation thresholds.

- Required (protect)—Set the optical validation threshold value for the protected GMPLS circuit for the protected path.

Customer ID (optional)—Identify the end user of the circuit.

Service ID (optional)—Enter the service ID of the circuit.

Step 5 In the Source pane, select the circuit source (shelf, slot, card, and port; shelf applies to multishelf NEs). Then, click Next.

Step 6 In the Destination pane, enter the circuit destination information; then, click Next.


Note Circuit creation will fail if the source or destination endpoints are in Unmanaged state. Circuit creation is not allowed between NEs in Out of Service or Unmanaged states.


Step 7 In the OCHxx Options pane, specify the following attributes for the trunk ports that are involved in the circuit; then, click Next:

G.709 OTN—Disables or enables the G.709 OTN feature.

FEC—Disables or enables forward error correction. G.709 OTN must be enabled before you can enable FEC.

SD BER—Sets the signal degrade bit error rate.

Mapping—The card can perform multiplexing per ITU-T G.709. The ODUk (client SONET/SDH payload) can be mapped to the optical channel (OTUk) either asynchronously (asynch mapping) or synchronously (synch mapping) with this setting.

OTU Mapping—Sets the client payload mapping to the trunk.

Revert/Reversion Time—Only for protected circuits (splitter-type protection).

If GMPLS check box is checked and if Y-cable is chosen as the protection type, the circuit wizard creates both the working and the protected paths in a single operation.

After a port is selected in the map as the source or destination endpoint, the Working Port Parameters pane, or Protected Port Parameters pane, or both are displayed depending on whether the selected ports are on the working or protect path. The working and protect port parameters on the source and destination endpoints must match with each other. Otherwise, the mismatched parameters are displayed in red in the port parameters pane. If feasible, align the parameters by using the various drop-down lists available in this pane.

Define the working or protect port parameters. Click Apply in the Working Port Parameters pane and Protected Port Parameters pane, to apply the settings.

Step 8 In the Routing Preferences pane, the Route Automatically check box is checked by default. You can finish circuit creation at this point by clicking Finish. Alternatively, you can do the following; then, click Next:

a. Using Required Nodes/Links—Check this check box to let Prime Optical automatically route the circuit through the required nodes and/or links. You can specify the required nodes and links using one of the following views:

Graphical

Graphical Enhanced

Textual

b. Review Route Before Creation—Check this check box to review the route before it is created. You can review the route using one of the following views:

Graphical

Graphical Enhanced

Step 9 In the Route Constraints pane (available when Route Automatically and Using Required Nodes/Links are enabled and the Graphical or Graphical Enhanced radio button is selected), a graphical representation of the network is displayed, including source and destination nodes. You can add route constraints in this pane. Complete the following substeps:

a. (Applicable if the Graphical Enhanced radio button is selected) Select one of the following top-level view types from the Selected View Type list:

Subnetwork—Allows you to view the subnetwork(s) to which the NEs belong. This is the default view type.

Group—Allows you to view the group(s) to which the NEs belong.

The Current View field is set to Top.

b. (Applicable if the Graphical Enhanced radio button is selected) Select a detailed view type from the Available Views list, or right-click a subnetwork or group and choose View. The Current View field is set to the detailed view type that you selected.

In a complex network, it might take several minutes or longer to calculate and display the graphic objects in the map view. The progress bar at the top of the map tracks the percentage of completion while the map is updated.

c. In the circuit display, select the node or link. The NE ID or link ID is displayed in the Selected Node/Link field.

d. Click Include to include the selected node in the route. The node appears in the Included Nodes list.

e. Click Exclude to exclude the selected node from the route. The node appears in the Excluded Nodes list.

f. Click Remove to remove the selected node from the Included Nodes or Excluded Nodes lists.

g. Click Up or Down to set the sequence of the nodes and spans included in the circuit.

h. (Optional) Select an NE from the Included Nodes list and click Side. Specify the in/out sides to be included in the route and click OK.

i. (Optional) Click the Protected tab. Repeat substeps d through h. This allows you to provide different constraints for both working and protected paths.

j. Repeat substeps c to i for each node or link that you want to include in the circuit route.

k. Click Finish, or, if Review Route Before Creation is checked in the Routing Preferences pane, proceed to Step 11.


Note If the Graphical Enhanced radio button is selected and you want to change the top-level view type at any time, click Top View. The map view reverts to the default Subnetwork view type.


Step 10 In the Route Constraints pane (available when Route Automatically and Using Required Nodes/Links are enabled and the Textual radio button is selected), specify the nodes or links to include in each hop of the circuit route. Complete the following substeps:

a. Select Nodes in the Select Nodes/Links area if you want to add nodes to your circuit route; then, specify the node information in the Select Nodes area.

b. Select Links in the Select Nodes/Links area if you want to add links to your circuit route; then, specify the link information in the Select Links area.

c. Click Add to add a BLSR-DRI or MS-SPring-DRI to the circuit route.

d. Click Include to include the selected node or link in the route. The node or link appears in the Included Links/Nodes list.

e. Click Exclude to exclude the selected node or link from the route. The node or link appears in the Excluded Links/Nodes list.

f. Click Remove to remove the selected node or link from the Included Links/Nodes or Excluded Links/Nodes lists.

g. Click Up or Down to set the sequence of the nodes and spans included in the circuit.

h. Repeat substeps a to e for each node or link that you want to include in the circuit route.

i. Click Finish, or, if Review Route Before Creation is checked in the Routing Preferences pane, proceed to Step 11.

Step 11 Click Next. The routing for the OCHCC circuit is calculated.

Step 12 The Review Route pane displays the selected route. Click Finish to create the circuit, Back to return to the Route Constraints pane, or Cancel to cancel the circuit creation.

Step 13 In the message box, click OK. You can view the OCHCC circuit information in the Circuit table. See Viewing the Circuit Table. After the circuit status has been verified, the DISCOVERED status appears in the Status column of the circuit table. For a graphical representation of the circuit, view the circuit trace. See Tracing Circuits.


Caution It takes several seconds to create a circuit. During that interval, if a new circuit is added with the same name, both circuits might be identified as duplicates. Therefore, be careful not to add a duplicate circuit during the creation of the first circuit.


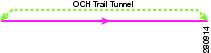
7.2.3.9  Creating a DWDM OCH Trail Circuit—ONS 15454 MSTP

Prime Optical allows you to create independent OCH trail circuits between two ONS 15454 MSTP NEs. For transponder and muxponder cards, OCH trail circuits are created automatically when an OCHCC is created. You can create independent OCH trail circuits for the following cards:

ADM-10G

Protection Switch Module (PSM)

XP_10GE, XP_GE (when configured as an L2 switch)

CRS-1 and ASR9k routers

For OCH trails connecting ADM-10G cards, the OCH trail provides the low-layer path to route STS or VC circuits over ADM-10G cards.

For OCH trails connecting GE_XP, 10GE_XP, GE_XPE, and 10GE_XPE cards in L2-over-DWDM mode, the OCH trail provides the links associated to the SVLAN entities.

For OCH trails connecting CRS-1 and ASR9k routers, the OCH trail provides end-to-end circuit connectivity between the CRS-1 and ASR9k routers passing through an MSTP network.

Complete the following steps to create a DWDM OCH trail circuit:


Step 1 Select a node for which to create a circuit, and open the Create Circuit wizard. For an explanation of wizard launch points, see Table 7-4.

Step 2 In the Type pane, choose OCHTRAIL. The circuit type determines the provisioning options that are displayed.

Step 3 If you require GMPLS provisioning, check the GMPLS check box; then, click Next.

Step 4 In the Attributes pane, enter the following information; then, click Next:

Name—Enter a unique name for the new circuit. The circuit name is a free-format string of up to 48 ASCII characters. If you leave the field blank, Prime Optical assigns a default name to the circuit.


Note This field is mandatory if the GMPLS check box (for OCHxx circuits only) is checked.


Circuit Alias—Enter a unique alias name for the new circuit. The alias name can contain alphanumeric characters. International character sets are also supported.

Description—Enter a circuit description of up to 256 characters.

Type—Display only.

Size—Display only.

OCHCC Wavelength—Choose the wavelength that you want to provision.

Channel Group—Choose the channel group that you want to provision.

Bidirectional—Display only. OCHCC circuits are always bidirectional.

State—Specify the circuit state.

Apply to source/destination ports, if allowed—Check this check box to apply the status value indicated for the circuit to the trunk ports that are involved in the circuit.

Protection—Displayed only when the GMPLS check box is checked.

GMPLS Protection Type—Choose the protection type. Value is Not Defined.

Optical Validation—Set the validation mode.

a. Validation—Choose the validation mode. The validation modes are listed in Table 7-7.

b. Required—Set the optical validation threshold value for the GMPLS circuit for the working path. The circuit is created if the actual optical validation result is greater than or equal to the value set in this field. The Validation Threshold values are listed in Table 7-8.

Customer ID (optional)—Identify the end user of the circuit.

Service ID (optional)—Enter the service ID of the circuit.

Step 5 In the Source pane, select the circuit source (shelf, slot, card, and port; shelf applies to multishelf NEs). Then, click Next.

Step 6 In the Destination pane, enter the circuit destination information; then, click Next.

Step 7 In the OCHxx Options pane, specify the following attributes for the trunk ports that are involved in the circuit; then, click Next.

G.709 OTN—Disables or enables the G.709 OTN feature.

FEC—Disables or enables forward error correction. G.709 OTN must be enabled before you can enable FEC.

SD BER—Sets the signal degrade bit error rate.

Mapping—The card can perform multiplexing per ITU-T G.709. The ODUk (client SONET/SDH payload) can be mapped to the optical channel (OTUk) either asynchronously (asynch mapping) or synchronously (synch mapping) with this setting.

Step 8 In the Routing Preferences pane, the Route Automatically check box is checked by default. You can finish circuit creation at this point by clicking Finish. Alternatively, you can do the following; then, click Next:

a. Using Required Nodes/Links—Check this check box to let Prime Optical automatically route the circuit through the required nodes and/or links. You can specify the required nodes and links using one of the following views:

Graphical

Graphical Enhanced

Textual

b. Review Route Before Creation—Check this check box to review the route before it is created. You can review the route using one of the following views:

Graphical

Graphical Enhanced

Step 9 In the Route Constraints pane (available when Route Automatically and Using Required Nodes/Links are enabled and the Graphical or Graphical Enhanced radio button is selected), a graphical representation of the network is displayed, including source and destination nodes. You can add route constraints in this pane. Complete the following substeps:

a. (Applicable if the Graphical Enhanced radio button is selected) Select one of the following top-level view types from the Selected View Type list:

Subnetwork—Allows you to view the subnetwork(s) to which the NEs belong. This is the default view type.

Group—Allows you to view the group(s) to which the NEs belong.

The Current View field is set to Top.

b. (Applicable if the Graphical Enhanced radio button is selected) Select a detailed view type from the Available Views list, or right-click a subnetwork or group and choose View. The Current View field is set to the detailed view type that you selected.

In a complex network, it might take several minutes or longer to calculate and display the graphic objects in the map view. The progress bar at the top of the map tracks the percentage of completion while the map is updated.

c. In the circuit display, select the node or link. The NE ID or link ID is displayed in the Selected Node/Link field.

d. Click Include to include the selected node in the route. The node appears in the Included Nodes list.

e. Click Exclude to exclude the selected node from the route. The node appears in the Excluded Nodes list.

f. Click Remove to remove the selected node from the Included Nodes or Excluded Nodes lists.

g. Click Up or Down to set the sequence of the nodes and spans included in the circuit.

h. (Optional) Select an NE from the Included Nodes list and click Side. Specify the in/out sides to be included in the route and click OK.

i. Repeat substeps c to h for each node or link that you want to include in the circuit route.

j. Click Finish, or, if Review Route Before Creation is checked in the Routing Preferences pane, proceed to Step 11.


Note If the Graphical Enhanced radio button is selected and you want to change the top-level view type at any time, click Top View. The map view reverts to the default Subnetwork view type.


Step 10 In the Route Constraints pane (available when Route Automatically and Using Required Nodes/Links are enabled and the Textual radio button is selected), specify the nodes or links to include in each hop of the circuit route. Complete the following substeps:

a. Select Nodes in the Select Nodes/Links area if you want to add nodes to your circuit route; then, specify the node information in the Select Nodes area.

b. Select Links in the Select Nodes/Links area if you want to add links to your circuit route; then, specify the link information in the Select Links area.

c. Click Add to add a BLSR-DRI or MS-SPring-DRI to the circuit route.

d. Click Include to include the selected node or link in the route. The node or link appears in the Included Links/Nodes list.

e. Click Exclude to exclude the selected node or link from the route. The node or link appears in the Excluded Links/Nodes list.

f. Click Remove to remove the selected node or link from the Included Links/Nodes or Excluded Links/Nodes lists.

g. Click Up or Down to set the sequence of the nodes and spans included in the circuit.

h. Repeat substeps a to e for each node or link that you want to include in the circuit route.

i. Click Finish, or, if Review Route Before Creation is checked in the Routing Preferences pane, proceed to Step 11.

Step 11 Click Next.

Step 12 The Review Route pane displays the selected route. Click Finish to create the circuit, Back to return to the Route Constraints pane, or Cancel to cancel the circuit creation.

Step 13 In the message box, click OK. You can view the OCH trail circuit information in the Circuit table. See Viewing the Circuit Table. After the circuit status has been verified, the DISCOVERED status appears in the Status column of the circuit table. For a graphical representation of the circuit, view the circuit trace. See Tracing Circuits.


Caution It takes several seconds to create a circuit. During that interval, if a new circuit is added with the same name, both circuits might be identified as duplicates. Therefore, be careful not to add a duplicate circuit during the creation of the first circuit.


7.2.3.10  Creating a Monitor Circuit—CTC-Based NEs

Use the Create Monitor Circuit wizard to create a new monitor circuit on CTC-based NEs.


Note A monitor circuit's alias is based on the alias of the original circuit. Prime Optical does not generate unique numbers; therefore, two monitor circuits created on the same circuit have the same alias, while their names are different (including two unique numbers appended in the network).


Step 1 Select the CTC-based NE where you want to create a monitor circuit and open the Circuit table. For an explanation of Circuit table launch points, see Table 7-2.

Step 2 In the Circuit table, select the bidirectional circuit to be monitored.

Step 3 Choose Configuration > Modify Circuit (or click the Modify tool). The Modify Circuit dialog box opens.

Step 4 In the Modify Circuit dialog box, click the Monitor tab. The Monitor tab displays the ports that can be used to monitor the circuit selected in Step 2.

Step 5 In the Monitor tab, select the monitor source and click Create Monitors. The Create Monitor Circuit wizard opens.

Step 6 In the Create Monitor Circuit wizard, enter the following monitor circuit information; then, click Next:

Name—Enter the monitor circuit name.

Circuit Alias—Enter a unique alias name for the new circuit. The alias name can contain alphanumeric characters. International character sets are also supported.

State—Specify the circuit state. Options vary depending on the type of circuit selected.

Step 7 In the Source pane, choose the source node, slot, port, STS, VT, or DS-1 for the monitored circuit; then, click Next.

Step 8 In the Destination pane, choose the destination node, slot, port, STS, VT, or DS-1 for the monitored circuit; then, click Next.

Step 9 In the Routing Preferences pane, do the following; then, click Next:

a. Route Automatically—Enable or disable automatic route selection. If enabled, Prime Optical automatically determines the route for the circuit. If the source and destination of the circuit are on the same node, automatic routing is enabled. If disabled, you can specify the spans associated with the circuit. You can manually provision the circuit using one of the following views:

Graphical

Textual

b. Using Required Nodes/Links—(Available only if Route Automatically is checked) Check this check box to let Prime Optical automatically route the circuit through the required nodes and/or links. You can specify the required nodes and links using one of the following views:

Graphical

Textual

c. Review Route Before Creation—(Available only if Route Automatically is checked) Check this check box to review the route before it is created. You can review the route using one of the following views:

Graphical

Graphical Enhanced

d. Time Slot Restriction—If checked, you can enter an STS/VC4 value (to be used end-to-end) that Prime Optical uses to automatically determine the route for the circuit. Circuit creation fails if the same STS/VC4 is not available end-to-end. If circuit creation fails, you can try again using different values. The valid range is from 1 to 192 for SONET, or from 1 to 64 for SDH networks.


Note For VCAT circuits, you must enter multiple STS/VC4 values in the Member Preferences table > Time Slot Restriction field. The STS/VC4 values that you enter in the Time Slot Restriction field cannot be identical, or circuit creation will fail with an error message.


e. Set the circuit path protection as follows:

To route the circuit on a protected path, leave the Fully Protected Path check box checked (default) and proceed to the next substep. A fully protected circuit route is created based on the path diversity option you choose. Fully protected paths might or might not have SNCP path segments with primary and alternate paths. The path diversity options apply only to SNCP path segments, if any exist.

To create an unprotected circuit, uncheck Fully Protected Path and go to Step 10.

To route the circuit on an MS-SPRing protection channel, uncheck Fully Protected Path, check Protection Channel Access, and go to Step 10.

f. If you selected Fully Protected Path, choose one of the following options:

Required—Ensures that the primary and alternate paths within the extended SNCP mesh network portions of the complete circuit path are nodally diverse.

Desired—Specifies that node diversity is preferred; however, if node diversity is not possible, link-diverse paths are created for the extended SNCP mesh network portion of the complete circuit path.

Don't Care: Link Diverse Only—Specifies that only link-diverse primary and alternate paths for extended SNCP mesh network portions of the complete circuit path are needed.

Dual Ring Interconnect—Provisions the circuit in a DRI topology. If selected, the other node specifications (Required, Desired, and Don't Care: Link Diverse Only) are disabled.

Step 10 In the Manual Provisioning pane (available when Route Automatically is unchecked and the Graphical radio button is selected), do the following; then, click Next:

a. Use the map view to manually route the circuit from the source to the destination specified by the addition of the links selected. Use the right-click menu options to navigate within the map view:

Find Node—Opens the Find Node dialog box, which lists all of the nodes displayed in the map view. Select a node from the drop-down list and click OK. The selection context in the map view changes to show the selected node highlighted in the visible map area.

Zoom In—Allows you to zoom in on an object in the map view.

Zoom Out—Allows you to zoom out on the map view.

Reset Zoom—Resets the current zoom level to the default.

Add—Allows you to add the selected span. Right-click a link and choose Add in the right-click menu. The selected link is added to the Available Spans list. The Add option applies to manual provisioning across all circuit types.

b. In the VCAT Member Number list box, select the member for which the route is to be selected.

c. In the circuit display, select the span to use for the next hop.

d. In the Available Spans area, complete the following information:

From—Displays the source of the span

To—Displays the destination of the span

e. Click Add. The span is added to the Selected Spans list.

f. Repeat substeps b to d for each intermediate NE until the destination NE is reached.

g. Repeat substeps a to e for each member until all members are routed.

h. To delete a span from the Selected Spans area, select a span from the Selected Spans list and click Remove.


Note To specify a DRI link, double-click the link on the map. The map view displays the link as bidirectional.


i. (For BLSR DRI or MS-SPRing DRI circuits) In the BLSR DRI Nodes or MS-SPRing DRI Nodes tab, click the Add button to open the BLSR/MS-SPRing DRI dialog box, which allows you to provide primary and secondary pairs for traditional and nontraditional DRI circuits. Also specify ring and path options for the first and second rings. Click Remove to remove a DRI node from the list.

Step 11 In the Manual Provisioning pane (available when Route Automatically is unchecked and the Textual radio button is selected), do the following; then, click Next:

a. Specify the following:

Src NE ID—Display only.

Dest NE ID—Display only.

Current NE ID—Display only.

Adj NE ID—Display only.

Available Links—Lists all links between the currently selected and adjacent NEs. Select a link from the drop-down list.

Available Spans—After you select a link from the Available Links drop-down list, its corresponding details are displayed in the Available Spans pane. Click Add to move the spans to the Selected Spans field.

Selected Spans—Select one or more spans and click Remove to remove them from the Selected Spans field.

b. Click Next Hop to specify the next intermediate hop; then, repeat substep a.

c. Click Reset to reset all hop information to the default values.

d. Click Alternate Route to specify hop information for the alternate circuit route.

Step 12 In the Route Constraints pane (available when Route Automatically and Using Required Nodes/Links are enabled and the Graphical radio button is selected), a graphical representation of the circuit is displayed, including source and destination nodes. Specify the spans that will route to the circuit. Prime Optical starts at the source node. The next NE associated with each span is also displayed. Complete the following substeps:

a. In the circuit display, select the node or link. The NE ID or link ID is displayed in the Selected Node/Link field.

b. Click Include to include the selected node or link in the route. The node or link appears in the Included Links/Nodes list.

c. Click Exclude to exclude the selected node or link from the route. The node or link appears in the Excluded Links/Nodes list.

d. Click Remove to remove the selected node or link from the Included Links/Nodes or Excluded Links/Nodes lists.

e. Click Up or Down to set the sequence of the nodes and spans included in the circuit.

f. Repeat substeps a to e for each node or link that you want to include in the circuit route.

g. (Optional) Repeat substeps a to f for each intermediate NE until the destination NE is reached.

h. Click Finish, or, if Review Route Before Creation is checked in the Routing Preferences pane, click Next.

Step 13 In the Route Constraints pane (available when Route Automatically and Using Required Nodes/Links are enabled and the Textual radio button is selected), specify the nodes or links to include in each hop of the circuit route. Complete the following substeps:

a. Select Nodes in the Select Nodes/Links area if you want to add nodes to your circuit route; then, specify the node information in the Select Nodes area.

b. Select Links in the Select Nodes/Links area if you want to add links to your circuit route; then, specify the link information in the Select Links area.

c. Click Add to add a BLSR-DRI or MS-SPring-DRI to the circuit route.

d. Click Include to include the selected node or link in the route. The node or link appears in the Included Links/Nodes list.

e. Click Exclude to exclude the selected node or link from the route. The node or link appears in the Excluded Links/Nodes list.

f. Click Remove to remove the selected node or link from the Included Links/Nodes or Excluded Links/Nodes lists.

g. Click Up or Down to set the sequence of the nodes and spans included in the circuit.

h. Repeat substeps a to g for each node or link that you want to include in the circuit route.

i. Click Finish, or, if Review Route Before Creation is checked in the Routing Preferences pane, click Next.

Step 14 In the Review Route pane (available only if Review Route Before Creation is checked), review the following information; then, click Finish:

a. In the circuit display, review the ID of the source and destination NEs.

b. Included Spans—Because automatic route selection is enabled in the Routing Preferences pane, Prime Optical automatically selects spans to route the circuit. This field lists all the spans that the Prime Optical server selected automatically.

c. Selected Span—Review the span information.

Step 15 In the message box, click OK.

Step 16 In the confirmation dialog box, click OK.

Step 17 In the Modify Circuit dialog box, click Close. The new monitor circuit is displayed in the Circuit table.


7.2.3.11  Creating a Unidirectional Drop Circuit—CTC-Based NEs

Use the Create Drop wizard to create a new protected or unprotected unidirectional circuit drop. A circuit drop can also be created on bidirectional Ethernet circuits. For all other types of circuits, drop creation is possible only on unidirectional circuits.


Step 1 Select the CTC-based NE where you want to create a new unidirectional circuit drop and open the Circuit table. For an explanation of Circuit table launch points, see Table 7-2.

Step 2 In the Circuit table, select the unidirectional circuit where you want to create the drop.

Step 3 Choose Configuration > Modify Circuit (or click the Modify tool). The Modify Circuit dialog box opens.

Step 4 In the Modify Circuit dialog box, click the Drops tab, which displays the existing drops on the selected circuit.

Step 5 In the Drops tab, click Create. The Create Drop wizard opens.

Step 6 In the Create Drop wizard, fill in the following fields; then, click Next.


Note Fields shown depend on the type and size of the selected circuit.


NE ID—Select the NE ID.

Slot—Specify the drop slot.

Port—Specify the drop port.

STS—(For SONET circuits) Specify the drop STS.

VT—(For SONET circuits) Specify the drop VT.

DS1—(For SONET circuits) Specify the drop DS-1.

VC4—(For SDH circuits) Specify the drop VC4.

VC3—(For SDH circuits) Specify the drop VC3.

VC11—(For SDH circuits) Specify the drop VC11.

VC12—(For SDH circuits) Specify the drop VC12.

TUG3—(For SDH circuits) Specify the drop TUG3.

TUG2—(For SDH circuits) Specify the drop TUG2.

Target Circuit State—Select an administrative state for the new circuit drop. SONET and SDH circuits have different values. For SONET circuits, values are:

IS

OOS DSBLD

IS AINS

OOS MT

For SDH circuits, values are:

Unlocked

Locked, disabled

Unlocked, automaticInService

Locked, maintenance

Apply to drop ports—Check this check box to apply the selected state to the drop port.

Step 7 (For protected unidirectional circuits) In the Routing Preferences pane, specify the routing and protection preferences for the new drop.

The Routing Preferences pane in the Create Drop wizard is similar to the Routing Preferences pane in the Create Circuit wizard, except that for a drop, the Fully Protected Path check box is unchecked (disabled) for Ethernet circuits and unchecked (enabled) for all other circuits. You can check or uncheck the Fully Protected Path check box. If the existing circuit is protected and during drop creation you check or uncheck the Fully Protected Path check box, an error message is returned after you click Next. You must change the protection option if the error message indicates that all drops must have the same protection.

Subsequent panes in the Create Drop wizard are identical to the panes in the Create Circuit wizard (see Table 7-6).

Step 8 Click Finish.

Step 9 In the message box, click OK.

Step 10 In the Modify Circuit dialog box, click Close.


7.2.3.12  Creating G1000-4 Circuits

This section explains how to provision G1000-4 point-to-point circuits and Ethernet manual cross-connects. Ethernet manual cross-connects allow you to cross-connect individual Ethernet circuits to an STS channel on the ONS 15454 SONET or ONS 15454 SDH optical interface and to bridge non-ONS SONET network segments.

7.2.3.12.1  G1000-4 Point-to-Point Ethernet Circuits

G1000-4 cards support point-to-point circuit configuration. Provisionable circuit sizes are STS-1, STS-3c, STS-6c, STS-9c, STS-12c, STS-24c, and STS-48c. Each Ethernet port maps to a unique STS circuit on the SONET side of the G1000-4.

The G1000-4 card supports any combination of up to four circuits from the list of valid circuit sizes; however, the circuit sizes can add up to no more than 48 STSs. Due to hardware constraints, the initial release of the G1000-4 card (software release 3.2) imposes additional restrictions on the combinations of circuits that can be dropped onto a G1000-4 card. These restrictions are transparently enforced by the ONS 15454 SONET and ONS 15454 SDH, so there is no need to keep track of restricted circuit combinations.

The restriction occurs when a single STS-24c is dropped on a card. In this instance, the remaining circuits on that card can be another single STS-24c or any combination of circuits of STS-12c size or smaller that add up to no more than 12 STSs (that is, a total of 36 STSs on the card).

No circuit restrictions are present if STS-24c circuits are not being dropped on the card. The full 48 STSs of bandwidth can be used (for example, a single STS-48c circuit or 4 STS-12c circuits).

Since the restrictions apply only when STS-24c circuits are involved but do not apply when two STS-24c circuits are on the same card, the impact of these restrictions can be easily minimized. Group the STS-24c circuits together on a card separate from circuits of other sizes. The grouped circuits can be dropped onto other G1000-4 cards on the ONS 15454 SONET or ONS 15454 SDH. The G1000-4 uses STS cross-connects only. No VT-level cross-connects are used. All SONET-side STS circuits must be contiguous.


Caution G1000-4 circuits connect with OC-N cards or other G1000-4 cards. G1000-4 cards do not connect with E-series Ethernet cards.


Caution The G1000-4 card requires the XC10G card to operate. The G1000-4 card is not compatible with XC or XCVT cards.

Complete the following steps to create G1000-4 point-to-point Ethernet circuits:


Step 1 In the Domain Explorer, select the ONS 15454 SONET or ONS 15454 SDH NE to use as one of the Ethernet circuit endpoints.

Step 2 Do the following in the Domain Explorer:

a. Select the source circuit.

b. Choose Configuration > Create Circuit.

c. Select the destination circuit. The Create Circuit wizard opens.

Step 3 From the Type field, choose STS; then, click Next. The Attributes pane opens.


Note The VT and VT Tunnel types do not apply to Ethernet circuits.


Step 4 In the Name field, enter a name for the circuit.

Step 5 In the Circuit Alias field, enter a unique alias name for the circuit. The alias name can contain alphanumeric characters. International character sets are also supported.

Step 6 From the Size field, choose the size of the circuit. The valid circuit sizes for a G1000-4 circuit are STS-1, STS-3c, STS-6c, STS-9c, STS-12c, STS-24c, and STS-48c.

Step 7 Verify that the Bidirectional check box is checked.


Note The states of the Number of Circuits check box and the Protected Drops check box are provided.


Caution If provisioning a G1000-4 circuit on a UPSR, do not check the Switch on PDI-P check box. Checking the Switch on PDI-P check box might cause unnecessary UPSR protection switches.

Step 8 (Optional) Specify the customer information:

Customer ID

Service ID

Step 9 Click Next.

Step 10 In the Source pane, choose the circuit source node. Either end node can be the circuit source.

Step 11 From the Slot field, choose the slot containing the G1000-4 card to use as one end of the point-to-point circuit.

Step 12 In the Port field, choose a port.

Step 13 Click Next.

Step 14 In the Destination pane, choose the circuit destination node.

Step 15 In the Slot field, choose the slot containing the G1000-4 card to use as the other end of the point-to-point circuit.

Step 16 From the Port field, choose a port.

Step 17 Click Next. The Routing Preferences pane opens.

Step 18 In the Routing Preferences pane, do the following; then, click Next:

a. Route Automatically—Enable or disable automatic route selection. If enabled, Prime Optical automatically determines the route for the circuit. If the source and destination of the circuit are on the same node, automatic routing is enabled. If disabled, you can specify the spans associated with the circuit. You can manually provision the circuit using one of the following views:

Graphical

Graphical Enhanced

Textual

b. Using Required Nodes/Links—(Available only if Route Automatically is checked) Check this check box to let Prime Optical automatically route the circuit through the required nodes and/or links. You can specify the required nodes and links using one of the following views:

Graphical

Graphical Enhanced

Textual

c. Review Route Before Creation—(Available only if Route Automatically is checked) Check this check box to review the route before it is created. You can review the route using one of the following views:

Graphical

Graphical Enhanced

d. Time Slot Restriction—If checked, you can enter an STS/VC4 value (to be used end-to-end) that Prime Optical uses to automatically determine the route for the circuit. Circuit creation fails if the same STS/VC4 is not available end-to-end. If circuit creation fails, you can try again using different values. The valid range is from 1 to 192 for SONET, or from 1 to 64 for SDH networks.


Note For VCAT circuits, you must enter multiple STS/VC4 values in the Member Preferences table > Time Slot Restriction field. The STS/VC4 values that you enter in the Time Slot Restriction field cannot be identical, or circuit creation will fail with an error message.


e. Set the circuit path protection as follows:

To route the circuit on a protected path, leave the Fully Protected Path check box checked (default) and proceed to the next substep. A fully protected circuit route is created based on the path diversity option you choose. Fully protected paths might or might not have SNCP path segments with primary and alternate paths. The path diversity options apply only to SNCP path segments, if any exist.

To create an unprotected circuit, uncheck Fully Protected Path and go to Step 19.

To route the circuit on an MS-SPRing protection channel, uncheck Fully Protected Path, check Protection Channel Access, and go to Step 19.

f. If you selected Fully Protected Path, choose one of the following options:

Required—Ensures that the primary and alternate paths within the extended SNCP mesh network portions of the complete circuit path are nodally diverse.

Desired—Specifies that node diversity is preferred; however, if node diversity is not possible, link-diverse paths are created for the extended SNCP mesh network portion of the complete circuit path.

Don't Care: Link Diverse Only—Specifies that only link-diverse primary and alternate paths for extended SNCP mesh network portions of the complete circuit path are needed.

Dual Ring Interconnect—Provisions the circuit in a DRI topology. If selected, the other node specifications (Required, Desired, and Don't Care: Link Diverse Only) are disabled.

Step 19 In the Manual Provisioning pane (available when Route Automatically is unchecked and the Graphical or Graphical Enhanced radio button is selected), do the following; then, click Next:

a. (Applicable if the Graphical Enhanced radio button is selected) Select one of the following top-level view types from the Selected View Type list:

Subnetwork—Allows you to view the subnetwork(s) to which the NEs belong. This is the default view type.

Group—Allows you to view the group(s) to which the NEs belong.

The Current View field is set to Top.

b. (Applicable if the Graphical Enhanced radio button is selected) Select a detailed view type from the Available Views list, or right-click a subnetwork or group and choose View. The Current View field is set to the detailed view type that you selected.

In a complex network, it might take several minutes or longer to calculate and display the graphic objects in the map view. The progress bar at the top of the map tracks the percentage of completion while the map is updated.

c. Use the map view to manually route the circuit from the source to the destination specified by the addition of the links selected. Use the right-click menu options to navigate within the map view:

Find Node—Opens the Find Node dialog box, which lists all of the nodes displayed in the map view. Select a node from the drop-down list and click OK. The selection context in the map view changes to show the selected node highlighted in the visible map area.

Zoom In—Allows you to zoom in on an object in the map view.

Zoom Out—Allows you to zoom out on the map view.

Reset Zoom—Resets the current zoom level to the default.

Add—Allows you to add the selected span. Right-click a link and choose Add in the right-click menu. The selected link is added to the Available Spans list. The Add option applies to manual provisioning across all circuit types.

d. In the VCAT Member Number list box, select the member for which the route is to be selected.

e. In the circuit display, select the span to use for the next hop.

f. In the Available Spans area, complete the following information:

From—Displays the source of the span

To—Displays the destination of the span

g. Click Add. The span is added to the Selected Spans list.

h. Repeat substeps d to f for each intermediate NE until the destination NE is reached.

i. Repeat substeps c to g for each member until all members are routed.

j. To delete a span from the Selected Spans area, select a span from the Selected Spans list and click Remove.


Note To specify a DRI link, double-click the link on the map. The map view displays the link as bidirectional.


k. (For BLSR DRI or MS-SPRing DRI circuits) In the BLSR DRI Nodes or MS-SPRing DRI Nodes tab, click the Add button to open the BLSR/MS-SPRing DRI dialog box, which allows you to provide primary and secondary pairs for traditional and nontraditional DRI circuits. Also specify ring and path options for the first and second rings. Click Remove to remove a DRI node from the list.


Note If the Graphical Enhanced radio button is selected and you want to change the top-level view type at any time, click Top View. The map view reverts to the default Subnetwork view type.


Step 20 In the Manual Provisioning pane (available when Route Automatically is unchecked and the Textual radio button is selected), do the following; then, click Next:

a. Specify the following:

Src NE ID—Display only.

Dest NE ID—Display only.

Current NE ID—Display only.

Adj NE ID—Display only.

Available Links—Lists all links between the currently selected and adjacent NEs. Select a link from the drop-down list.

Available Spans—After you select a link from the Available Links drop-down list, its corresponding details are displayed in the Available Spans pane. Click Add to move the spans to the Selected Spans field.

Selected Spans—Select one or more spans and click Remove to remove them from the Selected Spans field.

b. Click Next Hop to specify the next intermediate hop; then, repeat substep a.

c. Click Reset to reset all hop information to the default values.

d. Click Alternate Route to specify hop information for the alternate circuit route.

Step 21 In the Route Constraints pane (available when Route Automatically and Using Required Nodes/Links are enabled and the Graphical or Graphical Enhanced radio button is selected), a graphical representation of the circuit is displayed, including source and destination nodes. Specify the spans that will route to the circuit. Prime Optical starts at the source node. The next NE associated with each span is also displayed. Complete the following substeps:

a. (Applicable if the Graphical Enhanced radio button is selected) Select one of the following top-level view types from the Selected View Type list:

Subnetwork—Allows you to view the subnetwork(s) to which the NEs belong. This is the default view type.

Group—Allows you to view the group(s) to which the NEs belong.

The Current View field is set to Top.

b. (Applicable if the Graphical Enhanced radio button is selected) Select a detailed view type from the Available Views list, or right-click a subnetwork or group and choose View. The Current View field is set to the detailed view type that you selected.

In a complex network, it might take several minutes or longer to calculate and display the graphic objects in the map view. The progress bar at the top of the map tracks the percentage of completion while the map is updated.

c. In the circuit display, select the node or link. The NE ID or link ID is displayed in the Selected Node/Link field.

d. Click Include to include the selected node or link in the route. The node or link appears in the Included Links/Nodes list.

e. Click Exclude to exclude the selected node or link from the route. The node or link appears in the Excluded Links/Nodes list.

f. Click Remove to remove the selected node or link from the Included Links/Nodes or Excluded Links/Nodes lists.

g. Click Up or Down to set the sequence of the nodes and spans included in the circuit.

h. Repeat substeps c to g for each node or link that you want to include in the circuit route.

i. (Optional) Repeat substeps c to h for each intermediate NE until the destination NE is reached.

j. Click Finish, or, if Review Route Before Creation is checked in the Routing Preferences pane, click Next.


Note If the Graphical Enhanced radio button is selected and you want to change the top-level view type at any time, click Top View. The map view reverts to the default Subnetwork view type.


Step 22 In the Route Constraints pane (available when Route Automatically and Using Required Nodes/Links are enabled and the Textual radio button is selected), specify the nodes or links to include in each hop of the circuit route. Complete the following substeps:

a. Select Nodes in the Select Nodes/Links area if you want to add nodes to your circuit route; then, specify the node information in the Select Nodes area.

b. Select Links in the Select Nodes/Links area if you want to add links to your circuit route; then, specify the link information in the Select Links area.

c. Click Add to add a BLSR-DRI or MS-SPring-DRI to the circuit route.

d. Click Include to include the selected node or link in the route. The node or link appears in the Included Links/Nodes list.

e. Click Exclude to exclude the selected node or link from the route. The node or link appears in the Excluded Links/Nodes list.

f. Click Remove to remove the selected node or link from the Included Links/Nodes or Excluded Links/Nodes lists.

g. Click Up or Down to set the sequence of the nodes and spans included in the circuit.

h. Repeat substeps a to e for each node or link that you want to include in the circuit route.

i. Click Finish, or, if Review Route Before Creation is checked in the Routing Preferences pane, click Next.

Step 23 In the Review Route pane (available only if Review Route Before Creation is checked), review the following information; then, click Finish:

a. In the circuit display, verify the following information about the point-to-point circuit:

Circuit name

Circuit type

Circuit size

ONS 15454 SONET or ONS 15454 SDH nodes are included in the circuit

b. Included Spans—Because automatic route selection is enabled in the Routing Preferences pane, Prime Optical automatically selects spans to route the circuit. This field lists all the spans that the Prime Optical server selected automatically.

c. Selected Span—Review the span information.

Step 24 In the message box, click OK.

Step 25 To change the slot property information for the Ethernet card, see Slot Properties—G1000-4.


Note To change the capacity of a G1000-4 point-to-point circuit, delete the original circuit and reprovision a new, larger circuit.


7.2.3.12.2  G1000-4 Manual Cross-Connects

ONS 15454 SONET and ONS 15454 SDH NEs require end-to-end CTC visibility between nodes for normal provisioning of Ethernet circuits. When equipment from other vendors is placed between the ONS 15454 SONET and ONS 15454 SDH, equipment based on Open System Interconnection/Target Identifier Address Resolution Protocol (OSI/TARP) does not allow tunneling of the ONS 15454 SONET or ONS 15454 SDH TCP/IP-based data communications channel (DCC). To circumvent a lack of continuous DCC, the Ethernet circuit must be manually cross-connected to an STS channel riding through the non-ONS network. This allows an Ethernet circuit to run from ONS node to ONS node while utilizing the non-ONS network.


Note In this chapter, cross-connect and circuit have the following meanings: Cross-connect refers to the connections that occur within a single ONS 15454 SONET or ONS 15454 SDH to allow a circuit to enter and exit an ONS 15454 SONET or ONS 15454 SDH. Circuit refers to the series of connections from a traffic source (where traffic enters the ONS 15454 SONET or ONS 15454 SDH network) to the drop or destination (where traffic exits an ONS 15454 SONET or ONS 15454 SDH network).


Step 1 In the Domain Explorer, select the ONS 15454 SONET and ONS 15454 SDH Ethernet circuit endpoint nodes.

Step 2 Do the following in the Domain Explorer:

a. Select the source circuit.

b. Choose Configuration > Create Circuit.

c. Select the destination circuit. The Create Circuit wizard opens.

Step 3 From the Type field, choose STS; then, click Next. The Attributes pane opens.


Note The VT and VT Tunnel types do not apply to Ethernet circuits.


Step 4 In the Name field, enter a name for the circuit.

Step 5 In the Circuit Alias field, enter a unique alias name for the circuit. The alias name can contain alphanumeric characters. International character sets are also supported.

Step 6 From the Size field, choose the size of the circuit. The valid circuit sizes for a G1000-4 circuit are STS-1, STS-3c, STS-6c, STS-9c, STS-12c, STS-24c, and STS-48c.

Step 7 Verify that the Bidirectional check box is checked.

Step 8 (Optional) Specify the customer information:

Customer ID

Service ID

Step 9 Click Next.

Step 10 In the Source pane, choose the circuit source node.

Step 11 From the Slot field, choose the slot containing the Ethernet card.

Step 12 From the Port field, choose a port.

Step 13 Click Next.

Step 14 In the Destination pane, choose the current node as the circuit destination.

Step 15 From the Slot field, choose the optical card that will carry the circuit.

Step 16 Choose the STS that will carry the circuit from the STS field; then, click Next. The Routing Preferences pane opens.


Note For Ethernet manual cross-connects, the same ONS 15454 SONET or ONS 15454 SDH serves as both source and destination.


Step 17 In the Routing Preferences pane, do the following; then, click Next:

a. Route Automatically—Enable or disable automatic route selection. If enabled, Prime Optical automatically determines the route for the circuit. If the source and destination of the circuit are on the same node, automatic routing is enabled. If disabled, you can specify the spans associated with the circuit. You can manually provision the circuit using one of the following views:

Graphical

Graphical Enhanced

Textual

b. Using Required Nodes/Links—(Available only if Route Automatically is checked) Check this check box to let Prime Optical automatically route the circuit through the required nodes and/or links. You can specify the required nodes and links using one of the following views:

Graphical

Graphical Enhanced

Textual

c. Review Route Before Creation—(Available only if Route Automatically is checked) Check this check box to review the route before it is created. You can review the route using one of the following views:

Graphical

Graphical Enhanced

d. Time Slot Restriction—If checked, you can enter an STS/VC4 value (to be used end-to-end) that Prime Optical uses to automatically determine the route for the circuit. Circuit creation fails if the same STS/VC4 is not available end-to-end. If circuit creation fails, you can try again using different values. The valid range is from 1 to 192 for SONET, or from 1 to 64 for SDH networks.


Note For VCAT circuits, you must enter multiple STS/VC4 values in the Member Preferences table > Time Slot Restriction field. The STS/VC4 values that you enter in the Time Slot Restriction field cannot be identical, or circuit creation will fail with an error message.


e. Set the circuit path protection as follows:

To route the circuit on a protected path, leave the Fully Protected Path check box checked (default) and proceed to the next substep. A fully protected circuit route is created based on the path diversity option you choose. Fully protected paths might or might not have SNCP path segments with primary and alternate paths. The path diversity options apply only to SNCP path segments, if any exist.

To create an unprotected circuit, uncheck Fully Protected Path and go to Step 18.

To route the circuit on an MS-SPRing protection channel, uncheck Fully Protected Path, check Protection Channel Access, and go to Step 18.

f. If you selected Fully Protected Path, choose one of the following options:

Required—Ensures that the primary and alternate paths within the extended SNCP mesh network portions of the complete circuit path are nodally diverse.

Desired—Specifies that node diversity is preferred; however, if node diversity is not possible, link-diverse paths are created for the extended SNCP mesh network portion of the complete circuit path.

Don't Care: Link Diverse Only—Specifies that only link-diverse primary and alternate paths for extended SNCP mesh network portions of the complete circuit path are needed.

Dual Ring Interconnect—Provisions the circuit in a DRI topology. If selected, the other node specifications (Required, Desired, and Don't Care: Link Diverse Only) are disabled.

Step 18 In the Manual Provisioning pane (available when Route Automatically is unchecked and the Graphical or Graphical Enhanced radio button is selected), do the following; then, click Next:

a. (Applicable if the Graphical Enhanced radio button is selected) Select one of the following top-level view types from the Selected View Type list:

Subnetwork—Allows you to view the subnetwork(s) to which the NEs belong. This is the default view type.

Group—Allows you to view the group(s) to which the NEs belong.

The Current View field is set to Top.

b. (Applicable if the Graphical Enhanced radio button is selected) Select a detailed view type from the Available Views list, or right-click a subnetwork or group and choose View. The Current View field is set to the detailed view type that you selected.

In a complex network, it might take several minutes or longer to calculate and display the graphic objects in the map view. The progress bar at the top of the map tracks the percentage of completion while the map is updated.

c. Use the map view to manually route the circuit from the source to the destination specified by the addition of the links selected. Use the right-click menu options to navigate within the map view:

Find Node—Opens the Find Node dialog box, which lists all of the nodes displayed in the map view. Select a node from the drop-down list and click OK. The selection context in the map view changes to show the selected node highlighted in the visible map area.

Zoom In—Allows you to zoom in on an object in the map view.

Zoom Out—Allows you to zoom out on the map view.

Reset Zoom—Resets the current zoom level to the default.

Add—Allows you to add the selected span. Right-click a link and choose Add in the right-click menu. The selected link is added to the Available Spans list. The Add option applies to manual provisioning across all circuit types.

d. In the VCAT Member Number list box, select the member for which the route is to be selected.

e. In the circuit display, select the span to use for the next hop.

f. In the Available Spans area, complete the following information:

From—Displays the source of the span

To—Displays the destination of the span

g. Click Add. The span is added to the Selected Spans list.

h. Repeat substeps d to f for each intermediate NE until the destination NE is reached.

i. Repeat substeps c to g for each member until all members are routed.

j. To delete a span from the Selected Spans area, select a span from the Selected Spans list and click Remove.


Note To specify a DRI link, double-click the link on the map. The map view displays the link as bidirectional.


k. (For BLSR DRI or MS-SPRing DRI circuits) In the BLSR DRI Nodes or MS-SPRing DRI Nodes tab, click the Add button to open the BLSR/MS-SPRing DRI dialog box, which allows you to provide primary and secondary pairs for traditional and nontraditional DRI circuits. Also specify ring and path options for the first and second rings. Click Remove to remove a DRI node from the list.


Note If the Graphical Enhanced radio button is selected and you want to change the top-level view type at any time, click Top View. The map view reverts to the default Subnetwork view type.


Step 19 In the Manual Provisioning pane (available when Route Automatically is unchecked and the Textual radio button is selected), do the following; then, click Next:

a. Specify the following:

Src NE ID—Display only.

Dest NE ID—Display only.

Current NE ID—Display only.

Adj NE ID—Display only.

Available Links—Lists all links between the currently selected and adjacent NEs. Select a link from the drop-down list.

Available Spans—After you select a link from the Available Links drop-down list, its corresponding details are displayed in the Available Spans pane. Click Add to move the spans to the Selected Spans field.

Selected Spans—Select one or more spans and click Remove to remove them from the Selected Spans field.

b. Click Next Hop to specify the next intermediate hop; then, repeat substep a.

c. Click Reset to reset all hop information to the default values.

d. Click Alternate Route to specify hop information for the alternate circuit route.

Step 20 In the Route Constraints pane (available when Route Automatically and Using Required Nodes/Links are enabled and the Graphical or Graphical Enhanced radio button is selected), a graphical representation of the circuit is displayed, including source and destination nodes. Specify the spans that will route to the circuit. Prime Optical starts at the source node. The next NE associated with each span is also displayed. Complete the following substeps:

a. (Applicable if the Graphical Enhanced radio button is selected) Select one of the following top-level view types from the Selected View Type list:

Subnetwork—Allows you to view the subnetwork(s) to which the NEs belong. This is the default view type.

Group—Allows you to view the group(s) to which the NEs belong.

The Current View field is set to Top.

b. (Applicable if the Graphical Enhanced radio button is selected) Select a detailed view type from the Available Views list, or right-click a subnetwork or group and choose View. The Current View field is set to the detailed view type that you selected.

In a complex network, it might take several minutes or longer to calculate and display the graphic objects in the map view. The progress bar at the top of the map tracks the percentage of completion while the map is updated.

c. In the circuit display, select the node or link. The NE ID or link ID is displayed in the Selected Node/Link field.

d. Right-click the line, and click Include to include the selected node or link in the route. The node or link appears in the Included Links/Nodes list.

e. Right-click the line, and click Exclude to exclude the selected node or link from the route. The node or link appears in the Excluded Links/Nodes list.

f. Click Remove to remove the selected node or link from the Included Links/Nodes or Excluded Links/Nodes lists.

g. Click Up or Down to set the sequence of the nodes and spans included in the circuit.

h. Repeat substeps c to g for each node or link that you want to include in the circuit route.

i. (Optional) Repeat substeps c to h for each intermediate NE until the destination NE is reached.

j. Click Finish, or, if Review Route Before Creation is checked in the Routing Preferences pane, click Next.


Note If the Graphical Enhanced radio button is selected and you want to change the top-level view type at any time, click Top View. The map view reverts to the default Subnetwork view type.


Step 21 In the Route Constraints pane (available when Route Automatically and Using Required Nodes/Links are enabled and the Textual radio button is selected), specify the nodes or links to include in each hop of the circuit route. Complete the following substeps:

a. Select Nodes in the Select Nodes/Links area if you want to add nodes to your circuit route; then, specify the node information in the Select Nodes area.

b. Select Links in the Select Nodes/Links area if you want to add links to your circuit route; then, specify the link information in the Select Links area.

c. Click Add to add a BLSR-DRI or MS-SPring-DRI to the circuit route.

d. Right-click the line, and click Include to include the selected node or link in the route. The node or link appears in the Included Links/Nodes list.

e. Right-click the line, and click Exclude to exclude the selected node or link from the route. The node or link appears in the Excluded Links/Nodes list.

f. Click Remove to remove the selected node or link from the Included Links/Nodes or Excluded Links/Nodes lists.

g. Click Up or Down to set the sequence of the nodes and spans included in the circuit.

h. Repeat substeps a to e for each node or link that you want to include in the circuit route.

i. Click Finish, or, if Review Route Before Creation is checked in the Routing Preferences pane, click Next.

Step 22 In the Review Route pane (available only if Review Route Before Creation is checked), review the following information; then, click Finish:

a. In the circuit display, verify the following information about the point-to-point circuit:

Circuit name

Circuit type

Circuit size

ONS 15454 SONET or ONS 15454 SDH nodes are included in the circuit

b. Included Spans—Because automatic route selection is enabled in the Routing Preferences pane, Prime Optical automatically selects spans to route the circuit. This field lists all the spans that the Prime Optical server selected automatically.

c. Selected Span—Review the span information.

Step 23 In the message box, click OK.

Step 24 Provision the Ethernet ports. For port provisioning instructions, see Provisioning E-Series Ethernet Ports for VLAN Membership.

Step 25 To complete the procedure, repeat Steps 1 to 23 for the second ONS 15454 SONET or ONS 15454 SDH.


Note The appropriate STS circuit must exist in the non-ONS 15454 SONET or non-ONS 15454 SDH equipment to connect the two STSs from the ONS 15454 SONET or ONS 15454 SDH Ethernet manual cross-connect endpoints.


Caution If a CARLOSS alarm repeatedly appears and clears on an Ethernet manual cross-connect, the two Ethernet circuits might have a circuit-size mismatch. For example, a circuit size of STS-3c might have been configured on the first ONS 15454 SONET or ONS 15454 SDH, and a circuit size of STS-12c might have been configured on the second ONS 15454 SONET or ONS 15454 SDH. To troubleshoot the cause of the CARLOSS alarm, see the "Alarm Troubleshooting" chapter of the Cisco ONS 15454 Troubleshooting Guide or Cisco ONS 15454 SDH Troubleshooting Guide.

7.2.3.13  Creating E-Series Circuits

Ethernet circuits can link ONS nodes through point-to-point, shared packet ring, or hub-and-spoke configurations. Two nodes usually connect with a point-to-point configuration. More than two nodes usually connect with a shared packet ring configuration or a hub-and-spoke configuration. This section includes procedures for creating these configurations and also explains how to create Ethernet manual cross-connects. Ethernet manual cross-connects allow you to cross-connect individual Ethernet circuits to an STS channel on the ONS 15454 SONET or ONS 15454 SDH optical interface and also to bridge non-ONS SONET network segments.


Note Before creating Ethernet connections, choose an STS-1, STS-3c, STS-6c, or STS-12c circuit size.


Note When creating an STS-12c Ethernet circuit, Ethernet cards must be configured as single-card EtherSwitch. Multicard mode does not support STS-12c Ethernet circuits.


7.2.3.13.1  Provisioning E-Series EtherSwitch Point-to-Point Ethernet Circuits (Multicard, Single-Card, or Port-Mapped)

The ONS 15327, ONS 15454 SONET, and ONS 15454 SDH can set up a point-to-point (straight) Ethernet circuit as single-card or multicard. Multicard EtherSwitch is limited to STS-6c of bandwidth between two Ethernet circuit points, but allows you to add nodes and cards and create a shared packet ring. Single-card EtherSwitch allows a full STS-12c of bandwidth between two Ethernet circuit points.


Step 1 Select an ONS 15327, ONS 15454 SONET, or ONS 15454 SDH NE and choose Configuration > NE Explorer.

Step 2 In the tree view of the NE Explorer window, select the ONS 15327, ONS 15454 SONET, or ONS 15454 SDH Ethernet circuit endpoint nodes.

Step 3 Click the Identification tab.

Step 4 If you are building a multicard EtherSwitch point-to-point circuit:

a. In the Card Mode field, choose Multicard EtherSwitch Group.

b. In the message box, click OK.

c. Repeat Step 2 to Step 4 for each Ethernet card in the ONS 15327, ONS 15454 SONET, or ONS 15454 SDH that will carry the circuit.

Step 5 If you are building a single-card EtherSwitch circuit:

a. In the Card Mode field, choose Single-card EtherSwitch.

b. In the message box, click OK.

Step 6 If you are building a port mapped circuit:

a. In the Card Mode field, choose Port Mapped.

b. In the message box, click OK.

Step 7 Navigate to the other ONS 15327, ONS 15454 SONET, or ONS 15454 SDH Ethernet circuit endpoint.

Step 8 Repeat Step 1 to Step 7 for the other ONS 15327, ONS 15454 SONET, or ONS 15454 SDH Ethernet circuit endpoint.

Step 9 Do the following in the Domain Explorer:

a. Select the source circuit.

b. Choose Configuration > Create Circuit.

c. Select the destination circuit. The Create Circuit wizard opens.

Step 10 In the Type field, choose STS; then, click Next. The Attributes pane opens.


Note The VT and VT Tunnel types do not apply to Ethernet circuits.


Step 11 In the Name field, enter a name for the circuit.

Step 12 In the Circuit Alias field, enter a unique alias name for the circuit. The alias name can contain alphanumeric characters. International character sets are also supported.

Step 13 From the Size field, choose the size of the circuit.

The valid circuit sizes for an Ethernet multicard circuit are STS-1, STS-3c, and STS-6c.

The valid circuit sizes for an Ethernet single-card circuit are STS-1, STS-3c, STS-6c, and STS-12c.

Step 14 Verify that the Bidirectional check box is checked.

Step 15 (Optional) Specify the customer information:

Customer ID

Service ID

Step 16 Click Next. The Source pane opens.

a. From the Slot field, choose the circuit source. Either end node can be the circuit source.

b. When building a multicard EtherSwitch circuit, choose Ethergroup from the Slot field and click Next.

c. When building a single-card EtherSwitch circuit, from the Slot field choose the Ethernet card where the single-card EtherSwitch was enabled and click Next.

d. When building a circuit in port-mapped mode, from the Slot field choose the slot containing the E-series card that you will use for one end of the point-to-point circuit. Choose a port from the Port drop-down list and click Next.

Step 17 The Destination pane opens.

a. From the Slot field, choose the circuit destination. Choose the node that is not the source.

b. When building a multicard EtherSwitch circuit, choose Ethergroup from the Slot field and click Next.

c. When building a single-card EtherSwitch circuit, from the Slot field choose the Ethernet card where the single-card EtherSwitch was enabled and click Next.

d. When building a circuit in port-mapped mode, from the Slot field choose the slot containing the E-series card that you will use for the other end of the point-to-point circuit. Choose a port from the Port drop-down list and click Next. The VLAN Selection pane opens.

Step 18 Create the VLAN.

a. Click the New VLAN button. The Define New VLAN dialog box opens.

b. Assign an easily identifiable name to the VLAN.

c. Assign a VLAN ID.


Note The VLAN ID should be the next available number from 2 to 4093 that is not already assigned to an existing VLAN. Each ONS 15327, ONS 15454 SONET, or ONS 15454 SDH network supports a maximum of 509 user-provisionable VLANs.


d. Click OK.

e. Highlight the VLAN name and click the Add button to move the available VLAN to the Circuit VLANs list box.


Note A maximum of 509 VLANs are supported on a DCC-connected network.


Step 19 Check the Enable Spanning Tree check box to enable spanning tree protection.

Step 20 Click Next. The Routing Preferences pane opens.

Step 21 In the Routing Preferences pane, do the following; then, click Next:

a. Route Automatically—Enable or disable automatic route selection. If enabled, Prime Optical automatically determines the route for the circuit. If the source and destination of the circuit are on the same node, automatic routing is enabled. If disabled, you can specify the spans associated with the circuit. You can manually provision the circuit using one of the following views:

Graphical

Graphical Enhanced

Textual

b. Using Required Nodes/Links—(Available only if Route Automatically is checked) Check this check box to let Prime Optical automatically route the circuit through the required nodes and/or links. You can specify the required nodes and links using one of the following views:

Graphical

Graphical Enhanced

Textual

c. Review Route Before Creation—(Available only if Route Automatically is checked) Check this check box to review the route before it is created. You can review the route using one of the following views:

Graphical

Graphical Enhanced

d. Time Slot Restriction—If checked, you can enter an STS/VC4 value (to be used end-to-end) that Prime Optical uses to automatically determine the route for the circuit. Circuit creation fails if the same STS/VC4 is not available end-to-end. If circuit creation fails, you can try again using different values. The valid range is from 1 to 192 for SONET, or from 1 to 64 for SDH networks.


Note For VCAT circuits, you must enter multiple STS/VC4 values in the Member Preferences table > Time Slot Restriction field. The STS/VC4 values that you enter in the Time Slot Restriction field cannot be identical, or circuit creation will fail with an error message.


e. Set the circuit path protection as follows:

To route the circuit on a protected path, leave the Fully Protected Path check box checked (default) and proceed to the next substep. A fully protected circuit route is created based on the path diversity option you choose. Fully protected paths might or might not have SNCP path segments with primary and alternate paths. The path diversity options apply only to SNCP path segments, if any exist.

To create an unprotected circuit, uncheck Fully Protected Path and go to Step 22.

To route the circuit on an MS-SPRing protection channel, uncheck Fully Protected Path, check Protection Channel Access, and go to Step 22.

f. If you selected Fully Protected Path, choose one of the following options:

Required—Ensures that the primary and alternate paths within the extended SNCP mesh network portions of the complete circuit path are nodally diverse.

Desired—Specifies that node diversity is preferred; however, if node diversity is not possible, link-diverse paths are created for the extended SNCP mesh network portion of the complete circuit path.

Don't Care: Link Diverse Only—Specifies that only link-diverse primary and alternate paths for extended SNCP mesh network portions of the complete circuit path are needed.

Dual Ring Interconnect—Provisions the circuit in a DRI topology. If selected, the other node specifications (Required, Desired, and Don't Care: Link Diverse Only) are disabled.

Step 22 In the Manual Provisioning pane (available when Route Automatically is unchecked and the Graphical or Graphical Enhanced radio button is selected), do the following; then, click Next:

a. (Applicable if the Graphical Enhanced radio button is selected) Select one of the following top-level view types from the Selected View Type list:

Subnetwork—Allows you to view the subnetwork(s) to which the NEs belong. This is the default view type.

Group—Allows you to view the group(s) to which the NEs belong.

The Current View field is set to Top.

b. (Applicable if the Graphical Enhanced radio button is selected) Select a detailed view type from the Available Views list, or right-click a subnetwork or group and choose View. The Current View field is set to the detailed view type that you selected.

In a complex network, it might take several minutes or longer to calculate and display the graphic objects in the map view. The progress bar at the top of the map tracks the percentage of completion while the map is updated.

c. Use the map view to manually route the circuit from the source to the destination specified by the addition of the links selected. Use the right-click menu options to navigate within the map view:

Find Node—Opens the Find Node dialog box, which lists all of the nodes displayed in the map view. Select a node from the drop-down list and click OK. The selection context in the map view changes to show the selected node highlighted in the visible map area.

Zoom In—Allows you to zoom in on an object in the map view.

Zoom Out—Allows you to zoom out on the map view.

Reset Zoom—Resets the current zoom level to the default.

Add—Allows you to add the selected span. Right-click a link and choose Add in the right-click menu. The selected link is added to the Available Spans list. The Add option applies to manual provisioning across all circuit types.

d. In the VCAT Member Number list box, select the member for which the route is to be selected.

e. In the circuit display, select the span to use for the next hop.

f. In the Available Spans area, complete the following information:

From—Displays the source of the span

To—Displays the destination of the span

g. Click Add. The span is added to the Selected Spans list.

h. Repeat substeps d to f for each intermediate NE until the destination NE is reached.

i. Repeat substeps c to g for each member until all members are routed.

j. To delete a span from the Selected Spans area, select a span from the Selected Spans list and click Remove.


Note To specify a DRI link, double-click the link on the map. The map view displays the link as bidirectional.


k. (For BLSR DRI or MS-SPRing DRI circuits) In the BLSR DRI Nodes or MS-SPRing DRI Nodes tab, click the Add button to open the BLSR/MS-SPRing DRI dialog box, which allows you to provide primary and secondary pairs for traditional and nontraditional DRI circuits. Also specify ring and path options for the first and second rings. Click Remove to remove a DRI node from the list.


Note If the Graphical Enhanced radio button is selected and you want to change the top-level view type at any time, click Top View. The map view reverts to the default Subnetwork view type.


Step 23 In the Manual Provisioning pane (available when Route Automatically is unchecked and the Textual radio button is selected), do the following; then, click Next:

a. Specify the following:

Src NE ID—Display only.

Dest NE ID—Display only.

Current NE ID—Display only.

Adj NE ID—Display only.

Available Links—Lists all links between the currently selected and adjacent NEs. Select a link from the drop-down list.

Available Spans—After you select a link from the Available Links drop-down list, its corresponding details are displayed in the Available Spans pane. Click Add to move the spans to the Selected Spans field.

Selected Spans—Select one or more spans and click Remove to remove them from the Selected Spans field.

b. Click Next Hop to specify the next intermediate hop; then, repeat substep a.

c. Click Reset to reset all hop information to the default values.

d. Click Alternate Route to specify hop information for the alternate circuit route.

Step 24 In the Route Constraints pane (available when Route Automatically and Using Required Nodes/Links are enabled and the Graphical or Graphical Enhanced radio button is selected), a graphical representation of the circuit is displayed, including source and destination nodes. Specify the spans that will route to the circuit. Prime Optical starts at the source node. The next NE associated with each span is also displayed. Complete the following substeps:

a. (Applicable if the Graphical Enhanced radio button is selected) Select one of the following top-level view types from the Selected View Type list:

Subnetwork—Allows you to view the subnetwork(s) to which the NEs belong. This is the default view type.

Group—Allows you to view the group(s) to which the NEs belong.

The Current View field is set to Top.

b. (Applicable if the Graphical Enhanced radio button is selected) Select a detailed view type from the Available Views list, or right-click a subnetwork or group and choose View. The Current View field is set to the detailed view type that you selected.

In a complex network, it might take several minutes or longer to calculate and display the graphic objects in the map view. The progress bar at the top of the map tracks the percentage of completion while the map is updated.

c. In the circuit display, select the node or link. The NE ID or link ID is displayed in the Selected Node/Link field.

d. Right-click the line, and click Include to include the selected node or link in the route. The node or link appears in the Included Links/Nodes list.

e. Right-click the line, and click Exclude to exclude the selected node or link from the route. The node or link appears in the Excluded Links/Nodes list.

f. Click Remove to remove the selected node or link from the Included Links/Nodes or Excluded Links/Nodes lists.

g. Click Up or Down to set the sequence of the nodes and spans included in the circuit.

h. Repeat substeps c to g for each node or link that you want to include in the circuit route.

i. (Optional) Repeat substeps c to h for each intermediate NE until the destination NE is reached.

j. Click Finish, or, if Review Route Before Creation is checked in the Routing Preferences pane, click Next.


Note If the Graphical Enhanced radio button is selected and you want to change the top-level view type at any time, click Top View. The map view reverts to the default Subnetwork view type.


Step 25 In the Route Constraints pane (available when Route Automatically and Using Required Nodes/Links are enabled and the Textual radio button is selected), specify the nodes or links to include in each hop of the circuit route. Complete the following substeps:

a. Select Nodes in the Select Nodes/Links area if you want to add nodes to your circuit route; then, specify the node information in the Select Nodes area.

b. Select Links in the Select Nodes/Links area if you want to add links to your circuit route; then, specify the link information in the Select Links area.

c. Click Add to add a BLSR-DRI or MS-SPring-DRI to the circuit route.

d. Click Include to include the selected node or link in the route. The node or link appears in the Included Links/Nodes list.

e. Click Exclude to exclude the selected node or link from the route. The node or link appears in the Excluded Links/Nodes list.

f. Click Remove to remove the selected node or link from the Included Links/Nodes or Excluded Links/Nodes lists.

g. Click Up or Down to set the sequence of the nodes and spans included in the circuit.

h. Repeat substeps a to e for each node or link that you want to include in the circuit route.

i. Click Finish, or, if Review Route Before Creation is checked in the Routing Preferences pane, click Next.

Step 26 In the Review Route pane (available only if Review Route Before Creation is checked), review the following information; then, click Finish:

a. In the circuit display, verify the following information about the point-to-point circuit:

Circuit name

Circuit type

Circuit size

VLANS on the circuit

ONS 15454 SONET or ONS 15454 SDH nodes are included in the circuit

b. Included Spans—Because automatic route selection is enabled in the Routing Preferences pane, Prime Optical automatically selects spans to route the circuit. This field lists all the spans that the Prime Optical server selected automatically.

c. Selected Span—Review the span information.

Step 27 In the message box, click OK.

Step 28 Provision the Ethernet ports and assign ports to VLANs. For information about changing the slot properties, see Ethernet Cards. For information about assigning ports to VLANs, see E-Series Spanning Tree Protocol (IEEE 802.1D). For information about provisioning circuits manually, see E-Series Ethernet Manual Cross-Connects.


7.2.3.13.2  Provisioning E-Series Shared Packet Ring Ethernet Circuits


Step 1 Select an ONS 15327, ONS 15454 SONET, or ONS 15454 SDH NE in the Domain Explorer and choose Configuration > NE Explorer.

Step 2 In the tree view of the NE Explorer window, select the ONS 15327, ONS 15454 SONET, or ONS 15454 SDH Ethernet circuit endpoint nodes.

Step 3 Click the Identification tab.

Step 4 In the Card Mode field, choose Multicard EtherSwitch Group.

Step 5 Click Apply.

Step 6 Repeat Step 2 to Step 5 for each Ethernet card in the ONS 15327, ONS 15454 SONET, or ONS 15454 SDH that will carry the shared packet ring.

Step 7 Navigate to the other ONS 15327, ONS 15454 SONET, or ONS 15454 SDH endpoint.

Step 8 Repeat Step 2 to Step 7 for the other ONS 15327, ONS 15454 SONET, or ONS 15454 SDH endpoint.

Step 9 Do the following in the Domain Explorer:

a. Select the source circuit.

b. Choose Configuration > Create Circuit.

c. Select the destination circuit. The Create Circuit wizard opens.

Step 10 In the Type field, choose STS; then, click Next. The Attributes pane opens.


Note The VT and VT Tunnel types do not apply to Ethernet circuits.


Step 11 In the Name field, enter a name for the circuit.

Step 12 In the Circuit Alias field, enter a unique alias name for the circuit. The alias name can contain alphanumeric characters. International character sets are also supported.

Step 13 From the Size field, choose the size of the circuit. For shared packet ring Ethernet, valid circuit sizes are STS-1, STS-3c, and STS-6c.

Step 14 Verify that the Bidirectional check box is checked.


Note When building a shared packet ring configuration, the circuits must be provisioned manually.


Step 15 Click Next. The Source pane opens.

Step 16 From the Slot field, choose the circuit source. Any shared packet ring node can serve as the circuit source.

Step 17 Choose Ethergroup from the Slot field and click Next. The Destination pane opens.

Step 18 Choose the circuit destination from the Slot field. Except for the source node, any shared packet ring node can serve as the circuit destination.

Step 19 Choose Ethergroup from the Slot field and click Next. The VLAN Selection pane opens.

Step 20 Create the VLAN.

a. Click the New VLAN button. The Define New VLAN dialog box opens.

b. Assign an easily identifiable name to the VLAN.

c. Assign a VLAN ID.


Note The VLAN ID number must be unique. It should be the next available number from 2 to 4093 that is not already assigned to an existing VLAN. Each ONS 15327, ONS 15454 SONET, or ONS 15454 SDH network supports a maximum of 509 user-provisionable VLANs.


d. Click OK.

e. Highlight the VLAN name and click the Add button to move the VLAN from the Available VLANs column to the Circuit VLANs list box. When you move the VLAN from the Available VLANs column to the Circuit VLANs column, all of the VLAN traffic is forced to use the shared packet ring circuit that was created.

Step 21 Click Next.

Step 22 In the Routing Preferences pane, do the following; then, click Next:

a. Route Automatically—Enable or disable automatic route selection. If enabled, Prime Optical automatically determines the route for the circuit. If the source and destination of the circuit are on the same node, automatic routing is enabled. If disabled, you can specify the spans associated with the circuit. You can manually provision the circuit using one of the following views:

Graphical

Graphical Enhanced

Textual

b. Using Required Nodes/Links—(Available only if Route Automatically is checked) Check this check box to let Prime Optical automatically route the circuit through the required nodes and/or links. You can specify the required nodes and links using one of the following views:

Graphical

Graphical Enhanced

Textual

c. Review Route Before Creation—(Available only if Route Automatically is checked) Check this check box to review the route before it is created. You can review the route using one of the following views:

Graphical

Graphical Enhanced

d. Time Slot Restriction—If checked, you can enter an STS/VC4 value (to be used end-to-end) that Prime Optical uses to automatically determine the route for the circuit. Circuit creation fails if the same STS/VC4 is not available end-to-end. If circuit creation fails, you can try again using different values. The valid range is from 1 to 192 for SONET, or from 1 to 64 for SDH networks.


Note For VCAT circuits, you must enter multiple STS/VC4 values in the Member Preferences table > Time Slot Restriction field. The STS/VC4 values that you enter in the Time Slot Restriction field cannot be identical, or circuit creation will fail with an error message.


e. Set the circuit path protection as follows:

To route the circuit on a protected path, leave the Fully Protected Path check box checked (default) and proceed to the next substep. A fully protected circuit route is created based on the path diversity option you choose. Fully protected paths might or might not have SNCP path segments with primary and alternate paths. The path diversity options apply only to SNCP path segments, if any exist.

To create an unprotected circuit, uncheck Fully Protected Path and go to Step 23.

To route the circuit on an MS-SPRing protection channel, uncheck Fully Protected Path, check Protection Channel Access, and go to Step 23.

f. If you selected Fully Protected Path, choose one of the following options:

Required—Ensures that the primary and alternate paths within the extended SNCP mesh network portions of the complete circuit path are nodally diverse.

Desired—Specifies that node diversity is preferred; however, if node diversity is not possible, link-diverse paths are created for the extended SNCP mesh network portion of the complete circuit path.

Don't Care: Link Diverse Only—Specifies that only link-diverse primary and alternate paths for extended SNCP mesh network portions of the complete circuit path are needed.

Dual Ring Interconnect—Provisions the circuit in a DRI topology. If selected, the other node specifications (Required, Desired, and Don't Care: Link Diverse Only) are disabled.


Note If you selected VT as the circuit type in the Attributes pane and unchecked Route Automatically, the new VT tunnel is created when circuit provisioning is finished.


Step 23 In the Manual Provisioning pane (available when Route Automatically is unchecked and the Graphical or Graphical Enhanced radio button is selected), do the following; then, click Next:

a. (Applicable if the Graphical Enhanced radio button is selected) Select one of the following top-level view types from the Selected View Type list:

Subnetwork—Allows you to view the subnetwork(s) to which the NEs belong. This is the default view type.

Group—Allows you to view the group(s) to which the NEs belong.

The Current View field is set to Top.

b. (Applicable if the Graphical Enhanced radio button is selected) Select a detailed view type from the Available Views list, or right-click a subnetwork or group and choose View. The Current View field is set to the detailed view type that you selected.

In a complex network, it might take several minutes or longer to calculate and display the graphic objects in the map view. The progress bar at the top of the map tracks the percentage of completion while the map is updated.

c. Use the map view to manually route the circuit from the source to the destination specified by the addition of the links selected. Use the right-click menu options to navigate within the map view:

Find Node—Opens the Find Node dialog box, which lists all of the nodes displayed in the map view. Select a node from the drop-down list and click OK. The selection context in the map view changes to show the selected node highlighted in the visible map area.

Zoom In—Allows you to zoom in on an object in the map view.

Zoom Out—Allows you to zoom out on the map view.

Reset Zoom—Resets the current zoom level to the default.

Add—Allows you to add the selected span. Right-click a link and choose Add in the right-click menu. The selected link is added to the Available Spans list. The Add option applies to manual provisioning across all circuit types.

d. In the VCAT Member Number list box, select the member for which the route is to be selected.

e. In the circuit display, select the span to use for the next hop.

f. In the Available Spans area, complete the following information:

From—Displays the source of the span

To—Displays the destination of the span

g. Click Add. The span is added to the Selected Spans list.

h. Repeat substeps d to f for each intermediate NE until the destination NE is reached.

i. Repeat substeps c to g for each member until all members are routed.

j. To delete a span from the Selected Spans area, select a span from the Selected Spans list and click Remove.


Note To specify a DRI link, double-click the link on the map. The map view displays the link as bidirectional.


k. (For BLSR DRI or MS-SPRing DRI circuits) In the BLSR DRI Nodes or MS-SPRing DRI Nodes tab, click the Add button to open the BLSR/MS-SPRing DRI dialog box, which allows you to provide primary and secondary pairs for traditional and nontraditional DRI circuits. Also specify ring and path options for the first and second rings. Click Remove to remove a DRI node from the list.


Note If the Graphical Enhanced radio button is selected and you want to change the top-level view type at any time, click Top View. The map view reverts to the default Subnetwork view type.


Step 24 In the Manual Provisioning pane (available when Route Automatically is unchecked and the Textual radio button is selected), do the following; then, click Next:

a. Specify the following:

Src NE ID—Display only.

Dest NE ID—Display only.

Current NE ID—Display only.

Adj NE ID—Display only.

Available Links—Lists all links between the currently selected and adjacent NEs. Select a link from the drop-down list.

Available Spans—After you select a link from the Available Links drop-down list, its corresponding details are displayed in the Available Spans pane. Click Add to move the spans to the Selected Spans field.

Selected Spans—Select one or more spans and click Remove to remove them from the Selected Spans field.

b. Click Next Hop to specify the next intermediate hop; then, repeat substep a.

c. Click Reset to reset all hop information to the default values.

d. Click Alternate Route to specify hop information for the alternate circuit route.

Step 25 In the Route Constraints pane (available when Route Automatically and Using Required Nodes/Links are enabled and the Graphical or Graphical Enhanced radio button is selected), a graphical representation of the circuit is displayed, including source and destination nodes. Specify the spans that will route to the circuit. Prime Optical starts at the source node. The next NE associated with each span is also displayed. Complete the following substeps:

a. (Applicable if the Graphical Enhanced radio button is selected) Select one of the following top-level view types from the Selected View Type list:

Subnetwork—Allows you to view the subnetwork(s) to which the NEs belong. This is the default view type.

Group—Allows you to view the group(s) to which the NEs belong.

The Current View field is set to Top.

b. (Applicable if the Graphical Enhanced radio button is selected) Select a detailed view type from the Available Views list, or right-click a subnetwork or group and choose View. The Current View field is set to the detailed view type that you selected.

In a complex network, it might take several minutes or longer to calculate and display the graphic objects in the map view. The progress bar at the top of the map tracks the percentage of completion while the map is updated.

c. In the circuit display, select the node or link. The NE ID or link ID is displayed in the Selected Node/Link field.

d. Click Include to include the selected node or link in the route. The node or link appears in the Included Links/Nodes list.

e. Click Exclude to exclude the selected node or link from the route. The node or link appears in the Excluded Links/Nodes list.

f. Click Remove to remove the selected node or link from the Included Links/Nodes or Excluded Links/Nodes lists.

g. Click Up or Down to set the sequence of the nodes and spans included in the circuit.

h. Repeat substeps c to g for each node or link that you want to include in the circuit route.

i. (Optional) Repeat substeps c to h for each intermediate NE until the destination NE is reached.

j. Click Finish, or, if Review Route Before Creation is checked in the Routing Preferences pane, click Next.


Note If the Graphical Enhanced radio button is selected and you want to change the top-level view type at any time, click Top View. The map view reverts to the default Subnetwork view type.


Step 26 In the Route Constraints pane (available when Route Automatically and Using Required Nodes/Links are enabled and the Textual radio button is selected), specify the nodes or links to include in each hop of the circuit route. Complete the following substeps:

a. Select Nodes in the Select Nodes/Links area if you want to add nodes to your circuit route; then, specify the node information in the Select Nodes area.

b. Select Links in the Select Nodes/Links area if you want to add links to your circuit route; then, specify the link information in the Select Links area.

c. Click Add to add a BLSR-DRI or MS-SPring-DRI to the circuit route.

d. Click Include to include the selected node or link in the route. The node or link appears in the Included Links/Nodes list.

e. Click Exclude to exclude the selected node or link from the route. The node or link appears in the Excluded Links/Nodes list.

f. Click Remove to remove the selected node or link from the Included Links/Nodes or Excluded Links/Nodes lists.

g. Click Up or Down to set the sequence of the nodes and spans included in the circuit.

h. Repeat substeps a to e for each node or link that you want to include in the circuit route.

i. Click Finish, or, if Review Route Before Creation is checked in the Routing Preferences pane, click Next.

Step 27 In the Review Route pane (available only if Review Route Before Creation is checked), review the following information; then, click Finish:

a. In the circuit display, verify that the new circuit is configured correctly.

b. Included Spans—Because automatic route selection is enabled in the Routing Preferences pane, Prime Optical automatically selects spans to route the circuit. This field lists all the spans that the Prime Optical server selected automatically.

c. Selected Span—Review the span information.

Step 28 In the message box, click OK.

Step 29 Provision the Ethernet ports and assign ports to VLANs. For information about changing the slot properties, see Ethernet Cards. For information about assigning ports to VLANs, see E-Series Spanning Tree Protocol (IEEE 802.1D).


7.2.3.13.3  Provisioning E-Series Hub-and-Spoke Ethernet Circuits

This section provides steps for creating a hub-and-spoke Ethernet circuit configuration. The hub-and-spoke configuration connects point-to-point circuits (the spokes) to an aggregation point (the hub). In many cases, the hub links to a high-speed connection and the spokes are Ethernet cards.


Step 1 Select an ONS 15327, ONS 15454 SONET, or ONS 15454 SDH NE and choose Configuration > NE Explorer.

Step 2 In the tree view of the NE Explorer window, select the ONS 15327, ONS 15454 SONET, or ONS 15454 SDH Ethernet circuit endpoint nodes.

Step 3 Click the Identification tab.

Step 4 Under Card Mode, choose Single-card EtherSwitch and click Apply.

Step 5 Navigate to the other ONS 15327, ONS 15454 SONET, or ONS 15454 SDH endpoint and repeat Step 2 to Step 4.

Step 6 Do the following in the Domain Explorer:

a. Select the source circuit.

b. Choose Configuration > Create Circuit.

c. Select the destination circuit. The Create Circuit wizard opens.

Step 7 From the Type field, choose STS; then, click Next. The Attributes pane opens.


Note The VT and VT Tunnel types do not apply to Ethernet circuits.


Step 8 In the Name field, enter a name for the circuit.

Step 9 In the Circuit Alias field, enter a unique alias name for the circuit. The alias name can contain alphanumeric characters. International character sets are also supported.

Step 10 From the Size field, choose the size of the circuit.

Step 11 Verify that the Bidirectional check box is checked and click Next. The Source pane opens.

Step 12 Choose the circuit source. Either end node can be the circuit source.

Step 13 From the Slot field, choose the Ethernet card where the single-card EtherSwitch was enabled and click Next. The Destination pane opens.

Step 14 Choose the circuit destination. Choose the node that is not the source.

Step 15 From the Slot field, choose the Ethernet card where the single-card EtherSwitch was enabled and click Next. The VLAN Selection pane opens.

Step 16 Create the VLAN.

a. Click the New VLAN button. The Define New VLAN dialog box opens.

b. Assign an easily identifiable name to the VLAN.

c. Assign a VLAN ID.


Note The VLAN ID number must be unique. It should be the next available number from 2 to 4093 that is not already assigned to an existing VLAN. Each ONS 15327, ONS 15454 SONET, or ONS 15454 SDH network supports a maximum of 509 user-provisionable VLANs.


d. Click OK.

e. Highlight the VLAN name and click the Add button to move the VLAN from the Available VLANs column to the Circuit VLANs column.

Step 17 Click Next. The Routing Preferences pane opens.

Step 18 In the Routing Preferences pane, do the following; then, click Next:

a. Route Automatically—Enable or disable automatic route selection. If enabled, Prime Optical automatically determines the route for the circuit. If the source and destination of the circuit are on the same node, automatic routing is enabled. If disabled, you can specify the spans associated with the circuit. You can manually provision the circuit using one of the following views:

Graphical

Graphical Enhanced

Textual

b. Using Required Nodes/Links—(Available only if Route Automatically is checked) Check this check box to let Prime Optical automatically route the circuit through the required nodes and/or links. You can specify the required nodes and links using one of the following views:

Graphical

Graphical Enhanced

Textual

c. Review Route Before Creation—(Available only if Route Automatically is checked) Check this check box to review the route before it is created. You can review the route using one of the following views:

Graphical

Graphical Enhanced

d. Time Slot Restriction—If checked, you can enter an STS/VC4 value (to be used end-to-end) that Prime Optical uses to automatically determine the route for the circuit. Circuit creation fails if the same STS/VC4 is not available end-to-end. If circuit creation fails, you can try again using different values. The valid range is from 1 to 192 for SONET, or from 1 to 64 for SDH networks.


Note For VCAT circuits, you must enter multiple STS/VC4 values in the Member Preferences table > Time Slot Restriction field. The STS/VC4 values that you enter in the Time Slot Restriction field cannot be identical, or circuit creation will fail with an error message.


e. Set the circuit path protection as follows:

To route the circuit on a protected path, leave the Fully Protected Path check box checked (default) and proceed to the next substep. A fully protected circuit route is created based on the path diversity option you choose. Fully protected paths might or might not have SNCP path segments with primary and alternate paths. The path diversity options apply only to SNCP path segments, if any exist.

To create an unprotected circuit, uncheck Fully Protected Path and go to Step 19.

To route the circuit on an MS-SPRing protection channel, uncheck Fully Protected Path, check Protection Channel Access, and go to Step 19.

f. If you selected Fully Protected Path, choose one of the following options:

Required—Ensures that the primary and alternate paths within the extended SNCP mesh network portions of the complete circuit path are nodally diverse.

Desired—Specifies that node diversity is preferred; however, if node diversity is not possible, link-diverse paths are created for the extended SNCP mesh network portion of the complete circuit path.

Don't Care: Link Diverse Only—Specifies that only link-diverse primary and alternate paths for extended SNCP mesh network portions of the complete circuit path are needed.

Dual Ring Interconnect—Provisions the circuit in a DRI topology. If selected, the other node specifications (Required, Desired, and Don't Care: Link Diverse Only) are disabled.

Step 19 In the Manual Provisioning pane (available when Route Automatically is unchecked and the Graphical or Graphical Enhanced radio button is selected), do the following; then, click Next:

a. (Applicable if the Graphical Enhanced radio button is selected) Select one of the following top-level view types from the Selected View Type list:

Subnetwork—Allows you to view the subnetwork(s) to which the NEs belong. This is the default view type.

Group—Allows you to view the group(s) to which the NEs belong.

The Current View field is set to Top.

b. (Applicable if the Graphical Enhanced radio button is selected) Select a detailed view type from the Available Views list, or right-click a subnetwork or group and choose View. The Current View field is set to the detailed view type that you selected.

In a complex network, it might take several minutes or longer to calculate and display the graphic objects in the map view. The progress bar at the top of the map tracks the percentage of completion while the map is updated.

c. Use the map view to manually route the circuit from the source to the destination specified by the addition of the links selected. Use the right-click menu options to navigate within the map view:

Find Node—Opens the Find Node dialog box, which lists all of the nodes displayed in the map view. Select a node from the drop-down list and click OK. The selection context in the map view changes to show the selected node highlighted in the visible map area.

Zoom In—Allows you to zoom in on an object in the map view.

Zoom Out—Allows you to zoom out on the map view.

Reset Zoom—Resets the current zoom level to the default.

Add—Allows you to add the selected span. Right-click a link and choose Add in the right-click menu. The selected link is added to the Available Spans list. The Add option applies to manual provisioning across all circuit types.

d. In the VCAT Member Number list box, select the member for which the route is to be selected.

e. In the circuit display, select the span to use for the next hop.

f. In the Available Spans area, complete the following information:

From—Displays the source of the span

To—Displays the destination of the span

g. Click Add. The span is added to the Selected Spans list.

h. Repeat substeps d to f for each intermediate NE until the destination NE is reached.

i. Repeat substeps c to g for each member until all members are routed.

j. To delete a span from the Selected Spans area, select a span from the Selected Spans list and click Remove.


Note To specify a DRI link, double-click the link on the map. The map view displays the link as bidirectional.


k. (For BLSR DRI or MS-SPRing DRI circuits) In the BLSR DRI Nodes or MS-SPRing DRI Nodes tab, click the Add button to open the BLSR/MS-SPRing DRI dialog box, which allows you to provide primary and secondary pairs for traditional and nontraditional DRI circuits. Also specify ring and path options for the first and second rings. Click Remove to remove a DRI node from the list.


Note If the Graphical Enhanced radio button is selected and you want to change the top-level view type at any time, click Top View. The map view reverts to the default Subnetwork view type.


Step 20 In the Manual Provisioning pane (available when Route Automatically is unchecked and the Textual radio button is selected), do the following; then, click Next:

a. Specify the following:

Src NE ID—Display only.

Dest NE ID—Display only.

Current NE ID—Display only.

Adj NE ID—Display only.

Available Links—Lists all links between the currently selected and adjacent NEs. Select a link from the drop-down list.

Available Spans—After you select a link from the Available Links drop-down list, its corresponding details are displayed in the Available Spans pane. Click Add to move the spans to the Selected Spans field.

Selected Spans—Select one or more spans and click Remove to remove them from the Selected Spans field.

b. Click Next Hop to specify the next intermediate hop; then, repeat substep a.

c. Click Reset to reset all hop information to the default values.

d. Click Alternate Route to specify hop information for the alternate circuit route.

Step 21 In the Route Constraints pane (available when Route Automatically and Using Required Nodes/Links are enabled and the Graphical or Graphical Enhanced radio button is selected), a graphical representation of the circuit is displayed, including source and destination nodes. Specify the spans that will route to the circuit. Prime Optical starts at the source node. The next NE associated with each span is also displayed. Complete the following substeps:

a. (Applicable if the Graphical Enhanced radio button is selected) Select one of the following top-level view types from the Selected View Type list:

Subnetwork—Allows you to view the subnetwork(s) to which the NEs belong. This is the default view type.

Group—Allows you to view the group(s) to which the NEs belong.

The Current View field is set to Top.

b. (Applicable if the Graphical Enhanced radio button is selected) Select a detailed view type from the Available Views list, or right-click a subnetwork or group and choose View. The Current View field is set to the detailed view type that you selected.

In a complex network, it might take several minutes or longer to calculate and display the graphic objects in the map view. The progress bar at the top of the map tracks the percentage of completion while the map is updated.

c. In the circuit display, select the node or link. The NE ID or link ID is displayed in the Selected Node/Link field.

d. Click Include to include the selected node or link in the route. The node or link appears in the Included Links/Nodes list.

e. Click Exclude to exclude the selected node or link from the route. The node or link appears in the Excluded Links/Nodes list.

f. Click Remove to remove the selected node or link from the Included Links/Nodes or Excluded Links/Nodes lists.

g. Click Up or Down to set the sequence of the nodes and spans included in the circuit.

h. Repeat substeps c to g for each node or link that you want to include in the circuit route.

i. (Optional) Repeat substeps c to h for each intermediate NE until the destination NE is reached.

j. Click Finish, or, if Review Route Before Creation is checked in the Routing Preferences pane, click Next.


Note If the Graphical Enhanced radio button is selected and you want to change the top-level view type at any time, click Top View. The map view reverts to the default Subnetwork view type.


Step 22 In the Route Constraints pane (available when Route Automatically and Using Required Nodes/Links are enabled and the Textual radio button is selected), specify the nodes or links to include in each hop of the circuit route. Complete the following substeps:

a. Select Nodes in the Select Nodes/Links area if you want to add nodes to your circuit route; then, specify the node information in the Select Nodes area.

b. Select Links in the Select Nodes/Links area if you want to add links to your circuit route; then, specify the link information in the Select Links area.

c. Click Add to add a BLSR-DRI or MS-SPring-DRI to the circuit route.

d. Click Include to include the selected node or link in the route. The node or link appears in the Included Links/Nodes list.

e. Click Exclude to exclude the selected node or link from the route. The node or link appears in the Excluded Links/Nodes list.

f. Click Remove to remove the selected node or link from the Included Links/Nodes or Excluded Links/Nodes lists.

g. Click Up or Down to set the sequence of the nodes and spans included in the circuit.

h. Repeat substeps a to e for each node or link that you want to include in the circuit route.

i. Click Finish, or, if Review Route Before Creation is checked in the Routing Preferences pane, click Next.

Step 23 In the Review Route pane (available only if Review Route Before Creation is checked), review the following information; then, click Finish:

a. In the circuit display, verify the following information about the point-to-point circuit:

Circuit name

Circuit type

Circuit size

VLANs that will be transported across this circuit

ONS 15327, ONS 15454 SONET, or ONS 15454 SDH nodes are included on this circuit

b. Included Spans—Because automatic route selection is enabled in the Routing Preferences pane, Prime Optical automatically selects spans to route the circuit. This field lists all the spans that the Prime Optical server selected automatically.

c. Selected Span—Review the span information.

Step 24 In the message box, click OK.

Step 25 Provision the second circuit and attach it to the already created VLAN.

Step 26 Provision the Ethernet ports and assign ports to VLANs. For information about changing the slot properties, see Ethernet Cards. For information about assigning ports to VLANs, see E-Series Spanning Tree Protocol (IEEE 802.1D).


7.2.3.13.4  E-Series Ethernet Manual Cross-Connects

ONS 15327, ONS 15454 SONET, and ONS 15454 SDH NEs require end-to-end CTC visibility between nodes for normal provisioning of Ethernet circuits. When equipment from other vendors is positioned between ONS 15327, ONS 15454 SONET, or ONS 15454 SDH NEs, equipment based on OSI/TARP does not allow tunneling of the ONS 15327, ONS 15454 SONET, or ONS 15454 SDH TCP/IP-based DCC. To circumvent this lack of continuous DCC, the Ethernet circuit must be manually cross-connected to an STS channel riding through the non-ONS network. This allows an Ethernet circuit to run from ONS node to ONS node by utilizing the non-ONS network.


Note Provisioning manual cross-connects for multicard EtherSwitch circuits is a separate procedure from provisioning manual cross-connects for single-card EtherSwitch circuits. Both procedures are provided in the following sections.


7.2.3.13.5  Provisioning a Single-Card EtherSwitch Manual Cross-Connect


Step 1 Select an ONS 15327, ONS 15454 SONET, or ONS 15454 SDH NE in the Domain Explorer and choose Configuration > NE Explorer.

Step 2 In the tree view of the NE Explorer window, select the ONS 15327, ONS 15454 SONET, or ONS 15454 SDH Ethernet circuit endpoint nodes.

Step 3 Click the Identification tab.

Step 4 In Card Mode field, choose Single-card EtherSwitch and click Apply.

Step 5 Do the following in the Domain Explorer:

a. Select the source circuit.

b. Choose Configuration > Create Circuit.

c. Select the destination circuit. The Create Circuit wizard opens.

Step 6 From the Type field, choose STS; then, click Next. The Attributes pane opens.


Note The VT and VT Tunnel types do not apply to Ethernet circuits.


Step 7 In the Name field, enter a name for the circuit.

Step 8 In the Circuit Alias field, enter a unique alias name for the new circuit. The alias name can contain alphanumeric characters. International character sets are also supported.

Step 9 From the Size field, choose the size of the circuit. The valid circuit sizes for an Ethernet single-card circuit are STS-1, STS-3c and STS-6c.

Step 10 Verify that the Bidirectional check box is checked and click Next. The Source pane opens.

Step 11 Choose the current node as the circuit source.

Step 12 From the Slot field, choose the Ethernet card that will carry the circuit and click Next. The Destination pane opens.

Step 13 Choose the current node as the circuit destination.

Step 14 From the Slot field, choose the optical card that will carry the circuit.

Step 15 Choose the STS that will carry the circuit from the STS field and click Next. The VLAN Selection pane opens.


Note For Ethernet manual cross-connects, the same node serves as both source and destination.


Step 16 Create the VLAN.

a. Click the New VLAN button. The Define New VLAN dialog box opens.

b. Assign an easily identifiable name to the VLAN.

c. Assign a VLAN ID.


Note The VLAN ID should be the next available number from 2 to 4093 that is not already assigned to an existing VLAN. Each ONS 15327, ONS 15454 SONET, or ONS 15454 SDH network supports a maximum of 509 user-provisionable VLANs.


d. Click OK.

e. Highlight the VLAN name and click the Add button to move the VLAN from the Available VLANs column to the Circuit VLANs column.

Step 17 Click Next. The Routing Preferences pane opens.

Step 18 In the Routing Preferences pane, do the following; then, click Next:

a. Route Automatically—Enable or disable automatic route selection. If enabled, Prime Optical automatically determines the route for the circuit. If the source and destination of the circuit are on the same node, automatic routing is enabled. If disabled, you can specify the spans associated with the circuit. You can manually provision the circuit using one of the following views:

Graphical

Graphical Enhanced

Textual

b. Using Required Nodes/Links—(Available only if Route Automatically is checked) Check this check box to let Prime Optical automatically route the circuit through the required nodes and/or links. You can specify the required nodes and links using one of the following views:

Graphical

Graphical Enhanced

Textual

c. Review Route Before Creation—(Available only if Route Automatically is checked) Check this check box to review the route before it is created. You can review the route using one of the following views:

Graphical

Graphical Enhanced

d. Time Slot Restriction—If checked, you can enter an STS/VC4 value (to be used end-to-end) that Prime Optical uses to automatically determine the route for the circuit. Circuit creation fails if the same STS/VC4 is not available end-to-end. If circuit creation fails, you can try again using different values. The valid range is from 1 to 192 for SONET, or from 1 to 64 for SDH networks.


Note For VCAT circuits, you must enter multiple STS/VC4 values in the Member Preferences table > Time Slot Restriction field. The STS/VC4 values that you enter in the Time Slot Restriction field cannot be identical, or circuit creation will fail with an error message.


e. Set the circuit path protection as follows:

To route the circuit on a protected path, leave the Fully Protected Path check box checked (default) and proceed to the next substep. A fully protected circuit route is created based on the path diversity option you choose. Fully protected paths might or might not have SNCP path segments with primary and alternate paths. The path diversity options apply only to SNCP path segments, if any exist.

To create an unprotected circuit, uncheck Fully Protected Path and go to Step 19.

To route the circuit on an MS-SPRing protection channel, uncheck Fully Protected Path, check Protection Channel Access, and go to Step 19.

f. If you selected Fully Protected Path, choose one of the following options:

Required—Ensures that the primary and alternate paths within the extended SNCP mesh network portions of the complete circuit path are nodally diverse.

Desired—Specifies that node diversity is preferred; however, if node diversity is not possible, link-diverse paths are created for the extended SNCP mesh network portion of the complete circuit path.

Don't Care: Link Diverse Only—Specifies that only link-diverse primary and alternate paths for extended SNCP mesh network portions of the complete circuit path are needed.

Dual Ring Interconnect—Provisions the circuit in a DRI topology. If selected, the other node specifications (Required, Desired, and Don't Care: Link Diverse Only) are disabled.

Step 19 In the Manual Provisioning pane (available when Route Automatically is unchecked and the Graphical or Graphical Enhanced radio button is selected), do the following; then, click Next:

a. (Applicable if the Graphical Enhanced radio button is selected) Select one of the following top-level view types from the Selected View Type list:

Subnetwork—Allows you to view the subnetwork(s) to which the NEs belong. This is the default view type.

Group—Allows you to view the group(s) to which the NEs belong.

The Current View field is set to Top.

b. (Applicable if the Graphical Enhanced radio button is selected) Select a detailed view type from the Available Views list, or right-click a subnetwork or group and choose View. The Current View field is set to the detailed view type that you selected.

In a complex network, it might take several minutes or longer to calculate and display the graphic objects in the map view. The progress bar at the top of the map tracks the percentage of completion while the map is updated.

c. Use the map view to manually route the circuit from the source to the destination specified by the addition of the links selected. Use the right-click menu options to navigate within the map view:

Find Node—Opens the Find Node dialog box, which lists all of the nodes displayed in the map view. Select a node from the drop-down list and click OK. The selection context in the map view changes to show the selected node highlighted in the visible map area.

Zoom In—Allows you to zoom in on an object in the map view.

Zoom Out—Allows you to zoom out on the map view.

Reset Zoom—Resets the current zoom level to the default.

Add—Allows you to add the selected span. Right-click a link and choose Add in the right-click menu. The selected link is added to the Available Spans list. The Add option applies to manual provisioning across all circuit types.

d. In the VCAT Member Number list box, select the member for which the route is to be selected.

e. In the circuit display, select the span to use for the next hop.

f. In the Available Spans area, complete the following information:

From—Displays the source of the span

To—Displays the destination of the span

g. Click Add. The span is added to the Selected Spans list.

h. Repeat substeps d to f for each intermediate NE until the destination NE is reached.

i. Repeat substeps c to g for each member until all members are routed.

j. To delete a span from the Selected Spans area, select a span from the Selected Spans list and click Remove.


Note To specify a DRI link, double-click the link on the map. The map view displays the link as bidirectional.


k. (For BLSR DRI or MS-SPRing DRI circuits) In the BLSR DRI Nodes or MS-SPRing DRI Nodes tab, click the Add button to open the BLSR/MS-SPRing DRI dialog box, which allows you to provide primary and secondary pairs for traditional and nontraditional DRI circuits. Also specify ring and path options for the first and second rings. Click Remove to remove a DRI node from the list.


Note If the Graphical Enhanced radio button is selected and you want to change the top-level view type at any time, click Top View. The map view reverts to the default Subnetwork view type.


Step 20 In the Manual Provisioning pane (available when Route Automatically is unchecked and the Textual radio button is selected), do the following; then, click Next:

a. Specify the following:

Src NE ID—Display only.

Dest NE ID—Display only.

Current NE ID—Display only.

Adj NE ID—Display only.

Available Links—Lists all links between the currently selected and adjacent NEs. Select a link from the drop-down list.

Available Spans—After you select a link from the Available Links drop-down list, its corresponding details are displayed in the Available Spans pane. Click Add to move the spans to the Selected Spans field.

Selected Spans—Select one or more spans and click Remove to remove them from the Selected Spans field.

b. Click Next Hop to specify the next intermediate hop; then, repeat substep a.

c. Click Reset to reset all hop information to the default values.

d. Click Alternate Route to specify hop information for the alternate circuit route.

Step 21 In the Route Constraints pane (available when Route Automatically and Using Required Nodes/Links are enabled and the Graphical or Graphical Enhanced radio button is selected), a graphical representation of the circuit is displayed, including source and destination nodes. Specify the spans that will route to the circuit. Prime Optical starts at the source node. The next NE associated with each span is also displayed. Complete the following substeps:

a. (Applicable if the Graphical Enhanced radio button is selected) Select one of the following top-level view types from the Selected View Type list:

Subnetwork—Allows you to view the subnetwork(s) to which the NEs belong. This is the default view type.

Group—Allows you to view the group(s) to which the NEs belong.

The Current View field is set to Top.

b. (Applicable if the Graphical Enhanced radio button is selected) Select a detailed view type from the Available Views list, or right-click a subnetwork or group and choose View. The Current View field is set to the detailed view type that you selected.

In a complex network, it might take several minutes or longer to calculate and display the graphic objects in the map view. The progress bar at the top of the map tracks the percentage of completion while the map is updated.

c. In the circuit display, select the node or link. The NE ID or link ID is displayed in the Selected Node/Link field.

d. Click Include to include the selected node or link in the route. The node or link appears in the Included Links/Nodes list.

e. Click Exclude to exclude the selected node or link from the route. The node or link appears in the Excluded Links/Nodes list.

f. Click Remove to remove the selected node or link from the Included Links/Nodes or Excluded Links/Nodes lists.

g. Click Up or Down to set the sequence of the nodes and spans included in the circuit.

h. Repeat substeps c to g for each node or link that you want to include in the circuit route.

i. (Optional) Repeat substeps c to h for each intermediate NE until the destination NE is reached.

j. Click Finish, or, if Review Route Before Creation is checked in the Routing Preferences pane, click Next.


Note If the Graphical Enhanced radio button is selected and you want to change the top-level view type at any time, click Top View. The map view reverts to the default Subnetwork view type.


Step 22 In the Route Constraints pane (available when Route Automatically and Using Required Nodes/Links are enabled and the Textual radio button is selected), specify the nodes or links to include in each hop of the circuit route. Complete the following substeps:

a. Select Nodes in the Select Nodes/Links area if you want to add nodes to your circuit route; then, specify the node information in the Select Nodes area.

b. Select Links in the Select Nodes/Links area if you want to add links to your circuit route; then, specify the link information in the Select Links area.

c. Click Add to add a BLSR-DRI or MS-SPring-DRI to the circuit route.

d. Click Include to include the selected node or link in the route. The node or link appears in the Included Links/Nodes list.

e. Click Exclude to exclude the selected node or link from the route. The node or link appears in the Excluded Links/Nodes list.

f. Click Remove to remove the selected node or link from the Included Links/Nodes or Excluded Links/Nodes lists.

g. Click Up or Down to set the sequence of the nodes and spans included in the circuit.

h. Repeat substeps a to e for each node or link that you want to include in the circuit route.

i. Click Finish, or, if Review Route Before Creation is checked in the Routing Preferences pane, click Next.

Step 23 In the Review Route pane (available only if Review Route Before Creation is checked), review the following information; then, click Finish:

a. In the circuit display, verify the following information about the point-to-point circuit:

Circuit name

Circuit type

Circuit size

VLANs on this circuit

ONS 15327, ONS 15454 SONET, or ONS 15454 SDH nodes are included on this circuit

b. Included Spans—Because automatic route selection is enabled in the Routing Preferences pane, Prime Optical automatically selects spans to route the circuit. This field lists all the spans that the Prime Optical server selected automatically.

c. Selected Span—Review the span information.

Step 24 In the message box, click OK.

Step 25 Provision the Ethernet ports and assign ports to VLANs. For information about changing the slot properties, see Ethernet Cards. For information about assigning ports to VLANs, see E-Series Spanning Tree Protocol (IEEE 802.1D).

Step 26 After assigning the ports to the VLANs, repeat Step 1 to Step 25 at the second ONS 15327, ONS 15454 SONET, or ONS 15454 SDH Ethernet manual cross-connect endpoint.


Note The appropriate STS circuit must exist in the non-ONS 15454 SONET equipment to connect the two STSs from the ONS 15454 SONET Ethernet manual cross-connect endpoints.


Caution If a CARLOSS alarm repeatedly appears and clears on an Ethernet manual cross-connect, the two Ethernet circuits might have a circuit-size mismatch. For example, a circuit size of STS-3c might have been configured on the first ONS 15454 SONET or ONS 15454 SDH, and a circuit size of STS-12c might have been configured on the second ONS 15327, ONS 15454 SONET, or ONS 15454 SDH. To troubleshoot the CARLOSS alarm, see the CARLOSS alarm troubleshooting procedure in the "Alarm Troubleshooting" chapter of the Cisco ONS 15454 Troubleshooting Guide or Cisco ONS 15454 SDH Troubleshooting Guide.

7.2.3.13.6  Provisioning an E-Series Multicard EtherSwitch Manual Cross-Connect


Step 1 Select an ONS 15327, ONS 15454 SONET, or ONS 15454 SDH NE in the Domain Explorer and choose Configuration > NE Explorer.

Step 2 In the tree view of the NE Explorer window, select the ONS 15327, ONS 15454 SONET, or ONS 15454 SDH Ethernet circuit endpoint nodes.

Step 3 Click the Identification tab.

Step 4 In the Card Mode field, choose Multicard EtherSwitch Group and click Apply.

Step 5 Repeat Step 2 to Step 4 for each Ethernet card in the ONS 15327, ONS 15454 SONET, or ONS 15454 SDH that will carry the circuit.

Step 6 Do the following in the Domain Explorer:

a. Select the source circuit.

b. Choose Configuration > Create Circuit.

c. Select the destination circuit. The Create Circuit wizard opens.

Step 7 From the Type field, choose STS; then, click Next. The Attributes pane opens.


Note The VT and VT Tunnel types do not apply to Ethernet circuits.


Step 8 In the Name field, enter a name for the circuit.

Step 9 In the Circuit Alias field, enter a unique alias name for the new circuit. The alias name can contain alphanumeric characters. International character sets are also supported.

Step 10 From the Size field, choose the size of the circuit. The valid circuit sizes for an Ethernet multicard circuit are STS-1, STS-3c, and STS-6c.

Step 11 Verify that the Bidirectional check box is checked and click Next. The Source pane opens.

Step 12 Choose the current node as the circuit source.

Step 13 Choose Ethergroup from the Slot field and click Next. The Destination pane opens.

Step 14 Choose the current node as the circuit destination.

Step 15 Choose the Ethernet card that will carry the circuit from the Slot field and click Next. The VLAN Selection pane opens.


Note For the Ethernet manual cross-connect, the destination and source should be the same node.


Step 16 Create the VLAN.

a. Click the New VLAN button. The Define New VLAN dialog box opens.

b. Assign an easily identifiable name to the VLAN.

c. Assign a VLAN ID.


Note The VLAN ID should be the next available number from 2 to 4093 that is not already assigned to an existing VLAN. Each ONS 15327, ONS 15454 SONET, or ONS 15454 SDH network supports a maximum of 509 user-provisionable VLANs.


d. Click OK.

e. Highlight the VLAN name and click the Add button to move the VLAN from the Available VLANs column to the Circuit VLANs column.

Step 17 Click Next. The Routing Preferences pane opens.

Step 18 In the Routing Preferences pane, do the following; then, click Next:

a. Route Automatically—Enable or disable automatic route selection. If enabled, Prime Optical automatically determines the route for the circuit. If the source and destination of the circuit are on the same node, automatic routing is enabled. If disabled, you can specify the spans associated with the circuit. You can manually provision the circuit using one of the following views:

Graphical

Graphical Enhanced

Textual

b. Using Required Nodes/Links—(Available only if Route Automatically is checked) Check this check box to let Prime Optical automatically route the circuit through the required nodes and/or links. You can specify the required nodes and links using one of the following views:

Graphical

Graphical Enhanced

Textual

c. Review Route Before Creation—(Available only if Route Automatically is checked) Check this check box to review the route before it is created. You can review the route using one of the following views:

Graphical

Graphical Enhanced

d. Time Slot Restriction—If checked, you can enter an STS/VC4 value (to be used end-to-end) that Prime Optical uses to automatically determine the route for the circuit. Circuit creation fails if the same STS/VC4 is not available end-to-end. If circuit creation fails, you can try again using different values. The valid range is from 1 to 192 for SONET, or from 1 to 64 for SDH networks.


Note For VCAT circuits, you must enter multiple STS/VC4 values in the Member Preferences table > Time Slot Restriction field. The STS/VC4 values that you enter in the Time Slot Restriction field cannot be identical, or circuit creation will fail with an error message.


e. Set the circuit path protection as follows:

To route the circuit on a protected path, leave the Fully Protected Path check box checked (default) and proceed to the next substep. A fully protected circuit route is created based on the path diversity option you choose. Fully protected paths might or might not have SNCP path segments with primary and alternate paths. The path diversity options apply only to SNCP path segments, if any exist.

To create an unprotected circuit, uncheck Fully Protected Path and go to Step 19.

To route the circuit on an MS-SPRing protection channel, uncheck Fully Protected Path, check Protection Channel Access, and go to Step 19.

f. If you selected Fully Protected Path, choose one of the following options:

Required—Ensures that the primary and alternate paths within the extended SNCP mesh network portions of the complete circuit path are nodally diverse.

Desired—Specifies that node diversity is preferred; however, if node diversity is not possible, link-diverse paths are created for the extended SNCP mesh network portion of the complete circuit path.

Don't Care: Link Diverse Only—Specifies that only link-diverse primary and alternate paths for extended SNCP mesh network portions of the complete circuit path are needed.

Dual Ring Interconnect—Provisions the circuit in a DRI topology. If selected, the other node specifications (Required, Desired, and Don't Care: Link Diverse Only) are disabled.

Step 19 In the Manual Provisioning pane (available when Route Automatically is unchecked and the Graphical or Graphical Enhanced radio button is selected), do the following; then, click Next:

a. (Applicable if the Graphical Enhanced radio button is selected) Select one of the following top-level view types from the Selected View Type list:

Subnetwork—Allows you to view the subnetwork(s) to which the NEs belong. This is the default view type.

Group—Allows you to view the group(s) to which the NEs belong.

The Current View field is set to Top.

b. (Applicable if the Graphical Enhanced radio button is selected) Select a detailed view type from the Available Views list, or right-click a subnetwork or group and choose View. The Current View field is set to the detailed view type that you selected.

In a complex network, it might take several minutes or longer to calculate and display the graphic objects in the map view. The progress bar at the top of the map tracks the percentage of completion while the map is updated.

c. Use the map view to manually route the circuit from the source to the destination specified by the addition of the links selected. Use the right-click menu options to navigate within the map view:

Find Node—Opens the Find Node dialog box, which lists all of the nodes displayed in the map view. Select a node from the drop-down list and click OK. The selection context in the map view changes to show the selected node highlighted in the visible map area.

Zoom In—Allows you to zoom in on an object in the map view.

Zoom Out—Allows you to zoom out on the map view.

Reset Zoom—Resets the current zoom level to the default.

Add—Allows you to add the selected span. Right-click a link and choose Add in the right-click menu. The selected link is added to the Available Spans list. The Add option applies to manual provisioning across all circuit types.

d. In the VCAT Member Number list box, select the member for which the route is to be selected.

e. In the circuit display, select the span to use for the next hop.

f. In the Available Spans area, complete the following information:

From—Displays the source of the span

To—Displays the destination of the span

g. Click Add. The span is added to the Selected Spans list.

h. Repeat substeps d to f for each intermediate NE until the destination NE is reached.

i. Repeat substeps c to g for each member until all members are routed.

j. To delete a span from the Selected Spans area, select a span from the Selected Spans list and click Remove.


Note To specify a DRI link, double-click the link on the map. The map view displays the link as bidirectional.


k. (For BLSR DRI or MS-SPRing DRI circuits) In the BLSR DRI Nodes or MS-SPRing DRI Nodes tab, click the Add button to open the BLSR/MS-SPRing DRI dialog box, which allows you to provide primary and secondary pairs for traditional and nontraditional DRI circuits. Also specify ring and path options for the first and second rings. Click Remove to remove a DRI node from the list.


Note If the Graphical Enhanced radio button is selected and you want to change the top-level view type at any time, click Top View. The map view reverts to the default Subnetwork view type.


Step 20 In the Manual Provisioning pane (available when Route Automatically is unchecked and the Textual radio button is selected), do the following; then, click Next:

a. Specify the following:

Src NE ID—Display only.

Dest NE ID—Display only.

Current NE ID—Display only.

Adj NE ID—Display only.

Available Links—Lists all links between the currently selected and adjacent NEs. Select a link from the drop-down list.

Available Spans—After you select a link from the Available Links drop-down list, its corresponding details are displayed in the Available Spans pane. Click Add to move the spans to the Selected Spans field.

Selected Spans—Select one or more spans and click Remove to remove them from the Selected Spans field.

b. Click Next Hop to specify the next intermediate hop; then, repeat substep a.

c. Click Reset to reset all hop information to the default values.

d. Click Alternate Route to specify hop information for the alternate circuit route.

Step 21 In the Route Constraints pane (available when Route Automatically and Using Required Nodes/Links are enabled and the Graphical or Graphical Enhanced radio button is selected), a graphical representation of the circuit is displayed, including source and destination nodes. Specify the spans that will route to the circuit. Prime Optical starts at the source node. The next NE associated with each span is also displayed. Complete the following substeps:

a. (Applicable if the Graphical Enhanced radio button is selected) Select one of the following top-level view types from the Selected View Type list:

Subnetwork—Allows you to view the subnetwork(s) to which the NEs belong. This is the default view type.

Group—Allows you to view the group(s) to which the NEs belong.

The Current View field is set to Top.

b. (Applicable if the Graphical Enhanced radio button is selected) Select a detailed view type from the Available Views list, or right-click a subnetwork or group and choose View. The Current View field is set to the detailed view type that you selected.

In a complex network, it might take several minutes or longer to calculate and display the graphic objects in the map view. The progress bar at the top of the map tracks the percentage of completion while the map is updated.

c. In the circuit display, select the node or link. The NE ID or link ID is displayed in the Selected Node/Link field.

d. Click Include to include the selected node or link in the route. The node or link appears in the Included Links/Nodes list.

e. Click Exclude to exclude the selected node or link from the route. The node or link appears in the Excluded Links/Nodes list.

f. Click Remove to remove the selected node or link from the Included Links/Nodes or Excluded Links/Nodes lists.

g. Click Up or Down to set the sequence of the nodes and spans included in the circuit.

h. Repeat substeps c to g for each node or link that you want to include in the circuit route.

i. (Optional) Repeat substeps c to h for each intermediate NE until the destination NE is reached.

j. Click Finish, or, if Review Route Before Creation is checked in the Routing Preferences pane, click Next.


Note If the Graphical Enhanced radio button is selected and you want to change the top-level view type at any time, click Top View. The map view reverts to the default Subnetwork view type.


Step 22 In the Route Constraints pane (available when Route Automatically and Using Required Nodes/Links are enabled and the Textual radio button is selected), specify the nodes or links to include in each hop of the circuit route. Complete the following substeps:

a. Select Nodes in the Select Nodes/Links area if you want to add nodes to your circuit route; then, specify the node information in the Select Nodes area.

b. Select Links in the Select Nodes/Links area if you want to add links to your circuit route; then, specify the link information in the Select Links area.

c. Click Add to add a BLSR-DRI or MS-SPring-DRI to the circuit route.

d. Click Include to include the selected node or link in the route. The node or link appears in the Included Links/Nodes list.

e. Click Exclude to exclude the selected node or link from the route. The node or link appears in the Excluded Links/Nodes list.

f. Click Remove to remove the selected node or link from the Included Links/Nodes or Excluded Links/Nodes lists.

g. Click Up or Down to set the sequence of the nodes and spans included in the circuit.

h. Repeat substeps a to e for each node or link that you want to include in the circuit route.

i. Click Finish, or, if Review Route Before Creation is checked in the Routing Preferences pane, click Next.

Step 23 In the Review Route pane (available only if Review Route Before Creation is checked), review the following information; then, click Finish:

a. In the circuit display, verify the following information about the point-to-point circuit:

Circuit name

Circuit type

Circuit size

VLANs on this circuit

ONS 15327, ONS 15454 SONET, or ONS 15454 SDH nodes are included on this circuit

b. Included Spans—Because automatic route selection is enabled in the Routing Preferences pane, Prime Optical automatically selects spans to route the circuit. This field lists all the spans that the Prime Optical server selected automatically.

c. Selected Span—Review the span information.

Step 24 In the message box, click OK.

Step 25 Provision the Ethernet ports and assign ports to VLANs. For information about changing the slot properties, see Ethernet Cards. For information about assigning ports to VLANs, see E-Series Spanning Tree Protocol (IEEE 802.1D). Return to Step 26 of this procedure after assigning the ports to VLANs.

Step 26 Highlight the circuit and click Edit. The Edit Circuit dialog box opens.

Step 27 Click Drops; then, click Create. The Define New Drop dialog box opens.

Step 28 From the Slot field, choose the optical card that links the ONS 15454 SONET or ONS 15454 SDH to the non-ONS 15454 equipment.

Step 29 From the Port field, choose the appropriate port.

Step 30 From the STS field, choose the STS that matches the STS of the connecting non-ONS 15454 equipment.

Step 31 Click OK. The Edit Circuit dialog box opens.

Step 32 Confirm the circuit information that is displayed in the Circuit Information dialog box and click Close.

Step 33 Repeat Step 1 to Step 32 at the second ONS 15327, ONS 15454 SONET, or ONS 15454 SDH Ethernet manual cross-connect endpoint.


Note The appropriate STS circuit must exist in the non-ONS 15454 equipment to connect the two ONS 15454 SONET or ONS 15454 SDH Ethernet manual cross-connect endpoints.


Caution If a CARLOSS alarm repeatedly appears and clears on an Ethernet manual cross-connect, the two Ethernet circuits might have a circuit-size mismatch. For example, a circuit size of STS-3c might have been configured on the first ONS 15454 SONET or ONS 15454 SDH, and a circuit size of STS-12c might have been configured on the second ONS 15454 SONET or ONS 15454 SDH. To troubleshoot the CARLOSS alarm, see the CARLOSS alarm troubleshooting procedure in the "Alarm Troubleshooting" chapter of the Cisco ONS 15454 Troubleshooting Guide or Cisco ONS 15454 SDH Troubleshooting Guide.

7.2.3.14  Creating a BLSR DRI or MS-SPRing DRI Circuit Automatically

The BLSR/MS-SPRing DRI feature allows you to provision a circuit in a DRI topology to provide the required protection when transitioning traffic between two rings, where at least one ring is a BLSR or MS-SPRing.


Step 1 Select a node for which to create a circuit, and open the Create Circuit wizard. For an explanation of wizard launch points, see Table 7-4.

Step 2 In the Type pane, choose VC_HO_Path_Circuit for SDH circuits or STS for SONET circuits. In the Number of Circuits field, enter the number of circuits you want to create. The default is 1. If you enter a number higher than 1, you can use autoranging to create the additional circuits automatically.

Step 3 Click Next.

Step 4 In the Attributes pane, enter the following information; then, click Next:

Name—Enter a unique name for the new circuit. The circuit name is a free-format string of up to 48 ASCII characters. If you leave the field blank, Prime Optical assigns a default name to the circuit.

Circuit Alias—Enter a unique alias name for the new circuit. The alias name can contain alphanumeric characters. International character sets are also supported.

Description—Enter a circuit description of up to 256 characters.

Size—Select the circuit size. VC high-order path circuits can be VC4, VC4-2c, VC4-3c, VC4-4c, VC4-8c, VC4-16c, or VC4-64c for optical cards and for some Ethernet cards (depending on the card type). Of the Ethernet cards, only the G-1000 can use VC4-3c, VC4-8c, and VC4-16c. The "c" indicates concatenated VC4s.

Bidirectional—Check this check box to create a two-way circuit; uncheck it to create a one-way circuit.

State—Specify the circuit state. Options vary depending on the type of circuit selected.

Apply to source/destination ports—Check this check box to apply the selected state to the source and destination ports.

Protected Drops—Check this check box if you want the circuit routed to protected drops only; that is, to cards that are in 1:1, 1:N, or 1+1 protection.

Provision working go and return on primary path (bidirectional UPSR/SNCP protection only)—Check this check box to provision the working path to go and return to the primary path.


Note Prime Optical currently provisions unidirectional SNCP/UPSR circuits following the GR-1400 standard. For bidirectional SNCP/UPSR circuits, you can check the Provision working go and return on primary path check box to route the working and protect paths in one direction following the ITU-T G.841 standard. Unidirectional UPSR/SNCP circuits are not affected by this new routing, and the shortest path is always used as the working path.


SNCP path selector defaults—If the circuit will be routed on an SNCP node, set the defaults as follows:

Revertive—Check this check box if you want traffic to revert to the working path when the conditions that diverted it to the protect path are repaired. If Revertive is not chosen, traffic remains on the protect path.

Reversion time—If Revertive is checked, set the reversion time. This is the amount of time that elapses before the traffic reverts to the working path. Traffic can revert when conditions causing the switch are cleared. (The Cisco default reversion time is 5 minutes.)

SF threshold—Choose from 1 E-3, 1 E-4, or 1 E-5.

SD threshold—Choose from 1 E-5, 1 E-6, 1 E-7, 1 E-8, or 1 E-9.

Switch on PDI-P—Not applicable.

Customer ID (optional)—Identify the end user of the circuit.

Service ID (optional)—Enter the service ID of the circuit.

Step 5 In the Source pane, set the circuit source. The options displayed depend on the circuit type, the circuit properties selected in the Attributes pane, and the cards installed in the node. Click Use Secondary Source if you want to create an SNCP bridge/selector circuit entry point in a multivendor SNCP.

Step 6 Click Next.

Step 7 In the Destination pane, set the circuit destination. The options displayed depend on the circuit type, the circuit properties selected in the Attributes pane, and the cards installed in the node. Click Use Secondary Destination if you want to create a circuit destination point for unidirectional/bidirectional circuits.

Step 8 Click Next.

Step 9 In the Routing Preferences pane, do the following; then, click Next:

a. Route Automatically—Enable or disable automatic route selection. If enabled, Prime Optical automatically determines the route for the circuit. If the source and destination of the circuit are on the same node, automatic routing is enabled. If disabled, you can specify the spans associated with the circuit. You can manually provision the circuit using one of the following views:

Graphical

Graphical Enhanced

Textual

Check the Route Automatically check box.

b. Using Required Nodes/Links—(Available only if Route Automatically is checked) Check this check box to let Prime Optical automatically route the circuit through the required nodes and/or links. You can specify the required nodes and links using one of the following views:

Graphical

Graphical Enhanced

Textual

c. Check the Review Route Before Creation check box to review the route before it is created. You can review the route using one of the following views:

Graphical

Graphical Enhanced

d. To route the circuit on a protected path, leave the Fully Protected Path check box checked (default). A fully protected circuit route is created based on the path diversity option you choose. Fully protected paths might or might not have SNCP path segments with primary and alternate paths. The path diversity options apply only to SNCP path segments, if any exist. When you select Fully Protected Path, Required is selected automatically.

e. Check the Dual Ring Interconnect check box.

Step 10 In the Manual Provisioning pane (available when Route Automatically is unchecked and the Graphical radio button is selected), do the following; then, click Next:

a. (Applicable if the Graphical Enhanced radio button is selected) Select one of the following top-level view types from the Selected View Type list:

Subnetwork—Allows you to view the subnetwork(s) to which the NEs belong. This is the default view type.

Group—Allows you to view the group(s) to which the NEs belong.

The Current View field is set to Top.

b. (Applicable if the Graphical Enhanced radio button is selected) Select a detailed view type from the Available Views list, or right-click a subnetwork or group and choose View. The Current View field is set to the detailed view type that you selected.

In a complex network, it might take several minutes or longer to calculate and display the graphic objects in the map view. The progress bar at the top of the map tracks the percentage of completion while the map is updated.

c. Use the map view to manually route the circuit from the source to the destination specified by the addition of the links selected. Use the right-click menu options to navigate within the map view:

Find Node—Opens the Find Node dialog box, which lists all of the nodes displayed in the map view. Select a node from the drop-down list and click OK. The selection context in the map view changes to show the selected node highlighted in the visible map area.

Zoom In—Allows you to zoom in on an object in the map view.

Zoom Out—Allows you to zoom out on the map view.

Reset Zoom—Resets the current zoom level to the default.

Add—Allows you to add the selected span. Right-click a link and choose Add in the right-click menu. The selected link is added to the Available Spans list. The Add option applies to manual provisioning across all circuit types.

d. In the VCAT Member Number list box, select the member for which the route is to be selected.

e. In the circuit display, select the span to use for the next hop.

f. In the Available Spans area, complete the following information:

From—Displays the source of the span

To—Displays the destination of the span

g. Click Add. The span is added to the Selected Spans list.

h. Repeat substeps d to f for each intermediate NE until the destination NE is reached.

i. Repeat substeps c to g for each member until all members are routed.

j. To delete a span from the Selected Spans area, select a span from the Selected Spans list and click Remove.


Note To specify a DRI link, double-click the link on the map. The map view displays the link as bidirectional.


k. (For BLSR DRI or MS-SPRing DRI circuits) In the BLSR DRI Nodes or MS-SPRing DRI Nodes tab, click the Add button to open the BLSR/MS-SPRing DRI dialog box, which allows you to provide primary and secondary pairs for traditional and nontraditional DRI circuits. Also specify ring and path options for the first and second rings. Click Remove to remove a DRI node from the list.


Note If the Graphical Enhanced radio button is selected and you want to change the top-level view type at any time, click Top View. The map view reverts to the default Subnetwork view type.


Step 11 In the Manual Provisioning pane (available when Route Automatically is unchecked and the Textual radio button is selected), do the following; then, click Next:

a. Specify the following:

Src NE ID—Display only.

Dest NE ID—Display only.

Current NE ID—Display only.

Adj NE ID—Display only.

Available Links—Lists all links between the currently selected and adjacent NEs. Select a link from the drop-down list.

Available Spans—After you select a link from the Available Links drop-down list, its corresponding details are displayed in the Available Spans pane. Click Add to move the spans to the Selected Spans field.

Selected Spans—Select one or more spans and click Remove to remove them from the Selected Spans field.

b. Click Next Hop to specify the next intermediate hop; then, repeat substep a.

c. Click Reset to reset all hop information to the default values.

d. Click Alternate Route to specify hop information for the alternate circuit route.

Step 12 In the Route Constraints pane (available when Route Automatically and Using Required Nodes/Links are enabled and the Graphical or Graphical Enhanced radio button is selected), a graphical representation of the circuit is displayed, including source and destination nodes. Specify the spans that will route to the circuit. Prime Optical starts at the source node. The next NE associated with each span is also displayed. Complete the following substeps:

a. (Applicable if the Graphical Enhanced radio button is selected) Select one of the following top-level view types from the Selected View Type list:

Subnetwork—Allows you to view the subnetwork(s) to which the NEs belong. This is the default view type.

Group—Allows you to view the group(s) to which the NEs belong.

The Current View field is set to Top.

b. (Applicable if the Graphical Enhanced radio button is selected) Select a detailed view type from the Available Views list, or right-click a subnetwork or group and choose View. The Current View field is set to the detailed view type that you selected.

In a complex network, it might take several minutes or longer to calculate and display the graphic objects in the map view. The progress bar at the top of the map tracks the percentage of completion while the map is updated.

c. In the circuit display, select the node or link. The NE ID or link ID is displayed in the Selected Node/Link field.

d. Click Include to include the selected node or link in the route. The node or link appears in the Included Links/Nodes list.

e. Click Exclude to exclude the selected node or link from the route. The node or link appears in the Excluded Links/Nodes list.

f. Click Remove to remove the selected node or link from the Included Links/Nodes or Excluded Links/Nodes lists.

g. Click Up or Down to set the sequence of the nodes and spans included in the circuit.

h. Repeat substeps c to g for each node or link that you want to include in the circuit route.

i. (Optional) Repeat substeps c to h for each intermediate NE until the destination NE is reached.

j. Click Finish, or, if Review Route Before Creation is checked in the Routing Preferences pane, click Next.


Note If the Graphical Enhanced radio button is selected and you want to change the top-level view type at any time, click Top View. The map view reverts to the default Subnetwork view type.


Step 13 In the Route Constraints pane (available when Route Automatically and Using Required Nodes/Links are enabled and the Textual radio button is selected), specify the nodes or links to include in each hop of the circuit route. Complete the following substeps:

a. Select Nodes in the Select Nodes/Links area if you want to add nodes to your circuit route; then, specify the node information in the Select Nodes area.

b. Select Links in the Select Nodes/Links area if you want to add links to your circuit route; then, specify the link information in the Select Links area.

c. Click Add to add a BLSR-DRI or MS-SPring-DRI to the circuit route. The BLSR/MS-SPRing DRI dialog box opens. Use this dialog box to provide primary and secondary pairs for traditional and nontraditional DRI circuits. Also specify ring and path options for the first and second rings. Check the Use RIP bandwidth on secondary path check box to use RIP protection for the BLSR or MS-SPRing DRI circuit. Click OK. The information you specified in the BLSR/MS-SPRing DRI dialog box is shown in the Route Constraints pane, in the Included Links/Nodes field.

d. Click Include to include the selected node or link in the route. The node or link appears in the Included Links/Nodes list.

e. Click Exclude to exclude the selected node or link from the route. The node or link appears in the Excluded Links/Nodes list.

f. Click Remove to remove the selected node or link from the Included Links/Nodes or Excluded Links/Nodes lists.

g. Click Up or Down to set the sequence of the nodes and spans included in the circuit.

h. Repeat substeps a to e for each node or link that you want to include in the circuit route.

i. Click Finish, or, if Review Route Before Creation is checked in the Routing Preferences pane, click Next.

Step 14 After clicking Next, if you did not check the Revertive check box in the Attributes pane, a dialog box opens with the message "This Circuit Is Configured As Non-Revertive." If you do not want to specify reversion settings, click OK without filling in the fields in the dialog box. If you want to specify reversion settings, check the Revertive check box, specify the reversion time in 0.5-minute increments, and click OK.

Step 15 In the Review Route pane, review the following information; then, click Finish:

a. In the circuit display, review the ID of the source and destination NEs.

b. Included Spans—Because automatic route selection is enabled in the Routing Preferences pane, Prime Optical automatically selects spans to route the circuit. This field lists all the spans that the Prime Optical server selected automatically.

c. Selected Span—Review the span information.

Step 16 In the message box, click OK.


7.2.3.15  Creating a BLSR DRI or MS-SPRing DRI Circuit Manually

The BLSR/MS-SPRing DRI feature allows you to provision a circuit in a DRI topology to provide the required protection when transitioning traffic between two rings, where at least one ring is a BLSR or MS-SPRing.


Step 1 Select a node for which to create a circuit, and open the Create Circuit wizard. For an explanation of wizard launch points, see Table 7-4.

Step 2 In the Type pane, choose VC_HO_Path_Circuit for SDH circuits or STS for SONET circuits. In the Number of Circuits field, enter the number of circuits you want to create. The default is 1. If you enter a number higher than 1, you can use autoranging to create the additional circuits automatically.

Step 3 Click Next.

Step 4 In the Attributes pane, enter the following information; then, click Next:

Name—Enter a unique name for the new circuit. The circuit name is a free-format string of up to 48 ASCII characters. If you leave the field blank, Prime Optical assigns a default name to the circuit.

Circuit Alias—Enter a unique alias name for the new circuit. The alias name can contain alphanumeric characters. International character sets are also supported.

Description—Enter a circuit description of up to 256 characters.

Size—Select the circuit size. VC high-order path circuits can be VC4, VC4-2c, VC4-3c, VC4-4c, VC4-8c, VC4-16c, or VC4-64c for optical cards and for some Ethernet cards (depending on the card type). Of the Ethernet cards, only the G-1000 can use VC4-3c, VC4-8c, and VC4-16c. The "c" indicates concatenated VC4s.

Bidirectional—Check this check box to create a two-way circuit; uncheck it to create a one-way circuit.

State—Specify the circuit state. Options vary depending on the type of circuit selected.

Apply to source/destination ports—Check this check box to apply the selected state to the source and destination ports.

Protected Drops—Check this check box if you want the circuit routed to protected drops only; that is, to cards that are in 1:1, 1:N, or 1+1 protection.

Provision working go and return on primary path (bidirectional UPSR/SNCP protection only)—Check this check box to provision the working path to go and return to the primary path.


Note Prime Optical currently provisions unidirectional SNCP/UPSR circuits following the GR-1400 standard. For bidirectional SNCP/UPSR circuits, you can check the Provision working go and return on primary path check box to route the working and protect paths in one direction following the ITU-T G.841 standard. Unidirectional UPSR/SNCP circuits are not affected by this new routing, and the shortest path is always used as the working path.


SNCP path selector defaults—If the circuit will be routed on an SNCP node, set the defaults as follows:

Revertive—Check this check box if you want traffic to revert to the working path when the conditions that diverted it to the protect path are repaired. If Revertive is not chosen, traffic remains on the protect path.

Reversion time—If Revertive is checked, set the reversion time. This is the amount of time that elapses before the traffic reverts to the working path. Traffic can revert when conditions causing the switch are cleared. (The Cisco default reversion time is 5 minutes.)

SF threshold—Choose from 1 E-3, 1 E-4, or 1 E-5.

SD threshold—Choose from 1 E-5, 1 E-6, 1 E-7, 1 E-8, or 1 E-9.

Switch on PDI-P—Not applicable.

Customer ID (optional)—Identify the end user of the circuit.

Service ID (optional)—Enter the service ID of the circuit.

Step 5 In the Source pane, set the circuit source. The options displayed depend on the circuit type, the circuit properties selected in the Attributes pane, and the cards installed in the node. Click Use Secondary Source if you want to create an SNCP bridge/selector circuit entry point in a multivendor SNCP.

Step 6 Click Next.

Step 7 In the Destination pane, set the circuit destination. The options displayed depend on the circuit type, the circuit properties selected in the Attributes pane, and the cards installed in the node. Click Use Secondary Destination if you want to create a circuit destination point for unidirectional/bidirectional circuits.

Step 8 Click Next.

Step 9 In the Routing Preferences pane, do the following; then, click Next:

a. Uncheck the Route Automatically check box to disable automatic route selection. If disabled, you can specify the spans associated with the circuit. You can manually provision the circuit using one of the following views:

Graphical

Graphical Enhanced

Textual

b. To route the circuit on a protected path, leave the Fully Protected Path check box checked (default). A fully protected circuit route is created based on the path diversity option you choose. Fully protected paths might or might not have SNCP path segments with primary and alternate paths. The path diversity options apply only to SNCP path segments, if any exist. When you select Fully Protected Path, Required is selected automatically.

c. Check the Dual Ring Interconnect check box.

Step 10 In the Manual Provisioning pane (available when Route Automatically is unchecked and the Graphical or Graphical Enhanced radio button is selected), do the following; then, click Next:

a. (Applicable if the Graphical Enhanced radio button is selected) Select one of the following top-level view types from the Selected View Type list:

Subnetwork—Allows you to view the subnetwork(s) to which the NEs belong. This is the default view type.

Group—Allows you to view the group(s) to which the NEs belong.

The Current View field is set to Top.

b. (Applicable if the Graphical Enhanced radio button is selected) Select a detailed view type from the Available Views list, or right-click a subnetwork or group and choose View. The Current View field is set to the detailed view type that you selected.

In a complex network, it might take several minutes or longer to calculate and display the graphic objects in the map view. The progress bar at the top of the map tracks the percentage of completion while the map is updated.

c. Use the map view to manually route the circuit from the source to the destination specified by the addition of the links selected. Use the right-click menu options to navigate within the map view:

Find Node—Opens the Find Node dialog box, which lists all of the nodes displayed in the map view. Select a node from the drop-down list and click OK. The selection context in the map view changes to show the selected node highlighted in the visible map area.

Zoom In—Allows you to zoom in on an object in the map view.

Zoom Out—Allows you to zoom out on the map view.

Reset Zoom—Resets the current zoom level to the default.

Add—Allows you to add the selected span. Right-click a link and choose Add in the right-click menu. The selected link is added to the Available Spans list. The Add option applies to manual provisioning across all circuit types.

d. In the VCAT Member Number list box, select the member for which the route is to be selected.

e. In the circuit display, select the span to use for the next hop.

f. In the Available Spans area, complete the following information:

From—Displays the source of the span

To—Displays the destination of the span

g. Click Add. The span is added to the Selected Spans list.

h. Repeat substeps d to f for each intermediate NE until the destination NE is reached.

i. Repeat substeps c to g for each member until all members are routed.

j. To delete a span from the Selected Spans area, select a span from the Selected Spans list and click Remove.


Note To specify a DRI link, double-click the link on the map. The map view displays the link as bidirectional.


k. (For BLSR DRI or MS-SPRing DRI circuits) In the BLSR DRI Nodes or MS-SPRing DRI Nodes tab, click the Add button to open the BLSR/MS-SPRing DRI dialog box, which allows you to provide primary and secondary pairs for traditional and nontraditional DRI circuits. Also specify ring and path options for the first and second rings. Click Remove to remove a DRI node from the list.


Note If the Graphical Enhanced radio button is selected and you want to change the top-level view type at any time, click Top View. The map view reverts to the default Subnetwork view type.


Step 11 In the Manual Provisioning pane (available when Route Automatically is unchecked and the Textual radio button is selected), do the following; then, click Next:

a. Specify the following:

Src NE ID—Display only.

Dest NE ID—Display only.

Current NE ID—Display only.

Adj NE ID—Display only.

Available Links—Lists all links between the currently selected and adjacent NEs. Select a link from the drop-down list.

Available Spans—After you select a link from the Available Links drop-down list, its corresponding details are displayed in the Available Spans pane. Click Add to move the spans to the Selected Spans field.

Selected Spans—Select one or more spans and click Remove to remove them from the Selected Spans field.

b. Click Next Hop to specify the next intermediate hop; then, repeat substep a.

c. Click Reset to reset all hop information to the default values.

d. Click Alternate Route to specify hop information for the alternate circuit route.

Step 12 In the Route Constraints pane (available when Route Automatically and Using Required Nodes/Links are enabled and the Graphical or Graphical Enhanced radio button is selected), a graphical representation of the circuit is displayed, including source and destination nodes. Specify the spans that will route to the circuit. Prime Optical starts at the source node. The next NE associated with each span is also displayed. Complete the following substeps:

a. (Applicable if the Graphical Enhanced radio button is selected) Select one of the following top-level view types from the Selected View Type list:

Subnetwork—Allows you to view the subnetwork(s) to which the NEs belong. This is the default view type.

Group—Allows you to view the group(s) to which the NEs belong.

The Current View field is set to Top.

b. (Applicable if the Graphical Enhanced radio button is selected) Select a detailed view type from the Available Views list, or right-click a subnetwork or group and choose View. The Current View field is set to the detailed view type that you selected.

In a complex network, it might take several minutes or longer to calculate and display the graphic objects in the map view. The progress bar at the top of the map tracks the percentage of completion while the map is updated.

c. In the circuit display, select the node or link. The NE ID or link ID is displayed in the Selected Node/Link field.

d. Click Include to include the selected node or link in the route. The node or link appears in the Included Links/Nodes list.

e. Click Exclude to exclude the selected node or link from the route. The node or link appears in the Excluded Links/Nodes list.

f. Click Remove to remove the selected node or link from the Included Links/Nodes or Excluded Links/Nodes lists.

g. Click Up or Down to set the sequence of the nodes and spans included in the circuit.

h. Repeat substeps c to g for each node or link that you want to include in the circuit route.

i. (Optional) Repeat substeps c to h for each intermediate NE until the destination NE is reached.

j. Click Finish, or, if Review Route Before Creation is checked in the Routing Preferences pane, click Next.


Note If the Graphical Enhanced radio button is selected and you want to change the top-level view type at any time, click Top View. The map view reverts to the default Subnetwork view type.


Step 13 In the Route Constraints pane (available when Route Automatically and Using Required Nodes/Links are enabled and the Textual radio button is selected), specify the nodes or links to include in each hop of the circuit route. Complete the following substeps:

a. Select Nodes in the Select Nodes/Links area if you want to add nodes to your circuit route; then, specify the node information in the Select Nodes area.

b. Select Links in the Select Nodes/Links area if you want to add links to your circuit route; then, specify the link information in the Select Links area.

c. Click Add to add a BLSR-DRI or MS-SPring-DRI to the circuit route. The BLSR/MS-SPRing DRI dialog box opens. Use this dialog box to provide primary and secondary pairs for traditional and nontraditional DRI circuits. Also specify ring and path options for the first and second rings. Check the Use RIP bandwidth on secondary path check box to use RIP protection for the BLSR or MS-SPRing DRI circuit. Click OK. The information you specified in the BLSR/MS-SPRing DRI dialog box is shown in the Route Constraints pane, in the Included Links/Nodes field.

d. Click Include to include the selected node or link in the route. The node or link appears in the Included Links/Nodes list.

e. Click Exclude to exclude the selected node or link from the route. The node or link appears in the Excluded Links/Nodes list.

f. Click Remove to remove the selected node or link from the Included Links/Nodes or Excluded Links/Nodes lists.

g. Click Up or Down to set the sequence of the nodes and spans included in the circuit.

h. Repeat substeps a to e for each node or link that you want to include in the circuit route.

i. Click Finish, or, if Review Route Before Creation is checked in the Routing Preferences pane, click Next.

Step 14 After clicking Finish, if you did not check the Revertive check box in the Attributes pane, a dialog box opens with the message "This Circuit Is Configured As Non-Revertive." If you do not want to specify reversion settings, click OK without filling in the fields in the dialog box. If you want to specify reversion settings, check the Revertive check box, specify the reversion time in 0.5-minute increments, and click OK.

Step 15 In the message box, click OK.


7.2.4  Modifying Circuits on CTC-Based NEs

Use the Modify Circuit dialog box to modify properties of an existing circuit.


Step 1 Select the node that contains the circuit to be modified and open the Circuit table. For an explanation of Circuit table launch points, see Table 7-2.

Step 2 In the Circuit table, select the circuit to be modified and choose Configuration > Modify Circuit (or click the Modify tool). The Modify Circuit dialog box opens.

The tabs shown in the Modify Circuit dialog box depend on the type of circuit selected. The following table provides descriptions.

Table 7-9 Field Descriptions for the Modify Circuit Dialog Box 

Field
Description
General

Circuit ID

Enter a new circuit ID.

Circuit Alias

Enter a new alias name for the circuit. The alias name can contain alphanumeric characters. International character sets are also supported.

Description

Enter a new description of the selected circuit.

Customer ID

Optional text field that displays the customer ID of the circuit. The customer ID can contain 0 to 256 alphanumeric and special characters.

For VCAT member circuits, the Customer ID and Service ID fields are disabled. You cannot edit the customer ID or service ID for individual VCAT member circuits; rather, the individual circuits inherit this information from the parent VCAT circuit.

The customer ID of the VCAT circuit is applied to all member circuits. When the Customer ID field is changed for the parent VCAT circuit, the new value is applied to all members.

The Customer ID text field is disabled in the VCAT Member Circuit Edit area. You can still edit the member circuit ID (Name), Description, and Circuit Admin State.

When a new VCAT member circuit is added, the parent VCAT circuit's customer ID is also applied to the new member circuit.

Service ID

Optional text field that displays a service ID of the selected circuit. The service ID can contain 0 to 256 alphanumeric and special characters.

For VCAT member circuits, the Customer ID and Service ID fields are disabled. You cannot edit the customer ID or service ID for individual VCAT member circuits; rather, the individual circuits inherit this information from the parent VCAT circuit.

The service ID of the VCAT circuit is applied to all member circuits. When the Service ID field is changed for the parent VCAT circuit, the new value is applied to all members.

The Service ID text field is disabled in the VCAT Member Circuit Edit area. You can still edit the member circuit ID (Name), Description, and Circuit Admin State.

When a new VCAT member circuit is added, the parent VCAT circuit's service ID is also applied to the new member circuit.

Circuit Service State

Display only. The circuit service state is an aggregate of the cross-connect states within the circuit. SONET, SDH, and DWDM circuits have different values; see Table 7-3.

Circuit Admin State

Specify the administrative state to set for the selected circuit. SONET and SDH circuits have different values. For SONET circuits, values are:

IS (In Service)—The circuit is in service and able to carry traffic.

IS AINS (In Service-Auto In Service)—Alarm reporting is suppressed, but the circuit is able to carry traffic.

OOS DSBLD (Out of Service-Disabled)—The circuit is Out of Service and unable to carry traffic.

OOS MT (Out of Service-Maintenance)—The circuit is in maintenance state. The maintenance state does not interrupt traffic flow; it suppresses alarms and conditions and allows loopbacks to be performed on the circuit.

OOS OOG (Out of Service-Out of Group)—The VCAT member cross-connection is no longer used for carrying VCAT group traffic, but the cross-connection still exists.

No Change

For SDH circuits, corresponding values are:

Unlocked

Unlocked,autoInService

Locked,disabled

Locked,maintenance

No Change

Apply to source/
destination ports, if allowed

Check this check box to apply the selected state to the source and destination ports.

Routing Preferences (VCAT circuits only)

Display only. Indicates the type of routing for VCAT member circuits:

Common Route—Each member circuit in the selected VCAT circuit is routed on the same fiber.

Split Route—Member circuits are routed on separate paths.

VCAT Attributes (VCAT circuits only)

Display only. Displays the attributes that have been assigned to the selected VCAT circuit, including:

Node—Node name.

VCG Name—Virtual concatenation group name.

Mode—Circuit mode (None, SW-LCAS, or LCAS).

No. of Members—Number of members that have been configured for the VCAT circuit.

Monitor

Select Monitor Sources

Select a circuit monitor source from the list. Click Create Monitors to create a new monitor source for the circuit.

Drops (Unidirectional and stitched Ethernet circuits only)

Drops

Displays the list of circuit drops. By default, the drop list has only one original destination point of the circuit. You can create additional drop points to avoid excessive traffic in the circuit.

Follow these steps to create an additional drop point:

1. Click Create to open the Create Drop wizard.

2. Select a drop from the Destination panel.

3. Click Next.

4. Click Finish in the Routing Preference Panel.

The following message appears in the dialog box. Click OK.

Successfully submitted circuit creation request.

Note Verify that the new drop point has been added in the Circuit table.

Follow these steps to delete a drop point:

1. Select a drop from the Destination panel.

2. Click Delete.

The following message appears in the dialog box. Click Yes.

Deleting drops may be service affecting. Really delete the selected drops?

Note Ensure that the Delete button is disabled only if one destination point is listed.

Nodes (Stitched Ethernet circuits only)

Nodes

Displays the source nodes of the selected circuit. Select a node and click Remove to remove the node from the circuit. Click Add to open the Add Circuit Node window, where you can add a new node as a source NE.

VLANs (E-series cards in single-card and multicard mode only)

Available VLANs

Displays the list of available VLANs. Select one or more VLANs and click Add to add them to the Circuit VLANs field. Click New VLAN to open the Define New VLAN window, where you can enter a name and ID for a new VLAN for the selected circuit.

Circuit VLANs

Displays the list of selected VLANs. Select one or more VLANs and click Remove to remove them from the Circuit VLANs field. If the Circuit VLANs list is empty, Prime Optical assigns the default VLAN.

Enable Spanning Tree

Check this check box to enable spanning tree protection for the circuit.

UPSR, SNCP (UPSR is for CTC-based SONET protected circuits, SNCP is for CTC-based SDH protected circuits)

Note UPSR and SNCP attributes are editable only for VCAT member circuits, not for the VCAT parent circuit.

Node ID

Displays the name of the node.

Working Path

One of the two paths entering the selector function. In a revertive system, this is the preferred path. In a nonrevertive system, this is the path that is specified as the working path.

Protect Path

One of the two paths entering the selector function. In a revertive system, this is the nonpreferred path. In a nonrevertive system, this is the path that is not specified as the working path.

Reversion Time

Controls whether traffic reverts to the working path when conditions that diverted it to the protect path are repaired. If you choose Never, traffic does not revert. Choosing a time sets the amount of time that elapses before traffic reverts to the working path.

SF BER Level

(STS and VC4 circuits only) Sets the UPSR SF BER threshold.

SD BER Level

(STS and VC4 circuits only) Sets the UPSR SD BER threshold.

PDI-P

(STS and VC4 circuits only) When checked, traffic switches if an STS payload defect indication is received.

Switch State

Switches circuit traffic between the working and protect paths. The color of the Working Path and Protect Path fields indicates the active path (the path selected at an exit node) versus the standby path (the path not selected at an exit node). Normally, the working path is green and the protect path is purple. If the protect path is green, working traffic has switched to the protect path.

CLEAR—Removes a previously set switch command.

LOCKOUT OF PROTECT—Prevents traffic from switching to the protect circuit path under any circumstances. Of all switch states, LOCKOUT has the highest priority.

FORCE TO WORKING—Forces traffic to switch to the working circuit path, even if the path has SD or SF conditions. FORCE switch states have a higher priority than MANUAL switch.

FORCE TO PROTECT—Forces traffic to switch to the protect circuit path, even if the path has SD or SF conditions. FORCE switch states have a higher priority than MANUAL switch.

MANUAL TO WORKING—Switches traffic to the working circuit path if the path has an error rate less than the SD.

MANUAL TO PROTECT—Switches traffic to the protect circuit path if the path has an error rate less than the SD.


Caution The FORCE and LOCKOUT commands override normal protection switching mechanisms. Applying these commands incorrectly can cause traffic outages.

Hold Off Time

(DRI path selectors only) Sets the hold off time. Values are 0 to 10000 milliseconds, in increments of 100 milliseconds.


Use the tabs in the Modify Circuit dialog box as follows:

Use the General tab to edit the circuit ID and circuit description.

Use the Monitor tab to create monitors for the source drops. Select a drop in the Select Monitor Sources list and click Create Monitors. The Create Circuit wizard opens, with the source node and drops preset. See Creating an STS (Including Ethernet), STS-V, VT, VT-V, VT Tunnel, or VT Aggregation Circuit to create a new circuit.

Use the Drops tab to create multiple drops on existing unidirectional circuits. This feature is used to support different types of applications that could be routed from the same source to different destinations (video, voice, and so on). The multiple drops are provisioned on the destination side of the circuit. The source drop remains the same. In the Drops tab, select the required drops and click Create to provision a multidrop circuit. Make the selections and click OK.

Use the UPSR tab to edit UPSR selector attributes.


Note UPSR selectors can be edited on a circuit basis, but not on a span basis.


Use the Nodes tab to add or delete nodes in multicard Ethernet circuits. Select a node from the list and click Add or Remove.

Use the VLANs tab to edit VLANs for a VLAN-capable circuit.


Note If you make a mistake while editing VLANs, click the Reset button. This clears the selections entered, and you can restart the VLAN selection.


Step 3 Click Apply. (If the Apply button is not visible, proceed to Step 4.)

Step 4 Click Close.

Changes are visible in the Circuit table after the window has been refreshed.


7.2.5  Modifying Circuits on ONS 15530 or ONS 15540 NEs


Step 1 In the Domain Explorer, Subnetwork Explorer, or Network Map, select an ONS 15530 or ONS 15540 (or a group or domain containing an ONS 15530 or ONS 15540) and choose Configuration > ONS 155XX > Circuit Table. The Circuit table opens.

Step 2 Select a circuit and choose Configuration > Modify Circuit. The Modify Circuit dialog box opens.

Step 3 Change the circuit name or description. For ONS 15530 and ONS 15540 circuits, the circuit name can contain up to 64 characters, and the circuit description can contain up to 256 characters.

Step 4 Click Apply.

Changes are visible in the Circuit table after the window has been refreshed.


7.2.6  Summary of Edit Circuit Options

The following table summarizes the options to edit circuits.

Table 7-10 Summary of Edit Circuit Options 

Circuits
Edit Option
Type
Comments

All

Edit circuit ID, description, state, customer ID, and service ID

All

Change the circuit ID, but the ID must be unique. The description can contain up to 256 characters.

STS/VC_HO_PATH_CIRCUIT and VT/VC_LO_PATH_CIRCUIT in a UPSR ring

Change UPSR/SNCP selector attributes

Unidirectional and bidirectional

Change UPSR/SNCP selector attributes for STS/VC_HO_PATH_CIRCUIT and VT/VC_LO_PATH_CIRCUIT bidirectional circuits.

STS/VC_HO_PATH_CIRCUIT

Add drops

Unidirectional STS/VC_HO_PATH_CIRCUIT and unidirectional VT/VC_LO_PATH_CIRCUIT

Add a drop and verify it in the Prime Optical database or in the Circuit table.

Add drops to Ethernet circuits

Bidirectional STS/VC_HO_PATH_CIRCUIT

Add a drop and verify it in the Prime Optical database or in the Circuit table.

Add monitor circuits to STS circuits

Bidirectional STS/VC_HO_PATH_CIRCUIT

Monitor circuits must be unidirectional. Create a maximum of four monitor circuits for each STS circuit.

Add nodes to multicard Ethernet circuits

Multicard circuits

Add VLANs to Ethernet circuits

Bidirectional STS/VC_HO_PATH_CIRCUIT

Associate VLANs with the circuit and verify.

SDH circuits

Add monitor circuits

Bidirectional VC LO path tunnel


7.2.7  Updating Circuits

You must update circuits after adding nodes to the network.


Step 1 In the Domain Explorer tree, select the CTC-based NE and choose Configuration > CTC-Based SONET NEs or CTC-Based SDH NEs > Update Circuit. A message appears, stating that Prime Optical has successfully updated the circuit.

Step 2 Click OK.


7.2.8  Merging Circuits

Use the circuit merge feature to merge different circuits into one or more new circuits. This feature enables you to merge many circuits (including TL1 and OCHNC DCN circuits), thereby ensuring that the aligned sections are spliced into one circuit.


Step 1 In the Domain Explorer tree, select the CTC-based NE and choose Configuration > CTC-Based SONET NEs or CTC-Based SDH NEs > Circuit Table.

Step 2 In the Circuit table, select a circuit; this circuit will be the master circuit.

Step 3 Choose Configuration > Merge Table. The fields in the Circuit Merge table are identical to the fields in the Circuit table (Table 7-3). The Circuit Merge table displays the circuits that are path aligned with the master circuit. These circuits are called slave circuits. The Circuit Merge table shows circuits (slave circuits) that are the same size as the master circuit.


Note You must merge n selected slave circuits with one selected master circuit. When circuits are merged from Prime Optical, EMS attributes such as customer ID, service ID, description, and comments are retained only for master circuits. If the circuit merge is done through CTC, the EMS attributes are not retained in Prime Optical.


Note Circuits are allowed to merge only if the following conditions exist:
— Their connections are path aligned.
— They have compatible circuit type, size, and direction.
— They do not have different VLAN assignments.
— They do not have different nondefault SLA values.
— They have compatible circuit endpoints.
— They do not form an invalid circuit.


Step 4 To refresh any new aligned circuits with the selected circuit, choose Configuration > Refresh Lined Up Circuits (or click the Refresh Lined Up Circuits tool).

Step 5 Specify the circuit(s) that you want to merge with the selected circuit and choose Configuration > Merge (or click the Merge tool).

Step 6 If the selected circuit(s) cannot be merged completely into the current circuit, the following message appears:

The selected circuit(s) cannot be merged completely into the current circuit. Disjointed 
remnants of the selected circuit(s) might remain after the merge. Click OK to continue.

Step 7 Click OK to continue with the merge, or click Cancel to cancel the operation.


7.2.9  Reconfiguring Circuits

Use the reconfigure circuit(s) feature to upgrade TL1 circuits to regular circuits.


Step 1 In the Domain Explorer tree, select the CTC-based NE and choose Configuration > CTC-Based SONET NEs or CTC-Based SDH NEs > Circuit Table.

Step 2 Select the TL1 circuit(s) to reconfigure and choose Configuration > Reconfigure Circuit(s).


Tip Hold down the Shift key to select more than one option sequentially, or hold down the Ctrl key to select more than one option nonsequentially.


Step 3 In the confirmation dialog box, click OK.

A progress bar tracks the status of the reconfiguration. A failed or succeeded message displays the results of the reconfiguration. When the operation succeeds, the Circuit Status field in the Circuit table changes from Discovered-TL1 to Discovered.


Note The EMS attributes of the circuits are lost after the circuit reconfiguration.


7.2.10  Repairing Circuits

The Alarm Interface Panel (AIP) provides surge protection for CTC-based NEs. This pane has a nonvolatile memory chip that stores the unique node address known as the MAC address. The MAC address identifies the nodes that support circuits. It allows Prime Optical to determine circuit sources, destinations, and spans. If an AIP fails, an alarm is generated and the LCD display on the fan tray assemblies of the NEs becomes blank. To perform an in-service replacement of the AIP, you must contact the Cisco Technical Assistance Center (TAC). For contact information, visit the TAC website at http://www.cisco.com/tac.

You can replace the AIP on an in-service system without affecting traffic by using the circuit repair feature. If the AIP card needs to be replaced, you will need to repair circuits affected by the MAC address change on the NE. Circuit repair will work when all nodes are running the same software version. Each individual AIP replacement requires an individual circuit repair; if AIPs are replaced on two NEs, the circuit repair must be performed twice. Repairing circuits allows you to change the MAC address of all circuits originating at an NE to a user-provided NE ID.

To repair a Prime Optical circuit when an AIP card is changed, restart the Prime Optical server or complete the following steps:


NoteWhile completing the following steps, do not create or delete any circuits using Prime Optical.

The following procedure applies to circuits on CTC-based NEs.


Step 1 See the Cisco ONS 15454 Reference Manual to replace the AIP card.


Note Reset both Timing Communications and Control (TCC) cards after the AIP card is replaced.


Step 2 In the Domain Explorer, choose Administration > Control Panel.

Step 3 Expand NE Service.

Step 4 Select CTC-Based SONET NEs or CTC-Based SDH NEs and deactivate the network service. Click Save.

Step 5 Activate the network service again and click Save.

Step 6 In the Domain Explorer, select the CTC-based NE and choose Configuration > CTC-Based SONET NEs or CTC-Based SDH NEs > Repair Circuit. The Repair Circuit dialog box opens.

The Repair Circuit dialog box allows you to change the MAC address of all circuits originating at the selected NE with a user-provided NE ID. MAC addresses are a subset of data link layer addresses. MAC addresses identify network entities in LANs implementing the IEEE MAC sublayer of the data link layer. The following table provides descriptions.

Step 7 After making your selections, click OK.


Table 7-11 Field Descriptions for the Repair Circuit Dialog Box 

Field
Description

Old MAC Address

Enter the current MAC address of the NE. MAC addresses are 48 bits in length and are expressed as 12 hexadecimal digits (0-9, a-f):

The first 6 hexadecimal digits are the manufacturer identification (or vendor code), called the Organizational Unique Identifier (OUI). These 6 digits are administered by the IEEE.

The last 6 hexadecimal digits are the interface serial number or another value administered by the specific vendor.

New MAC Address

Enter the new MAC address of the NE.


7.2.11  Deleting Circuits

Use the Circuit table to delete an existing circuit or multiple circuits from the Prime Optical database and remove the associated cross-connections from the NEs.


NoteYou cannot delete VT tunnel and VAP circuits that are in use.

You cannot delete OCHNC DCN circuits from Prime Optical. If you try to delete an OCHNC DCN circuit, Prime Optical returns the following error message: "Circuit deletion failed. Failed to delete the following circuit(s). Circuit details: You cannot remove a DCN OCHNC circuit from CTM." You must use CTC to delete OCHNC DCN circuits.

You cannot delete OCH trail circuits that are created automatically upon OCHCC circuit creation. OCH trail circuits are removed automatically when the corresponding OCHCC circuit is removed.


Complete the following steps to delete circuits:


Step 1 Select the node that contains the circuit to be deleted and open the Circuit table. For an explanation of Circuit table launch points, see Table 7-2.

Step 2 In the Circuit table, select the circuit(s) to be deleted and choose Configuration > Delete Circuit (or click the Delete tool).

Step 3 (For CTC-based NEs) In the Delete Circuit(s) confirmation box, do the following:

a. Check the Change drop port admin state check box.

b. Select the state of the source or destination port from the drop-down list. For SONET and OCHCC circuits, the available states are:

IS (In Service)—The circuit is in service and able to carry traffic.

IS,AINS (In Service-Auto In Service)—Alarm reporting is suppressed, but the circuit is able to carry traffic.

OOS,DSBLD (Out of Service-Disabled)—The circuit is out of service and unable to carry traffic.

OOS,MT (Out of Service-Maintenance)—The circuit is in maintenance state. The maintenance state does not interrupt traffic flow; it suppresses alarms and conditions and allows loopbacks to be performed on the circuit.

For SDH circuits, the corresponding values are:

Unlocked

Unlocked,autoInService

Locked,disabled

Locked,maintenance

Step 4 Click Yes.

Step 5 In the message box, click OK.


Note When deleting multiple circuits, if an error occurs during the deletion of a particular circuit, the operation continues with the deletion of the remaining selected circuits.


7.2.12  Viewing Circuit Spans

In the Circuit table, you can select a circuit and choose Configuration > Open Circuit Span (or click the Open Circuit Span tool). The Circuit Span table opens, showing information about all spans associated with the selected circuit. The following table provides descriptions.

Table 7-12 Field Descriptions for the Circuit Span Table 

Column Name
Description

Circuit Name

Displays the name of the selected circuit.

Circuit Type

Displays the type of circuit that the span belongs to.

Circuit Alias

Enter a new alias name for the circuit. The alias name can contain alphanumeric characters. International character sets are also supported.

Circuit Size

Displays the size of the circuit that the span belongs to.

Source Network Element

Displays the NE ID of the span source.

Source Module Type/Physical Loc/Interface

Displays the module type at the span source, the slot and port name and numbers (physical location), and the STS number (interface).

Source State

Displays the state of the circuit span according to the source circuit node. Valid values are:

Inactive—The circuit is inactive and the segment cannot be used.

Stranded—Bandwidth is not available and the segment cannot be used.

Routed—Circuit is being routed, but not provisioned, meaning that cross-connects have not been provisioned on the node/TCC.

Tentative—Cross-connects have been created on the node, but circuit information is incomplete or has not been updated correctly. This is not a complete circuit.

Active—Segment is in use.

Destination Network Element

Displays the NE ID of the span destination.

Destination Module Type/Physical Loc/Interface

Displays the module type at the span destination, the slot and port numbers (physical location), and the STS number (interface).

Destination State

Displays the state of the circuit span from the destination circuit node point of view. Valid values are Inactive, Stranded, Routed, Tentative, and Active.

Span Part of UPSR Ring

Indicates whether or not the circuit span is part of a UPSR.

Span Part of SNCP Ring (ONS 15454 SDH only)

Indicates whether or not the circuit span is part of an SNCP.

Span Active State

Indicates whether or not the circuit span carries active traffic.

Span Protection State

Displays the last successful span protection operation performed on the selected circuit span. Values are Clear, Manual, Force, and Lockout. This field only applies to circuit spans that are part of an SNCP ring.


7.2.13  Viewing VLAN Information

For CTC-based NEs, you can select a circuit in the Circuit table and choose Configuration > VLAN Table. The VLAN table opens, showing VLAN information associated with the selected circuit. The following table provides descriptions.

Table 7-13 Field Descriptions for the VLAN Table 

Field
Description

VLAN ID

Displays the numerical ID of the VLAN. The VLAN ID range is from 1 to 4093.

VLAN Name

Displays the user-assigned name of the VLAN.


7.2.14  Viewing the ONS 15530 and ONS 15540 Circuit Table

The Circuit table displays circuit information for a network of ONS 15530 and ONS 15540 NEs. A circuit is an end-to-end connection between two ONS 15530 or ONS 15540 ports in terms of lambda (wavelength). The ONS 15530 and ONS 15540 provide transport for traffic over fiber, using dense wavelength division multiplexing (DWDM) technology to multiplex many lambdas over the same fiber.

By using circuit services, you can:

Find all end-to-end connections between ONS 155xx NEs in terms of client ports, provided the entire path is traversed within ONS 155xx NEs.

View each circuit's protection information.

For all circuits, view directional-based paths that have been configured and are in use.

For protected circuits, view active and standby paths that have been configured and are in use.

Filter the Circuit table display by choosing File > Filter.

Modify a circuit name or description by selecting the circuit and choosing Configuration > Modify Circuit.

Display ONS 15530 contained circuits (if any) by selecting a circuit and choosing Configuration > Show Contained Circuits.

Display the paths in a circuit by selecting the circuit and choosing Configuration > Open Circuit Path Table.

Complete the following steps to view the ONS 15530 and ONS 15540 Circuit table:


Step 1 In the Domain Explorer, Subnetwork Explorer, or Network Map, select the ONS 15530 or ONS 15540 group and choose Configuration > ONS 155XX > Circuit Table.

The Circuit table opens, showing circuit information for the selected NEs. Only those circuits for which the selected ONS 15530 or ONS 15540 is either the source or the destination are listed. See Table 7-14 for descriptions.

Step 2 To filter the Circuit table, choose File > Filter. The filter dialog box opens, containing circuits that you can filter in the following ways:

By circuit name.

By type and size of circuit.

By NE ID.

By active/inactive status—Filters out inactive circuits.

By passthrough status—Filters out passthrough circuits (circuits that pass through a node without being dropped).

Step 3 To display contained circuits on an ONS 15530 or ONS 15540, select a circuit in the Circuit table and choose Configuration > Show Contained Circuits. Another Circuit table opens, showing any circuits contained within the selected circuit.


Table 7-14 Field Descriptions for the Circuit Table-ONS 15530 and ONS 15540 

Field
Description

Circuit Name

The name of the circuit.

Circuit Description

The circuit description.

Note

Displays any comments that have been entered for the selected circuit. Allows you to add additional comments.

Circuit Type

The type of circuit selected. Values are:

SONET

Gigabit Ethernet

10-Gigabit Ethernet (GE)

Fiber Channel

FICON

ESCON

SDH

ISC Compatible

ISC Peer

SYSPLEX

DWDM Transparent—A circuit associated with the transparent port

DWDM Wavelength—A circuit associated with the OSC channel

Fast Ethernet

FDDI

2.5-GE Trunk Wavelength

10-GE Trunk Wavelength

10-GE Trunk

Circuit Size

The size of the circuit. Values are:

STS1

STS3C

STS12C

STS48C

DWDM_2.5G

DWDM_10G

FIBERCHANNEL1

FIBERCHANNEL2

FICON

ESCON

SYSPLEX

FAST_ETHERNET

GIGABIT_ETHERNET

10_GIGABIT_ETHERNET

FDDI

STM1C

STM4C

STM16C

ISC_COMPATIBLE

ISC_PEER

SYSPLEX_TIMER_ETR

SYSPLEX_TIMER_CLO

Circuit Direction

Whether the circuit carries unidirectional (one-way) or bidirectional (two-way) traffic.

Circuit State

The state of the circuit. Values are:

Active—The circuit is active and completely discovered.

Incomplete—The circuit was not completely discovered; that is, Prime Optical was not able to trace the circuit all the way from source to destination.

Errored—The circuit was discovered but it might be down. A circuit in this state might be operating and carrying traffic because circuits are shown as errored when one or more paths are down. Check the Circuit Path table (Configuration > Open Circuit Path Table) to find out whether any paths are still carrying traffic.

Inactive—The source or destination port(s) have been shut down administratively.

Source Network Element

The source NE ID.

Source Interface

The module type at the circuit source node, the slot and port numbers (physical location), and the interface name.

Secondary Source Interface

The module type of the secondary source node, the slot and port numbers (physical location), and the interface name. The secondary source node is on the same device as the source module. Note that a secondary source is displayed only when the circuit has Y-cable protection at the source side.

Destination Network Element

The destination NE ID.

Destination Interface

The module type at the destination node, the slot and port numbers (physical location), and the interface name.

Source Protection Type

The type of protection at the source. Values are:

Not Protected—There is no protection at the source

Splitter Protection

Y-cable/Line-Card Protection

Trunk Protection

Destination Protection Type

The type of protection at the destination. Values are:

No Protection—There is no protection at the destination

Splitter Protection

Y-cable/Line-Card Protection

Trunk Protection

Additional Information

Wavelength, frequency, channel number, and band name of the source and secondary source. Secondary source information is applicable only when the circuit has Y-cable or line-card protection.

CDL Flow ID

(ONS 15530 only) The ID of the converged data link layer.


7.2.15  Viewing Circuits in the Circuit Path Table—ONS 15530 and ONS 15540

The Circuit Path table displays information about all of the paths associated with the selected circuit or link.


Step 1 In the Domain Explorer, choose Configuration > Link Table.

Step 2 In the Link table, choose Configuration > Circuit Path Table. The Circuit Path table opens. The following table provides descriptions.


Table 7-15 Field Descriptions for the Circuit Path Table 

Field
Description

Circuit Name

The circuit name of the circuit associated with the path.

Circuit Alias

The alias name for the circuit. The alias name can contain alphanumeric characters. International character sets are also supported.

Circuit Path Number

The unique path number associated with the path.

Source NE ID

The source NE system ID for the path.

Source Interface

The source interface name for the path.

Destination NE ID

The destination NE system ID for the path.

Destination Interface

The destination interface name for the path.

Path Status

The overall status of the path:

Active—The path is active and completely discovered. The possible paths for a circuit are Active-Working, Active-Protected, Standby-Working, or Standby-Protected.

Incomplete—The path is active but not completely discovered. Prime Optical cannot trace the path all the way from source to destination.

Errored—The path was discovered but one or more interfaces are down.

Working Path

Whether the path is configured to be working or protected.

Active Path

Whether the path is active or on standby.

Down Interfaces

If the path is in the errored state, the list of interfaces that are causing this state.

Destination Optical Power (dBm)

The optical power level at the destination.

This value is not refreshed automatically. By default, the value shown is the value obtained at the last discovery. To refresh the value in this column, choose File > Refresh Circuit Power Levels.


7.2.16  Viewing Circuits in the Circuit Path Span Table—ONS 15530 and ONS 15540

The Circuit Path Span table displays detailed lightpath information about all spans associated with the selected circuit. Each entry in the Circuit Path Span table displays a cross-connect (span within the NE) or segment (span between NEs) being used by the selected circuit.


Step 1 In the Domain Explorer, choose Configuration > Link Table.

Step 2 In the Link table, choose Configuration > Circuit Path Table.

Step 3 Select a circuit path and choose Configuration > Open Circuit Path Span Table. The Circuit Path Span table opens. The following table provides descriptions.


Table 7-16 Field Descriptions for the Circuit Path Span Table 

Field
Description

Circuit Name

The circuit name.

Circuit Alias

The alias name for the circuit. The alias name can contain alphanumeric characters. International character sets are also supported.

Circuit Type

The type of the selected circuit.

Circuit Size

The size of the selected circuit.

Path Number

The number of the cross-connect or segment.

Path Hop Number

The hop number of the cross-connect or segment.

Source Network Element

The name of the NE where the circuit span originates.

Source Interface

The name of the interface that is the source for the cross-connect or segment.

Destination Network Element

The name of the NE where the circuit span terminates.

Destination Interface

The name of the interface that is the destination of the cross-connect or segment.


7.2.17  Viewing VCAT Member Circuits

Use the VCAT Member table to view members of a VCAT circuit.


Step 1 Select a CTC-based NE in the Domain Explorer tree and choose Configuration > CTC-Based SONET NEs or CTC-Based SDH NEs > Circuit Table.

Step 2 In the Circuit table, choose Configuration > Member Circuits. The VCAT Member table opens. The following table provides descriptions.


Table 7-17 Field Descriptions for the VCAT Member Table 

Field
Description

Circuit Name

Displays the VCAT member name.

Note If there are multiple circuits with the same name displayed in the Circuit table, the label Duplicate appears in this column.

Circuit Alias

Displays the alias name for the circuit. The alias name can contain alphanumeric characters. International character sets are also supported.

Note

Displays comments that have been entered for the selected VCAT member circuit. Allows you to add additional comments.

Source NE—Module Type/Physical Loc/Interface

Displays the NE ID and module type at the span source, the slot and port name and numbers (physical location), and the STS number (interface).

Destination NE—Module Type/Physical Loc/Interface

Displays the NE ID, the module type at the destination, the slot and port name and numbers (physical location), and the STS number (interface).

Circuit Type

Displays the type of VCAT member circuit selected. SONET circuit types are STS, VT, VT Aggregation, VT Tunnel, VT VCAT (shown as VT-v), STS VCAT (shown as STS-v), DWDM OCHNC, and DWDM OCHCC.

SDH circuit types are HOP, LOP, LOPA, LOPT, HOV (HO VCAT), LOV (LO VCAT), OCHNC, and OCHCC.

Circuit Size

Displays the size of the VCAT member circuit.

SONET circuit sizes are VT1.5, VT2, STS 1, STS 3c, STS 6c, STS 9c, STS 12c, STS 24c, STS 48c, and STS 192c.

SDH circuit sizes are VC11, VC12, VC3, VC4, VC4-2c, VC4-3c, VC4-4c, VC4-8c, VC4-16c, and VC4-64c.

OCHNC circuit sizes are multirate, 2.5 Gb/s FEC, 2.5 Gb/s No FEC, 10 Gb/s FEC, and 10 Gb/s No FEC.

OCHCC circuit sizes are STM1, STM4, STM16, STM64, OC3, OC12, OC48, OC192, 10GE, 1GE, 10GFC, 4GFC, 2GFC, 1GFC, 4GFiCon, 2GFiCon, 1GFiCon, ESCON, ETR-CLO, ISC-PEER, ISC3-PEER-1G, ISC-PEER-2G, ISC-COMPACT, HDVT, SD1/D1, DV6000, or Pass Through.

Note Not all circuit sizes are supported on all NE releases.

Circuit Direction

Indicates whether the VCAT member circuit carries unidirectional or bidirectional traffic.

Customer ID

Optional text field that displays the customer ID of the VCAT member circuit.

Service ID

Optional text field that displays the service ID of the VCAT member circuit.

Circuit Status

Displays the status of the selected VCAT member circuit:

Discovered—The circuit is completely configured in the network; all components are in place and a complete path exists from the circuit source to the circuit destination.

Partial—The circuit is not complete; one or more cross-connections are not in place.

Creating—Prime Optical is creating the circuit.

Deleting—Prime Optical is deleting the circuit.

Discovered_TL1—A TL1-created circuit or a TL1-like Prime Optical-created circuit is complete and has upgradable cross-connects. A complete path from source to destination(s) exists.

Partial_TL1—A TL1-created circuit or a TL1-like Prime Optical-created circuit with upgradable cross-connects is missing a cross-connect, and a complete path from source to destination(s) does not exist. The circuit cannot be upgraded until the missing cross-connects are in place.

Circuit Service State

The circuit service state is an aggregate of the cross-connect states within the circuit. SONET, SDH, and DWDM circuits have different values; see Table 7-3.

Is Monitor

A value of True means that the VCAT member circuit is a monitor circuit. A value of False means that the VCAT member circuit is not a monitor circuit.

Circuit Protection Type

Indicates the VCAT member circuit protection scheme. Options are:

2F BLSR—The circuit is protected by a 2-fiber BLSR.

4F BLSR—The circuit is protected by a 4-fiber BLSR.

BLSR—The circuit is protected by both 2-fiber and 4-fiber BLSR.

UPSR—The circuit is protected by UPSR.

DRI—The circuit is protected by a UPSR dual ring interconnection.

1+1—The circuit is protected by 1+1 protection group.

Y-Cable—The circuit is protected by a transponder or muxponder card Y-cable protection group.

Protected—The circuit is protected by diverse SONET topologies; for example, a BLSR and a UPSR, or a UPSR and 1+1.

Unprotected—The circuit is not protected.

2F-PCA—The circuit is routed on a PCA path on a 2-fiber BLSR. PCA circuits are unprotected.

4F-PCA—The circuit is routed on a PCA path on a 4-fiber BLSR. PCA circuits are unprotected.

PCA—The circuit is routed on a PCA path on both 2-fiber and 4-fiber BLSRs. PCA circuits are unprotected.

Unknown—Circuit protection types appear in the Circuit Protection Type column of the Circuit table when the circuit status is Discovered. If the circuit not discovered, the protection type is Unknown.

Lost—The circuit was protected, but the protection has been lost due to changes in the network.

Description

Displays the description of the selected VCAT member circuit.

No. of VLANs

Displays the number of VLANs associated with the VCAT member circuit.

Is VCAT or Member Circuit

A value of True means that the circuit is a VCAT member circuit.

OCHNC Wavelength

Indicates the wavelength provisioned for the OCHNC, in nanometers (nm).

OCHNC Direction

Indicates the direction of the OCHNC. Values are east-to-west or west-to-east.


7.2.18  Creating VCAT Member Circuits

Use the Add Member wizard to add new members to an existing VCAT or open-ended VCAT circuit.


NoteYou can launch the Add Member wizard only for VCAT circuits that allow reconfiguration.

VCAT circuits created through TL1 cannot be reconfigured (Add/Delete Member) until the parent VCAT circuit is reconfigured (Configuration > Reconfigure Circuit(s) in the Circuit table).

To specify member endpoints for VCAT circuit endpoints on CE-MR-10 cards, the Add Member wizard shows the Endpoint Selection pane (with slot/port/STS, Member Selection button, and a link for circuit creation).


Complete the following steps to create VCAT member circuits:


Step 1 Select a CTC-based NE in the Domain Explorer tree and choose Configuration > CTC-Based SONET NEs or CTC-Based SDH NEs > Circuit Table.

Step 2 In the Circuit table, choose Configuration > Member Circuits.

Step 3 In the VCAT Member table, choose Configuration > Add Member. The Add Member wizard opens. The following table provides descriptions.

Step 4 In the Add Members pane, specify the number of members to add to the existing VCAT circuit. Choose the administrative state for the new VCAT member circuit. All of the other panes (Routing Preferences, Manual Provisioning, Route Constraints, Review Route, and so on) are identical to the Create Circuit wizard. (See Table 7-6.)

Step 5 Click Next to proceed through the wizard panes. After finalizing your selections, click Finish.


Table 7-18 Field Descriptions for the Add Member Wizard 

Field
Description
Add Members

Current Circuit Size

Displays the current size of the circuit.

Number of Members

Enter the number of members to add to the existing VCAT circuit.

New Circuit Size

Displays the new size of the circuit.

State

Select an administrative state for the new VCAT member circuit. SONET and SDH circuits have different values. For SONET circuits, values are:

IS—The circuit is in service and able to carry traffic.

IS AINS—Alarm reporting is suppressed, but the circuit is able to carry traffic.

OOS DSBLD—The circuit is out of service and unable to carry traffic.

OOS_MT—The circuit is in maintenance state. The maintenance state does not interrupt traffic flow; it suppresses alarms and conditions and allows loopbacks to be performed on the circuit.

For SDH circuits, corresponding values are:

Unlocked

Unlocked, autoInService

Locked, disabled

Locked, maintenance

Add to Drop Ports

Check this check box to apply the selected state to the drop ports.

Circuit Summary

Summarizes the selections you made in the wizard panes. To change the circuit summary, click Back and change your selection(s).


7.2.19  Filtering the Circuit Table

Use the Circuit table filter to filter circuit data according to criteria that you select.


Step 1 In the Domain Explorer tree, select the NE for which to view circuit information.

Step 2 From the Configuration menu, choose CTC-Based SONET NEs, CTC-Based SDH NEs, or ONS 155xx; then, choose Circuit Table from the submenu. The Circuit table opens, showing circuit information for the selected NE.

Step 3 Choose File > Filter (or click the Filter Data tool). The Circuit table filter opens. The following table provides descriptions. Fields shown depend on the type of NE selected.

Step 4 After making your selections, click OK. The filtered circuit data is displayed in the Circuit table.


Table 7-19 Field Descriptions for the Circuit Table Filter Dialog Box 

Field
Description

Circuit Names

Displays the list of available circuit names. Click Add and Remove to move circuit names to and from the Selected Names list. If you check Ignore Circuit Names, Prime Optical ignores all circuit names and the Available Names and Selected Names lists and Add and Remove buttons are disabled. This is equivalent to selecting all the names in the Available Names list of the Circuit Names tab.

Circuit Alias

Enter a new alias name for the circuit. The alias name can contain alphanumeric characters. International character sets are also supported.

Type and Size (CTC-based SONET NEs)

Allows you to specify the type and size of circuit to display. Select All to display circuit data for all Ethernet, STS, VT, VT Aggregation, VT Tunnel, VT VCAT (shown as VT-v), STS VCAT (shown as STS-v), DWDM OCHNC, and DWDM OCHCC circuits.

Select Size All to display circuit data for all VT1.5, VT2, STS-1, STS-3c, STS-6c, STS-9c, STS-12c, STS-18c, STS-24c, STS-36c, STS-48c, STS-96c, and STS-192c interfaces.

OCHNC and OCHCC sizes (shown only when the OCHNC or OCHCC circuit type is selected, not when the All option is selected) include multirate, 2.5 Gb/s FEC, 2.5 Gb/s No FEC, 10 Gb/s FEC, and 10 Gb/s No FEC.

Note When you select All, all circuit types and sizes for the specific NE model are displayed.

Note When circuit size is selected for filtering circuits, a VCAT circuit will be filtered if the size matches its member circuit size.

Type and Size (CTC-based SDH NEs)

Allows you to specify the type and size of circuit to display. Select Type All to display circuit data for all HOP, LOP, LOPA, LOPT, HOV (HO VCAT), LOV (LO VCAT), OCHNC and OCHCC circuits. Select Size All to display circuit data for all VC11, VC12, VC3, VC4, VC4-2c, VC4-3c, VC4-4c, VC4-6c, VC4-8c, VC4-12c, VC4-16c, VC4-32c, and VC4-64c interfaces.

OCHNC, and OCHCC sizes (shown only when the OCHNC, or OCHCC circuit type is selected, not when the All option is selected) include multirate, 2.5 Gb/s FEC, 2.5 Gb/s No FEC, 10 Gb/s FEC, and 10 Gb/s No FEC.

Type and Size (ONS 15530 and ONS 15540 NEs)

Allows you to specify the type and size of circuit to display. Select All to display circuit data for all 2.5 GB interfaces.

NE ID

Displays the list of available NE IDs. Click Add and Remove to move NEs to and from the Selected NE IDs list, and then run the filter.

Links (CTC-based NEs)

Displays all available links.

Note If you open the Circuit table from the Find window or the Domain Explorer, the Links tab is disabled. The tab is enabled only if you open the Circuit table from the Link table.

Description (CTC-based NEs)

Allows you to filter by circuit description.

Circuit State (ONS 15530 and ONS 15540 NEs)

Allows you to specify whether to display active or inactive circuits.

Passthru Circuits (ONS 15530 and ONS 15540 NEs)

Allows you to specify whether to display passthrough circuits. If checked, all circuits that pass through the selected node without being dropped are displayed. If unchecked, only the circuits being dropped at the node are displayed.

Customer ID

Displays a list of available customer IDs. Click Add and Remove to move customer IDs to and from the Selected Customer IDs list, and then run the filter. If you check Ignore All Customer IDs, Prime Optical ignores the customer IDs in the filter criteria.

Service ID

Displays a list of available service IDs. Click Add and Remove to move service IDs to and from the Selected Service IDs list, and then run the filter. If you check Ignore All Service IDs, Prime Optical ignores the service IDs in the filter criteria.

No. of VLANs

Displays filter criteria for the VLAN count. Enter the VLAN count in the text box and specify one of the options for comparison: Greater than or equal to, Less than or equal to, or Equal to.

SRLG

Displays a list of available SRLGs. Click Add and Remove to move SRLG entries to and from the Selected SRLG Entries list, and then run the filter. If you check Ignore SRLG, Prime Optical ignores the SRLGs in the filter criteria.


7.2.20  Tracing Circuits

Use the Circuit Trace window to trace the connectivity of a circuit by showing the source node, the destination node, and any intermediate nodes in graphical format. In addition, the Circuit Trace window displays the primary and secondary circuit paths. A circuit trace report is available only for ONS 15305 and CTC-based NEs.

7.2.20.1  Tracing High-Level Circuits

Prime Optical displays a High-Level Circuit Trace window, where:

A graphic map uses high-level span information such as NEs and links to display the circuit trace.

The graphic map displays logical and physical high-level views:

Logical view—The circuit is traced on the map using logical links. For example, OCHCC circuits use OCH trail links for the trace.

Physical view—The circuit is traced on the map using physical links. For example, OCHCC circuits use OTS links for the trace.

Links are highlighted according to the high-level view that is selected.

Link color corresponds to link status. For example, working links are shown in green.

The window does not trace the following link types:

2-fiber BLSR with protection channel access (PROT_BLSR_2F_PCA)

4-fiber BLSR with protection channel access (PROT_BLSR_4F_PCA)

To view a high-level circuit trace, complete the following steps:


Step 1 Select the node that contains the circuit to be traced and open the Circuit table. For an explanation of Circuit table launch points, see Table 7-2.

Step 2 In the Circuit table, select the circuit to be traced, and choose Configuration > Trace High-Level Circuit (or click the High-Level Trace tool). The High-Level Circuit Trace window opens. Based on the NEs involved in the circuit, all links that belong to the subnetwork are retrieved and displayed.


Note You cannot trace STS VCAT, VT VCAT, VC HO VCAT, and VC LO VCAT circuits, or circuits with a status other than Active or Roll Pending.


Step 3 By default, the High-Level Circuit Trace window opens with the logical view displayed. Choose View > WDM Topology to switch to the physical view. The window highlights the relevant links according to your selection.

Step 4 When multiple links belong to the same NE object, a link bundle is created automatically to manage the set of links. You can right-click a link or link bundle and choose Expand or Collapse from the shortcut menu. If you choose Collapse, the links are hidden and the link bundle is displayed. If you choose Expand, the link bundle is hidden and the links are displayed. The color of the link bundle represents the link selection status, which has the following order of priority (from highest to lowest):

Magenta—The link bundle contains at least one excluded link.

Blue—The link bundle contains at least one selected link.

White—The link bundle contains at least one selecting link.

Green—All links in the link bundle are selectable.

Red—The link bundle contains at least one unselectable link.

Step 5 Position your mouse cursor over a link. The tooltip reports the following information, if available:

Link type.

Source NE name, slot number, card name, port number, side information.

Destination NE name, slot number, card name, port number, side information.

Protection type.


Note When you move the cursor over an NE for a high level circuit, the tooltip displays the fiber information for that NE. In case of invalid values such as a different forward and backward lengths, the background of the tooltip is shown in red color.


Step 6 To adjust the zoom level within the map view, do any of the following:

Choose Edit > Zoom In, Zoom Out, or Zoom Area.

In the toolbar, click the Zoom In, Zoom Out, or Zoom Area tool.

Right-click an empty area of the map and choose Zoom In, Zoom Out, or Zoom Area from the popup menu.

The zoom tools work as follows:

Zoom In—Allows you to zoom in on an object in the map view. This tool increases the size of all of the graphic objects on the map.

Zoom Out—Allows you to zoom out on the map view. This tool decreases the size of all of the graphic objects on the map.

Zoom Area—Allows you to pan and zoom the view to a different region of the map. Hold down the left mouse button and use the Zoom Area box to highlight an area on the map. When you release the left mouse button, the zoom is applied on the selected area of the map.

Step 7 Click an NE object to open the NE Explorer window for that NE.

Step 8 Choose View > Detailed View to open a detailed Circuit Trace window from the current window. For information about the detailed view, see Tracing Detailed Circuits.


The following table describes the icons in the High-Level Circuit Trace window.

Table 7-20 Object Icon Descriptions for the High-Level Circuit Trace Window 

Object
Icon

The color of the NE represents the highest alarm severity on that entity. For icon colors, see Table A-2. The label under the NE icon shows the NE name.

While the NE is initializing, a small hourglass is shown to the right of the NE. The hourglass icon disappears when the NE state changes to In Service.

Circuit source, where n indicates the source number.

Circuit destination, where n indicates the destination number.

Solid green link with bidirectional arrows: The link is active and bidirectional, and supports the working (main) span.

Solid magenta link with bidirectional arrows: The link is active and bidirectional, and supports the protected (standby) span.

Solid green link with unidirectional arrows: A single arrow in the middle of the link shows the direction of the source or destination.

Solid magenta link with unidirectional arrows: A single arrow in the middle of the link shows the direction of the source or destination.

Solid gray link: The link is active but is not directly involved in the circuit.

Dashed-line link: A dashed line represents an invalid link or a logical link, such as an OCH trail link.

Note If the logical link is involved in a circuit, the circuit type is shown above the dashed line.

Dashed-line link that uses triple dots with spacing: While the NE is being discovered, the links are created but might remain invalid. In this case, the link is shown on the map as a dashed line that uses triple dots with spacing.


The Refresh Data tool flashes when updates are available. Or, if the automatic Refresh Data feature is enabled, the High-Level Circuit Trace window refreshes automatically whenever updates occur. The following table shows which events prompt a real-time update to the High-Level Circuit Trace window.

Table 7-21 Events that Cause a Real-Time Update to the High-Level Circuit Trace Window 

Event
Action

Add a link

The graphic object representing the link is added to the map.

Modify a link

If the link validity changes, the corresponding graphic object is updated.

Delete a link

The graphic object representing the link is deleted from the map.

Change the NE state to Out of Service

The NE icon color changes to gray. All links that belong to the NE are deleted and removed from the map.

Change the NE state to In Maintenance

The NE icon color changes. All links that belong to the NE are deleted and removed from the map.

Change the NE state to In Service

The NE icon color reflects the highest alarm severity on that entity, and the hourglass icon disappears. All links that belong to the NE are discovered and shown on the map.

Change the NE state to Initializing

A small hourglass is shown to the right of the NE while the NE initializes.

Change the circuit name

The window title updates to show the new circuit name.

Delete a circuit

A warning message informs you that the circuit has been deleted. Then, the High-Level Circuit Trace window closes automatically.


Note If you are trying to trace subnetwork information but there are insufficient map coordinates for the Subnetwork Explorer, the graphic objects are placed randomly on the Circuit Trace window. To fix this problem, open the Subnetwork Explorer map view and click Save to save the graphic objects' positions.


7.2.20.2  Tracing Detailed Circuits

In addition to high-level circuit traces, Prime Optical displays detailed circuit traces. To view a detailed circuit trace, complete the following steps:


Step 1 Select the node that contains the circuit to be traced and open one of the following:

Circuit table. For an explanation of Circuit table launch points, see Table 7-2.

Link Utilization table. To launch the Link Utilization table, see Viewing Link Utilization.

Step 2 In the Circuit table, select the circuit to be traced, and choose Configuration > Trace Circuit (or click the Trace tool). The Circuit Trace window opens.

Step 3 In the Link Utilization table, select the circuit to be traced, and choose View > Circuit Trace. The Circuit Trace window opens.

Step 4 In the Circuit Trace window, choose Edit > Zoom In, Zoom Out, or Zoom Area to adjust the zoom level. You can also click the Zoom In, Zoom Out, or Zoom Area tool.


Note Prime Optical traces the connectivity of circuits in Partial state. However, if the source or destination node information is not available during circuit discovery, Prime Optical cannot start the circuit trace and generates an error message.


The following figure shows the color scheme used to represent the port state and alarm status in the Circuit Trace window. The color of the NEs and ports represents the highest alarm severity on that entity.

Figure 7-1 Colors of Port State and Alarm Status

Row
Color
Port State
Port State Abbreviation
Alarm Status
1

Gray

Out of Service

OOS_DSBLD

2

Cyan

Out of Service-Maintenance

OOS_MT

3

Purple

In Service

IS_AINS

4

Green

In Service

IS

Clear

5

Light blue

In Service

IS

Warning

6

Yellow

In Service

IS

Minor

7

Orange

In Service

IS

Major

8

Red

In Service

IS

Critical


NoteThe administrative state color (OOS_DSBLD, OOS_MT, IS_AINS) overrides the alarm state color.

For in-service (IS) ports, the alarm state color overrides the administrative state color.


The following table describes the icons in the detailed Circuit Trace window.

Table 7-22 Object Icon Descriptions for the Detailed Circuit Trace Window 

Object
Icon

Circuit source, where n indicates the source number

Circuit destination, where n indicates the destination number

NE

Active span

Note Arrows indicate the direction of traffic flow, with green indicating active traffic.

Standby span

Note Arrows indicate the direction of traffic flow, with purple indicating standby traffic.

PCA, VT tunnel, or VAP span

Note Each span is tagged with a Tunnel, VAP, or PCA label.

Rolled path

Note The rolled path could be the source, the destination, or one or more spans. All entities that have been added to a circuit are shown in orange once the roll is created.

Port

Note If there are multiple ports displayed, the ports on the top of the NE icon have a left-right to bottom-top association with the port name.

Unidirectional circuit

Bidirectional circuit

UPSR selector

Note The color of the UPSR selector represents the switch state. Green indicates that the selector is using the traffic from the working path; purple indicates that the selector is using traffic from the protected path.

(For UPSR selectors) Switched state is Locked

(For UPSR selectors) Switched state is Forced

(For UPSR selectors) Switched state is Manual

(For UPSR selectors) Switched state is APS clear

(For UPSR selectors) Switched state is Exercise

(For UPSR selectors) Provisioning type is Protected (PRT)

<PTP>Port name<CTP>(PRT)

(For UPSR selectors) Provisioning type is Working (WRK)

<PTP>Port name<CTP>(WRK)

Internal drop for VT tunnel

Internal drop for VAP circuit

Internal drop for Ethernet circuit

Facility (line) loopback

Terminal loopback

Automatic J1 path trace mode

Manual J1 path trace mode

Dual Connection Node


The following figure shows a sample circuit diagram that uses many of the objects and icons described in Table 7-22.

Figure 7-2 Sample Circuit Diagram

The Circuit Trace window provides tooltips. For each span, the tooltip displays link protection and bandwidth information. If a circuit passes through a VT tunnel, the intermediate nodes through which the VT tunnel passes are displayed and the level of cross-connection is STS-1.

For DRI circuits, DRI nodes are tagged with a DRI label.

The Circuit Trace also displays ONS 15600 circuits that are in Roll Pending state. The Roll From circuit path is marked in green and the Roll To circuit path is marked in orange. CTPs that are part of the roll are labeled RollTo and RollFrom.

7.2.20.3  Viewing Photonic Path Trace Details

Prime Optical displays Photonic Path Trace (PPT) for Layer 1 services of OCHNC and OCH Trail circuits. The PPT is a graphic representation of the Optical Power and the corresponding Threshold values for each port.


Note Prime Optical displays PPT details only for unidirectional circuits. For bidirectional circuits, the Photonic Path trace details are displayed individually for each direction: Source to Destination, and Destination to Source.


To view Photonic Path Trace, complete the following steps:


Step 1 Select the node that contains the circuit to be traced and open one of the following:

Circuit table—For an explanation of Circuit table launch points, see Table 7-2.

Link Utilization table—To launch the Link Utilization table, see Viewing Link Utilization.

Step 2 In the Circuit table, select the circuit to be traced, and choose Configuration > Trace Circuit (or click the Trace tool). The Circuit Trace window opens.

Step 3 In the Link Utilization table, select the circuit to be traced, and choose View > Circuit Trace. The Circuit Trace window opens.

Step 4 In the Circuit Trace window, choose the Photonic Path Trace tab.


Note For optimal network performance, PPT details are not automatically displayed when the Circuit Trace window is opened.


Step 5 In the Photonic Path Trace tab, click Start. All NEs in the circuit are displayed in the left pane.


Note For a bidirectional circuit, the NEs are displayed under two NE groups in the left pane: one group for each direction.


Step 6 Click the specific NE for which to view the PPT details. The corresponding PPT graph is displayed in the right pane.


The Photonic Path Trace tab also displays the date and time at which the PPT data was last retrieved. You will find it next to the Start button at the bottom-left corner of the tab.


Note You can also export PPT data as an HTML file by clicking Export at the bottom of the Photonic Path Trace tab.


The following limitations apply to Photonic Path Trace:

When the service is provisioned on preprovisioned cards, the PPT tab is available in the Circuit Trace window, but PPT data cannot be retrieved. In such cases, the NEs that are listed are affixed with <N/A> to indicate that PPT data is not available.

When the service is splitter-protected or is part of a regeneration group, an error message is displayed when you try to start PPT data collection.

7.2.20.4  Viewing a Port or Node from the Circuit Trace Window

To view a port or node from the Circuit Trace Window, complete the following steps:


Step 1 Launch the Circuit Trace window. See Tracing Circuits.

Step 2 To view a port, right-click it and choose Open Port from the shortcut menu (or double-click the port). The NE Explorer opens and displays the port.

Step 3 To view a node, double-click it. The NE Explorer opens and displays the shelf view of the node.

Step 4 For OCHCC circuits, you can view the complete circuit span between the source and destination NE by choosing View > WDM Topology in the Circuit Trace window. This feature shows the complete circuit span between two endpoints.


7.2.20.5  Editing the Trail Trace Identifier from the Circuit Trace Window

You can edit the trail trace identifier (TTI) from the Circuit Trace window. The Edit TTI option is available on all trunk ports that support OTN. The Edit TTI option does not appear if:

You disable OTN on the trunk port.

The trunk port is the protected actor of the protection group.

To edit TTI from the Circuit Trace window, complete the following steps:


Step 1 Launch the Circuit Trace window. See Tracing Circuits.

Step 2 Right-click the port and choose Edit TTI from the shortcut menu. The Edit TTI dialog box opens. Table 7-23 provides field descriptions. Specify the following information:

Level—Select the trail trace identifier level. You can select either Section or Path.

Received Trace Mode—Enable the expected string for the path trace. Choose one of these options:

Off/None—Disables received trace mode.

Manual—Uses the value of the Current Expected String field as the baseline. An alarm is raised when a string that differs from the Current Expected String is received.

Disable FDI on TTIM—Check this check box to disable forward defect indication (FDI) for trail trace identifier mismatch (TTIM) alarms.


Note The received trace mode must be set to Manual before you can disable FDI on TTIM.


In the Transmit area, do the following:

In the New Transmit String text box, enter the new string to be transmitted.

Click Hex Mode to display the string in hexadecimal mode. The string is displayed in the Current Transmit String area.

Click ASCII Mode to display the string in ASCII format. The string is displayed in the Current Transmit String area.

In the Expected area, do the following:

Select the Expected String Type. You can select either ASCII or Hex (1 byte).

If you set the Received Trace Mode to Manual, enter the string that the target card should receive in the New Expected String text box.

Click Hex Mode to display the string in hexadecimal mode. The string is displayed in the Current Expected String area.

Click ASCII Mode to display the string in ASCII format. The string is displayed in the Current Expected String area.

In the Received area, the current received string is displayed in the Current Received String area. Do one of the following:

Click Hex Mode to display the string in hexadecimal mode.

Click ASCII Mode to display the string in ASCII format.

Step 3 Complete one of the following options:

Click Reset to reset the values.

Click Default to restore the default values.

Click Apply to apply the information you specified.

Click Close to close the Edit TTI dialog box.


Table 7-23 Field Descriptions for the Edit Trail Trace Identifier Dialog Box 

Field
Description

Port

Displays the port number.

Level

Allows you to set the trail trace identifier level (Section or Path).

Received Trace Mode

Allows you to modify the received trace mode (Off/None or Manual).

Disable FDI on TTIM

Allows you to disable FDI for TTIM alarms.

Note The received trace mode must be set to Manual before you can disable FDI on TTIM.

Current Transmit String

Displays the current transmit string.

New Transmit String

Allows you to set a new transmit string.

Hex Mode

Click Hex Mode to display the string in hexadecimal mode.

Current Expected String

Displays the current expected string.

Expected String Type

Allows you to select the expected string type. You can choose one of the following:

ASCII—Displays the string in ASCII format.

Hex (1 byte)—Displays the string in hexadecimal mode.

If you choose Hex (1 byte), only one character (1 byte) is allowed.

New Expected String

Allows you to set a new expected string.

Hex Mode

Click Hex Mode to display the string in hexadecimal mode.

Current Received String

Display only. Displays the current received string.

Hex Mode

Click Hex Mode to display the string in hexadecimal mode.

Refresh

Allows you to refresh the data shown in the Edit TTI dialog box.

Auto-Refresh

Allows you to set the time interval at which the Edit TTI dialog box refreshes automatically. The following values are allowed:

None—Disables auto-refresh, if enabled.

Every 5 seconds.

Every 30 seconds.

Every 1 minute.

Every 5 minutes.

Every 15 minutes.

Every 30 minutes.

Note You cannot enable auto-refresh if the remote entity does not support it.


7.2.20.6  Using the Circuit Trace Window to Apply Protection to the Ports in a Splitter-Protection Group

You can use the Circuit Trace window to apply optical protection to the ports in a splitter-protection group.

7.2.20.6.1  Overview of Protected OCHNC

OCHNC identifies a wavelength optical path in an MSTP node. The optical path can be:

Pass-through—The wavelength crosses the node in its path from source to destination. Pass-through OCHNC has two side line ports as transmit and receive endpoints.

Add—The wavelength path starts from the node. Add OCHNC has an OCH filter port as the receiving endpoint and a side line port as the transmitting endpoint.

Drop—The wavelength path ends at the node. Drop OCHNC has an OCH filter port as the transmitting endpoint and a side line port as the receiving endpoint.

PSM extends OCHNC on the source and destination node, adding protected OCHNC for add and drop. Splitter-protection OCHNC is bidirectional only.

According to the protection used, the ports involved in protected OCHNC are different even if each protected OCHNC is always characterized by the parameters shown in the following table.

Table 7-24 Endpoints Involved In Protected OCHNC 

Endpoint
Protection Type
OCH
Multiplex Section
Path

TX/RX OCH NC endpoints

PSM COM-TX and COM-RX ports

Mux/Dmx CHAN-TX and CHAN-RX ports

Mux/Dmx CHAN-TX and CHAN-RX ports

Working TX/RX OTS ports

Unprotected-side line ports

Working-side line ports

PSM W-TX and W-RX (working-side line ports)

Protect TX/RX OTS ports

Unprotected-side line ports

Protect-side line ports

PSM P-TX and P-RX (protect-side line ports)


Protected OCHNC is supported on:

ROADM (2-4-8 degree) and OADM for OCH protection

Terminal site for multiplex section or path protection

Wavelength is determined by Mux/Dmx OCH ports, not by PSM units. Protected OCHNC involves all physical ports and patchcords that connect the OCH/OTS endpoint.

Multiplex section and path protection are supported by terminal sites only. The patchcord manager must consider the following limitations when identifying the line side ports for PSM:

One PSM and a ROADM/OADM unit supporting line ports requires OCH protection.

One PSM and one additional unit supporting line ports requires path protection.

One PSM and two additional units supporting line ports requires multiplex section protection.


Note If the node equips more than one side, PSM can be connected only in an OCH protection configuration. Other patchcord creation requests are denied.


7.2.20.6.2  General Rules for Automatic Patchcord Creation

Note the following general rules for automatic patchcord creation:

Using the Calculate Connections feature, the patchcord manager always tries to connect optical units that belong to the same side to match one of the known layouts.

The Calculate Connections feature does not connect OCH trunk and OCH filter ports because it is difficult to add TxP and MxP to a standard managed layout in a multiside node. Every algorithm involving TxP or MxP requires a user-provisioned TxP wavelength.

The patchcord manager connects PSM in a path or multiplex section configuration if there is only one PSM provisioned or equipped on the node, and if there are no incompatible patchcords provisioned on any of the PSM ports.

To distinguish between path and section, the patchcord manager considers the number of preamplifiers and booster amplifiers, assuming that in the multiplex section the two fiber stages have the same layout.

For protected layouts, if more than two line side ports are identified (for example, a node equips three boosters), only the first two ports are connected to PSM.

The patchcord manager creates working and protection sides; that is, A(W) and A(P) for PSM in a path-protection configuration.

7.2.20.6.3  Applying Optical Protection

To apply optical protection to the ports in a splitter-protection group:


Step 1 Launch the Circuit Trace window. See Tracing Circuits.

Step 2 Right-click a port in a splitter-protection group and choose Protection Group from the shortcut menu. This feature applies to OCHCC, OCHTRAIL, and OCHNC circuits that use optical protection.

Step 3 Choose from among the following options. Unavailable functions are dimmed, and the current function is indicated in parentheses. A menu separator divides the switch functions from the locking functions:

Clear—Removes a previously set switch command.

Manual to Working—Switches traffic to the working circuit path if the path has an error rate less than the signal degrade.

Manual to Protect—Switches traffic to the protect circuit path if the path has an error rate less than the signal degrade.

Force to Working—Forces traffic to switch to the working circuit path, even if the path has signal degrade or signal failure conditions. Force switch states have a higher priority than manual switch.

Force to Protect—Forces traffic to switch to the protect circuit path, even if the path has signal degrade or signal failure conditions.

Unlock—Unlocks the port from its current state.

Lockout of Working—Prevents traffic from switching to the working circuit path under any circumstances. Of all switch states, lockout has the highest priority.

Lockout of Protect—Prevents traffic from switching to the protect circuit path under any circumstances.


Caution Force and lockout commands override normal protection switching mechanisms. Applying these commands incorrectly can cause traffic outages.

Step 4 At the Confirm Selector Switch prompt, click OK.

A message indicates whether the operation succeeded or failed.


7.2.20.7  Viewing a J1 Path Trace from the NE Explorer

The SONET J1 path trace is a repeated, fixed-length string comprised of 64 consecutive J1 bytes. You can use the string to monitor interruptions or changes to circuit traffic. The Cisco ONS 15454 Reference Manual shows the ONS 15454 cards that support path trace. DS-1 and DS-3 cards can transmit and receive the J1 field, while the EC-1, OC-3, OC-48AS, and OC-192 can only receive J1 bytes. Cards that are not listed in the reference manual do not support J1 bytes.

To view a J1 path trace from the NE Explorer:


Step 1 Select a CTC-based NE in the Domain Explorer tree and choose Configuration > NE Explorer (or click the Open NE Explorer tool).

Step 2 In the NE Explorer, select a card in the NE Explorer tree; then, click the J1 Path Trace tab in the card properties pane.

Step 3 Click the Retrieve button to retrieve J1 path trace information. Information is displayed in the properties pane.

Step 4 Select the row that corresponds to the port for which you want to display circuit trace information.

Step 5 Click Display. The Trace dialog box opens. The following table provides descriptions.


Table 7-25 Field Descriptions for the J1 Path Trace Dialog Box 

Field
Description

STS Choices (J1 STS path trace only)

Choose the STS circuit that has path trace provisioned on the source and destination ports. This field does not appear on the J1 VC Path Trace dialog box.

VC3/VC4 Choices (J1 VC path trace only)

Choose the VC3 or VC4 circuit that has path trace provisioned on the source and destination ports. This field does not appear on the J1 STS Path Trace dialog box.

Path Trace Mode

Enable the path trace expected string by choosing one of the following values from the Path Trace Mode drop-down list:

Off/None—Path trace mode is disabled.

Auto—Uses the first string received from the port at the other end as the baseline string. An alarm is raised when a string that differs from the baseline is received. For OC-N ports, Auto is recommended, since Manual mode requires you to trace the circuit on the Edit Circuit window to determine whether the port is the source or destination path.

Manual—Uses the Current Expected String field as the baseline string. An alarm is raised when a string that differs from the Current Expected String is received.

Disable AIS and RDI if TIM-P is Detected

Check the Disable AIS on TIM-P check box if you want to suppress the Alarm Indication Signal (AIS) and the Remote Defect Indication (RDI) when the STS or VC3/VC4 path trace identifier mismatch (TIM-P) alarm is detected.

Path Trace String Size

Select the path trace string size.

Note For information about the different path trace string sizes, see the Cisco ONS 15454 Procedure Guide or Cisco ONS 15454 SDH Reference Manual.

Current Expected String

Displays the current expected string. Click Hex Mode to display the string in hexadecimal mode. Click ASCII Mode to display the string in ASCII text.

New Expected String

If you set Path Trace Mode to Manual, enter the string that the OC-N port should receive in the New Expected String field.

Current Received String

Displays the current received string.


7.2.20.8  Editing a J1 Path Trace


Step 1 Select the CTC-based node that contains the circuit to be traced and open the Circuit table. For an explanation of Circuit table launch points, see Table 7-2.

Step 2 In the Circuit table, select the circuit to be traced, and choose Configuration > Trace Circuit.

Step 3 Right-click a port and choose Edit J1 Path Trace. The J1 Path Trace dialog box opens. The Edit J1 Path Trace drop-down list is not displayed (when you right click) for ports that do not support the J1/J2 string. (See Table 7-25 for field descriptions.) Specify the following information:

Path Trace Mode—Enable the path trace expected string. Select one of the following options:

Off/None—Path trace mode is disabled.

Auto—Uses the first string received from the port at the other end as the baseline string. An alarm is raised when a string that differs from the baseline is received.

Manual—Uses the Current Expected String field as the baseline string. An alarm is raised when a string that differs from the Current Expected String is received.

Alarm Action—Select one of the following options:

Disable AIS and RDI on J1-TIM—Check this check box to suppress the alarm indication signal and the remote defect indication when the circuit TIM-P alarm is detected. This option is disabled if you select Off/None as path trace mode.

Disable AIS on C2 Mismatch—Check this check box to suppress the alarm indication signal when the C2 byte mismatch alarm is detected.

Path Trace String Size—Select the path trace string size (16 byte or 64 byte).

In the Transmit area, do the following:

In the New Transmit String text box, enter the new string to be transmitted.

Click Hex Mode to display the string in hexadecimal mode. The string is displayed in the Current Transmit String area.

Click ASCII Mode to display the string in ASCII format. The string is displayed in the Current Transmit String area.

In the Expected area, do the following:

If you set the path trace mode to Manual, enter the string that the target card should receive in the New Expected String field.

Click Hex Mode to display the string in hexadecimal mode. The string is displayed in the Current Expected String area.

Click ASCII Mode to display the string in ASCII format. The string is displayed in the Current Expected String area.

In the Received area, the current received string is displayed in the Current Received String area. Do one of the following:

Click Hex Mode to display the string in hexadecimal mode.

Click ASCII Mode to display the string in ASCII format.

Step 4 Complete one of the following options:

Click Default to restore the default values for the J1 path trace fields.

Click Refresh to refresh the J1 path trace information.

Click Apply to apply the information you specified.


7.2.20.9  Editing a J2 Path Trace


Step 1 Select the CTC-based SDH NE that contains the VC12 circuit to be traced and open the Circuit table. For an explanation of Circuit table launch points, see Table 7-2.

Step 2 In the Circuit table, select the VC12 circuit and choose Configuration > Trace Circuit.

Step 3 Right-click a port and choose Edit J2 Path Trace. The J2 Path Trace dialog box opens. Specify the following information:

Path Trace Mode—Enable the path trace expected string. Select one of the following options:

Off/None—Path trace mode is disabled.

Auto—Uses the first string received from the port at the other end as the baseline string. An alarm is raised when a string that differs from the baseline is received.

Manual—Uses the Current Expected String field as the baseline string. An alarm is raised when a string that differs from the Current Expected String is received.

Alarm Action—Select one of the following options:

Disable AIS and RDI on J2-TIM—Check this check box to suppress the alarm indication signal and the remote defect indication when the VC12 circuit TIM-P alarm is detected. This is disabled if you select Off/None as path trace mode.

Disable AIS on LO SLM—Check this check box to suppress the alarm indication signal when the VC12 circuit, low-order signal label mismatch (LO SLM) alarm is detected.

Path Trace String Size—Select the path trace string size (16 byte or 64 byte).

In the Transmit area, do the following:

In the New Transmit String text box, enter the new string to be transmitted.

Click Hex Mode to display the string in hexadecimal mode. The string is displayed in the Current Transmit String area.

Click ASCII Mode to display the string in ASCII format. The string is displayed in the Current Transmit String area.

In the Expected area, do the following:

If you set the path trace mode to Manual, enter the string that the EC-42 card should receive in the New Expected String field.

Click Hex Mode to display the string in hexadecimal mode. The string is displayed in the Current Expected String area.

Click ASCII Mode to display the string in ASCII format. The string is displayed in the Current Expected String area.

In the Received area, the current received string is displayed in the Current Received String area. Do one of the following:

Click Hex Mode to display the string in hexadecimal mode.

Click ASCII Mode to display the string in ASCII format.

Step 4 Complete one of the following options:

Click Default to restore the default values for the J2 path trace fields.

Click Refresh to refresh the J2 path trace information.

Click Apply to apply the information you specified.


7.2.21  Modifying Traces

Trace information can be used to find faults. The Modify Trace dialog box allows you to change the section trace information for applicable cards. Select a port and click Modify to open the Modify Trace dialog box. Fields shown depend on the type of card selected. The following table provides descriptions.

Table 7-26 Field Descriptions for the Modify Trace Dialog Box 

Field
Description

Port Number

Displays the port number.

Level

Allows you to set the trail trace identifier level (Section or Path).

Trace Mode

Allows you to set the trace mode (Auto, Manual, or Off).

Disable FDI on TTIM

Allows you to disable forward defect indication (FDI) for trail trace identifier mismatch (TTIM) alarms.

Note The trace mode must be set to Manual before you can disable FDI on TTIM.

Disable AIS/RDI on TIM-S

Allows you to disable the AIS and the RDI when the path trace identifier mismatch section (TIM-S) alarm is detected.

Note The trace mode must be set to Manual before you can disable AIS/RDI on TIM-S.

Transmit Length

Select a transmit length for the trace. Values are 1 byte, 16 bytes, or 64 bytes.

Current Transmit String

Displays the current transmit string.

New Transmit String

Allows you to set a new transmit string.

Hex Mode

Click Hex Mode to display the string in hexadecimal mode.

Current Expected String

Displays the current expected string.

New Expected String

Allows you to set a new expected string.

Hex Mode

Click Hex Mode to display the string in hexadecimal mode.

Current Received String

Display only. Displays the current received string.

Hex Mode

Click Hex Mode to display the string in hexadecimal mode.


7.2.22  Managing Circuit Notes

The Circuit Note dialog box allows you to view and add notes to circuits displayed in the Circuit table. If a circuit has a note, the Circuit Note tool appears under the Note column. Comments are visible to all users.


Step 1 In the Domain Explorer, choose Configuration > CTC-Based SONET NEs or CTC-Based SDH NEs > Circuit Table.

Step 2 In the Circuit table, choose Configuration > Show Circuit Note (or click the Show Circuit Note tool). The Circuit Note dialog box opens. The following table provides descriptions.

Step 3 After reading, adding, or deleting notes, click OK.


Table 7-27 Field Descriptions for the Circuit Note Dialog Box 

Field
Description

Note

Provides space to type comments about the selected circuit. To add your comments to the previous comments, click the Append radio button. To overwrite the previous comments, click Replace. To delete the comments, click Delete.

Note You can enable and disable the Replace and Delete functions in the Control Panel > UI Properties pane > Overwrite Circuit Notes field.

History

Displays comments that were entered by previous users.


7.2.23  Managing Circuit Rolls

Use the following procedures to manage circuit rolls:

Viewing the Rolls Table

Rolling a Circuit

Completing a Roll

Forcing a Valid Signal

Finishing a Roll

Canceling a Roll

Filtering the Rolls Table

Deleting a Roll

7.2.23.1  Viewing the Rolls Table

The Rolls table displays circuit roll information for the selected NE or NEs. The rolling maintenance function is available in CTC-based NEs to move live traffic from one entity to another. The connections can be single- or dual-ended. Only path-level (not line-level) bridging and rolling is supported.

To view the Rolls table, select a CTC-based NE in the Domain Explorer tree and choose Configuration > CTC-Based SONET NEs or CTC-Based SDH NEs > Rolls Table. The following table provides descriptions.

Table 7-28 Field Descriptions for the Rolls Table 

Field
Description

Roll from Circuit

Displays the name of the circuit where the circuit roll originates.

Roll to Circuit

Displays the name of the circuit where the circuit roll terminates. This value could be the same as Roll From Circuit when only a single circuit is involved in a roll.

Roll State

Displays the current state of the circuit roll. Values are:

ROLL_PENDING—The roll is awaiting completion or cancellation.

ROLL_COMPLETED—The roll has already been completed.

ROLL_CANCELLED—The roll has been cancelled.

Roll Valid Signal

Displays the roll valid signal status (True or False).

Roll Mode

Displays the roll mode. Values are:

Automatic—When a valid signal is received on the new path, Prime Optical completes the roll on the node automatically. You can cancel an automatic roll only when the Roll Valid Signal value is False. One-way source rolls are always automatic.

Manual—You must complete a manual roll after a valid signal is received. You can cancel a manual roll at any time. One-way destination rolls are always manual.

Roll Path

Displays the roll path for the entire circuit roll.

Roll from Path

Indicates the path that is being rolled away. The original cross-connection goes from Roll Path to Roll from Path.

Roll to Path

Indicates the new path being rolled to. After a successful completion of a roll, the new cross-connection goes from Roll Path to Roll to Path.


7.2.23.2  Rolling a Circuit

Use the Roll Circuit wizard to transfer CTC-based NE traffic from one facility to another without service interruption. The wizard is generally used to move a circuit off a card (for card or facility replacements) or to increase bandwidth utilization (for example, by moving lower-rate circuits across a shared high-rate circuit or rerouting circuits or parts of a circuit). You can roll SONET and SDH circuits only.


Step 1 In the Domain Explorer, choose Configuration > CTC-Based SONET NEs or CTC-Based SDH NEs > Circuit Table.

Step 2 In the Circuit table, select the circuit to roll and choose Configuration > Roll Circuit (or click the Roll Circuit tool). The Roll Circuit wizard opens. The following table provides descriptions.

Table 7-29 Field Descriptions for the Roll Circuit Wizard 

Field
Description
Roll Attributes

Circuit Roll Mode

Select the circuit roll mode (Auto or Manual).

Circuit Roll Type

Select the circuit roll type (Single or Dual).

Roll From Circuit

If you selected multiple circuits, select a circuit to roll from in the Roll From Circuit list.

Roll Summary

Displays the results of your choices on this screen.

Pivot/Fixed Point 1

Circuit Trace

The Roll From Circuit is traced so that you can select the circuit termination point. Select a circuit termination point from the graphic.

Selected CTP

Displays the user-selected circuit termination point.

Roll Summary

Displays the results of your choices on this screen.

Pivot/Fixed Point 2 (available when Circuit Roll Type is Dual)

Circuit Trace

The Roll From Circuit is traced so that you can select the circuit termination point. Select a circuit termination point from the graphic.

Selected CTP

Displays the user-selected circuit termination point.

Roll Summary

Displays the results of your choices on this screen.

Select New Endpoint (available when Circuit Roll Type is Single; fields depend on the NE selected and the circuit type)

NE ID

Select a new NE as the endpoint from the list of available NE IDs.

Subnetwork ID

Display only. Displays the ID of the subnetwork.

Slot

(For SONET/SDH circuits) Select the slot from the list.

Port

(For SONET/SDH circuits) Select the port from the list.

STS

(For SONET circuits) Select an STS from the list.

VT

(For SONET circuits) Select the VT for the new endpoint from the list.

VC4

(For SDH circuits) Select the VC4 from the list.

VC11

(For SDH circuits) Select the VC11 from the list.

VC12

(For SDH circuits) Select the VC12 from the list.

TUG3

(For SDH circuits) Select the TUG3 from the list.

TUG2

(For SDH circuits) Select the TUG2 from the list.

Routing Preferences View (available when Circuit Roll Mode is Dual)

Route Automatically

Enable or disable automatic route selection. If enabled, Prime Optical automatically determines the route for the circuit. Alternatively, you can choose manual routing and specify all the intermediate hops on a hop-by-hop basis (up to 64 hops per circuit).

Note If the source and destination of the circuit are on the same node, automatic routing is enabled.

Using Required Nodes/Links

(Available only if Route Automatically is checked) If checked, Prime Optical automatically routes the circuit through the required nodes and/or links.

Review Route Before Creation

(Available only if Route Automatically is checked) Check this check box to review the route before it is created.

VT-DS3 Mapped Conversion

Display only. If checked, the roll-away path includes the node on which the VT/DS-3 conversion is done. If unchecked, the roll-away path does not include the node on which the VT/DS-3 conversion is done.

Time Slot Restriction

If checked, you can enter an STS/VC4 value (to be used end-to-end) that Prime Optical uses to automatically determine the route for the circuit. Circuit creation fails if the same STS/VC4 is not available end-to-end. If circuit creation fails, you can try again using different values. The valid range is from 1 to 192 for SONET, or from 1 to 64 for SDH networks.

Note Time Slot Restriction is not available for OCHCC and OCHNC circuit types.

Note For VCAT circuits, you must enter multiple STS/VC4 values in the Time Slot Restriction field, in the Member Preferences table. The STS/VC4 values you enter in the Time Slot Restriction field cannot be identical or circuit creation will fail with an error message.

Fully Protected Path

If selected, Prime Optical ensures that the circuit is fully protected. You can provision the circuit in a UPSR DRI topology by checking the Dual Ring Interconnect check box. Alternatively, if the circuit must pass across unprotected links, Prime Optical creates a primary and alternate circuit route (virtual UPSR) based on the following node diversity specifications:

Required—Ensures that the primary and alternate paths of the UPSR portions of the complete circuit path are node-diverse.

Desired—Prime Optical attempts node diversity. If node diversity is impossible, Prime Optical uses primary and alternate paths that are link-diverse for the UPSR portions of the complete circuit path.

Don't Care: Link Diverse Only—Prime Optical creates primary and alternate paths that are link-diverse for the UPSR portions of the complete circuit path. The paths might be node-diverse, but Prime Optical does not check for node diversity.

Protection Channel Access

To route the circuit on a BLSR protection channel, if available, uncheck the Fully Protected Path check box, and check the Protection Channel Access check box.

Dual Ring Interconnect

If you selected Fully Protected Path and the circuit will be routed on a DRI, check the Dual Ring Interconnect check box.

Note For DRI and iDRI manually created circuits, you must double-click the DRI span for it to become DRI. A single-click does not enable the DRI span.

Diverse Shared Risk Link Group (SRLG)

If checked, fully protected circuits are routed through working and protected links that do not share risk groups.

Manual Provisioning

Map view

Displays the NEs that are available in the subnetwork for circuit creation. This pane also indicates the source and destination NEs (and secondary source and destination NEs, if applicable) selected for circuit creation. The map view is used to manually route the circuit from the source to the destination specified by the addition of the links selected.

Use the right-click menu options to navigate within the map view:

Find Node—Opens the Find Node dialog box, which lists all of the nodes displayed in the map view. Select a node from the drop-down list and click OK. The selection context in the map view changes to show the selected node highlighted in the visible map area.

Zoom In—Allows you to zoom in on an object in the map view.

Zoom Out—Allows you to zoom out on the map view.

Reset Zoom—Resets the current zoom level to the default.

Available Spans

Select a link on the map view (related to the selected node) and its corresponding details are displayed in the Available Spans pane. Click Add to move the spans to the Selected Spans field. The newly added link appears in blue on the map view.

Selected Spans

Select one or more spans and click Remove to remove them from the Selected Spans field. The removed link appears in green to indicate its unselected state.

Note To specify a DRI link, double-click the link on the map. The map view displays the link as bidirectional.

Links/Nodes tab

Select the links/nodes in the graphic to populate the selected node field.

BLSR DRI Nodes or MS-SPRing DRI Nodes tab

(For BLSR DRI or MS-SPRing DRI circuits) Click the Add button to open the BLSR/MS-SPRing DRI dialog box, which allows you to provide primary and secondary pairs for traditional and nontraditional DRI circuits. Also specify ring and path options for the first and second rings. Click Remove to remove a DRI node from the list.

Route Constraints (available only if the Using Required Node/Links check box is checked)

Map view

Displays the NEs that are available in the subnetwork for circuit creation. This pane also indicates the source and destination NEs (and secondary source and destination NEs, if applicable) selected for circuit creation. The map view is used for the inclusion and exclusion of links or nodes during the specification of route constraints. The included nodes are shown in blue and the excluded links are shown in magenta.

Use the right-click menu options to navigate within the map view:

Find Node—Opens the Find Node dialog box, which lists all of the nodes displayed in the map view. Select a node from the drop-down list and click OK. The selection context in the map view changes to show the selected node highlighted in the visible map area.

Zoom In—Allows you to zoom in on an object in the map view.

Zoom Out—Allows you to zoom out on the map view.

Reset Zoom—Resets the current zoom level to the default.

Selected Node/Link

Displays the currently selected NE or link.

Included Links/Nodes

Displays the list of links or nodes that are included in the route.

Excluded Links/Nodes

Displays the list of links or nodes that are excluded from the route.

VT/VC LO Circuit Options (available only for VT and VC LO path circuits)

VT/VC LO Tunnel on Transit Nodes

This option is available if the VT or VC circuit passes through a node that does not have a low-order tunnel, or if an existing low-order tunnel is full. Low-order tunnels allow VT/VC circuits to pass through NEs without consuming low-order cross-connect card resources. In general, creating tunnels is a good idea if you are creating many low-order circuits from the same source and destination.

VT Aggregation Point (VAP)/VC LO Aggregation Point (LAP)

(For SONET) This option is available if you are creating a VT1.5 circuit on a DS-1, EC-1, DS3XM-6; or an OC-N port on a BLSR, 1+1, or unprotected node. A VAP allows VT1.5 circuits to be routed through a node using one STS connection on the cross-connect card matrix rather than multiple connections on the VT1.5 matrix.

(For SDH) This option is available if you are creating a VC12 circuit on an STM-N port for handoff to non-SDH networks or equipment, such as an IOF, switch, or DACS. A LAP allows low-order circuits to be routed through a node using one VC4 connection on the cross-connect card high-order matrix rather than multiple connections on the low-order matrix.

First fixed point is STS/VC4 Grooming Node

Creates the VAP or LAP on the VT or VC circuit source node. This option is available only if the VT circuit originates on a DS-1, EC-1, DS3XM-6, or OC-N card, or if the VC circuit originates on an STM-N card.

Second fixed point is STS/VC4 Grooming Node

Creates the VAP or LAP on the VT or VC circuit destination node. This option is available only if the VT circuit terminates on a DS-1, EC-1, DS3XM-6, or OC-N card, or if the VC circuit terminates on an STM-N card.

None

Choose this option if you do not want to create a low-order tunnel or a VAP/LAP. This is the only available option if Prime Optical cannot create a low-order tunnel or VAP/LAP.

Conversion Route Constraints (available only if VT-DS3 Mapped Conversion is checked)

NE ID

Select from the list of available NE IDs to specify the source NE ID.

Subnetwork ID

Display only. Displays the ID of the subnetwork associated with the circuit source.

Slot

Specify the source slot that contains the DS3XM12 card.

DS3 Mapped STS

Choose Circuit Source or Circuit Dest.

Review Route (available only if the Review Route Before Creation check box is checked)

Map view

Displays the NEs that are available in the subnetwork for circuit creation. This pane also indicates the source and destination NEs (and secondary source and destination NEs, if applicable) selected for circuit creation. The map view is used for the inclusion and exclusion of links or nodes during the specification of route constraints. The included nodes are shown in blue and the excluded links are shown in magenta.

Use the right-click menu options to navigate within the map view:

Find Node—Opens the Find Node dialog box, which lists all of the nodes displayed in the map view. Select a node from the drop-down list and click OK. The selection context in the map view changes to show the selected node highlighted in the visible map area.

Zoom In—Allows you to zoom in on an object in the map view.

Zoom Out—Allows you to zoom out on the map view.

Reset Zoom—Resets the current zoom level to the default.

Review Route

Displays the NEs that are available in the subnetwork for circuit creation. This pane also indicates the source and destination NEs (and secondary source and destination NEs, if applicable) selected for circuit creation. The map view displays information about the spans selected during autorouting in the subnetwork. The selected spans are shown in blue. When you select a span, its corresponding details are displayed in the Selected Span pane. The circuit summary displays the total hops and the cost for working and protect paths for the routed circuit.

Source NE ID

Displays the ID of the NE selected as the source node.

Destination NE ID

Displays the ID of the NE selected as the destination node.

Included Spans

If you enabled automatic route selection in the Routing Preferences pane, Prime Optical automatically selects spans to route the circuit. This field lists all the spans that the Prime Optical server selected automatically.

Selected Span

Displays detailed information about the span selected in the Included Spans list.


Step 3 In the Roll section of the Roll Attributes pane, specify the following information:

Circuit Roll Mode—Select either:

Auto—Create an automatic roll (required for a one-way source roll).

Manual—Create a manual roll (required for a one-way destination roll).

Circuit Roll Type—Select either Single or Dual. If you select Dual, click OK in the message box.

Step 4 In the Roll From Circuit section of the Roll Attributes pane, select the circuit from which to roll the circuit.

Step 5 Click Next.

Step 6 The Pivot/Fixed 1 pane displays the circuit trace. Click the square in the graphic image that represents the facility that you want to keep. This facility is the fixed location in the cross-connection involved in the roll process. The identifier appears in the text box below the graphic image. The facility not selected is the Roll From path, which is deleted after the roll is completed.

Step 7 Depending on which circuit roll type you selected, do one of the following:

a. If you selected Single as the circuit roll type, the Select New Endpoint pane opens. The selections in this pane indicate the Roll To facility. Specify the following (when available) for the new endpoint; then, click Next:

NE ID

Slot

Port

STS

VT

b. If you selected Dual as the circuit roll type, specify the roll points and click Next.

Step 8 In the Routing Preferences pane, do the following; then, click Next:

a. Route Automatically—Enable or disable automatic route selection. If enabled, Prime Optical automatically determines the route for the circuit. If the source and destination of the circuit are on the same node, automatic routing is enabled.

b. Using Required Nodes/Links—Check this check box to let Prime Optical automatically route the circuit through the required nodes and/or links.

c. Review Route Before Creation—(Available only if Route Automatically is checked) Check this check box to review the route before it is created.

d. Fully Protected Path—If not selected, choose Protection Channel Access to route the circuit on a BLSR protection channel.

e. Fully Protected Path—If selected, Prime Optical ensures that the circuit is fully protected. You can provision the circuit in a UPSR DRI topology by checking Dual Ring Interconnect. Alternatively, if the circuit must pass across unprotected links, Prime Optical creates a primary and alternate circuit route (virtual UPSR) based on the following node diversity specifications:

Required—Prime Optical ensures that the primary and alternate paths within the UPSR portions of the complete circuit path are node-diverse.

Desired—Prime Optical attempts node diversity. If node diversity is impossible, Prime Optical uses primary and alternate paths that are link-diverse for the UPSR portions of the complete circuit path.

Don't Care: Link Diverse Only—Prime Optical creates primary and alternate paths that are link-diverse for the UPSR portions of the complete circuit path. The paths might be node-diverse, but Prime Optical does not check for node diversity.

Dual Ring Interconnect—If selected, the other node specifications (Required, Desired, and Don't Care: Link Diverse Only) are disabled.

Step 9 In the Manual Provisioning pane (available when Route Automatically is unchecked), a graphical representation of the circuit is displayed, including source and destination nodes. Select the member from the Member list box at the top of the pane. You must select each member and route the member from source to destination manually, by selecting spans and adding them to the route until the destination is reached. When the member selection is changed, the display is refreshed for the new member. Complete the following substeps; then, click Finish:

a. In the circuit display, select the span to use for the next hop.

b. In the Available Spans area, complete the following information:

From—Displays the source of the span

To—Displays the destination of the span

c. Click Add. The span is added to the Selected Spans list.

d. Repeat substeps a to c for each intermediate NE until the destination NE is reached.

e. Repeat substeps a to d for each member until all members are routed.

f. To delete a span from the Selected Spans area, select a span from the Selected Spans list and click Remove.

Step 10 In the Route Constraints pane (available only if Route Automatically and Using Required Nodes/Links are checked), do the following; then, click Next to view the Review Route pane:

a. Selected Nodes/Links area:

Nodes—Select whether to use nodes in the circuit route

Links—Select whether to specify the links in the circuit route

b. Click Include to include the selected node or link in the route. The node or link appears in the Included Links/Nodes list.

c. Click Exclude to exclude the selected node or link from the route. The node or link appears in the Excluded Links/Nodes list.

d. Click Remove to remove the selected node or link from the Included Links/Nodes or Excluded Links/Nodes lists.

e. Click Up or Down to set the sequence of the nodes and spans included in the circuit.

f. If the Review Route Before Creation check box is checked, click Next to review the route summary.

Step 11 If you did not select Using Required Nodes/Links, specify VC-LO circuit options. In the VC LO Options pane, choose one of the following radio buttons; then, click Finish (if you did not check Review Route Before Creation) or Next (to view the spans included in the route in the Review Route pane):

a. VC LO Tunnel on transit nodes

b. VC LAP

First fixed point is VC4 grooming node

Second fixed point is VC4 grooming node

c. None

Step 12 In the Review Route pane (available only if Review Route Before Creation is checked), review the following information; then, click Finish:

a. In the circuit display, review the ID of the source and destination NEs.

b. Included Spans—Because automatic route selection is enabled in the Routing Preferences pane, Prime Optical automatically selects spans to route the circuit. This field lists all the spans that the Prime Optical server selected automatically.

c. Selected Span—Displays the following information about the span selected in the Included Spans list:

From—Span source

To—Span destination

Source STS—STS value

VT—VT time slot

Step 13 In the message box, click OK.


7.2.23.3  Completing a Roll

Use the Complete Roll button to terminate a manual roll. You can do this when a manual roll is in a ROLL_PENDING state and you have not yet completed the roll or have not canceled its sibling roll.


Step 1 In the Domain Explorer tree, select the CTC-based NE and choose Configuration > CTC-Based SONET NEs or CTC-Based SDH NEs > Rolls Table.

Step 2 In the Rolls table, choose a roll to complete; then, choose Configuration > Complete Roll (or click the Complete Roll tool). The traffic is routed to the new port.


7.2.23.4  Forcing a Valid Signal

Use the Force Valid Signal button to force a valid signal on a pending roll so the roll will be completed.


Note You cannot force a valid signal on a one-way cross-connection that is involved in a manual roll.


Step 1 In the Domain Explorer tree, select the CTC-based NE and choose Configuration > CTC-Based SONET NEs or CTC-Based SDH NEs > Rolls Table.

Step 2 In the Rolls table, choose a roll to complete. The Roll Valid Signal field of the roll you selected is set to false.

Step 3 Choose Configuration > Force Valid Signal.


7.2.23.5  Finishing a Roll

Use the Finish Roll tool to complete the circuit processing of both manual and automatic rolls. It changes the circuit state from ROLL_PENDING to ACTIVE.


Step 1 In the Domain Explorer tree, select the CTC-based NE and choose Configuration > CTC-Based SONET NEs or CTC-Based SDH NEs > Rolls Table.

Step 2 In the Rolls table, choose a roll to finish; then, choose Configuration > Finish Roll (or click the Finish Roll tool). The roll is cleared from the Rolls table and the new rolled circuit on the Circuit table returns to Active state.


7.2.23.6  Canceling a Roll

Use the Cancel Roll tool to cancel the selected roll. You can cancel a manual roll at any time; you can cancel an automatic roll only if the Roll Valid Signal is False.


Step 1 In the Domain Explorer tree, select the CTC-based NE and choose Configuration > CTC-Based SONET NEs or CTC-Based SDH NEs > Rolls Table.

Step 2 In the Rolls table, choose a roll to cancel; then, choose Configuration > Cancel Roll (or click the Cancel Roll tool).


Note To cancel a dual roll, both rolls must have the same roll state.


7.2.23.7  Filtering the Rolls Table

Use the Rolls table filter to filter circuit roll data according to criteria that you select and to display the results in the Rolls table.


Step 1 In the Domain Explorer tree, select a CTC-based NE and choose Configuration > CTC-Based SONET NEs or CTC-Based SDH NEs > Rolls Table.

Step 2 Choose File > Filter (or click the Filter Data tool). The Rolls table filter opens.

Step 3 The Roll Path tab displays the list of available roll paths. Click Add and Remove to move roll paths to and from the Selected Roll Path list.

Step 4 After making your selections, click OK.


7.2.23.8  Deleting a Roll


Step 1 In the Domain Explorer tree, select the CTC-based NE and choose Configuration > CTC-Based SONET NEs or CTC-Based SDH NEs > Rolls Table.

Step 2 In the Rolls table, choose a roll to delete; then, choose Configuration > Delete Roll.


Note To delete a dual roll, both rolls must have the same roll state.


Step 3 In the message box, click OK.


7.2.24  Circuit Promotion of GMPLS Circuits

Circuit promotion upgrades a non-GMPLS circuit to a GMPLS circuit.


Step 1 From the circuit table, select the circuit to be upgraded.

Step 2 Click WSON and choose Promote. The Update Circuit to WSON dialog box opens.

Step 3 From the Validation drop-down list, choose the validation mode. For more information about the validation modes, see Validation Modes.

Step 4 From the Required drop-down list, choose the optical validation value. For more information about the validation threshold values, see Validation Thresholds.

When you position your mouse cursor over the circuit information field, the tooltip gives information about the device name, circuit alias, size, type, and wavelength.

Step 5 Click Apply.

The progress bar is displayed. After the operation is successfully completed, the circuit is upgraded.


7.2.25  Validation of GMPLS Circuits

To validate a GMPLS circuit:


Step 1 Select the GMPLS circuit to be validated.

Step 2 Click WSON and choose Validate.

The Validation dialog box opens.

Step 3 Click Apply.

The progress bar is displayed. After the operation is successfully completed, the circuit is validated.


7.2.26  Reroute Wavelength of GMPLS Circuits

This task reroutes an existing GMPLS circuit through an alternate path based on the specified path constraints.


Note GMPLS OCHCC circuits cannot be rerouted. Only the OCH Trail associated with the OCHCC circuit can be rerouted.


Step 1 From the circuit table, select the circuit to be upgraded.

Step 2 Click WSON and choose Re-route Wavelength. The Re-route Wavelength pane is displayed.

Step 3 Select the GMPLS circuit to be rerouted.

Step 4 From the Constraint Config drop-down list, select the required constraint type. Values are:

exclude Node—The rerouted path does not pass through the selected node.

include Node—The rerouted path passes through the selected node.

exclude Link—The rerouted path does not use the selected span.

include Link—The rerouted path uses the selected span.

Step 5 Right-click the map or click the Add/Remove button to select the node or link to which the constraint is to be applied.

Step 6 Repeat Step 3 and Step 4 to apply more constraints, as needed.


Note When you apply a constraint to include a node or link on the alternate path, you must select nodes or links sequentially, from the source to the destination of the circuit.


Step 7 Click Apply.

The circuit is rerouted if a feasible path is found that complies with the specified constraints. After a successful reroute, a confirmation message is displayed. Otherwise, a failure notification is displayed.

Step 8 If the reroute failed in Step 7, repeat the reroute process.

Step 9 Do the following in the Re-route Wavelength pane:

Click Clear to clear the previous selections.

Click the Side toggle button to view the link side information.

Click the Working/Protected toggle button to select the path.

Step 10 Repeat Step 4 through Step 7 as needed.

Step 11 Click Apply to apply your changes, or click Cancel to cancel the operation.


7.2.27  L1 Circuit Report

The Circuit Report displays circuit information for Layer 1 services of ONS 15305 CTC, ONS 15310 CL, ONS 15310 MA SONET, ONS 15310 MA SDH, ONS 15327, ONS 15454 MSTP, ONS 15454 SONET, ONS 15454 SDH, ONS 15454-M6, ONS 15454-M2, ONS 15600 SONET, and ONS 15600 SDH. The Circuit report displays both ANSI and ETSI circuits. Also, both VCAT and member circuits are displayed together.

7.2.27.1  Viewing Circuit Reports

To view ONS 154XX Circuit reports, complete the following steps:


Step 1 In the Network Map window, select the ONS 154XX group and choose Configuration > ONS 155XX > Circuit Report.

The Circuit report opens, displaying the following information for the selected NEs:

Circuit Name

Circuit Type

Circuit Size

Discovery State

Service State

Wavelength

Customer ID

Service ID


Note Only those circuits for which the selected ONS 154XX is either the source or the destination are listed.


Step 2 To filter the Circuit report, click the Filter tool in the Circuit Report window. A filter drop-down text box appears at the top of each column, from which you can select the values by which to filter the report.

Step 3 To edit a circuit listed in the Circuit report, select the circuit and choose Circuit > Edit Circuit (or click the Open Circuit Edit tool). The Edit Circuit window is displayed.

Step 4 To trace a circuit listed in the Circuit report, select the circuit and choose Circuit > Circuit Trace (or click the Open Circuit Trace tool). The Circuit Trace window is displayed.

Step 5 To open the Circuit table for a circuit from the Circuit report, select the circuit and choose Circuit > Circuit Table (or click the Circuit Table tool). The Circuit table is displayed.


Note You can select multiple circuits for which to view the Circuit table, provided they are of the same type: either ANSI or ETSI.


If the Auto-Refresh check box is selected in the Circuit Report window, the respective rows are automatically highlighted when a circuit undergoes a change. When the Auto-Refresh check box is not selected, a notification bar appears at the top of the Circuit Report window stating that the reported data has changed. You can click the Refresh tool to refresh the report.

If the report has more than one page, the Previous Page and Next Page arrows at the top-right corner of the Circuit report window are enabled. The Pagination Settings tool allows you to select the number of records to be displayed per page.

The status bar at the bottom of the Circuit Report window displays:

Current page number

Total number of pages in the report

Number of records displayed

Number of records selected

If you want to move to a specific page, you can enter the page number in the Page text box and press Enter.

7.2.27.2  Exporting Circuit Reports

To export a Circuit report, complete the following steps:


Step 1 In the Circuit Report window, select File > Export to CSV (or click the Export to CSV tool). The Export to CSV dialog box appears.

Step 2 Specify the filter parameters in the Export to CSV dialog box. See Table 3-16, "Field Descriptions for the Export to CSV Dialog Box," on page 51.

Step 3 Click OK to export.


7.3  Managing BLSRs

Use the following procedures to manage BLSRs. You can launch the BLSR table from either the Domain Explorer or the NE Explorer.

Viewing the BLSR Table from the Domain Explorer

Creating a BLSR from the Domain Explorer

Creating a BLSR from the NE Explorer

Deleting a BLSR from the Domain Explorer

Deleting a BLSR from the NE Explorer

7.3.1  Viewing the BLSR Table

You can launch the BLSR table from either the Domain Explorer (see Viewing the BLSR Table from the Domain Explorer) or the NE Explorer (see Viewing the BLSR Table from the NE Explorer). Use the BLSR table to view BLSRs that are available in a subnetwork. The BLSR table displays the BLSR attributes and the nodes that participate in the ring. You can select a BLSR in the table and edit, delete, switch, or upgrade the ring from 2-fiber to 4-fiber. The following table provides descriptions.

Table 7-30 Field Descriptions for the BLSR Table 

Field
Description

Ring ID

Displays the ring ID as an alphanumeric value of up to six characters.

Ring Type

Displays the ring type.

Line Rate

Displays the line rate. For SONET, the rates are OC12, OC48, and OC192. For SDH, the rates are STM4, STM16, and STM64.

Status

Displays the ring status.

Nodes

Displays the nodes associated with the ring.

Ring Reversion

Displays the ring reversion time, in minutes.

Span Reversion

Displays the span reversion time, in minutes.


7.3.1.1  Viewing the BLSR Table from the Domain Explorer

In the Domain Explorer, select the NE; then, choose Configuration > CTC-Based SONET NEs > BLSR Table. The BLSR table opens.

7.3.1.2  Viewing the BLSR Table from the NE Explorer


Step 1 Select an ONS 15327, ONS 15454 SONET, or ONS 15600 SONET NE in the Domain Explorer and choose Configuration > NE Explorer (or click the Open NE Explorer tool).

Step 2 In the node properties pane, click the BLSR tab. The BLSR tab contains the following fields:

Fiber Type—Indicates whether the fiber type is 2-fiber or 4-fiber.

Rate—BLSR rate.

Ring Name—Not available for the ONS 15600. Name of the BLSR ring.

Ring ID—Assign a ring ID number from 0 to 9999. Nodes in the same BLSR must have the same ring ID.

Node ID—Assign a node ID that identifies the node to the BLSR. Nodes in the same BLSR must have unique node IDs.

Ring Reversion—Set the amount of time before the traffic reverts to the original working path. The Cisco default is 5 minutes. All nodes in a BLSR ring should have the same ring reversion setting, particularly if Never (that is, nonrevertive) is selected.

Span Reversion—Not available for the ONS 15327. Set the amount of time to pass before the span reverts to the working path.

East Line—Assign the east BLSR port.

East Switch—Displays a list of switch commands for the east port.

West Line—Assign the west BLSR port.

West Switch—Displays a list of switch commands for the west port.

East Protect—Not available for the ONS 15327. For 4-fiber BLSR, assign the east BLSR protect port.

West Protect—Not available for the ONS 15327. For 4-fiber BLSR, assign the west BLSR protect port.


7.3.2  Creating a BLSR for an Individual Node

Use the BLSR Creation wizard to create BLSRs for the selected CTC-based SONET NE. The creation wizard can be launched by selecting an NE from the Domain Explorer, Subnetwork Explorer, or Network Map.


Note Use the Create BLSR wizard to create the BLSR for all desired nodes simultaneously. See Creating BLSRs for Multiple Nodes Simultaneously.


7.3.2.1  Creating a BLSR from the Domain Explorer


Step 1 In the Domain Explorer, select the NE; then, choose Configuration > CTC-Based SONET NEs > Create BLSR. The BLSR Creation wizard opens. The following table provides descriptions.

Step 2 After making your selections, click Next.

Step 3 A graphical view of the BLSR is displayed. You can complete any of the following:

Selected Link—Displays the link information for a selected link in the BLSR graphical view.

Add Span—Add a span. A span is represented by a green line.

Remove Span—Remove an existing span. A deleted span is represented by a black line.

Reverse Span—Allows you to reverse the direction of the span.

Excluded Nodes—Provides a list of nodes that were not included in the BLSR.

Step 4 Click Finish.


Table 7-31 Field Descriptions for the Create BLSR Wizard 

Field
Description

Type

Specify the fiber type (2-fiber or 4-fiber).

Line Rate

Choose the BLSR ring speed: OC-12 (2-fiber BLSR only), OC-48, or OC-192. The speed must match the OC-N speed of the BLSR trunk (span) cards.

Ring ID

Assign a ring ID, which can be any combination of up to six alphanumeric characters. Nodes in the same BLSR must have the same ring ID.

Ring Reversion

Set the amount of time that elapses before the traffic reverts to the original working path. The Cisco default is 5 minutes. All nodes in a BLSR ring should have the same ring reversion setting, particularly if Never (that is, nonrevertive) is selected.

Span Reversion

(For 4-fiber BLSRs only) Set the amount of time that elapses before the traffic reverts to the original working path following a span switch. The Cisco default is 5 minutes. Span reversions can be set to Never.


7.3.2.2  Creating a BLSR from the NE Explorer


Step 1 Select a CTC-based SONET NE in the Domain Explorer and choose Configuration > NE Explorer (or click the Open NE Explorer tool).

Step 2 Click the BLSR tab.

Step 3 Click Create.

Step 4 In the Create BLSR dialog box, set the BLSR properties:

Fiber Type—Select the BLSR fiber ring type (2-fiber or 4-fiber).

Ring Name—Assign the BLSR ring name.

Ring ID—Assign a ring ID (a number from 0 to 9999). Nodes in the same BLSR must have the same ring ID.

Node ID—Assign a node ID. The node ID identifies the node to the BLSR. Nodes in the same BLSR must have unique node IDs.

Ring Reversion—Set the amount of time that elapses before the traffic reverts to the original working path. The Cisco default is 5.0. All nodes in a BLSR ring should have the same ring reversion setting, particularly if Never (that is, nonrevertive) is selected.

West Line—Assign the west BLSR port for the node from the drop-down list.

East Line—Assign the east BLSR port for the node from the drop-down list.

For 4-fiber BLSRs, complete the following information:

Span Reversion—Set the amount of time that elapses before the traffic reverts to the original working path following a span reversion. The Cisco default is 5 minutes. Span reversions can be set to Never. If a ring reversion time was set, the times must be the same for both ends of the span. That is, if the west fiber of Node A is connected to the east port of Node B, the Node A west span reversion time must be the same as the Node B east span reversion time. To avoid reversion time mismatches, it is recommended that you use the same span reversion time throughout the ring.

West Protect—Assign the west BLSR port that will connect to the west protect fiber.

East Protect—Assign the east BLSR port that will connect to the east protect fiber.

Step 5 Click OK.


Note Some or all of the following alarms appear during BLSR setup: E-W MISMATCH, RING MISMATCH, APSCIMP, APSDFLTK, BLSROSYNC. The alarms clear after all of the nodes in the BLSR are configured.


Step 6 Complete Step 1 through Step 5 at each node where the BLSR will be added.

Step 7 After configuring the last BLSR node, wait for the BLSR Ring Map Change dialog box to appear. This can take from 10 to 30 seconds.


Note The dialog box does not appear if SDCC Termination alarms (such as EOC) or BLSR alarms (such as E-W MISMATCH and RING MISMATCH) are present. If an SDCC alarm is present, review the DCC provisioning at each node. If BLSR alarms have not cleared, repeat Step 1 through Step 5 at each node, making sure that each node is provisioned correctly. The dialog box does not apply to the ONS 15327 R3.4 or ONS 15454 R3.4.


Step 8 In the BLSR Ring Map Change dialog box, click Yes.

Step 9 In the BLSR Ring Map Change dialog box, verify that the ring map contains all of the provisioned nodes in the expected order. If so, click Accept. If the nodes do not appear, or are not in the expected order, repeat Step 1 through Step 8, making sure that no errors are made.

Step 10 Test the BLSR using the following standard site testing procedure:

a. Run test traffic through the ring.

b. Click the BLSR tab and then click BLSR Span. Choose MANUAL RING from the East Switch list. Click Apply.

c. In the Alarm Browser, verify that a Ring Switch West event is displayed, and that the far-end node that responded to this request reports a Ring Switch East event.

d. Verify that traffic switches normally.

e. Choose Clear from the East Switch list and click Apply.

f. Repeat substeps a through d for the west switch.

g. Disconnect the fibers at one node and verify that traffic switches normally.


7.3.3  Creating BLSRs for Multiple Nodes Simultaneously

Use the Create BLSR wizard from the Domain Explorer to create a BLSR for all desired SONET nodes simultaneously.

Table 7-32 Field Descriptions for the Create BLSR Wizard 

Field
Description
BLSR Attributes

Type

The BLSR type (2-fiber or 4-fiber).

Line Rate

The line rate (OC12, OC48, or OC192).

Ring ID

Used-defined ring ID. The value can be any combination of up to six alphanumeric characters.

Ring Reversion

Ring reversion time, in minutes.

Span Reversion

Span reversion time, in minutes.

Working Spans Selection

After the attributes are defined, a possible BLSR map is shown. You can select the spans from the map and perform Add, Remove, or Reverse operations. The Add operation adds all the spans to the ring. The Remove operation removes the selected span. The Reverse operation switches the east and west ports in the span. If all the spans are added to make a loop, the Finish button is enabled.

Note For 4-fiber BLSRs, instead of Finish, the Next button is provided.

Click Excluded Nodes to view the nodes that are being excluded from the BLSR and the reason for the exclusion.

Protect Ports Selection

(4-fiber BLSRs only) The table lists all the spans along with the potential protect ports. You can select the desired protect ports (east and west) for each span in the ring. The Finish button is enabled if all the required protect ports are selected.


7.3.4  Viewing the BLSR Ring Map Table

The Ring Map table contains BLSR information for the selected object in the table.


Step 1 Select an ONS 15327, ONS 15454 SONET, or ONS 15600 SONET NE in the Domain Explorer and choose Configuration > NE Explorer (or click the Open NE Explorer tool).

Step 2 Click the BLSR tab; then, click Ring Map. The Ring Map table opens. The following table provides descriptions.


Table 7-33 Field Descriptions for the Ring Map Table 

Field
Description

Node ID

Displays the node ID, which identifies the node to the BLSR. Nodes in the same BLSR must have unique node IDs.

IP Address

Displays the NE IP address.


7.3.5  Viewing the BLSR Squelch Table

When multiple fiber cuts isolate a BLSR node, the Squelch table displays the circuits that are isolated on the node by STS number, east source/destination, and west source/destination. The table is display only.


Step 1 Select an ONS 15327, ONS 15454 SONET, or ONS 15600 SONET NE in the Domain Explorer and choose Configuration > NE Explorer (or click the Open NE Explorer tool).

Step 2 Click the BLSR tab; then, select a ring in the table.

Step 3 Click Squelch Table. The Squelch table opens. The following table provides descriptions.


Table 7-34 Field Descriptions for the Squelch Table 

Field
Description

STS No.

Displays the STS number of the circuit.

East Source

Displays the east source NE.

East Destination

Displays the east destination NE.

West Source

Displays the west source NE.

West Destination

Displays the west destination NE.


7.3.6  Editing BLSRs


Step 1 In the Domain Explorer, select the NE; then, choose Configuration > CTC-Based SONET NEs > BLSR Table.

Step 2 In the BLSR table, select the ring to edit; then, choose Edit > Edit BLSR (or click the Edit Selected BLSR tool).

Step 3 Edit the BLSR attributes:

Ring ID—Specify an ID of up to six alphanumeric characters.

Ring Reversion (min)—Set the ring reversion time to Never or from 0.5 to 12 minutes.

Span Reversion (min)—Set the span reversion time to Never or from 0.5 to 12 minutes.

Step 4 Click Apply.


7.3.7  Switching BLSRs

The Switch BLSR dialog box displays a graphical representation of a BLSR, including the following details:

The NEs that are part of the ring are shown along with the node name.

The colors of the NEs reflect the state.

The working ports that are selected during creation of the ring are shown in green. The working port names are also shown in green.

The protect ports that are selected during creation of the ring are shown in purple. The protect port names are also shown in purple.

The working spans are shown in green. This identifies spans that are selected during creation as the working spans.

The protect spans are shown in purple. For a 2-fiber BLSR, these spans are automatically assigned during creation. For a 4-fiber BLSR, these spans are based on the protect ports selected.

Complete the following steps to switch BLSRs:


Step 1 In the Domain Explorer, select the NE; then, choose Configuration > CTC-Based SONET NEs > BLSR Table.

Step 2 In the BLSR table, select the ring to edit; then, choose Edit > Switch BLSR (or click the Switch Selected BLSR tool). The Switch BLSR dialog box opens. The following table provides descriptions.

Step 3 After making your selections, click OK.

Step 4 The job is queued in the Job Monitor table. For more information, see Monitoring Scheduled Tasks.


Table 7-35 Field Descriptions for the Switch BLSR Dialog Box 

Field
Description

Initial Node

Select the initial node from the graphic. The name of the selected node appears in the field.

Switch Command

Select one from the following switch commands:

Clear—Clears an existing switch command

Lockout Span—Prevents automatic switching

Force Ring—Performs a forced BLSR switch

Manual Ring—Performs a manual BLSR switch

Switch Ring—Switches BLSRs

Time

Schedule the switch to occur immediately or at an exact time, including date, hour, and minute. Choose Now to schedule the BLSR switch to begin immediately. Choose At Time to set the specific date and time of the switch. Use the calendar tool to choose the year, month, and day:

Year—Click the year combo box or the double arrow (<<, >>) at the bottom of the calendar.

Month—Click the month combo box or the single arrow (<, >) at the bottom of the calendar.

Day—Click the day number on the calendar. The current date is shown in blue.

To repeat the switch, select a repeat interval from the Frequency drop-down list. A switch can occur once, daily, or weekly.


7.3.8  Changing the BLSR Switch Interval

The interval between BLSR switches can be configured in the Control Panel. This interval represents the interval between east and west tasks of a ring switch task.


Step 1 In the Domain Explorer, choose Administration > Control Panel.

Step 2 In the Control Panel, expand NE Service and choose CTC-Based SONET NEs.

Step 3 In the BLSR-Ring Switch Interval field, enter the interval time. The Cisco default is 60 seconds.

Step 4 Click Save.


7.3.9  Using the BLSR Upgrade Table

Use the BLSR Upgrade table to upgrade a 2-fiber BLSR to a 4-fiber ring. The BLSR Upgrade wizard allows you to select the span reversion along with upgrade options. After selecting the spans, the protect ports selection wizard is displayed.

The following table describes the fields in the BLSR Upgrade table.

Table 7-36 Field Descriptions for the BLSR Upgrade Table 

Field
Description

Ring ID

Allows you to modify the ring ID. It can be any combination of up to six alphanumeric characters.

Ring Reversion

Allows you to modify the ring reversion time.

Span Reversion

Allows you to modify the span reversion time.


7.3.10  Upgrading BLSRs

Use the Upgrade BLSR wizard to upgrade 2-fiber BLSRs to 4-fiber BLSRs. Only OC-48 (or higher) rings can be upgraded.


Step 1 In the Domain Explorer, select the NE; then, choose Configuration > CTC-Based SONET NEs > BLSR Table.

Step 2 In the BLSR table, select the ring to edit; then, choose Edit > Upgrade BLSR (or click the Upgrade Selected BLSR tool). The Upgrade BLSR wizard opens. The following table provides descriptions.

Step 3 In the Upgrade BLSR wizard, specify the following information:

Span reversion

Upgrade options

Step 4 Click Next.

Step 5 The Protect Ports table opens and displays the following port information:

Name

West Working

West Protect

East Working

East Protect

Step 6 Click Finish.


Table 7-37 Field Descriptions for the Upgrade BLSR Wizard 

Field
Description
BLSR Attributes

Span Reversion

Select the span reversion time, in minutes.

Upgrade Options

Select an upgrade option for the BLSR:

Override Protection Operations—The upgrade procedure automatically clears all the protection operations and proceeds with the BLSR upgrade.

Override Protection Switch—The upgrade continues despite the protection switch. If a protection switch occurs as a result of a fiber cut, there is a loss of traffic.

Ignore PCA—If there is extra PCA traffic on the ring, the traffic is dropped during the upgrade.

BLSR Summary

Summarizes the selections you made on this screen.

Protect Ports Selection

Protect Ports table

Displays the protect ports for the upgraded BLSR.

BLSR Summary

Summarizes the selections you made on this screen.


7.3.11  Filtering the BLSR Table


Step 1 In the Domain Explorer, select the NE; then, choose Configuration > CTC-Based SONET NEs > BLSR Table.

Step 2 In the BLSR table, choose File > Filter (or click the Filter Data tool). The filter dialog box opens.

Step 3 Use the filter to filter data according to criteria that you select and to display the results in the table. The following table provides descriptions.


Table 7-38 Field Descriptions for the BLSR Filter Dialog Box 

Field
Description

Network Elements

Displays the list of available NE IDs. Click Add and Remove to move NEs to and from the Selected list. The filter runs against the NEs in the Selected list.

BLSR Names

Allows you to filter the table using a range of BLSR names. The filter runs against the names in the Selected Names list. Check the Ignore All BLSR Names check box if you want to filter BLSR data and the name is not important.

Ring Type

Allows you to filter the table using a specific ring type (All, 2-fiber, or 4-fiber).

Line Rate

Allows you to filter the table using a specific line rate (All, OC12, OC48, or OC192). You can also select Inconsistent as a filter option, meaning that the BLSR goes into an inconsistent state if it has been provisioned correctly but is nonfunctional due to changes in the network.


7.3.12  Deleting BLSRs

You can delete a BLSR from the Domain Explorer or the NE Explorer.

7.3.12.1  Deleting a BLSR from the Domain Explorer


Step 1 In the Domain Explorer, select the NE; then, choose Configuration > CTC-Based SONET NEs > BLSR Table.

Step 2 In the BLSR table, select the ring to delete; then, choose Edit > Delete BLSR (or click the Delete Selected BLSR tool).

Step 3 In the confirmation dialog box, click Yes.


7.3.12.2  Deleting a BLSR from the NE Explorer


Step 1 Select an ONS 15327, ONS 15454 SONET, or ONS 15600 NE in the Domain Explorer and choose Configuration > NE Explorer (or click the Open NE Explorer tool).

Step 2 Click the BLSR tab.

Step 3 Select the ring to delete and click Delete.

Step 4 In the confirmation dialog box, click OK.


7.4  Managing MS-SPRings

Use the following procedures to manage MS-SPRings.

Viewing an MS-SPRing from the Domain Explorer

Viewing an MS-SPRing from the NE Explorer

Creating an MS-SPRing from the Domain Explorer

Creating an MS-SPRing from the NE Explorer

Deleting an MS-SPRing from the Domain Explorer

Deleting an MS-SPRing from the NE Explorer

Deleting an MS-SPRing from the NE Explorer

7.4.1  Viewing the MS-SPRing Table

Use the MS-SPRing table to view MS-SPRings that are available in a subnetwork. The MS-SPRing table displays the MS-SPRing attributes and the nodes that participate in the ring. You can select an MS-SPRing in the table and edit, delete, switch, or upgrade the ring from 2-fiber to 4-fiber.

The following table provides descriptions.

Table 7-39 Field Descriptions for the MS-SPRing Table 

Field
Description

Ring ID

Displays the ring ID as an alphanumeric value of up to six characters.

Ring Type

Displays the ring type.

Line Rate

Displays the line rate. For SONET, the rates are OC12, OC48, and OC192. For SDH, the rates are STM4, STM16, and STM64.

Status

Displays the ring status.

Nodes

Displays the nodes associated with the ring.

Ring Reversion

Displays the ring reversion time, in minutes.

Span Reversion

Displays the span reversion time, in minutes.


You can launch the MS-SPRing table from either the Domain Explorer or the NE Explorer.

7.4.1.1  Viewing an MS-SPRing from the Domain Explorer

In the Domain Explorer, click an ONS 15454 SDH or ONS 15600 SDH NE; then, choose Configuration > CTC-Based SDH NEs > MS-SPRing Table. The MS-SPRing table displays the information shown in Table 7-39.

7.4.1.2  Viewing an MS-SPRing from the NE Explorer


Step 1 Select an ONS 15454 SDH or ONS 15600 SDH NE in the Domain Explorer and choose Configuration > NE Explorer (or click the Open NE Explorer tool).

Step 2 In the node properties pane, click the MS-SPRing tab. The tab displays the following information:

Type—Indicates whether the fiber type is 2-fiber or 4-fiber.

Rate—Select the MS-SPRing rate.

Ring ID—Assign a ring ID, using alphanumeric values. Nodes in the same MS-SPRing must have the same ring ID.

Node ID—Assign a node ID. This identifies the node to the MS-SPRing. Nodes in the same MS-SPRing must have a unique node ID.

Ring Reversion—Set the amount of time that elapses before the traffic reverts to the original working path. The Cisco default is 5 minutes. All nodes in an MS-SPRing should have the same ring reversion setting, particularly if Never is selected.

Span Reversion—Set the amount of time to pass before the span reverts to the working path.

East Line—Assign the east MS-SPRing port.

East Switch—Displays a list of switch commands for the east port.

West Line—Assign the west MS-SPRing port.

West Switch—Displays a list of switch commands for the west port.

East Protect—For a 4-fiber MS-SPRing, assign the east MS-SPRing protect port.

West Protect—For a 4-fiber MS-SPRing, assign the west MS-SPRing protect port.


7.4.2  Creating an MS-SPRing for an Individual Node

Use the MS-SPRing Creation wizard to create MS-SPRings for the selected ONS 15454 SDH or ONS 15600 SDH NE. MS-SPRings share the ring bandwidth equally between working and protection traffic. Half of the payload bandwidth is reserved for protection in each direction, making the communication pipe half-full under normal operation.


Note Use the Create MS-SPRing wizard to create the MS-SPRing for all desired nodes simultaneously. See Creating MS-SPRings for Multiple Nodes Simultaneously.


You can create an MS-SPRing from the Domain Explorer or the NE Explorer.

7.4.2.1  Creating an MS-SPRing from the Domain Explorer


Step 1 Select an ONS 15454 SDH or ONS 15600 SDH NE in the Domain Explorer and choose Configuration > CTC-Based SDH NEs > Create MS-SPRing. The MS-SPRing Creation wizard opens. The following table provides descriptions.

Step 2 After making your selections, click Next.

Step 3 A graphical view of the MS-SPRing is displayed. You can complete any of the following:

Selected Link—Displays the link information for a selected link in the MS-SPRing graphical view.

Add Span—Add a span. A span is represented by a green line.

Remove Span—Remove an existing span. A deleted span is represented by a black line.

Reverse Span—Allows you to reverse the direction of the span.

Excluded Nodes—Provides a list of nodes that were not included in the MS-SPRing.

Step 4 Click Finish.


Table 7-40 Field Descriptions for the MS-SPRing Creation Wizard 

Field
Description

Type

MS-SPRing type (2-fiber or 4-fiber).

Line Rate

Line rate (STM4, STM16, or STM64).

Ring ID

Used-defined ring ID. The value can be any combination of up to six alphanumeric characters.

Ring Reversion

Ring reversion time, in minutes.

Span Reversion

Span reversion time, in minutes.

Working Spans Selection

After the attributes are defined, a possible MS-SPRing map is shown. You can select the spans from the map and perform Add, Remove, or Reverse operations. The Add operation adds all the spans to the ring. The Remove operation removes the selected span. The Reverse operation switches the east and west ports in the span. If all the spans are added to make a loop, the Finish button is enabled.


7.4.2.2  Creating an MS-SPRing from the NE Explorer


Step 1 Select an ONS 15454 SDH or ONS 15600 SDH NE in the Domain Explorer and choose Configuration > NE Explorer (or click the Open NE Explorer tool).

Step 2 Click the MS-SPRing tab; then, click Create.

Step 3 In the Create MS-SPRing dialog box, set the MS-SPRing properties:

Type—Select the MS-SPRing ring type, either two fiber or four fiber.

Ring ID—Assign a ring ID (a number from 0 to 9999). Nodes in the same MS-SPRing must have the same ring ID.

Node ID—Select the node ID (0-31).

Ring Reversion—Set the amount of time that elapses before the traffic reverts to the original working path. The Cisco default is 5 minutes. All nodes in an MS-SPRing ring should have the same ring reversion setting, particularly if Never (that is, nonrevertive) is selected.

West Line—Select the west port.

East Line—Select the east port.

Span Reversion—Choose the amount of time that elapses before the traffic reverts to the original working path following a traffic failure. The Cisco default is 5 minutes. Span reversions can be set to Never. If you set a ring reversion time, the times must be the same for both ends of the span. That is, if Node A's west fiber is connected to Node B's east port, the Node A west span reversion time must be the same as the Node B east span reversion time.

West Protect—Select the west MS-SPRing port that will connect to the west protect fiber.

East Protect—Select the east MS-SPRing port that will connect to the east protect fiber.

Step 4 Click OK.


7.4.3  Creating MS-SPRings for Multiple Nodes Simultaneously

Use the Create MS-SPRing wizard to create an MS-SPRing for all desired SDH nodes simultaneously.

Table 7-41 Field Descriptions for the Create MS-SPRing Wizard 

Field
Description
MS-SPring Attributes

Type

MS-SPRing type (2-fiber or 4-fiber).

Line Rate

Line rate (STM4, STM16, or STM64).

Ring ID

Used-defined ring ID. The value can be any combination of up to six alphanumeric characters.

Ring Reversion

Ring reversion time, in minutes.

Span Reversion

Span reversion time, in minutes.

Working Spans Selection

After the attributes are defined, a possible MS-SPRing map is shown. You can select the spans from the map and perform Add, Remove, or Reverse operations. The Add operation adds all the spans to the ring. The Remove operation removes the selected span. The Reverse operation switches the east and west ports in the span. If all the spans are added to make a loop, the Finish button is enabled.

Note For 4-fiber MS-SPRings, instead of Finish, the Next button is provided.

Click Excluded Nodes to view the nodes that are being excluded from the MS-SPRing and the reason for the exclusion.

Protect Ports Selection

(4-fiber MS-SPRings only) The table lists all the spans along with the potential protect ports. You can select the desired protect ports (east and west) for each span in the ring. The Finish button is enabled if all the required protect ports are selected.


7.4.4  Editing MS-SPRings

Use the MS-SPRing Edit window to modify the ring ID, ring reversion, and span reversion on a ring.


Step 1 Select an ONS 15454 SDH or ONS 15600 SDH NE in the Domain Explorer and choose Configuration > CTC-Based SDH NEs > MS-SPRing Table.

Step 2 In the MS-SPRing table, select the ring to edit; then, choose Edit > Edit MS-SPRing (or click the Edit Selected MS-SPRing tool).

Step 3 Edit the MS-SPRing attributes:

Ring ID—Specify an ID from 0 to 9999.

Ring Reversion (min)—Set the ring reversion time to Never or from 0.5 to 12 minutes.

Span Reversion (min)—Set the span reversion time to Never or from 0.5 to 12 minutes.

Step 4 Click Apply.


7.4.5  Using the MS-SPRing Upgrade Table

Use the MS-SPRing Upgrade table to upgrade a 2-fiber MS-SPRing to a 4-fiber ring. The MS-SPRing Upgrade wizard allows you to select the span reversion along with upgrade options. After selecting the spans, the protect ports selection wizard is displayed.

The following table provides descriptions.

Table 7-42 Field Descriptions for the MS-SPRing Upgrade Table 

Field
Description

Ring ID

Allows you to modify the ring ID. It can be any combination of up to six alphanumeric characters.

Ring Reversion

Allows you to modify the ring reversion time.

Span Reversion

Allows you to modify the span reversion time.


7.4.6  Upgrading MS-SPRings

Only STM16 (or higher) rings can be upgraded.


Step 1 Select an ONS 15454 SDH or ONS 15600 SDH NE in the Domain Explorer and choose Configuration > CTC-Based SDH NEs > MS-SPRing Table.

Step 2 In the MS-SPRing table, select the ring to edit; then, choose Edit > Upgrade MS-SPRing.

Step 3 In the Upgrade MS-SPRing dialog box, specify the following information:

Span reversion

Upgrade options—Choose one of the following options:

Override Protection Operations—The upgrade procedure automatically clears all the protection operations and proceeds with the upgrade.

Override Protection Switch—The upgrade continues despite the protection switch. If a protection switch occurs as a result of a fiber cut, there is a loss of traffic.

Ignore PCA—If there is extra PCA traffic on the ring, the traffic is dropped during the upgrade.

Step 4 Click Next. The Protect Ports table opens, displaying the following protect ports information for the upgraded MS-SPRing:

Name

West Working

West Protect

East Working

East Protect

Step 5 Click Finish.


7.4.7  Viewing the MS-SPRing Ring Map Table

The Ring Map table contains MS-SPRing information for the selected object in the table.


Step 1 Select an ONS 15454 SDH or ONS 15600 SDH NE in the Domain Explorer and choose Configuration > NE Explorer (or click the Open NE Explorer tool).

Step 2 Click the MS-SPRing tab; then, select a ring in the table.

Step 3 Click Ring Map. The Ring Map table opens. The following table provides descriptions.


Table 7-43 Field Descriptions for the Ring Map Table 

Field
Description

Node ID

Displays the Node ID, which identifies the node to the MS-SPRing. Nodes in the same MS-SPRing must have unique node IDs.

IP Address

Displays the NE IP address.


7.4.8  Viewing the MS-SPRing Squelch Table

When multiple fiber cuts isolate an MS-SPRing node, the Squelch table displays the circuits that are isolated on the node by STS number, east source/destination, and west source/destination. The table is display only.


Step 1 Select an ONS 15454 SDH or ONS 15600 SDH NE in the Domain Explorer and choose Configuration > NE Explorer (or click the Open NE Explorer tool).

Step 2 Click the MS-SPRing tab; then, select a ring in the table.

Step 3 Click Squelch Table. The Squelch table opens. The following table provides descriptions.


Table 7-44 Field Descriptions for the Squelch Table 

Field
Description

STS No.

Displays the STS number of the circuit.

East Source

Displays the east source NE.

East Destination

Displays the east destination NE.

West Source

Displays the west source NE.

West Destination

Displays the west destination NE.


7.4.9  Switching MS-SPRings

The Switch MS-SPRing dialog box displays a graphical representation of an MS-SPRing, including the following details:

The NEs that are part of the ring are shown along with the node name.

The colors of the NEs reflect the state.

The working ports that are selected during creation of the ring are shown in green. The working port names are also shown in green.

The protect ports that are selected during creation of the ring are shown in purple. The protect port names are also shown in purple.

The working spans are shown in green. This identifies spans that are selected during creation as the working spans.

The protect spans are shown in purple. For a 2-fiber MS-SPRing, these spans are automatically assigned during creation. For a 4-fiber MS-SPRing, these spans are based on the protect ports selected.

Complete the following steps to switch MS-SPRings:


Step 1 Select an ONS 15454 SDH or ONS 15600 SDH NE in the Domain Explorer and choose Configuration > CTC-Based SDH NEs > MS-SPRing Table.

Step 2 In the MS-SPRing table, choose Edit > Switch MS-SPRing (or click the Switch Selected MS-SPRing tool). The Switch MS-SPRing dialog box opens. The following table provides descriptions.

Step 3 After making your selections, click OK.

The job is queued in the Job Monitor table. For more information, see Monitoring Scheduled Tasks.


Table 7-45 Field Descriptions for the Switch MS-SPRing Dialog Box 

Field
Description

Initial Node

Select the initial node from the graphic. The name of the selected node is displayed in the field.

Switch Command

Select one from the following switch commands:

Clear—Clears an existing switch command

Lockout Span—Prevents automatic switching

Force Ring—Performs a forced MS-SPRing switch

Manual Ring—Performs a manual MS-SPRing switch

Switch Ring—Switches MS-SPRings

Time

Set up the MS-SPRing switch to occur immediately or at an exact time, including date, hour, and minute. Choose Now to schedule the MS-SPRing switch to begin immediately. Choose At Time to set the specific date and time of the switch. Use the calendar tool to choose the year, month, and day:

Year—Click the year combo box or the double arrow (<<, >>) at the bottom of the calendar.

Month—Click the month combo box or the single arrow (<, >) at the bottom of the calendar.

Day—Click the day number on the calendar. The current date is shown in blue.

To repeat the switch, select a repeat interval from the Frequency drop-down list. A switch can occur once, daily, or weekly.


7.4.10  Changing the MS-SPRing Switch Interval

The interval between the MS-SPRing switches can be configured in the Control Panel. This interval represents the interval between east and west tasks of a ring switch task.


Step 1 In the Domain Explorer, choose Administration > Control Panel.

Step 2 In the Control Panel, expand NE Service and choose CTC-Based SDH NEs.

Step 3 In the MS-SPRing Switch Interval field, enter the interval time. The Cisco default is 60 seconds.

Step 4 Click Save.


7.4.11  Filtering the MS-SPRing Table


Step 1 Select an ONS 15454 SDH or ONS 15600 SDH NE in the Domain Explorer and choose Configuration > CTC-Based SDH NEs > MS-SPRing Table.

Step 2 In the MS-SPRing table, choose File > Filter (or click the Filter Data tool). The filter dialog box opens.

Step 3 Use the filter to filter data according to criteria that you select and to display the results in the table. The following table provides descriptions.


Table 7-46 Field Descriptions for the MS-SPRing Filter Dialog Box 

Field
Description

Network Elements

Displays the list of available NE IDs. Click Add and Remove to move NEs to and from the Selected list. The filter runs against the NEs in the Selected list.

MS-SPRing Names

Allows you to filter the table using a range of MS-SPRing names. The filter runs against the names in the Selected Names list. Check the Ignore All MS-SPRing Names check box if you want to filter data and the name is not important.

Ring Type

Allows you to filter the table using a specific ring type (All, 2-fiber, or 4-fiber).

Line Rate

Allows you to filter the table using a specific line rate (All, STM4, STM16, STM64). You can also select Inconsistent as a filter option, meaning that the MS-SPRing goes into an inconsistent state if it has been provisioned correctly but is nonfunctional due to changes in the network.


7.4.12  Deleting MS-SPRings

You can delete an MS-SPRing from the Domain Explorer or the NE Explorer.

7.4.12.1  Deleting an MS-SPRing from the Domain Explorer


Step 1 Select an ONS 15454 SDH or ONS 15600 SDH NE in the Domain Explorer and choose Configuration > CTC-Based SDH NEs > MS-SPRing Table.

Step 2 In the MS-SPRing table, select the ring to delete; then, choose Edit > Delete MS-SPRing (or click the Delete Selected MS-SPRing tool).

Step 3 In the confirmation dialog box, click Yes.


7.4.12.2  Deleting an MS-SPRing from the NE Explorer


Step 1 Select an ONS 15454 SDH or ONS 15600 SDH in the Domain Explorer and choose Configuration > NE Explorer (or click the Open NE Explorer tool).

Step 2 Click the MS-SPRing tab.

Step 3 Select the ring to delete and click Delete.

Step 4 In the confirmation dialog box, click OK.


7.5  Managing VLANs for E-Series Cards

VLANs are managed at the network partition level. All VLANs that are discovered on one NE are propagated to all available NEs under the same network partition. Creating, editing, or deleting VLANs affects all the NEs under the network partition.


Caution Be sure that the VLANs are unique across the entire network partition.

If you use CTC to manage VLANs, Prime Optical will discover two VLANs with the same name but different IDs if the following conditions exist:

You created a VLAN with an ID and name in one ring

You created another VLAN with the same name but a different ID in another ring managed by another instance of CTC

Both rings are managed by the same network partition in Prime Optical

A similar situation arises when two or more VLANs are created with the same ID but different names.


Note The procedures in this section apply only to E-series cards. VLAN association for E-series cards is done during circuit creation.


Use the following procedures to manage VLANs:

Creating VLANs

Tracing VLANs

Deleting VLANs

7.5.1  Creating VLANs

Use the Manage VLANs dialog box to create new VLANs or delete existing VLANs from the Prime Optical domain. All Prime Optical user types can access the Manage VLANs dialog box, but Operators cannot create or delete VLANs.

The Manage VLANs dialog box displays a list of all available VLANs in the Prime Optical domain. The list is ordered alphanumerically by VLAN name, where numbers precede letters and uppercase letters precede lowercase ones.


Step 1 In the Domain Explorer, select a CTC-based NE and choose Configuration > Manage VLANs. The following table describes the fields in the Manage VLANs dialog box.

Alternatively, perform one of the following tasks to open the Manage VLANs dialog box:

Select a CTC-based NE in the Subnetwork Explorer and choose Configuration > Manage VLANs.

Select a CTC-based NE in the Network Map and choose Configuration > Manage VLANs.

Table 7-47 Field Descriptions for the Manage VLANs Dialog Box 

Button
Description
All VLANs

Trace

Allows you to trace a VLAN.

Create

Allows you to add a new VLAN.

Delete

Allows you to delete a VLAN.

Close

Allows you to cancel the VLAN creation or deletion and close the dialog box.


Step 2 In the Manage VLANs dialog box, click Create.

Step 3 In the Define New VLAN dialog box, enter a unique VLAN name and ID. The VLAN ID must be an integer greater than 1.

Step 4 Click OK.

Step 5 In the confirmation dialog box, click OK.


Note If the VLAN creation fails with an error message, it means that the Prime Optical server is in a Config Resync operation state. In this state, all provisioning operations are blocked because the server is retrieving updated configuration information from the card. Close the Manage VLANs dialog box and wait 2 to 3 minutes; then, retry the VLAN creation.


7.5.2  Tracing VLANs

The VLAN Trace table displays a tabular representation of the endpoints associated with the VLAN in the selected network partition.


Step 1 In the Domain Explorer, Subnetwork Explorer, or Network Map window, select a CTC-based NE and choose Configuration > Manage VLANs.

Step 2 In the Manage VLANs dialog box, select the VLAN to be traced and click Trace. The VLAN Trace table opens. The following table provides descriptions.


Table 7-48 Field Descriptions for the VLAN Trace Table 

Field
Description

Bridge ID

Displays the bridge ID.

Designated Root

Displays the root bridge.

NE ID

Displays the name of the node.

Physical Location

Displays the slot and port that identify the PTP.

STP State

Displays the current spanning tree protocol (STP) state.

STP Enabled

Indicates whether or not STP is enabled for the card.

Network Partition ID

Displays the network partition ID.


7.5.3  Deleting VLANs


Step 1 In the Domain Explorer, Subnetwork Explorer, or Network Map window, choose Configuration > Manage VLANs.

Step 2 In the Manage VLANs dialog box, select the VLAN to be deleted and click Delete.


Note You cannot delete a VLAN that is in use. VLAN deletion will fail if any of the NEs in the network partition are not reachable.


Step 3 You are prompted to confirm the deletion request. Click OK.

Step 4 In the confirmation dialog box, click OK.


7.6  Managing VLANs (ML-Series Cards)

A VLAN is an end-to-end service within a Layer 2 topology. When provisioning a VLAN, Prime Optical internally configures bridge groups, one on each card, wherever an Ethernet service drop is specified. A bridge group associates a service drop with the service VLAN ID, the optical virtual port subinterface. A VLAN service is a collection of bridge groups on a particular Layer 2 topology.

Bridge groups are invisible on the Layer 2 service provisioning application. You can review the associated service drops on each VLAN service.


Step 1 Select an existing Layer 2 topology from the Layer 2 Topology table.

Step 2 Select a service provider VLAN ID.

Step 3 Specify a customer ID and service ID. These are strings that you can assign to a VLAN service during provisioning. This information is local to Prime Optical and is not configurable on the NE.

Step 4 Specify the QoS parameters (CIR/PIR).

Step 5 Specify the service drops. There must be at least one drop per ML card for point-to-point and Layer 2 topologies, and at least two drops, on a different card, for Resilient Packet Ring (RPR).

Step 6 For each drop port, specify the port type and connection type.


7.7  Managing SVLAN Profiles

You can add, modify, and delete service provider virtual LAN (SVLAN) profiles on ONS 15454 SONET and ONS 15454 SDH NEs.


Step 1 In the Domain Explorer, Subnetwork Explorer, or Network Map window, choose Configuration > CTC-Based SONET NEs or CTC-Based SDH NEs > SVLAN Profile Management. The SVLAN Profile Management wizard opens. Table 7-49 provides descriptions.

Step 2 In the Select a Resource pane, select the resource from which to load the SVLAN profile. You can load the SVLAN profile from the network, from a local file, or from a remote file. Alternatively, you can choose None, and an empty table will be shown in the next step. After specifying a resource, click Next.

Step 3 In the Edit SVLAN Profiles pane, edit the parameters described in Table 7-49. Click Add Row if you want to add a new SVLAN profile. Click Delete Row if you want to delete an existing SVLAN profile. Click Delete All if you want to delete the entire set of SVLAN profiles. Then, click Next.

Step 4 In the Select a Resource pane, select a resource on which to store the new SVLAN profile(s). You can specify one or more resources in the network, on a local file, or on a remote file.

Step 5 Click Finish.


Table 7-49 Field Descriptions for the SVLAN Profile Management Wizard 

Field
Description
Select a Resource

Network

From the list of nodes displayed, choose the resource on which you want to load the new SVLAN profile.

Local File

Specify the file from the local drive by clicking the Local File radio button and specifying the directory path. You can click the Browse button and navigate to a specific file on your local drive. You can select a file with a .svp extension.

Remote File

Specify the file from the server by clicking the Remote File radio button. You can select a file with a .svp extension.

None

Click the None radio button if you want to edit a blank SVLAN profile instead of loading a profile from the network or from a file.

Edit SVLAN Profiles

Name

User-defined name that identifies the SVLAN profile.

Committed Info

Sets the guaranteed information rate as provided by the service-provider SLA.

Committed Burst

In Frame Relay links, sets the maximum number of bits that are transferred per second. The value is in megabits per second (mb/s) or kilobits per second (kb/s).

Peak Info Rate

Specifies the maximum allowed rate.

Excess Burst

Sets the maximum number of bits that are credited for later transfer in the event the committed burst rate cannot be transmitted. The value is mb/s or kb/s.

Link Integrity

Enables or disables link integrity.

Insert a profile name

Enter a name for the new SVLAN profile, up to a maximum of 32 characters.

Add Row

Click the Add Row button to add the new SVLAN profile to the pane.

Delete Row

Click the Delete Row button to delete an existing SVLAN profile from the pane.

Delete All

Click the Delete All button to delete the entire set of SVLAN profiles.


7.8  Managing the SVLAN Database

You can provision the SVLAN database for the network of ONS 15454 SONET and ONS 15454 SDH NEs. On NE releases earlier than 9.0, the SVLAN database is stored on the NE itself. On NE releases 9.0 and later, the SVLAN database is stored on the 10GE_XP and GE_XP cards.


Step 1 In the Domain Explorer, Subnetwork Explorer, or Network Map window, choose Configuration > CTC-Based SONET NEs or CTC-Based SDH NEs > SVLAN DB Management. The SVLAN Database Management wizard opens. Table 7-50 provides descriptions.

Step 2 In the Select a Resource pane, select the resource from which to load the SVLAN database. You can load the SVLAN database from the network, from a local file, or from a remote file. Alternatively, you can choose Empty DB, and an empty table will be shown in the next step. After specifying a resource, click Next.

Step 3 In the Edit VLAN Database pane, edit the parameters described in Table 7-50. Click Add Row if you want to add a new SVLAN database. Click Delete Row if you want to delete an existing SVLAN database. Click Delete All if you want to delete the entire SVLAN database. Then, click Next.

Step 4 In the Select a Resource pane, specify where you want to store the new SVLAN database. You can select a network resource (NE or cards, depending on the NE software version), a local file, or a remote file.

Step 5 Click Finish.

Step 6 At the confirmation prompt, click Yes.

Step 7 The wizard schedules the operation. Click OK.

You can view the results of the operation in the Job Monitor table. For more information, see Monitoring Scheduled Tasks.


Table 7-50 Field Descriptions for the SVLAN Database Management Wizard 

Field
Description
Select a Resource

Network

Choose the resource where the new SVLAN database will be applied.

The tree represents the NE-card relationship, where cards are organized by shelf. Use the check box to select each branch of the tree. For NE releases earlier than 9.0 (where the SVLAN database is stored on the NE, not on the cards), no cards are shown.

Node—Lists all of the working NEs. If you select an NE release 9.0 or later, the slot list contains all GE_XP or 10GE_XP cards that are provisioned with L2 over DWDM card mode. You can select only one card.

If you select an NE release earlier than 9.0, you can select only the NE; no cards are listed in the slot list.

Shelf—Specify the shelf in which the GE_XP or 10GE_XP card(s) are located.

Slot—Specify the slot in which the GE_XP or 10GE_XP card(s) are located.

Local File

Specify the file from the local drive by clicking the Local File radio button and specifying the directory path. You can click the Browse button and navigate to a specific file on your local drive. You can select a file with a .vlf extension.

Remote File

Specify the file from the server by clicking the Remote File radio button. You can select a file with a .vlf extension.

Empty DB

Click the Empty DB radio button if you want to edit a blank SVLAN database instead of loading a database from the network or from a file. Use the drop-down list to specify the database version to create.

Edit VLAN Database, for NE releases earlier than 9.0

VLAN ID

Unique number that identifies the VLAN in an SVLAN database profile. The range is from 1 to 4093.

VLAN Name

SVLAN name, up to a maximum of 32 characters.

Protection

If checked, the SVLAN is protected.

Edit VLAN Database, for NE release 9.0 and later

SVLAN ID

Unique number that identifies the SVLAN in a VLAN database profile.

SVLAN Name

SVLAN name, up to a maximum of 32 characters.

Protection

If checked, the SVLAN is protected.

MAC Learning

Enables or disables MAC learning for the port. MAC learning is used by Layer 2 switches to learn the MAC addresses of network nodes so they know where to send traffic. Layer 2 switches—including GE_XP and 10GE_XP cards in L2 over DWDM mode—maintain a MAC learning table that associates the MAC addresses and VLANs with a given port.

IGMP

Enables or disables Internet Group Management Protocol (IGMP), which is a protocol used by IPv4 systems to report IP multicast memberships to neighboring multicast routers.

IGMP is used to dynamically register individual hosts in a multicast group on a particular LAN. IGMP provides a means to automatically control and limit the flow of multicast traffic throughout your network with the use of special multicast queriers and hosts.

IGMP Fast Leave

Enables or disables IGMP fast leave. IGMP-snooping fast-leave processing allows the switch to remove an interface from the forwarding-table entry without first sending out MAC-based general queries to the interface. The VLAN interface is pruned from the multicast tree for the multicast group specified in the original leave message. Fast-leave processing ensures optimal bandwidth management for all hosts on a switched network, even when multiple multicast groups are being used simultaneously.

IGMP Suppression

Enables or disables IGMP report suppression. Switches use IGMP report suppression to forward only one IGMP report per multicast router query to multicast devices. When IGMP router suppression is enabled (the default), the switch sends the first IGMP report from all hosts for a group to all the multicast routers. The switch does not send the remaining IGMP reports for the group to the multicast routers. This feature prevents duplicate reports from being sent to the multicast devices.

Insert a new SVLAN ID

Enter a numeric ID from 1 to 4094 for the new SVLAN database. This field does not accept letters or special characters.

Add Row

Click the Add Row button to add the new SVLAN database to the pane.

Delete Row

Click the Delete Row button to delete an existing SVLAN database from the pane.

Delete All

Click the Delete All button to delete the entire set of SVLAN databases.

Select a Resource

Network

Choose the NE(s) on which to save the SVLAN database for NE releases earlier than 9.0; or choose the cards on which to save the SVLAN database for NE release 9.0 or later.

Select Mode

Use the Select Mode drop-down list to overwrite or append the SVLAN database:

Overwrite—Prime Optical overwrites the existing SVLAN database stored on the network equipment with the newly provisioned database.

Append—Prime Optical appends the new SVLAN database to the existing SVLAN database. If an SVLAN ID is already provisioned on the network equipment, the operation fails.

Note When you choose Append mode, Prime Optical takes longer to execute the task.

Local File

Specify the file from the local drive by clicking the Local File radio button and specifying the directory path. You can click the Browse button and navigate to a specific file on your local drive. You can select a file with a .vlf extension.

Remote File

Specify the file from the server by clicking the Remote File radio button. You can select a file with a .vlf extension.


7.9  Managing SVLANs

You can view, create, modify, trace, and delete SVLANs on GE_XP or 10GE_XP cards on ONS 15454 SONET and ONS 15454 SDH R9.1 and later NEs. You can also add and delete SVLAN drops.

7.9.1  Viewing the SVLAN Table

Use the SVLAN table to view, modify, and delete existing SVLANs that are provisioned on GE_XP or 10GE_XP cards on ONS 15454 SONET and ONS 15454 SDH R9.1 and later NEs.

In the Domain Explorer, choose Configuration > CTC-Based SONET NEs or CTC-Based SDH NEs > SVLAN Table. The SVLAN table opens. Table 7-51 provides descriptions.

The SVLAN table is empty when you first open it. The table is populated only after you use the Filter Data tool (or choose File > Filter) to define a specific SVLAN ID range.

Use the menu options or toolbar icons to filter the SVLAN table; create, modify, trace, or delete an SVLAN; add or delete an SVLAN drop; or cancel the SVLAN query.

Table 7-51 Field Descriptions for the SVLAN Table 

Field
Description

SVLAN Name

Displays the user-assigned name of the SVLAN.

SVLAN ID

Displays the numerical ID of the SVLAN.

SVLAN Endpoints

Displays a string (in NE/card/slot/port format) that represents the SVLAN endpoints that are currently provisioned.

Tip The SVLAN Endpoints row in the lower half of the table has a drop-down arrow that you can click to view the different endpoints associated with this SVLAN.

Protection

Indicates whether protection is enabled (True) or disabled (False) for the selected SVLAN.

Spans

Displays the number of spans associated with the selected SVLAN.

Status

Indicates the status of the SVLAN. Values are:

Discovered—The SVLAN is completely configured in the network; all components are in place and a complete path exists from the source to the destination endpoint.

Partial—The SVLAN is not complete; one or more endpoints are not in place or one of the spans is missing.

Type

Displays the type of circuit selected.

Direction

Indicates whether the circuit carries unidirectional (one-way) or bidirectional (two-way) traffic.


7.9.2  Filtering the SVLAN Table

Use the SVLAN ID Query dialog box to filter on a range of SVLAN IDs and display the results in the SVLAN table.


Step 1 In the Domain Explorer, choose Configuration > CTC-Based SONET NEs or CTC-Based SDH NEs > SVLAN Table. The SVLAN table opens.

Step 2 In the SVLAN table, choose File > Filter (or click the Filter Data tool). The SVLAN ID Query dialog box opens.

Step 3 Do one of the following to narrow the filter scope:

In the Select Single Range tab, specify a starting and ending range in the From and To text fields. Alternatively, check the Get All check box to filter on all SVLAN IDs without specifying an exact range. When you choose Get All, the From and To text fields are dimmed.

In the Select Multiple Ranges tab, specify a starting and ending range in the From and To text fields; then, click Add. The ID range appears in the list on the right. You can specify a second range and click Add again. Repeat this process for all ID ranges that you want to filter. To remove all ranges from the list, click Clear.


Note The SVLAN ID range is from 1 to 4093.


In the Select Query Scope tab, narrow the query to the list of NEs in the current selection context (group or subnetwork). Choose one of the following options from the drop-down list:

NE Service—Selecting this option could slow down the query, depending on network conditions and the number of managed NEs.

Selected NEs—Queries only those NEs in the current selection context. Although this query is faster than the NE Service option, you should choose Selected NEs only when the SVLAN NEs belong to the same group or subnetwork.

Click the Display NEs button to view the list of NEs in the current selection context.


Note The Select Query Scope tab is disabled if only one NE is selected, because an SVLAN query on a single NE returns partial circuits.


Step 4 After making your selections, click OK to run the filter. The results are displayed in the SVLAN table.

Step 5 (Optional) To cancel the SVLAN query, choose Configuration > Cancel Query (or click the Cancel Query tool) in the SVLAN table. At the following confirmation message, click OK:

This operation will cancel the current SVLAN query. Do you want to continue?

Note Because communication between the Prime Optical server and NEs is remote, the Cancel Query operation might take a while to complete.


Note If you click the Refresh Data tool, a new SVLAN query does not start unless the query parameters changed. Use the Refresh Data tool when network conditions prevent the complete discovery of the provisioned SVLAN circuits. Refreshing the SVLAN table synchronizes the displayed data with the latest results of the server-side processing. In most cases, a new discovery does not start, which makes the Refresh Data operation faster than the SVLAN query.


7.9.3  Creating an SVLAN

Use the Create SVLAN wizard to configure SVLANs on GE_XP or 10GE_XP cards on ONS 15454 SONET and ONS 15454 SDH R9.1 and later NEs.


Step 1 In the Domain Explorer, choose Configuration > CTC-Based SONET NEs or CTC-Based SDH NEs > Create SVLAN. The Create SVLAN wizard opens. Table 7-52 provides descriptions.


Note The Create SVLAN menu option is dimmed if there are no ONS 15454 SONET or ONS 15454 SDH R9.1, R9.2 or R9.3 NEs in the selected domain, group, subnetwork, or network partition.


Tip You can also launch the Create SVLAN wizard by choosing Configuration > Create SVLAN in the SVLAN table.


Step 2 In the Info View pane, enter the following information; then, click Next:

Name—Enter a unique name for the new SVLAN. The SVLAN name is a free-format string of up to 48 ASCII characters.

ID—Enter the ID of the new SVLAN. The valid range is from 1 to 4093.

Protection—Check this check box to enable protection for the SVLAN.

Step 3 In the Source pane, configure the SVLAN source endpoint parameters (source, shelf, slot, and port); then, click Next.


Note Ports that are network-node interfaces (NNIs) have "NNI" appended to the port name, indicating that the port connects to other network nodes.


Step 4 In the Destination pane (not available if the SVLAN is protected), configure the destination endpoint parameters (source, shelf, slot, and port) and routing preferences; then, click Next:

Using Required Nodes—If checked, you manually include or exclude nodes. Once a node is selected, the intermediate hops are determined automatically (if a route path exists).

Review Route Before Creation—Check this check box to review the route before it is created.

Step 5 In the Endpoint QinQ Settings pane, configure the source and destination QinQ settings:


Note QinQ settings enable the encapsulation of different SVLAN IDs within a parent Ethernet frame, thereby shielding the IDs during data transmission.


a. Configure the source QinQ settings:

Source Client Port—Source port on which to provision IEEE 802.1 QinQ VLAN tags on the GE_XP or 10GE_XP cards.

Source Client Mode—Set the source QinQ mode (Selective or Transparent). If you select Transparent, the SVLAN table disappears and the Add/Remove buttons are dimmed.

BPDU—Set the source bridge protocol data unit (BPDU) mode (Drop or Tunnel).

Transparent SVLAN ID—Displays the SVLAN ID.

DSCP-CoS—Displays the DSCP-CoS mapping table for provisioning the CoS based on DSCP for the port.

b. Click Add (available only if you chose the Selective source client mode).

c. To specify a source customer VLAN (CVLAN) range, enter the CVLAN range in the boxes next to the Add CVLAN Range button; then, click Add CVLAN Range.

A source QinQ table entry will be added for each CVLAN in the range.

d. Configure the destination QinQ settings:

Destination Client Port—Destination port on which to provision IEEE 802.1 QinQ VLAN tags on the GE_XP or 10GE_XP cards.

Destination Client Mode—Set the destination QinQ mode (Selective or Transparent).

BPDU—Set the destination BPDU mode (Drop or Tunnel).

Transparent SVLAN ID—Displays the SVLAN ID.

DSCP-CoS—Displays the DSCP-CoS mapping table for provisioning the CoS based on DSCP for the port.


Note QinQ destination settings are not displayed if the SVLAN is protected.


e. Click Add (available only if you chose the Selective source client mode).

f. To specify a destination customer VLAN (CVLAN) range, enter the CVLAN range in the boxes next to the Add CVLAN Range button; then, click Add CVLAN Range.

A source QinQ table entry will be added for each CVLAN in the range.

Step 6 In the Routing Constraints pane (available only if Using Required Nodes is selected), a graphical representation of the SVLAN is displayed, including source and destination nodes. Specify the nodes to include in the SVLAN. Complete the following substeps:

a. In the map view, select the node. The NE ID is displayed in the Selected Node field.

b. Click Include to include the selected node in the route. The node appears in the Included Nodes list.

c. Click Exclude to exclude the selected node from the route. The node appears in the Excluded Nodes list.

d. Click Remove to remove the selected node from the Included Nodes or Excluded Nodes lists.

e. Click Up or Down to set the sequence of the nodes and spans included in the SVLAN.

f. Repeat substeps a to e for each node that you want to include in the SVLAN route.

g. Click Finish or Next.

Step 7 In the Routing Summary pane, do the following:

a. In the map view, review the ID of the source and destination NEs.

b. Included Spans—Lists all of the spans that the Prime Optical server selected automatically.

c. Selected Span—Displays the following information about the span selected in the Included Spans list:

From—Span source.

To—Span destination.

d. Click Finish.

Step 8 In the message box, click OK.


Caution It takes several seconds to create an SVLAN. During that interval, if a new SVLAN is added with the same name, both SVLANs are identified as duplicates. If another user tries to provision one of the duplicate SVLANs, the operation fails. Therefore, be careful not to add a duplicate SVLAN during the creation of the first SVLAN.

Table 7-52 Field Descriptions for the Create SVLAN Wizard 

Field
Description
Navigation Pane

The navigation pane on the left side of the Create SVLAN wizard tells you where you are in the process of creating the SVLAN. The list of tasks shown initially is the default list of all possible tasks. As you move through the SVLAN creation, you are taken to the appropriate task. You can use the navigation pane to jump quickly from one task to the next, or to an already visited task.

Using the navigation pane is faster than using the Back and Next buttons, because you can jump over multiple panes in one step versus clicking Back or Next and moving through the panes sequentially.

Tip As you proceed through the wizard, the panes you have visited are highlighted in white and identified by a number.
Tip Click the Maximize button to expand the Create SVLAN wizard. After you expand the Create SVLAN wizard, the Maximize button changes to the Reset Size button. Click the Reset Size button to reduce the Create SVLAN wizard to its original size.
Info View

Name

Enter a unique name for the new SVLAN. The SVLAN name is a free-format string, up to 48 ASCII characters.

ID

Enter the ID of the new SVLAN. The valid range is from 1 to 4093.

Protection

If checked, protection is enabled for the new SVLAN.

If protection is enabled, provisioning succeeds only if the GE_XP or 10GE_XP cards are connected by contiguous OCH trail circuits configured in a Fast Access Protection Switch (FAPS) ring topology. Source and client ports coincide for protected SVLAN, and a master node must be provisioned. 1+1 card protection is also supported for protected SVLAN, but an intertrunk patchcord must be provisioned among trunk ports within the protection group.

You can provision protection only on SVLAN IDs that are defined as protected in the database.

Source

Source

Select from the list of available NEs to specify the source NE.

Shelf

Select from the list of available shelves to specify the source shelf.

Slot

Specify the source slot.

Port

Specify the source port. NNI source ports have "NNI" appended to the port name.

Destination (not available if the SVLAN is protected)

Destination

Select from the list of available NEs to specify the destination NE.

Shelf

Select from the list of available shelves to specify the destination shelf.

Slot

Specify the destination slot.

Port

Specify the destination port. NNI destination ports have "NNI" appended to the port name.

Review Route Before Creation

Check this check box to review the route before it is created.

Using Required Nodes

If checked, you manually include or exclude nodes. Once a node is selected, the intermediate hops are determined automatically (if a route path exists).

Endpoint QinQ Settings

Source Client Port

Shows the source port on which to provision IEEE 802.1 QinQ VLAN tags on the GE_XP or 10GE_XP cards. QinQ tags expand the VLAN capability by tagging the tagged packets to produce a "double-tagged" Ethernet frame. For service providers, the expanded VLAN allows specific services to be provided on specific VLANs for specific customers, while other types of services can be provided to other customers on other VLANs.

Source Client Mode

Set the source QinQ mode. The options are:

Selective—Allows you to specify the mapping between CVLANs and SVLANs. The Selective setting acts on port and VLAN tags. You can provision different operations on the ID tags carried by the received frames.

Transparent—Allows you to specify a single SVLAN. With the Transparent port setting, when a port receives a frame, that frame is tagged with the current SVLAN ID.

BPDU

Set the source BPDU mode. BPDUs are transmitted to identify network topology tunnel settings and enable transparent data transmission among devices. The BPDU options are:

Drop—Discards incoming packets with the MAC address on the BPDU list.

Tunnel—Transports packets with MAC addresses on the BPDU list.

Transparent SVLAN ID

Displays the SVLAN ID used when the QinQ mode is set to Transparent. When the QinQ mode is set to Selective, you can specify the mapping between the customer VLAN and the service VLAN.

DSCP-CoS

Click the DSCP-CoS button. The DSCP-CoS mapping table for provisioning the CoS based on DSCP for each port is displayed with the following information:

DSCP—Displays the DSCP value.

CoS Value—Displays the CoS value. Choose a CoS value from 0 to 7 and click OK.

The DSCP-CoS button is enabled only when the following conditions are met:

QinQ mode is set to Selective.

Ingress CoS is set to DSCP on the Ether and Channel Group ports.

The DSCP-CoS button is enabled only if XPE cards are provisioned in the slot.

Destination Client Port

Shows the destination port on which to provision IEEE 802.1 QinQ VLAN tags on the GE_XP or 10GE_XP cards.

Note QinQ destination settings are not displayed if the SVLAN is protected.

Destination Client Mode

Set the destination QinQ mode. The options are:

Selective—Allows you to specify the mapping between CVLANs and SVLANs. The Selective setting acts on port and VLAN tags. You can provision different operations on the ID tags carried by the received frames.

Transparent—Allows you to specify a single SVLAN. With the Transparent port setting, when a port receives a frame, that frame is tagged with the current SVLAN ID.

BPDU

Set the destination BPDU mode. The options are:

Drop—Discards incoming packets with the MAC address on the BPDU list.

Tunnel—Transports packets with MAC addresses on the BPDU list.

Transparent SVLAN ID

Displays the SVLAN ID used when the QinQ mode is set to Transparent. When the QinQ mode is set to Selective, you can specify the mapping between the customer VLAN and the service VLAN.

DSCP-CoS

Click the DSCP-CoS button. The DSCP-CoS mapping table for provisioning the CoS based on DSCP for each port is displayed with the following information:

DSCP—Displays the DSCP value.

CoS Value—Displays the CoS value. Choose a CoS value from 0 to 7 and click OK.

The DSCP-CoS button is enabled only when the following conditions are met:

QinQ mode is set to Selective.

Ingress CoS is set to DSCP on the Ether and Channel Group ports.

The DSCP-CoS button is enabled only if XPE cards are provisioned in the slot.

Add and Remove buttons

Click the Add button to add the source or destination QinQ setting to the table on the right side of the pane. Click the Remove button to remove the selected row(s) from the table. If the client source port mode is set to Transparent, the settings table disappears and the Add/Remove buttons are dimmed.

Add CVLAN Range button

To specify a source CVLAN range, enter the CVLAN range in the boxes next to the Add CVLAN Range button; then, click Add CVLAN Range. A source QinQ table entry is added for each CVLAN in the range.

SVLAN table

CVLAN—Sets the CVLAN range.

SVLAN—Represents the SVLAN ID.

Operation—Specifies the operation mode. The options are:

Add—Appends a new .1Q tag with a specific SVLAN ID to all the incoming Ethernet frames tagged with a CVLAN ID.

Double Add—Adds a double tag for the incoming untagged packets.

Translate—Translates the incoming VLAN ID of the incoming Ethernet frames tagged with a CVLAN ID. The CVLAN ID is translated into an SVLAN ID. After this translation, the .1Q tag of the frame is SVLAN.

Translate Add—Adds the outer SVLAN and translates the inner VLAN for incoming single-tagged packets.

Inner SVLAN—Represents the VLAN of the incoming packet. This value can be set only when the operation mode is Double Add or Translate Add.

CoS—Displays the CoS egress queue (0 through 7).

IGMP CVLAN—Displays the IGMP CVLAN values. An IGMP CVLAN check box is provided to set the IGMP CVLAN for each row.

Note the following IGMP CVLAN setting restrictions:

You can only set one IGMP CVLAN.

You cannot set IGMP CVLAN on the CVLAN range.

You cannot set IGMP CVLAN when the operation mode is set to either Double Add or Translate Add.

To set this option, the card mode must be L2 over DWDM.

Note If the IGMP CVLAN check box is not enabled in the MVR tab, the field shows N/A.

Routing Constraints (available only if Using Required Nodes is selected)

Map view

(For graphical manual provisioning) Displays the NEs that are available in the subnetwork for SVLAN creation. This pane also indicates the source and destination NEs selected for SVLAN creation. The map view is used for the inclusion and exclusion of nodes during the specification of route constraints.

Use the right-click menu options to navigate within the map view:

Find Node—Opens the Find Node dialog box, which lists all of the nodes displayed in the map view. Select a node from the drop-down list and click OK. The selection context in the map view changes to show the selected node highlighted in the visible map area.

Zoom In—Allows you to zoom in on an object in the map view.

Zoom Out—Allows you to zoom out on the map view.

Reset Zoom—Resets the current zoom level to the default.

Selected Node

Displays the currently selected NE.

Included Nodes

Displays the list of nodes that are included in the route.

Excluded Nodes

Displays the list of nodes that are excluded from the route.

Routing Summary

Map view

The map view indicates the source and destination NEs selected for SVLAN creation. Use the right-click menu options to navigate within the map view:

Find Node—Opens the Find Node dialog box, which lists all of the nodes displayed in the map view. Select a node from the drop-down list and click OK. The selection context in the map view changes to show the selected node highlighted in the visible map area.

Zoom In—Allows you to zoom in on an object in the map view.

Zoom Out—Allows you to zoom out on the map view.

Reset Zoom—Resets the current zoom level to the default.

Included Spans

Lists all of the spans that the Prime Optical server selected automatically.

Selected Span

Displays detailed information about the span selected in the Included Spans list.

Summary

Summarizes the selections you made in the wizard panes. To change the SVLAN summary, click Back and change your selection(s).


7.9.4  Modifying an SVLAN

Use the Modify SVLAN dialog box to change the name of an existing SVLAN on a GE_XP or 10GE_XP card on an ONS 15454 SONET or ONS 15454 SDH R9.1 or later NEs.


Step 1 In the Domain Explorer, choose Configuration > CTC-Based SONET NEs or CTC-Based SDH NEs > SVLAN Table. The SVLAN table opens.

Step 2 Select the SVLAN whose name you want to change and choose Edit > Modify SVLAN (or click the Modify tool). The Modify SVLAN dialog box opens.

Step 3 In the Name field, enter a unique name for the SVLAN. The SVLAN name is a free-format string, up to 48 ASCII characters.

Step 4 Click OK.

Step 5 Click the Refresh Data tool to view the modified SVLAN name in the SVLAN table.


7.9.5  Deleting an SVLAN

Use the Delete SVLAN dialog box to delete an existing SVLAN from a GE_XP or 10GE_XP card on an ONS 15454 SONET or ONS 15454 SDH R9.1 or later NEs.


Step 1 In the Domain Explorer, choose Configuration > CTC-Based SONET NEs or CTC-Based SDH NEs > SVLAN Table. The SVLAN table opens.

Step 2 Select the SVLAN that you want to delete and choose Edit > Delete SVLAN (or click the Delete tool).

Step 3 In the confirmation dialog box, click OK.

Step 4 Click the Refresh Data tool. After the window refreshes, the deleted SVLAN is no longer visible in the SVLAN table.


7.9.6  Adding an SVLAN Drop

You can add a new SVLAN drop that belongs to:

NEs that are part of the current SVLAN

NEs that are connected via an existing route (such as an OCH trail tunnel link or a Layer 2 trunk-to-trunk patchcord)


Step 1 In the Domain Explorer, choose Configuration > CTC-Based SONET NEs or CTC-Based SDH NEs > SVLAN Table. The SVLAN table opens.

Step 2 Choose Configuration > Add Drop (or click the Add SVLAN Drop tool). The Create SVLAN wizard opens.

Step 3 In the Add New Drop pane, configure the SVLAN drop details (destination, shelf, slot, and port); then, click Next.

Step 4 In the Endpoint QinQ Settings pane, configure QinQ settings for the drop. QinQ settings enable the encapsulation of different SVLAN IDs within a parent Ethernet frame, thereby shielding the IDs during data transmission.

SVLAN Drop—Display only. View the drop port on which to provision IEEE 802.1 QinQ VLAN tags on the GE_XP or 10GE_XP cards.

SVLAN Drop Mode—Set the drop QinQ mode (Selective or Transparent). If you select Transparent, the SVLAN table disappears and the Add/Remove buttons are dimmed.

BPDU—Set the drop BPDU mode (Drop or Tunnel).

Add and Remove buttons—Click the Add button to add the drop QinQ setting to the table on the right side of the pane. Click the Remove button to remove the selected row(s) from the table. If the drop mode is set to Transparent, the settings table disappears and the Add/Remove buttons are dimmed.

Step 5 Click Finish.

Step 6 Click the Refresh Data tool. After the window refreshes, the new SVLAN drop appears in the SVLAN table.


7.9.7  Deleting an SVLAN Drop


Step 1 In the Domain Explorer, choose Configuration > CTC-Based SONET NEs or CTC-Based SDH NEs > SVLAN Table. The SVLAN table opens.

Step 2 In the SVLAN table, choose Edit > Delete SVLAN Drop (or click the Delete tool). The Delete SVLAN Drop dialog box opens.

Step 3 From the SVLAN Drops list, select the drop that you want to delete. You can delete one drop at a time; you cannot select multiple drops in the list.

Step 4 Click OK.

Step 5 Click the Refresh Data tool. After the window refreshes, the deleted SVLAN drop is no longer visible in the SVLAN table.


7.9.8  Tracing an SVLAN

Use the SVLAN Trace window to display spans and endpoints for a specific SVLAN.


Step 1 In the Domain Explorer, choose Configuration > CTC-Based SONET NEs or CTC-Based SDH NEs > SVLAN Table. The SVLAN table opens.

Step 2 Select the SVLAN that you want to trace and choose Configuration > Trace SVLAN (or click the Trace SVLAN tool). The SVLAN Trace window opens.


Note The SVLAN Trace window does not have a Refresh Data tool. The port labels shown are those that belong to circuit spans.


Step 3 Right-click an endpoint (EP) marker to view the list of endpoints that belong to the node to which the marker refers.


7.10  Provisioning Data Services


Note Layer 2 (L2) services apply to ONS 15310 CL, ONS 15310 MA SONET, ONS 15310 MA SDH, ONS 15454 SONET, and ONS 15454 SDH NEs only.


Note You need to complete all prerequisites for adding NEs before provisioning data services. See section Prerequisites for Adding NEs for information.


Note See Cisco Prime Optical 9.6 ML Provisioning Methodology for more information on the methodology that Prime Optical uses for data functionalities.


Metro Ethernet service capability is available through the ML-series cards on the ONS 15454 NE and the ML-100T-8 card on the ONS 15310 CL, ONS 15310 MA SONET, and ONS 15310 MA SDH.

These cards provide the Ethernet interface (access point) to the service provider customer equipment and enable the transport of the customer traffic over the optical network domain.

Prime Optical supports Layer 2, Ethernet, service provisioning, and discovery. Before an Ethernet service can be provisioned, you must define an access domain, referred to in Prime Optical as a Layer 2 topology. A Layer 2 topology consists of optical circuits with specific Layer 2 configurations. Prime Optical supports Layer 2 topology provisioning and discovery. The following table summarizes the types of Layer 2 topology supported.

Table 7-53 Types of Layer 2 Topology Supported in Prime Optical 

Type
Description
See

Point-to-point

A single point-to-point optical circuit with specific Layer 2 configuration.

Creating Layer 2 Topologies

Hub and spoke

In Prime Optical, this refers to a maximum of two point-to-point Layer
2 topologies connected by a single ML-series card on which both point-to-point Layer 2 topologies are created.

Note You can create other hub-and-spoke configurations, including one in which the ML-series card is placed at the spoke locations, with the G-series card providing an extension of the traffic to a Cisco 7600, which forms the hub of the architecture.

RPR

A chain of optical circuits connected through packet over SONET (POS) ports with a specific Layer 2 configuration.


The following table summarizes the Ethernet service types supported by Prime Optical.

Table 7-54 Types of Ethernet Services Supported in Prime Optical 

Type
Description
See

UNI QinQ

Transparent LAN service. Service can be multiplexed with other UNI Dot1Q services.

Layer 2 Service Management Tasks

UNI Dot1Q

Services are multiplexed at the UNI.

NNI Dot1Q

Network-to-network interface. Services are multiplexed at the NNI.

UNI untagged

Service occupies the entire interface. This type is designed for interface with a device that does not provide user VLAN ID capability.


Caution Prime Optical provides optical circuit provisioning on the device through the CORBA interface and data service through the Cisco IOS command-line interface (CLI). On the Cisco IOS side, Prime Optical only recognizes the CLI configuration that is supported by Prime Optical and ignores unsupported CLI configurations. Prime Optical does not explicitly overwrite the existing configuration on the card. However, it can erase some of the configuration on the card without its knowledge. If you intend to use Prime Optical to provision the supported services and plan to directly configure the nonsupported services on the card by passing Prime Optical, consult Cisco first to prevent any configuration overwrite.

7.10.1  Initializing Layer 2 Cards

Before provisioning, you must first enable Prime Optical communication with the Layer 2 cards. The cards to be managed must be initialized with a minimum configuration.

To allow Prime Optical to communicate with Layer 2 cards, you must configure each card with a username, password, and hostname. You can customize this information in the Cisco IOS configuration file before loading it on the ML-series card.

When a Layer 2 topology is configured on NEs, Prime Optical configures each ML-series card with a barebone configuration file. This file contains the minimum configuration required for Prime Optical to support the Layer 2 topology and Layer 2 services on it.

Prime Optical provides the following barebone configuration files:

barebone15454CLI_Security.txt—Use this base barebone configuration file for ML100, ML1000, or ML100X cards on ONS 15454 SONET and ONS 15454 SDH NEs. This file loads the ML card in microcode base mode. This barebone configuration file is the recommended default.

barebone15454CLI_Enhanced_Security.txt—This configuration file provides microcode enhanced commands. Use this file to load a microcode enhanced image on ML100, ML1000, or ML100X cards on ONS 15454 SONET and ONS 15454 SDH NEs. The enhanced microcode image is required for CoS PM collection on ML cards.

bareboneCLI_Generic.txt—Use this barebone configuration file for ML-100T-8 cards on ONS 15310 NEs. This file loads the ML-100T-8 card in microcode enhanced mode. Microcode base mode is not supported on the ML-100T-8 card. Also use this barebone configuration file for ONS 15454 SONET and ONS 15454 SDH R4.1.7 and earlier NEs, because these software versions do not support the microcode security feature.


Note The barebone configuration files are located on the server installation CD (Disk1/misc/). After you install the Prime Optical server, the appropriate barebone configuration file is automatically copied by default to the opt/CiscoTransportManagerServer/IosConfig directory.


A sample Cisco IOS configuration file is shown below.


Note If you use a username/password combination other than CISCO15/CTM123+, it is recommended that you download this barebone configuration file to one of your ML-series cards, change the username and password to the ones you use, and manually copy the running configuration to all your ML-series cards.


! 
version 12.1 
no service pad 
service timestamps debug datetime msec localtime 
service timestamps log datetime msec localtime 
service password-encryption 
service internal 
! 
hostname default46 
! 
logging buffered 4096 debugging 
! 
username CISCO15 privilege 15 password 7 112A2D2846405847 
ip subnet-zero 
! 
! 
ip classless 
no ip http server 
! 
! 
logging history size 100 
snmp-server enable traps snmp authentication warmstart linkdown linkup coldstart 
snmp-server enable traps bridge 
snmp-server enable traps flash insertion removal 
snmp-server enable traps hsrp 
snmp-server enable traps config 
snmp-server enable traps entity 
snmp-server enable traps bgp 
snmp-server enable traps syslog 
! 
! 
line con 0 
exec-timeout 0 0 
line vty 0 4 
exec-timeout 0 0 
login local 
! 
end

You must perform the following steps before Prime Optical can manage Layer 2 cards correctly:


Step 1 Initialize each card with the barebone configuration file through the Prime Optical NE Explorer.

Step 2 Set the username and password, so that Prime Optical will use the same username and password to communicate with the cards. This is done through the Control Panel > Security Properties tab for ONS 15454 SONET and ONS 15454 SDH NEs.


7.10.2  Backing Up and Restoring ML Configuration Files on Layer 2 Cards

You can back up and restore ML configuration files using CTC or the Cisco IOS commands on the ML-series cards.

To store a backup version of the TCC2 (software) database on the workstation running CTC or on a network server, see the Cisco ONS 15454 Procedure Guide.

To load a Cisco IOS startup configuration file through CTC, see the Cisco ONS 15454 SONET/SDH ML-Series Multilayer Ethernet Card Software Feature and Configuration Guide.

7.10.3  Naming Convention for Discovered Layer 2 Topologies

Prime Optical follows a set naming convention when creating Layer 2 topologies.

If an RPR topology is created through Prime Optical with the name toponame, the Layer 1 member circuits are named as follows: toponame.1CTML2, toponame.2CTML2, and so on. During discovery, if Layer 1 circuits matching this naming convention are discovered, a Layer 2 topology with the name toponame is added to Prime Optical.

If the CTM naming convention is not followed for discovered circuits, the RPR topology takes the name of one of the circuits in the RPR topology.

In the case of point-to-point topologies, the Layer 1 circuit has the same name as the topology. On the other hand, when a Layer 1 circuit between an ML and a non-ML series card is discovered, a point-to-point topology with the same name as the Layer 1 circuit is added to the Prime Optical database.


Note There are no VLAN naming conventions.


For RPR or point-to-point topologies created as a result of creating Layer 1 circuits for a TL1 interface, the name appears as a numeric string. This numeric string is based on the unique number used to identify the circuits.

7.10.4  Provisioning Layer 2 Topologies

Prime Optical allows you to create VCAT circuits and their constituent member circuits during Layer 2 topology creation. To support a Layer 2 topology, for RPR, Prime Optical allows you to create all VCAT circuits (and contained member circuits), all CCAT circuits, or a combination of VCAT and CCAT circuits. For a point-to-point L2 topology you can create either a VCAT or a CCAT circuit.

The Layer 2 topology can be a point-to-point optical circuit, or RPR consisting of a chain of optical circuits, or hub and spoke consisting of multiple optical circuits connected in a hub-and-spoke fashion:

Point-to-point topology—Select the source and destination of the point-to-point topology and provide the routing information for the SONET/SDH circuit. Both manual and automatic routing are supported. The following table lists the NE models and cards supported for L2 point-to-point topologies.

Table 7-55 NE Models and Cards Supported by Prime Optical for L2 Topology 

ONS 15305
ONS 15310 CL
ONS 15310 MA SONET
ONS 15310 MA SDH
ONS 15327
ONS 15454 SONET
ONS 15454 SDH
ONS 15600 SONET
ONS 15600 SDH
L2-supported source NE?

No

Yes

Yes

Yes

No

Yes

Yes

No

No

L2-supported destination NE?

No

Yes

Yes

Yes

Yes

Yes

Yes

No

No

ML-series cards and L2-enabled ONS 15310 ML-100T-8 cards as source point of L2 topology?

Yes

Yes

Yes

No

Yes

Yes

ML-series cards and L2-enabled ONS 15310 ML-100T-8 cards as destination point of L2 topology?

Yes

Yes

Yes

No

Yes

Yes

OC-n and STM-n cards as destination point of L2 topology?

Yes

Yes

Yes

No

Yes

Yes

G-series cards as destination point of L2 topology?

Yes

Yes

Yes

No

Yes

Yes

CE-100, CE-1000, and CE-MR-6 cards as destination point of L2 topology?

Yes

Yes

Yes

No

Yes

Yes

E-series cards as destination point of L2 topology?

Yes1

No

No

1 Available only in LAN extension (LEX) encapsulation mode.


Note The E-series card requires a a field-programmable gate array (FPGA) upgrade to be compatible with ML-series and G-series cards. 16-bit cyclic redundancy check (CRC) is required.


Note The G-series to E-series card combination does not involve the L2 Topology wizard.


RPR topology—Select the set of nodes that contains ML-series cards and then the set of ML-series cards. The ML-series order is important because it defines the order of the cards inside the rings. Once the ML-series cards have been selected, you are prompted with the set of SONET/SDH circuits that will be created underneath the Layer 2 topology. You can automatically route all the circuits or manually route the circuits that will be created underneath the Layer 2 topology. A minimum of two ML-series cards is required to configure an RPR.

Hub-and-spoke topologies—In Prime Optical, this refers to a maximum of two point-to-point Layer 2 topologies connected by a single ML-series card on which both point-to-point Layer 2 topologies are created. For point-to-point topologies, the following combinations of cards are supported:

ML-series to ML-series

ML-series to G-series

ML-series to OC-n/STM-n

When deployed as hub and spoke, the ML-series cards can be placed at the spoke locations, with the G-series cards providing an extension of the traffic to a Cisco 7600, which forms the hub of the architecture. This arrangement provides a cost-effective way to interface to the Cisco 7600. Alternatively, the ML-series cards can be deployed at both the hub and the spoke sites. See the ML-Series Metro Ethernet Design and Implementation Guide for network configurations.


Note When creating a hub-and-spoke topology, during creation of a PTP topology on an ML-series card that already has a PTP created on it, you cannot modify the base card configuration. This limitation ensures that the pre-existing base card configuration is retained.


When deployed as RPR, all sites contain ML-series cards.

The Create Circuit wizard is used to repair a Layer 2 topology when the bottom circuit has been deleted or removed erroneously.

The Layer 2 Topology table reports the operational state and the state for each Layer 2 topology. For point-to-point topologies, the operational state reflects the state of the underlying optical circuit. For RPR topologies, the operational state can have one of the following values:

In Service (IS)—RPR is in IS state when all the circuits underneath it are in IS state.

In Service Partial (IS-Partial)—RPR is in IS-Partial state when only one circuit underneath it is in OOS state and all remaining circuits underneath it are in IS state.

Out of Service (OOS)—RPR is in OOS state when more than two circuits underneath the RPR are in OOS state.

The Layer 2 Service Resync state provides the configuration synchronization state after discovery of the Layer 2 topology. The state can be In Progress, Complete, Partially Complete, Layer 2 Service Not Ready, or Sync Failed. VLAN status is different and is available in the Layer 2 Services table.

Prime Optical can discover a Layer 2 topology through the Create Layer 2 Topology wizard or Create Circuit wizard, through CTC, or through the TL1 interface.

A Layer 2 topology provisioned by this application is Layer 2 service enabled, meaning the optical circuit and the Cisco IOS configuration are set for subsequent Layer 2 services. However, a Layer 2 topology created through other means (such as through the Create Circuit wizard, CTC, or TL1 interface) is not Layer 2 service enabled. This is because the Cisco IOS configuration is missing. This type of Layer 2 topology must be Layer 2 service enabled if you want to provision Layer 2 services.


Note Layer 2 topology discovery in Prime Optical depends on the underlying L1 circuit endpoints and not on the shared packet ring (SPR) interface ID configured on the ML card. If you change the SPR interface ID on a card used in an RPR topology so that the ID is a duplicate of an SPR interface ID configured on another card in the topology, Prime Optical does not recognize the anomaly and does not display alarms.


Note Network Control Protocol (NCP) circuit update events received by Prime Optical might be scattered in time, especially in complex GNE-ENE network configurations. As a result, the discovery of L2 topologies in Prime Optical might be interrupted by a fixed, 5-minute delay before displaying an L2 topology as Incomplete. The fixed, 5-minute delay is a result of the Prime Optical L2 topology discovery algorithm, which takes into account the scattering of NCP events. An incomplete topology appears in the L2 Topology Table (along with its L2 links in the Link table) after the fixed, 5-minute delay has elapsed.


Note Do not create an L2 topology or add a card to the L2 topology in mixed high-level data link control (HDLC) and generic framing procedure (GFP) modes. If you create an L2 topology using cards in different modes, traffic cannot flow through the topology. An L2 topology with cards in mixed modes generates an Encapsulation Mismatch alarm, which indicates that traffic cannot be passed through the ring.


Note Use a fresh barebone configuration file when creating an RPR L2 topology on a card that was initially created with a PTP topology, or when creating a PTP L2 topology on a card that was initially created with an RPR topology. It is always better to create an L2 topology with a fresh barebone configuration file loaded on the card, because Prime Optical does not clear all of the old configuration on the card.


7.10.5  Viewing the Layer 2 Topology Table

In the Domain Explorer window, choose Configuration > CTC-Based SONET NEs or CTC-Based SDH NEs > L2 Topology Table. The Layer 2 Topology table opens.


Tip You can also open the Layer 2 Topology table from the CTC-based NE Explorer. In the NE Explorer window, choose Configuration > L2 Topology Table.


The Layer 2 Topology table displays all the configured Layer 2 topologies. It also reports the bandwidth settings for each Layer 2 topology. These are set for each Layer 2 topology and added through the Layer 2 topology wizard. The following bandwidth settings are reported:

SP management bandwidth

Committed information rate (CIR) bandwidth

Best-effort (BE) bandwidth

AVVID_CONTROL

Multicast priority queuing

Service classes and bandwidth values for 802.17 RPRs

The following table describes the fields in the Layer 2 Topology table.

Table 7-56 Field Descriptions for the Layer 2 Topology Table 

Column
Description

Layer 2 Topology Name

Displays the name of the topology.

Layer 2 Topology Alias

Displays the alias name of the topology.

Description

Displays the user-defined description of the topology.

Layer 2 Topology Type

Displays the topology type (point-to-point, RPR, or RPR_DOT17).

Layer 2 Topology Size

Displays the topology size. When the size of the circuit underneath is not the same, the value is Mixed.

Layer 2 Topology State

Displays the topology state (Complete, Incomplete, Complete-Wrapped, Complete-Steering, Incomplete-Wrapped, or Incomplete-Steering). The state of a point-to-point topology is always Complete. A complete RPR is one in which all of the circuits linking the ML-series cards in the RPR are known by Prime Optical. An incomplete RPR is one in which one or more ML-series cards in the RPR are missing. A complete RPR can become incomplete when one or more circuits forming the RPR are deleted by the user in CTC or another external interface. An incomplete RPR can become complete when all of the circuits forming the RPR become known.

The topology enters the Complete-Wrapped/Incomplete-Wrapped state if one or more PoS ports related to the topology are shut down or if an RPR Wrapped alarm is generated and captured for any of the ML cards related to the L2 topology.

The topology enters the Complete-Steering/Incomplete-Steering state if either the rpr-east or rpr-west ports related to the topology are shut down, or if an RPR Protection Active alarm is generated and captured for any of the ML cards related to the L2 topology.

The ML Card table allows you to view additional information on the state of an L2 topology. See Viewing the ML Card Table and Checking VLAN Alignment.

Layer 1 Protection

Displays the L1 protection state, either Fully Protected or Unprotected.

Operational State

Displays the operational states of the circuits underneath. Values include:

In Service (IS)—All circuits are in service.

In Service-Partial (IS-Partial)—One circuit is out of service and the rest are in service.

Out of Service (OOS)—More than two circuits are out of service.

Layer 2 Service Resync Status

Displays the Prime Optical status after trying to synchronize the configuration of all the ML-series cards in the topology. Values include:

Sync Failed—A card in the topology cannot resynchronize.

In Progress—Prime Optical is trying to synchronize configuration information for all ML-series cards in the topology.

Complete—The Layer 2 service discovery is complete or the resynchronization is complete. In this state, the Layer 2 service information is synchronized with the NE.

L2Service NotReady—One of the cards in the topology does not have a base card configuration.

Partially Completed—If Prime Optical cannot parse the configuration (for example, the configuration does not exist or is corrupt), the Layer 2 service discovery proceeds without acquiring the information from the ML card that has the problem. At the end of the discovery, the Layer 2 Service Resync Status is partially completed. You must reload the backed-up config file or the barebone config file (myconfig.txt) in the Prime Optical server installation directory/IosConfig. You must reload the backed-up configuration file or the barebone configuration file from a synchronized ML card to the card that is not synchronized.

Note If the barebone configuration file is loaded in an ML slot, all previous configuration on the card is erased.

Note When the Prime Optical server reboots and NEs are resynchronized, the Prime Optical database resynchronizes the information related to the ML cards. After resynchronization, the L2 topology moves to the Complete state. This entire process takes some time, which causes the L2 topology to remain in L2Service NotReady or Sync Failed state until the resynchronization is complete.

Service Provider Management Bandwidth

Displays the bandwidth percentage used for the service provider (SP) management traffic class. The sum of the percentage allocation for all traffic classes cannot exceed 99%. The bandwidth range for each traffic type has a minimum of 1% and a maximum of 99%.

Note In an ML configuration, if the bandwidth is not used, the bandwidth utilization is rebalanced to use the assigned percentage.

Service Provider Management Class of Service

Class of service value for SP management traffic.

Committed Information Rate Bandwidth

Displays the bandwidth percentage used for the committed information rate (CIR) traffic class. The sum of the percentage allocation for all traffic classes cannot exceed 99%. The bandwidth range for each traffic type has a minimum of 1% and a maximum of 99%.

Committed Information Rate Class of Service

Class of service for CIR/PIR traffic.

AVVID Control Bandwidth

Allows you to set the bandwidth percentage used for the AVVID control. The sum of the percentage allocation for all traffic classes cannot exceed 99%. The bandwidth range for each traffic type has a minimum of 1% and a maximum of 99%.

AVVID Control Class of Service

Class of service for AVVID control traffic.

AVVID Voice/Video Bandwidth

Displays the bandwidth percentage used for the AVVID voice/video traffic class.

AVVID Voice/Video Class of Service

Class of service for AVVID voice/video traffic.

Best Effort Bandwidth

Displays the bandwidth percentage used for the best-effort traffic class. The sum of the percentage allocation for all traffic classes cannot exceed 99%. The bandwidth range for each traffic type has a minimum of 1% and a maximum of 99%.

CoS Commit

Committed class of service (CoS). This value is set when applying the base card configuration and the value is the same on all the cards in the topology. CoS values below this value are discard eligible.

Topology Bandwidth Utilized

Displays the bandwidth of the topology that is used by the configured Layer 2 services on the topology, in kilobits per second (kb/s).

Topology Bandwidth Available

Displays the bandwidth available for creating the L2 service on the topology, in kb/s.

Note The available bandwidth is shown as "Over Subscribed" when the available bandwidth is less than the utilized bandwidth.

Multicast Group 1 Bandwidth

Displays the Multicast Group 1 bandwidth percentage.

Multicast Group 1 Class of Service

Displays the class of service for Multicast Group 1.

Multicast Group 2 Bandwidth

Displays the Multicast Group 2 bandwidth percentage.

Multicast Group 2 Class of Service

Displays the class of service for Multicast Group 2.


7.10.5.1  Viewing the ML Card Table and Checking VLAN Alignment

The ML Card table allows you to view information on the state of the ML cards that are part of the L2 topology.


Step 1 In the Domain Explorer window, choose Configuration > CTC-Based SONET NEs or CTC-Based SDH NEs > L2 Topology Table.

Step 2 Select an L2 topology in the Layer 2 Topology table.

Step 3 Choose Configuration > ML Cards. The ML Card table opens. Table 7-57 provides descriptions.

Step 4 You can associate a specific ML1000 card in an 802.17 RPR with another ML1000 card as the standby card. Prime Optical configures the redundant interconnect commands in both cards to establish their working role and protect role and their association (through the peer MAC address). Prime Optical automatically replicates the VLAN drop configuration from the active ML card to the standby card. You can check the VLAN alignment between the active and standby cards by selecting a working ML1000 card in the ML Card table and choosing Configuration > Check VLAN Alignment. This menu option is dimmed if:

The working card is not in the "Base card detection complete" configuration state.

The protect card is not in the "Base card detection complete" configuration state.

The card is not associated with any protect card.

If the cards are aligned, the following message is displayed:

The VLAN information is aligned for working and protect cards.

Step 5 If the ML cards are not aligned, you can merge the running configuration on the active card with the standby card (provided the Cisco IOS configuration on the standby card does not conflict with the active ML card). Click OK at the following prompt:

The VLAN configuration on the standby card differs from the configuration on the active 
card. Do you want to force the alignment?

A Clone ML Card task is scheduled. The result of the task execution is available in the Job Monitor table.


Note The Check VLAN alignment functionality might not be able to align working and protect cards, even when the Clone ML Card task is successful. This can happen when there are conflicts between the Cisco IOS configurations of the protect and working cards. If the Check VLAN Alignment functionality cannot align working and protect cards, manually align the protect card using the ML Card CLI console.


Note The check VLAN alignment functionality detects only the misalignments between working and protect ML cards that are strictly related to VLAN drops. The following values are not checked for VLAN alignment: Ethernet port attributes (for example, MTU, speed, and flow control), COS accounting, and port enabling/disabling.


Table 7-57 Field Descriptions for the ML Card Table 

Field
Description

NE ID

Displays the name of the NE.

Slot Number

Displays the ML card slot number.

Equipment Type

Displays the equipment type that the slot is provisioned for.

Configuration State

Displays information about the configuration state of the port. Values are:

Waiting for synchronization to complete

Synchronization failed

Synchronization completed

Base card configuration is in progress

Base card configuration failed

Base card configuration is complete

Base card detection is in progress

Base card detection failed

Base card detection complete

POS 0

For point-to-point and RPR topologies, displays the POS 0 port state. Values are Enabled or Disabled. For 802.17 RPR topologies, the value is N/A.

POS 1

For point-to-point and RPR topologies, displays the POS 1 port state. Values are Enabled or Disabled. For 802.17 RPR topologies, the value is N/A.

RPR 0

For 802.17 RPR topologies, displays the RPR-IEEE interface on an ML card. Values are Enabled or Disabled. For point-to-point and RPR topologies, the value is N/A.

Additional Information

Displays additional information when the card enters a configuration state from which it cannot recover. Any of the following messages could be displayed when the Configuration State field shows "Base card configuration failed":

CoS Commit value does not match the topology value

The CoS Commit value specified is invalid

Policy Map does not exist

Exception occurred while retrieving bandwidth values

Bandwidth values do not exist for bandwidth-class-name

Invalid bandwidth values were found for bandwidth-class-name

Bandwidth values do not match bandwidth-class-name

Protect Card

For 802.17 RPR topologies with protection, displays the protect ML card.


7.10.6  Creating Layer 2 Topologies

Use the Create Layer 2 Topology wizard to set up a point-to-point, RPR, or 802.17 RPR topology.


Note Prime Optical does not discover Layer 2 topologies when it discovers underlying circuits in the Partial state. If the Layer 2 Topology table does not display a particular topology, check the circuit state in the Circuit table. This is a known problem; Layer 2 topology discovery depends on circuits that are in the Discovered state only.


7.10.6.1  Creating a Point-to-Point Layer 2 Topology


Note You must have the appropriate user privileges to use the Create Layer 2 Topology wizard.


Step 1 In the Domain Explorer window, choose Configuration > CTC-Based SONET NEs or CTC-Based SDH NEs > L2 Topology Table.

Step 2 In the Layer 2 Topology table, choose Configuration > Create L2 Topology (or click the Create L2 Topology icon). The Create Layer 2 Topology wizard opens.


Tip You can also access the Create Layer 2 Topology wizard by choosing Configuration > CTC-Based SONET NEs or CTC-Based SDH NEs > Create L2 Topology in the Domain Explorer.


The following table describes the fields in the wizard. Fields shown depend on the type of topology selected.

Table 7-58 Field Descriptions for the Create Layer 2 Topology Wizard 

Field
Description
Navigation Pane

The navigation pane on the left side of the wizard tells you where you are in the process of creating the L2 topology. The list of tasks shown initially is the default list of all possible tasks. As you move through the topology creation, you are taken to the appropriate task. You can use the navigation pane to jump quickly from one task to the next, or to an already visited task.

Using the navigation pane is faster than using the Back and Next buttons, because you can jump over multiple panes in one step versus clicking Back or Next and moving through the panes sequentially.

Tip As you proceed through the wizard, the panes you have visited are highlighted in white and identified by a number. Panes that are not applicable to the current creation sequence are shown in strikethrough italics.
Topology Information, Topology Details

Name

Enter a unique name for the new topology. The topology name is a free-format string, up to 30 ASCII characters.

Alias

Enter a unique alias name for the new topology. The alias name can contain alphanumeric characters. International character sets are also supported.

Description

Enter a description for the new topology, up to 60 ASCII characters.

L2 Topology Type

Select the type of topology you want to create:

Point-to-Point

Resilient Packet Ring

802.17 Resilient Packet Ring

Note The contents of subsequent wizard panes depend on the selected topology type.

Topology Information, Circuit Information (for point-to-point topologies)

Circuit Type

Specify the type of circuit: STS and STS-v for SONET NEs; VC_HO_PATH_VCAT_CIRCUIT, VC_HO-v, VC_LO_PATH_VCAT_CIRCUIT, and VC_LO-v for SDH NEs.

Circuit Size

Specify the size of the circuit. STS circuit sizes are STS-1, STS-3c, STS-6c, STS-9c, STS-12c, and STC-24c.

SDH circuit sizes are VC3, VC4, VC4-2c, VC4-3c, VC4-4c, and VC4-8c.

Note The CE-MR-10 card supports STS-48c, VC4-16c, and VC4-64c circuit sizes.

L1 Protected Drops

This field is visible only if you select point-to-point as the topology type.

Topology Information, L1 Protection Information (for point-to-point topologies, for STS circuits only)

Revertive

Specify whether traffic is reverted back to its original path when the conditions that diverted the circuit to the protect path are repaired. This field is visible only if you select point-to-point as the topology type.

Reversion Time

Specify the amount of time (in minutes) after which traffic reverts back to the original working path when conditions that caused the switch are cleared. The Cisco default is 5 minutes. This field is visible only if you select point-to-point as the topology type.

SF Threshold

Set the UPSR path-level SF threshold. This field is visible only for point-to-point topologies.

SD Threshold

Set the UPSR path-level SD threshold. This field is visible only for point-to-point topologies.

Switch on PDI-P

Specify whether traffic should switch based on a received STS payload defect indication. This field is visible only for point-to-point topologies.

Topology Information, VCAT (for point-to-point topologies, STS-v, VC_HO_PATH_VCAT_CIRCUIT, and VC_LO_PATH_VCAT_CIRCUIT)

Symmetric

Display only. Provisions the same number of members in both directions. Symmetric is the default for STS VCAT circuits. Members use the same set of time slots but in opposite directions.

Member Size

Select a circuit size:

STS-1

STS-3c

STS-12c

VC-3

VC-4

VC-4-4c

Note See Step 5 and Step 6 of section Creating a Regular or Open-Ended VCAT Circuit for information on member sizes supported for CE-MR-10 cards.

Number of Members

Select the number of members, as follows:

ML-1000 and ML-1000T cards (supported on ONS 15454 SONET/SDH only), STS-1, STS-3c, STS-12c, VC4, VC4-4c, and VC3 can support two members. VT1.5 is not applicable.

FCMR card (supported on ONS 15454 SONET/SDH only) and STS-3c can support eight members. The FCMR with VC4-4c can support up to 16 members. The FCMR with STS-1 can support up to 48 members. STS-12c, VC3, and VT1.5 are not applicable.

ML-100T-8 card (supported on ONS 15310 CL, ONS 15310 MA SONET, and ONS 15310 MA SDH only) and STS-1 can support one, two, or three members, and VT1.5 can support 1 to 64 members. STS-3c, STS-12c, VC4, VC4-4c, and VC3 are not applicable.

CE-100T-8 card (supported on ONS 15454 SONET only) and STS-1 can support one, two, or three members, and VT1.5 can support 1 to 64 members. STS-3c, STS-12c, VC4, VC4-4c, and VC3 are not applicable.

CE-MR-6 card (supported on ONS 15310 MA SONET and ONS 15310 MA SDH only) can support high-order circuits on STS-1-nv, where n is 1 to 21; and STS3c-mv, where m is 1 to 7. The equivalent high-order VC-4 VCAT bandwidth is VC-4-mv, where m is 1 to 7. For low-order circuits, CE-MR-6 supports VT1.5-nv, where n is 1 to 64; VC3-mv, where m is 1 to 21; and VC12-mv, where m is 1 to 63.

Note See Step 5 and Step 6 of section Creating a Regular or Open-Ended VCAT Circuit for information on member sizes supported for CE-MR-10 cards.

Mode

Select the circuit mode using the mode radio buttons (None, SW-LCAS, or LCAS).

Source (for point-to-point topologies)

NE ID

Select from the list of available nodes to specify the source node.

Subnetwork ID

Displays the subnetwork ID for the selected node.

Slot

Select a source slot from the list.

Port

Select a source port from the list.

STS

Select a source STS from the list.

VT

Select a Virtual Tributary (VT) from the list.

Destination (for point-to-point topologies)

NE ID

Select from the list of available nodes to specify the destination node.

Subnetwork ID

Displays the subnetwork ID for the selected node.

Slot

Select a destination slot from the list.

Port

Select a destination port from the list.

STS

Select a destination STS from the list.

VT

Select a VT from the list.

NE Selection (for RPR Layer 2 and 802.17 RPR topologies)

Subnetwork ID (Also displays NEs that are connected to NEs in this subnetwork)

Select the subnetwork from the drop-down list. After selecting a subnetwork, the Available NEs list includes all available NEs in that subnetwork as well as NEs that are topologically connected to NEs in that subnetwork.

Available NEs

Select one or more NEs from the list and click Add to add them to the Selected NEs field.

Selected NEs

Displays the NEs selected for the Layer 2 topology. Select one or more NEs and click Remove to remove them from the Selected NEs list.

Card Selection (for RPR Layer 2 and 802.17 RPR topologies)

Available Cards

Select one or more cards from the list and click Add to add them to the Selected Cards list.

Selected Cards

Displays the cards selected for the Layer 2 topology. Select one or more cards and click Remove to remove them from the Selected Cards list.

Add Working

For 802.17 RPR topologies, click this button to add working cards to the Selected Cards list.

Note Protection is supported only on ML1000-2 cards.

Add Protection

For 802.17 RPR topologies, click this button to add protection cards to the Selected Cards list.

Note Protection is supported only on ML1000-2 cards.

Source (fields depend on the NE selected and the circuit type)

Use Secondary Source

(For DRI, open UPSR, and open-ended SNCP circuits) Check to define a secondary source. Then, specify the slot, port, STS, DS-1, or VT for the secondary source.

NE ID

Select from the list of available NE IDs to specify the source NE ID.

Subnetwork ID

Display only. Displays the ID of the subnetwork associated with the circuit source.

Slot

Specify the source slot.

Port

Specify the source port.

STS

(For SONET circuits) Specify the source STS.

VC4

(For SDH circuits) Specify the source VC4.

VC3

(For SDH circuits) Specify the source VC3.

Destination (fields depend on the NE selected and the circuit type)

Use Secondary Destination

(For DRI, open UPSR, and open-ended SNCP circuits) Check this check box to define a secondary destination. Then, specify the slot, port, STS, DS-1, or VT for the secondary destination.

NE ID

Select from the list of available TPs to specify the destination TP.

Subnetwork ID

Display only. Displays the ID of the subnetwork associated with the circuit destination.

Slot

Specify the destination slot.

Port

Specify the destination port.

STS

(For SONET circuits) Specify the destination STS.

VC4

(For SDH circuits) Specify the destination VC4.

VC3

(For SDH circuits) Specify the destination VC3.

Layer 2 Topology Bandwidth

Prime Optical allows you to enter multiple CoS values that are the same. This is harmless and is consistent with the ML CLI, which allows the entry of multiple CoS values but sets only one value.

The maximum bandwidth for 802.17 RPR topologies per circuit size is:

STS-1: 51840 kb/s

STS-3c: 155520 kb/s

STS-6c: 311040 kb/s

STS-9c: 466560 kb/s

STS-12c: 622080 kb/s

STS-24c: 1244160 kb/s

VC3: 48960 kb/s

VC4: 155520 kb/s

VC4-2c: 311040 kb/s

VC4-3c: 466560 kb/s

VC4-4c: 622080 kb/s

VC4-8c: 1244160 kb/s

Enable Multicast Group 1

(not available for 802.17 RPR topologies)

Check the Enable Multicast Group 1 check box to enable the Multicast Group 1 bandwidth and Class of Service text boxes and display the default values for those text boxes. By default these check boxes are unchecked during topology creation. Only when you choose to enter these values (by selecting any of these check boxes) can you enter values related to bandwidth and CoS for that multicast group.

Note Multicast Group 2 is enabled only after enabling Multicast Group 1.

Multicast Group 1

(not available for 802.17 RPR topologies)

Check the Enable Multicast Group 1 check box to enable the Multicast Group 1 bandwidth field. The default value (1%) is displayed. Edit this value as required. The valid range is from 1 to 95.

Note The Multicast Group 1 check box is unchecked by default. You must check the Enable Multicast Group 1 check box before you can enter values in the Multicast Group 1 field.

Class of Service

(not available for 802.17 RPR topologies)

Check the Enable Multicast Group 1 check box to enable the Class of Service field. The default value (4) is displayed. Edit this value as required. The valid range is from 0 to 7.

Note The Enable Multicast Group 1 check box is unchecked by default. You must check the Enable Multicast Group 1 check box before you can enter values in the Class of Service field.

Enable Multicast Group 2

(not available for 802.17 RPR topologies)

Check the Enable Multicast Group 2 check box to enable the Multicast Group 2 bandwidth and Class of Service text boxes and display the default values for those text boxes.

Note Multicast Group 2 is enabled only after enabling Multicast Group 1.

Multicast Group 2

(not available for 802.17 RPR topologies)

Check the Enable Multicast Group 2 check box to enable the Multicast Group 2 bandwidth box. The default value (1%) is displayed. Edit this value as required. The valid range is from 1 to 95.

Note The Enable Multicast Group 2 check box is unchecked by default. You must check the Enable Multicast Group 2 check box before you can enter values in the Multicast Group 2 field.

Class of Service

(not available for 802.17 RPR topologies)

Check the Enable Multicast Group 2 check box to enable the Class of Service field. The default value (6) is displayed. Edit this value as required. The valid range is from 0 to 7.

Note The Enable Multicast Group 2 check box is unchecked by default. You must check the Enable Multicast Group 2 check box before you can enter values in the Class of Service field.

Low Latency Queue

Low Latency Queueing (LLQ) is used for latency/delay-sensitive traffic such as voice. On ML-series and CE-series cards, there is no limit on the bandwidth allocation of LLQ at the L2 topology level. It is limited only by input rate limiting of specific ports. Because some ports might be trusted (external CoS becomes internal CoS), Prime Optical does not know how much bandwidth might be used by LLQ, so it cannot reduce the calculated available bandwidth by the correct amount for the L2 topology. The actual available bandwidth allocation is the displayed available bandwidth value minus the amount (if any) that will be used for LLQ traffic.

For 802.17 RPR topologies, the LLQ value is not a percentage but a selectable value. Choose a, b, or c from the drop-down list to map low latency queuing to the selected service class. Choose None if you do not want to create the class map.

SP Management

Allows you to modify the bandwidth percentage used for the SP management traffic class. Values are 0 to 99. If the value is 0, Prime Optical does not set this value in the CLI for the cards participating in the topology.

For 802.17 RPR topologies, the SP Management value is not a percentage but a selectable value. Choose a, b, or c from the drop-down list to map SP management to the selected service class. Choose None if you do not want to create the class map.

Committed Rate

Allows you to modify the bandwidth percentage used for the CIR traffic class. Values are 0 to 99. If the value is 0, Prime Optical does not set this value in the CLI for the cards participating in the topology.

For 802.17 RPR topologies, the Committed Rate value is not a percentage but a selectable value. Choose a, b, or c from the drop-down list to map the committed rate to the selected service class. Choose None if you do not want to create the class map.

AVVID Control

Allows you to set the bandwidth percentage used for the AVVID control. Values are 0 to 99. If the value is 0, Prime Optical does not set this value in the CLI for the cards participating in the topology.

For 802.17 RPR topologies, the AVVID Control value is not a percentage but a selectable value. Choose a, b, or c from the drop-down list to map the AVVID control to the selected service class. Choose None if you do not want to create the class map.

Default Best Effort

Allows you to modify the default bandwidth percentage used for the best-effort traffic class. Values are 0 to 99. By default, Prime Optical does not allow you to proceed if you set this field to 0, and Prime Optical automatically assigns any remaining bandwidth as the best-effort bandwidth. For example, if you enter 0, Prime Optical automatically assigns 99 as the best-effort bandwidth.

For 802.17 RPR topologies, the Default Best Effort value is not a percentage but a selectable value. Choose a, b, or c from the drop-down list to map the default best effort to the selected service class. Choose None if you do not want to create the class map.

Available (Excluding LLQ)

(not available for 802.17 RPR topologies)

Available bandwidth percentage.

CoS Commit (CoS values below this value are discard eligible)

Committed CoS. This value is set when applying the base card configuration and the value is the same on all the cards in the topology.

Class of Service

Class of service for Low Latency Queueing, SP Management, Committed Rate, and AVVID Control types of traffic. The valid range is from 0 to 7. If the SP Management, Committed Rate, and AVVID Control values are 0, this field is disabled.

Class A

(for 802.17 RPR topologies)

Enter the traffic limit, in Mb/s, for Class A traffic. The range depends on the topology circuit size. For details, see "IEEE 802.17 RPR Base Card Configuration" in Cisco Prime Optical 9.6 ML Provisioning Methodology.

Class A1

(for 802.17 RPR topologies)

Enter the traffic limit, in Mb/s, for Class A1 traffic. The range depends on the topology circuit size. For details, see "IEEE 802.17 RPR Base Card Configuration" in Cisco Prime Optical 9.6 ML Provisioning Methodology.

Class B-CIR

(for 802.17 RPR topologies)

Enter the traffic limit, in Mb/s, for Class B-CIR traffic. The range depends on the topology circuit size. For details, see "IEEE 802.17 RPR Base Card Configuration" in Cisco Prime Optical 9.6 ML Provisioning Methodology.

Fairness Mode

(for 802.17 RPR topologies)

Display only. Aggressive fairness mode is applied on all of the ML cards participating in the 802.17 RPR topology. Aggressive rate fairness is responsive to rate adjustments to requests. Conservative rate fairness is not supported.

Protection Frame

(for 802.17 RPR topologies)

Display only. Jumbo frame support is applied on all of the ML cards participating in the 802.17 RPR topology. Jumbo frame support is set at the ring level and carried in the attribute discovery messages.

RPR Circuit Segment Details (for RPR and 802.17 RPR Layer 2 topologies)

Auto Route Entire RPR

Enable or disable automatic RPR routing. If enabled, Prime Optical automatically determines the route for the RPR. Alternatively, you can choose manual routing and specify all the intermediate hops on a hop-by-hop basis.

Note Selecting Auto Route Entire RPR disables all specific routing options on this window. Auto Route Entire RPR is enabled only if Apply to All Circuits is selected. When Apply to All Circuits is unchecked, the Auto Route Entire RPR check box is dimmed.

Routing Preferences

Route Automatically

Enable or disable automatic route selection. If enabled, Prime Optical automatically determines the route for the circuit. Alternatively, you can disable automatic route selection and manually route the circuit where you specify all the intermediate hops on a hop-by-hop basis (up to 64 hops per circuit). You can manually route the circuit using either one of the following views:

Graphical—Provides a map view that displays the nodes and links you can use to create the circuits. You can select the nodes and links that you need for your circuit from the map view.

Textual—Provides a text view that lists the nodes and links you can use to create the circuits.

Note If the source and destination of the circuit are on the same node, automatic routing is enabled.

Using Required Nodes/Links

(Available only if Route Automatically is checked) If checked, Prime Optical automatically routes the circuit through the required nodes and/or links. There are two ways you can specify the required nodes and links. Choose one of the following:

Graphical

Textual

Review Route Before Creation

(Available only if Route Automatically is checked) Check this check box to review the route before it is created.

VT-DS3 Mapped Conversion

(Available only if Route Automatically is checked) If checked, you can route the circuit using the DS3XM12 card. This field does not apply to data cards (ML-series and CE-100T-8 cards). VT-DS3 mapped conversion is for VAP circuits and is automatically selected while creating a VAP circuit using a DS3 port.

Time Slot Restriction

If checked, you can enter an STS/VC4 value (to be used end-to-end) that Prime Optical uses to automatically determine the route for the circuit. Circuit creation fails if the same STS/VC4 is not available end-to-end. If circuit creation fails, you can try again using different values. The valid range is from 1 to 192 for SONET, or from 1 to 64 for SDH networks. In case of an RPR, you can set this one at a time, for each circuit segment of the RPR.

Note This field is disabled when you check the Auto Route Entire RPR and Apply to All Circuits check boxes in the RPR Circuit Segment Details area. It is enabled when you uncheck the Auto Route Entire RPR and Apply to All Circuits check boxes and proceed to automatically route the individual circuit segments.

Note Time Slot Restriction is not available for OCHCC and OCHNC circuit creation types.

Note For VCAT circuits, you must enter multiple STS/VC4 values in the Member Preferences table > Time Slot Restriction field. The STS/VC4 values that you enter in the Time Slot Restriction field cannot be identical, or circuit creation will fail with an error message.

Fully Protected Layer 1

If selected, Prime Optical ensures that the Layer 1 circuit is fully protected. If the circuit must pass across unprotected links, Prime Optical creates a primary and alternate circuit route (virtual UPSR) based on the following node diversity specifications:

Required—Prime Optical ensures that the primary and alternate paths of the path-protected mesh networking (PPMN) portions of the complete circuit path are node-diverse.

Desired—Prime Optical attempts node diversity. If node diversity is impossible, Prime Optical uses primary and alternate paths that are link-diverse for the PPMN portions of the complete circuit path.

Don't Care: Link Diverse Only—Prime Optical creates primary and alternate paths that are link-diverse for the PPMN portions of the complete circuit path. The paths might be node-diverse, but Prime Optical does not check for node diversity.

Node-Diverse Path Required

Prime Optical ensures that the primary and alternate paths of the PPMN portions of the complete circuit path are node-diverse.

Node-Diverse Path Desired

Prime Optical attempts node diversity. If node diversity is impossible, Prime Optical uses primary and alternate paths that are link-diverse for the PPMN portions of the complete circuit path.

Node-Diverse Path Don't Care

Prime Optical creates primary and alternate paths that are link-diverse for the PPMN portions of the complete circuit path. The paths might be node-diverse, but Prime Optical does not check for node diversity.

Protection Channel Access

To route the circuit on a BLSR protection channel, if available, uncheck Fully Protected Path, and check Protection Channel Access.

Dual Ring Interconnect

If selected, the other node specifications (Required, Desired, and Don't Care: Link Diverse Only) are disabled.

Diverse Shared Risk Link Group (SRLG)

If checked, fully protected circuits are routed through working and protected links that do not share risk groups.

Manual Provisioning (available if the Route Automatically check box is unchecked and the Enhanced Graphical radio button is selected)

VCAT Member Number

(For VCAT circuits) Use the drop-down list to select route constraints for each member circuit.

Map view

Displays the NEs that are available in the subnetwork for circuit creation. This pane also indicates the source and destination NEs (and secondary source and destination NEs, if applicable) selected for circuit creation. The map view is used to manually route the circuit from the source to the destination specified by the addition of the links selected.

Use the right-click menu options to navigate within the map view:

Find Node—Opens the Find Node dialog box, which lists all of the nodes displayed in the map view. Select a node from the drop-down list and click OK. The selection context in the map view changes to show the selected node highlighted in the visible map area.

Zoom In—Allows you to zoom in on an object in the map view.

Zoom Out—Allows you to zoom out on the map view.

Reset Zoom—Resets the current zoom level to the default.

Add—Allows you to add the selected span. Right-click a link and choose Add in the right-click menu. The selected link is added to the Include list with the default STS or VC4 value. The Add option applies to manual provisioning across all circuit types.

Available Spans

Select a link on the map view (related to the selected node) and its corresponding details are displayed in the Available Spans pane. Click Add to move the spans to the Selected Spans field. The newly added link appears in blue on the map view.

Selected Spans

Select one or more spans and click Remove to remove them from the Selected Spans field. The removed link appears in green to indicate its unselected state.

Note To specify a DRI link, double-click the link on the map. The map view displays the link as bidirectional.

Manual Provisioning (available if the Route Automatically check box is unchecked and the Textual radio button is selected)

Src NE ID

Displays the circuit source NE.

Dest NE ID

Displays the circuit destination NE.

Current NE ID

Displays the currently selected NE.

Adj NE ID

Displays all the NEs that are adjacent to the currently selected NE.

Available Links

Lists all links between the currently selected and adjacent NEs. Select a link from the drop-down list.

Available Spans

After you select a link from the Available Links drop-down list, its corresponding details are displayed in the Available Spans pane. Click Add to move the spans to the Selected Spans field.

Selected Spans

Select one or more spans and click Remove to remove them from the Selected Spans field.

Next Hop

Click Next Hop to specify the next intermediate hop.

Reset

Click Reset to reset all hop information to the default values.

Alternate Route

Click Alternate Route to specify hop information for the alternate circuit route.

Route Constraints (applicable only if the Using Required Nodes/Links check box is checked)

VCAT Member Number

(For VCAT circuits) Use the drop-down list to select route constraints for each member circuit.

Map view

(For graphical manual provisioning) Displays the NEs that are available in the subnetwork for circuit creation. This pane also indicates the source and destination NEs (and secondary source and destination NEs, if applicable) selected for circuit creation. The map view is used for the inclusion and exclusion of links or nodes during the specification of route constraints. The included nodes are shown in blue and the excluded links are shown in magenta.

Use the right-click menu options to navigate within the map view:

Find Node—Opens the Find Node dialog box, which lists all of the nodes displayed in the map view. Select a node from the drop-down list and click OK. The selection context in the map view changes to show the selected node highlighted in the visible map area.

Zoom In—Allows you to zoom in on an object in the map view.

Zoom Out—Allows you to zoom out on the map view.

Reset Zoom—Resets the current zoom level to the default.

Src NE ID

(For textual manual provisioning) Displays the circuit source NE.

Dest NE ID

(For textual manual provisioning) Displays the circuit destination NE.

Nodes

(For textual manual provisioning) Select Nodes if you want to add nodes to your circuit route.

Links

(For textual manual provisioning) Select Links if you want to add links to your circuit route.

Current NE ID

(For textual manual provisioning) Displays the currently selected NE.

Adj NE ID

(For textual manual provisioning) Displays all the NEs that are adjacent to the currently selected NE.

Available Links

(For textual manual provisioning) Lists all links between the currently selected and adjacent NEs. Select a link from the drop-down list.

Select Nodes

(For textual manual provisioning) Lists all nodes related to the currently selected NE. Select a node from the list.

Selected Node/Link

Displays the currently selected NE or link.

Included Links/Nodes

Displays the list of links or nodes that are included in the route.

Excluded Links/Nodes

Displays the list of links or nodes that are excluded from the route.

Review Route (applicable only if the Review Route before creation check box is checked)

VCAT Member Number

(For VCAT circuits) Use the drop-down list to view the route chosen for each member circuit.

Review Route

Displays the NEs that are available in the subnetwork for circuit creation. This pane also indicates the source and destination NEs (and secondary source and destination NEs, if applicable) selected for circuit creation. The map view displays information about the spans selected during autorouting in the subnetwork. The selected spans are shown in blue. When you select a span, its corresponding details are displayed in the Selected Span pane. The circuit summary displays the total hops and the cost for working and protect paths for the routed circuit.

Source NE ID

Displays the ID of the NE selected as the source node.

Destination NE ID

Displays the ID of the NE selected as the destination node.

Included Spans

If you enabled automatic route selection in the Routing Preferences pane, Prime Optical automatically selects spans to route the circuit. This field lists all the spans that the Prime Optical server selected automatically.

Selected Span

Displays detailed information about the span selected in the Included Spans list.

Circuit Summary

Circuit Summary

Summarizes the selections you made in the wizard panes. To change the circuit summary, click Back and change your selection(s).


Step 3 In the Topology Information area, complete the following information:

Name—Enter a unique name for the new topology. The topology name is a free-format string, up to 30 ASCII characters.

Alias—Enter a unique alias name for the new topology. The alias name can contain alphanumeric characters. International character sets are also supported.

Description—Enter a description for the new topology, up to 60 ASCII characters.

L2 Topology Type—Choose Point to Point.

Circuit Type—Specify the type of circuit: STS and STS-v for SONET NEs; VC_HO_PATH_CIRCUIT, VC_HO-v, VC_LO_PATH_CIRCUIT, and VC_LO-v for SDH NEs.


Note The Circuit Information area displays different fields depending upon the circuit type selected.


Circuit Size—Specify the size of the circuit. STS circuit sizes are STS-1, STS-3c, STS-6c, STS-9c, STS-12c, and STS-24c. SDH circuit sizes are VC3, VC4, VC4-2c, VC4-3c, VC4-4c, and VC4-8c.

L1 Protected Drops—Check this check box if you are adding Layer 1 protected drops.

L1 Protection Information (for STS-type circuits only)—Complete the following information:

Revertive—Specify whether traffic is reverted back to its original path when the conditions that diverted the circuit to the protect path are repaired.

Reversion Time—Specify the amount of time (in minutes) after which traffic reverts back to the original working path when conditions that caused the switch are cleared. The Cisco default is 5 minutes.

SF Threshold—For STS circuits only. Set the UPSR path-level SF.

SD Threshold—For STS circuits only. Set the UPSR path-level SD threshold.

Switch on PDI-P—For STS circuits only. Specify whether traffic should switch based on a received STS payload defect indication.

VCAT (for STS-v, VC_HO_PATH_VCAT_CIRCUIT, and VC_LO_PATH_VCAT_CIRCUIT circuits only)—Complete the following information:


Note For SDH nodes, only VC_HO_PATH_VCAT_CIRCUIT is supported on FCMR-4 cards.


Symmetric—Display only.

Member Size—Select a size for each VCAT member.

Mode—Select the protection mode for the VCAT circuit.

Step 4 Click Next.

Step 5 Specify the following information:

a. In the Source pane, specify the following; then, click Next:

Use Secondary Source—Select to create a secondary source (if required)

NE ID

Subnetwork ID—Display only.

Slot

Port

STS

VT

b. In the Destination pane, specify the following; then, click Next:

NE ID

Subnetwork ID—Display only.

Slot

Port

STS (applicable to OC-N cards only)

VT

Step 6 In the Layer 2 Topology Bandwidth pane, configure the Enable Multicast Group 1 and Enable Multicast
Group 2 panes as required. Specify the bandwidth percentage used for each traffic class; then, click Next.

Step 7 In the Routing Preferences pane, do the following; then, click Next:

a. Route Automatically—Enable or disable automatic route selection. If enabled, Prime Optical automatically determines the route for the circuit. If the source and destination of the circuit are on the same node, automatic routing is enabled. If disabled, you can specify the spans associated with the circuit. You can manually provision the circuit using one of the following views:

Graphical

Textual

b. Using Required Nodes/Links—(Available only if Route Automatically is checked) Check this check box to let Prime Optical automatically route the circuit through the required nodes and links. You can specify the required nodes and links using one of the following views:

Graphical

Textual

c. Review Route Before Creation—(Available only if Route Automatically is checked) Check this check box to review the route before it is created.

d. Time Slot Restriction—If checked, you can enter an STS/VC4 value (to be used end-to-end) that Prime Optical uses to automatically determine the route for the circuit. Circuit creation fails if the same STS/VC4 is not available end-to-end. If circuit creation fails, you can try again using different values. The valid range is from 1 to 192 for SONET, or from 1 to 64 for SDH networks.


Note For VCAT circuits, you must enter multiple STS/VC4 values in the Member Preferences table > Time Slot Restriction field. The STS/VC4 values that you enter in the Time Slot Restriction field cannot be identical, or circuit creation will fail with an error message.


e. Set the circuit path protection as follows:

To route the circuit on a protected path, leave the Fully Protected Path check box checked (default) and proceed to the next substep. A fully protected circuit route is created based on the path diversity option you choose. Fully protected paths might or might not have SNCP path segments with primary and alternate paths. The path diversity options apply only to SNCP path segments, if any exist.

To create an unprotected circuit, uncheck Fully Protected Path and go to Step 8.

To route the circuit on an MS-SPRing protection channel, uncheck Fully Protected Path, check Protection Channel Access, and go to Step 8.

f. If you selected Fully Protected Path, choose one of the following options:

Required—Ensures that the primary and alternate paths within the extended SNCP mesh network portions of the complete circuit path are nodally diverse.

Desired—Specifies that node diversity is preferred; however, if node diversity is not possible, link-diverse paths are created for the extended SNCP mesh network portion of the complete circuit path.

Don't Care: Link Diverse Only—Specifies that only link-diverse primary and alternate paths for extended SNCP mesh network portions of the complete circuit path are needed.

Dual Ring Interconnect—Provisions the circuit in a DRI topology. If selected, the other node specifications (Required, Desired, and Don't Care: Link Diverse Only) are disabled.

Step 8 In the Manual Provisioning pane (available when Route Automatically is unchecked and the Graphical radio button is selected), do the following; then, click Next:

a. Use the map view to manually route the circuit from the source to the destination specified by the addition of the links selected. Use the right-click menu options to navigate within the map view:

Find Node—Opens the Find Node dialog box, which lists all of the nodes displayed in the map view. Select a node from the drop-down list and click OK. The selection context in the map view changes to show the selected node highlighted in the visible map area.

Zoom In—Allows you to zoom in on an object in the map view.

Zoom Out—Allows you to zoom out on the map view.

Reset Zoom—Resets the current zoom level to the default.

Add—Allows you to add the selected span. Right-click a link and choose Add in the right-click menu. The selected link is added to the Available Spans list. The Add option applies to manual provisioning across all circuit types.

b. In the VCAT Member Number list box, select the member for which the route is to be selected.

c. In the circuit display, select the span to use for the next hop.

d. In the Available Spans area, complete the following information:

From—Displays the source of the span

To—Displays the destination of the span

e. Click Add. The span is added to the Selected Spans list.

f. Repeat substeps b to d for each intermediate NE until the destination NE is reached.

g. Repeat substeps a to e for each member until all members are routed.

h. To delete a span from the Selected Spans area, select a span from the Selected Spans list and click Remove.


Note To specify a DRI link, double-click the link on the map. The map view displays the link as bidirectional.


i. (For BLSR DRI or MS-SPRing DRI circuits) In the BLSR DRI Nodes or MS-SPRing DRI Nodes tab, click the Add button to open the BLSR/MS-SPRing DRI dialog box, which allows you to provide primary and secondary pairs for traditional and nontraditional DRI circuits. Also specify ring and path options for the first and second rings. Click Remove to remove a DRI node from the list.

Step 9 In the Manual Provisioning pane (available when Route Automatically is unchecked and the Textual radio button is selected), do the following; then, click Next:

a. Specify the following:

Src NE ID—Display only.

Dest NE ID—Display only.

Current NE ID—Display only.

Adj NE ID—Display only.

Available Links—Lists all links between the currently selected and adjacent NEs. Select a link from the drop-down list.

Available Spans—After you select a link from the Available Links drop-down list, its corresponding details are displayed in the Available Spans pane. Click Add to move the spans to the Selected Spans field.

Selected Spans—Select one or more spans and click Remove to remove them from the Selected Spans field.

b. Click Next Hop to specify the next intermediate hop; then, repeat substep a.

c. Click Reset to reset all hop information to the default values.

d. Click Alternate Route to specify hop information for the alternate circuit route.

Step 10 In the VT Options pane (available only if you are creating a VT circuit and Route Automatically is selected), choose one of the following radio buttons; then, click Next:

VT Tunnel on Transit Nodes

VAP

None

Step 11 If you created a VT aggregation point, in the VT Grooming Node selection pane, select the following:

STS Grooming Node

VT Grooming Node

Step 12 In the Route Constraints pane (available when Route Automatically and Using Required Nodes/Links are enabled and the Graphical radio button is selected), a graphical representation of the circuit is displayed, including source and destination nodes. Specify the spans that will route to the circuit. Prime Optical starts at the source node. The next NE associated with each span is also displayed. Complete the following substeps:

a. In the circuit display, select the node or link. The NE ID or link ID is displayed in the Selected Node/Link field.

b. Click Include to include the selected node or link in the route. The node or link appears in the Included Links/Nodes list.

c. Click Exclude to exclude the selected node or link from the route. The node or link appears in the Excluded Links/Nodes list.

d. Click Remove to remove the selected node or link from the Included Links/Nodes or Excluded Links/Nodes lists.

e. Click Up or Down to set the sequence of the nodes and spans included in the circuit.

f. Repeat substeps a to e for each node or link that you want to include in the circuit route.

g. (Optional) Repeat substeps a to f for each intermediate NE until the destination NE is reached.

h. Click Finish, or, if Review Route Before Creation is checked in the Routing Preferences pane, click Next.

Step 13 In the Route Constraints pane (available when Route Automatically and Using Required Nodes/Links are enabled and the Textual radio button is selected), specify the nodes or links to include in each hop of the circuit route. Complete the following substeps:

a. Select Nodes in the Select Nodes/Links area if you want to add nodes to your circuit route; then, specify the node information in the Select Nodes area.

b. Select Links in the Select Nodes/Links area if you want to add links to your circuit route; then, specify the link information in the Select Links area.

c. Click Add to add a BLSR-DRI or MS-SPring-DRI to the circuit route.

d. Click Include to include the selected node or link in the route. The node or link appears in the Included Links/Nodes list.

e. Click Exclude to exclude the selected node or link from the route. The node or link appears in the Excluded Links/Nodes list.

f. Click Remove to remove the selected node or link from the Included Links/Nodes or Excluded Links/Nodes lists.

g. Click Up or Down to set the sequence of the nodes and spans included in the circuit.

h. Repeat substeps a to e for each node or link that you want to include in the circuit route.

i. Click Finish, or, if Review Route Before Creation is checked in the Routing Preferences pane, click Next.

Step 14 In the Review Route pane (available only if Review Route Before Creation is checked), review the following information; then, click Finish:

a. In the circuit display, review the ID of the source and destination NEs.

b. Included Spans—Because automatic route selection is enabled in the Routing Preferences pane, Prime Optical automatically selects spans to route the circuit. This field lists all the spans that the Prime Optical server selected automatically.

c. Selected Span—Displays the following information about the span selected in the Included Spans list:

From—Span source

To—Span destination

Source—Select the source (STS for SONET NEs or VC4 for SDH NEs) from the drop-down list

VT—Select the VT time slot (SONET NEs only)


Note If you selected VT as the circuit type in the Attributes pane, chose Review Route Before Creation in the Routing Preferences pane, and selected VT Tunnel on Transit Nodes in the VT Options pane, the VT tunnel is created regardless of whether or not you are finished provisioning the circuit. Even if you click the Back button in the Review Route pane and change the VT circuit options, the newly created VT tunnel will not be deleted.


Step 15 In the confirmation dialog box, click OK.


Note It might take 10 minutes or more for Prime Optical to resynchronize with the NEs.


Caution It takes several seconds to create a circuit. During that interval, if a new circuit is added with the same name, both circuits might be identified as duplicates. Therefore, be careful not to add a duplicate circuit during the creation of the first circuit.


7.10.6.2  Creating an RPR or 802.17 RPR Layer 2 Topology


Step 1 In the Domain Explorer window, choose Configuration > CTC-Based SONET NEs or CTC-Based SDH NEs > L2 Topology Table.

Step 2 In the Layer 2 Topology table, choose Configuration > Create L2 Topology. The Create Layer 2 Topology wizard opens. Table 7-58 provides descriptions. The fields displayed depend on the type of topology selected.


Tip You can also access the Create Layer 2 Topology wizard by choosing Configuration > CTC-Based SONET NEs or CTC-Based SDH NEs > Create L2 Topology in the Domain Explorer.


Note You must have the appropriate user privileges to use the Create Layer 2 Topology wizard.


Step 3 In the Topology Information area, complete the following information:

Name—Enter a unique name for the new topology. The topology name is a free-format string, up to 30 ASCII characters.

Alias—Enter a unique alias name for the new topology. The alias name can contain alphanumeric characters. International character sets are also supported.

Description—Enter a description for the new topology, up to 60 ASCII characters.

L2 Topology Type—Choose Resilient Packet Ring or 802.17 Resilient Packet Ring.


Note The ML cards must be in 802.17 RPR mode before you can create an 802.17 RPR topology.


Step 4 Click Next.

Step 5 In the NE Selection area, complete the following information:

a. Select the subnetwork ID from the drop-down list. After selecting a subnetwork, the Available NEs list includes all available NEs in that subnetwork as well as NEs that are topologically connected to NEs in that subnetwork.

b. Add at least two NEs to the topology by selecting NEs from the Available NEs list and clicking Add. Delete an NE from the topology by selecting the NE from the Selected NEs list and clicking Remove.

c. Rearrange the sequence of the NEs in the Selected NEs list by clicking the Up or Down arrows.

Step 6 Click Next.

In the Card Selection area, add a card to the topology by selecting a card from the Available Cards list and clicking Add. Delete a card from the topology by selecting the card from the Selected Cards list and clicking Remove. For 802.17 RPR topologies, click Add Working or Add Protection to add working or protection cards to the Selected Cards list. Note that protection is supported only on ML1000-2 cards.

Step 7 Click Next.

Step 8 In the Layer 2 Topology Bandwidth pane, configure the Enable Multicast Group 1 and Enable Multicast Group 2 panes as required for RPR topologies. Specify the bandwidth percentage (for RPR topologies) or value (for 802.17 RPRs) used for each traffic class; then, click Next.

Step 9 In the RPR Circuit Segment Details area, do the following:

a. Route the entire RPR automatically by checking Auto route entire RPR.

b. If Auto route entire RPR is unchecked, select a circuit segment from the list; then, specify its route type. Select either Auto, for automatic route, or Manual, to manually set the route.


Note The Auto route entire RPR option is available only if the Apply to all Circuits check box is checked.


c. If Apply to all Circuits is checked, the circuit type and size are applied to all the circuits in the RPR. If it unchecked, you can select a different circuit type and size for each individual circuit in the RPR.

d. In the Circuit Type field, specify the type of circuit. For the ONS 15454 SONET, select STS. For the ONS 15454 SDH, select VC_HO_PATH_CIRCUIT or VC_LO_PATH_CIRCUIT.

e. In the Circuit Size field, specify the size of the circuit. STS circuit sizes are STS-1, STS-3c, STS-6c, STS-9c, STS-12c, and STS-24c. SDH circuit sizes are VC3, VC4, VC4-2c, VC4-3c, VC4-4c, and VC4-8c.

Step 10 Click Next.

Step 11 If you specified the route type for a specific segment as Auto, continue to Step 12. If you specified the route type for a specific segment as Manual, continue to Step 13. If you selected to route the entire RPR automatically, complete the following information:

Fully Protected Layer 1—If selected, Prime Optical ensures that the circuit is fully protected. You can provision the circuit if the circuit must pass across unprotected links. Prime Optical creates a primary and alternate circuit route (virtual UPSR) based on the following node diversity specifications:

Required—Prime Optical ensures that the primary and alternate paths within the UPSR portions of the complete circuit path are node-diverse.

Desired—Prime Optical attempts node diversity. If node diversity is impossible, Prime Optical uses primary and alternate paths that are link-diverse for the UPSR portions of the complete circuit path.

Don't Care: Link Diverse Only—Prime Optical creates primary and alternate paths that are link-diverse for the UPSR portions of the complete circuit path. The paths might be node-diverse, but Prime Optical does not check for node diversity.

Protection Channel Access—If Fully Protected Layer 1 is not selected, enable PCA to route the circuit on a BLSR protection channel. Once you enable PCA, a label reading PCA will appear on the link.

Step 12 If you specified the route type for a specific segment as Manual, continue to Step 13. If you selected to route the entire RPR automatically, continue to Step 14. If you specified the route type for a specific segment as Auto, complete the following information:

a. Using Required Nodes/Links—Check this check box to let Prime Optical automatically route the circuit through the required nodes and/or links.

b. Review Route Before Creation—Check this check box to review the route before it is created.

c. Fully Protected Layer 1—If selected, Prime Optical ensures that the circuit is fully protected. You can provision the circuit if the circuit must pass across unprotected links. Prime Optical creates a primary and alternate circuit route (virtual UPSR) based on the following node diversity specifications:

Required—Prime Optical ensures that the primary and alternate paths within the UPSR portions of the complete circuit path are node-diverse.

Desired—Prime Optical attempts node diversity. If node diversity is impossible, Prime Optical uses primary and alternate paths that are link-diverse for the UPSR portions of the complete circuit path.

Don't Care: Link Diverse Only—Prime Optical creates primary and alternate paths that are link-diverse for the UPSR portions of the complete circuit path. The paths might be node-diverse, but Prime Optical does not check for node diversity.

d. Protection Channel Access—If Fully Protected Layer 1 is not selected, enable PCA to route the circuit on a BLSR protection channel. Once you enable PCA, a label reading PCA will appear on the link.

e. Click Next to specify the route constraints (available when Route Automatically and Using Required Nodes/Links are enabled):

Src NE ID—Display only.

Dest NE ID—Display only.

Nodes—Click this radio button if you want to add nodes to the route.

Links—Click this radio button if you want to add links to the route; then, choose Current NE ID, Adj NE ID, or Available Links.

f. Click Include to add the selected node or link to the route constraint, or Exclude to remove the selected node or link from the route constraint.

g. If the Review Route Before Creation check box (available when Route Automatically and Review Route before Creation are enabled) is checked and there are more segments for which you need to specify the routing information, click Next. RPR circuit segment details are displayed.

Step 13 If you specified the route type for a specific segment as Manual, complete the following information:

a. Fully Protected Layer 1—If selected, Prime Optical ensures that the circuit is fully protected. You can provision the circuit if the circuit must pass across unprotected links. Prime Optical creates a primary and alternate circuit route (virtual UPSR) based on the following node diversity specifications:

Required—Prime Optical ensures that the primary and alternate paths within the UPSR portions of the complete circuit path are node-diverse.

Desired—Prime Optical attempts node diversity. If node diversity is impossible, Prime Optical uses primary and alternate paths that are link-diverse for the UPSR portions of the complete circuit path.

Don't Care: Link Diverse Only—Prime Optical creates primary and alternate paths that are link-diverse for the UPSR portions of the complete circuit path. The paths might be node-diverse, but Prime Optical does not check for node diversity.

b. Protection Channel Access—If Fully Protected Layer 1 is not selected, enable PCA to route the circuit on a BLSR protection channel. Once you enable PCA, a label reading PCA will appear on the link.

c. Click Next to specify the following information:

Source Node—Displays the source node

Destination—Displays the destination node

Current Node—Displays the current node

Adj NEID—Select the adjacent NE ID from the drop-down list

Available Links—Select a link from the drop-down list

d. Select the span from the Available Spans area. Span information includes:

From—Start point of the span

To—Endpoint of the span

Source STS

e. Click Add to add the span to the Selected Spans list. Click Remove to remove spans from the Selected Spans list.

f. Click Next Hop to specify links and nodes for the next hop. Complete substeps a through c for each hop.

g. Click Reset to reset the link and node information.

h. Click Alternate Route to provision an alternate route.

i. If there are more segments for which you need to specify routing information, click Next. RPR circuit segment details are displayed.

Step 14 Click Finish.


NoteIt might take 10 minutes or more for Prime Optical to resynchronize with the NEs.

For 802.17 RPRs, the active or standby configuration support is based on the Ring Interconnect feature. A Ring Interconnect switchover can be done only by shutting down the Gigabit or RPR-IEEE interfaces. If one of the cards is unplugged, the Ring Interconnect feature does not work because the peer is unavailable.


7.10.7  Deleting Layer 2 Topologies

You cannot delete a Layer 2 topology if there are VLANs associated with it. Be sure to delete all VLANs associated with the Layer 2 topology before deleting the Layer 2 topology. See Tracing VLANs.


Step 1 In the Domain Explorer window, choose Configuration > CTC-Based SONET NEs or CTC-Based SDH NEs > L2 Topology Table.

Step 2 In the Layer 2 Topology table, select the topology that you want to delete and choose Configuration > Delete L2 Topology (or click the Delete L2 Topology tool).

Step 3 In the confirmation dialog box, click Yes.


7.10.8  Enabling Layer 2 Services

To ensure that provisioning is available for Layer 2 services, the Layer 2 topology attributes must be configured correctly on the underlying optical circuits. A Layer 2 topology can be configured using the TL1 interface, CTC, or Prime Optical. Layer 2 topologies configured using Prime Optical are Layer 2 service-ready. Layer 2 topologies configured using the TL1 interface, CTC, or Prime Optical Create Circuit wizard are not Layer 2 service-ready. Some examples of the latter case are:

The optical circuit(s) of the Layer 2 topology are provisioned using the TL1 interface for Operations System Modifications for the Integration of Network Elements (OSMINE) compliance.

You want to resize the optical circuits and instead of deleting the entire Layer 2 topology, you delete each circuit from an existing Layer 2 topology and add a new circuit with the new size until all circuits have been resized. This could result in a service outage.

You want to add or delete an optical circuit from an existing Layer 2 topology.

Complete the following steps to enable Layer 2 services:


Step 1 Create a point-to-point, RPR, or 802.17 RPR topology with ML-series cards using the TL1 interface, CTC, or the Create Circuit wizard.

Step 2 In the Domain Explorer window, choose Configuration > CTC-Based SONET NEs or CTC-Based SDH NEs > L2 Topology Table. The Layer 2 Topology table opens. The new topology is listed and its Layer 2 Service Resync Status is L2Service NotReady.

Step 3 In the Layer 2 Topology table, choose Configuration > Enable L2 Service. Depending on which type of topology you are enabling, one of the following dialog boxes displays: point-to-point and/or RPR (see Table 7-59) or 802.17 RPR (see Table 7-60).

Step 4 After making your selections, click Apply.

If circuits forming the RPR are created with names following the CTM naming convention (for example, cktname.1CTML or cktname.2CTML), the RPR has the name cktname. If the CTM naming convention is not followed, the RPR has the name of one of the circuits in the RPR topology.


Table 7-59 Field Descriptions for the Enable L2 Service—Point-to-Point and RPR Bandwidth Tab 

Field
Description
Multicast Priority Queuing

Enable Multicast Group 1

Check to enable the Multicast Group 1 bandwidth and Class of Service text boxes and display the default values for those text boxes.

Note The Enable Multicast Group 1 check box is checked by default during Layer 2 topology modification if you previously specified the multicast bandwidth parameters for the L2 topology (either during L2 topology creation or during the last modify operation), and you can modify the Multicast Group 1 and Class of Service text boxes. If the Multicast Group 1 and Class of Service text boxes were not configured when the Layer 2 topology was created (and hence these check boxes are unchecked by default), you can check the check box to configure the Multicast Group 1 and Class of Service text boxes for the group if required. To remove the priority multicast command already set for the topology, you can uncheck the check box and the command is removed from the card.

Multicast Group 1 (%)

The default value is 1%. Edit this value as required. The valid range is from 1 to 95.

Class of Service

The default value is 4. Edit this value as required. The valid range is from 0 to 7.

Enable Multicast Group 2

Check to enable the Multicast Group 2 bandwidth and Class of Service text boxes and display the default values for those text boxes.

Note The Enable Multicast Group 2 check box is checked by default during Layer 2 topology modification if you previously specified the multicast bandwidth parameters for the L2 topology (either during L2 topology creation or during the last modify operation), and you can modify the Multicast Group 2 and Class of Service fields. If the Multicast Group 2 and Class of Service fields were not configured when the Layer 2 topology was created (and hence these check boxes are unchecked by default), you can check the check box to configure the Multicast Group 2 and Class of Service fields for the group if required. To remove the priority multicast command already set for the topology, you can uncheck the check box and the command is removed from the card.

Multicast Group 2 (%)

The default value is 1%. Edit this value as required. The valid range is from 1 to 95.

Class of Service

The default value is 6. Edit this value as required. The valid range is from 0 to 7.

Low Latency Queue

Low Latency Queueing (LLQ) is used for latency/delay-sensitive traffic such as voice. On ML-series and CE-series cards, there is no limit on the bandwidth allocation of LLQ at the L2 topology level. It is limited only by input rate limiting of specific ports. Because some ports might be trusted (external CoS becomes internal CoS), Prime Optical does not know how much bandwidth might be used by LLQ, so it cannot reduce the calculated available bandwidth by the correct amount for the L2 topology. The actual available bandwidth allocation is the displayed available bandwidth value minus the amount (if any) that will be used for LLQ traffic.

SP Management

Allows you to modify the bandwidth percentage used for the SP management traffic class. Values are 0 to 99. If the value is 0, Prime Optical does not set this value in the CLI for the cards participating in the topology.

Committed Rate

Allows you to modify the bandwidth percentage used for the CIR traffic class. Values are 0 to 99. If the value is 0, Prime Optical does not set this value in the CLI for the cards participating in the topology.

AVVID Control

Allows you to set the bandwidth percentage used for the AVVID control. Values are 0 to 99. If the value is 0, Prime Optical does not set this value in the CLI for the cards participating in the topology.

Default Best Effort

Allows you to modify the default bandwidth percentage used for the best-effort traffic class. Values are 0 to 99. By default, Prime Optical does not allow you to proceed if you set this field to 0, and Prime Optical automatically assigns any remaining bandwidth as the best-effort bandwidth. For example, if you enter 0, Prime Optical automatically assigns 99 as the best-effort bandwidth.

Available (%)

Displays the available bandwidth.

CoS Commit

Committed CoS. This value is set when applying the base card configuration and the value is the same on all the cards in the topology. CoS values below this value are discard eligible.

Class of Service

Class of service for LLQ, SP management, CIR/PIR, and AVVID control types of traffic. The valid range is from 0 to 7.


Table 7-60 Field Descriptions for the Enable L2 Service—802.17 RPR Bandwidth Tab 

Field
Description

Class A

Modify the traffic limit, in Mb/s, for Class A traffic. The range depends on the topology circuit size. For details, see "IEEE 802.17 RPR Base Card Configuration" in Cisco Prime Optical 9.6 ML Provisioning Methodology.

Class A1

Modify the traffic limit, in Mb/s, for Class A1 traffic. The range depends on the topology circuit size. For details, see "IEEE 802.17 RPR Base Card Configuration" in Cisco Prime Optical 9.6 ML Provisioning Methodology.

Class B-CIR

Modify the traffic limit, in Mb/s, for Class B-CIR traffic. The range depends on the topology circuit size. For details, see "IEEE 802.17 RPR Base Card Configuration" in Cisco Prime Optical 9.6 ML Provisioning Methodology.

Fairness Mode

Display only. Aggressive fairness mode is applied on all of the ML cards participating in the 802.17 RPR topology. Aggressive rate fairness is responsive to rate adjustments to requests. Conservative rate fairness is not supported.

Protection Frame

Display only. Jumbo frame support is applied on all of the ML cards participating in the 802.17 RPR topology. Jumbo frame support is set at the ring level and carried in the attribute discovery messages.

Class Map Configuration

Low Latency Queue

Select a, b, or c from the drop-down list to map low latency queuing to the selected service class. Choose None if you do not want to create the class map.

SP Management

Select a, b, or c from the drop-down list to map SP management to the selected service class. Choose None if you do not want to create the class map.

Committed Rate

Select a, b, or c from the drop-down list to map the committed rate to the selected service class. Choose None if you do not want to create the class map.

AVVID Control

Select a, b, or c from the drop-down list to map the AVVID control to the selected service class. Choose None if you do not want to create the class map.

Default Best Effort

Select a, b, or c from the drop-down list to map the default best effort to the selected service class. Choose None if you do not want to create the class map.

CoS Commit

Committed CoS. This value is set when applying the base card configuration and the value is the same on all cards in the topology. CoS values below this value are discard eligible.

Class of Service

Class of service for LLQ, SP management, CIR/PIR, and AVVID control types of traffic. The valid range is from 0 to 7.


The maximum bandwidth for 802.17 RPR topologies per circuit size is as follows:

STS-1: 51840 kb/s

STS-3c: 155520 kb/s

STS-6c: 311040 kb/s

STS-9c: 466560 kb/s

STS-12c: 622080 kb/s

STS-24c: 1244160 kb/s

VC3: 48960 kb/s

VC4: 155520 kb/s

VC4-2c: 311040 kb/s

VC4-3c: 466560 kb/s

VC4-4c: 622080 kb/s

VC4-8c: 1244160 kb/s

7.10.9  Modifying Layer 2 Topologies


Note For the Layer 2 topology modification operation, you should wait until the changes are applied and reflected in the Layer 2 Topology table before modifying another Layer 2 topology.


Use the Modify Layer 2 Topology window to modify the parameters of the selected Layer 2 topology. The window has two tabs, General and Bandwidth.


Step 1 In the Domain Explorer window, choose Configuration > CTC-Based SONET NEs or CTC-Based SDH NEs > L2 Topology Table.

Step 2 In the Layer 2 Topology table, select the appropriate topology and choose Configuration > Modify L2 Topology (or click the Modify L2 Topology tool).

Step 3 Click the General tab to modify the settings in the following table, as required.

Table 7-61 Field Descriptions for the Modify Layer 2 Topology—General Tab 

Field
Description
Modify Layer 2 Topology

L2 Topology Name

Allows you to modify the name of the topology.

L2 Topology Alias

Allows you to modify the alias name of the topology.

Description

Allows you to modify the user-defined description of the topology.

L2 Topology Type

Display only. Displays the topology type (point-to-point, RPR, or 802.17 RPR).

L2 Topology Size

Display only. Displays the topology size.


Step 4 Click Apply to apply your settings or Reset to use the default settings.


Note A progress animator is displayed while the new settings are being applied.


Step 5 Click the Bandwidth tab to modify the settings in the following table, as required.


Note Prime Optical allows you to enter multiple CoS values that are the same. This is harmless and is consistent with the ML CLI, which allows the entry of multiple CoS values but sets only one value.


Table 7-62 Field Descriptions for the Modify Layer 2 Topology—Bandwidth Tab 

Field
Description
L2 Topology Bandwidth

The maximum bandwidth for 802.17 RPR topologies per circuit size is:

STS-1: 51840 kb/s

STS-3c: 155520 kb/s

STS-6c: 311040 kb/s

STS-9c: 466560 kb/s

STS-12c: 622080 kb/s

STS-24c: 1244160 kb/s

VC3: 48960 kb/s

VC4: 155520 kb/s

VC4-2c: 311040 kb/s

VC4-3c: 466560 kb/s

VC4-4c: 622080 kb/s

VC4-8c: 1244160 kb/s

Class A (for 802.17 RPR topologies)

Modify the traffic limit, in Mb/s, for Class A traffic. The range depends on the topology circuit size. For details, see "IEEE 802.17 RPR Base Card Configuration" in Cisco Prime Optical 9.6 ML Provisioning Methodology.

Class A1 (for 802.17 RPR topologies)

Modify the traffic limit, in Mb/s, for Class A1 traffic. The range depends on the topology circuit size. For details, see "IEEE 802.17 RPR Base Card Configuration" in Cisco Prime Optical 9.6 ML Provisioning Methodology.

Class B-CIR (for 802.17 RPR topologies)

Modify the traffic limit, in Mb/s, for Class B-CIR traffic. The range depends on the topology circuit size. For details, see "IEEE 802.17 RPR Base Card Configuration" in Cisco Prime Optical 9.6 ML Provisioning Methodology.

Fairness Mode (for 802.17 RPR topologies)

Display only. Aggressive fairness mode is applied on all of the ML cards participating in the 802.17 RPR topology. Aggressive rate fairness is responsive to rate adjustments to requests. Conservative rate fairness is not supported.

Protection Frame (for 802.17 RPR topologies)

Display only. Jumbo frame support is applied on all of the ML cards participating in the 802.17 RPR topology. Jumbo frame support is set at the ring level and carried in the attribute discovery messages.

Enable Multicast Group 1 (for point-to-point and RPR topologies)

Check the Enable Multicast Group 1 check box to enable the Multicast Group 1 bandwidth and Class of Service text boxes and display the default values for those text boxes.

Note The Enable Multicast Group 1 check box is checked by default during Layer 2 topology modification if you previously specified the multicast bandwidth parameters for the L2 topology (either during L2 topology creation or during the last modify operation), and you can modify the Multicast Group 1 and Class of Service text boxes. If the Multicast Group 1 and Class of Service text boxes were not configured when the Layer 2 topology was created (and hence these check boxes are unchecked by default), you can check the check box to configure the Multicast Group 1 and Class of Service text boxes for the group if required. To remove the priority multicast command already set for the topology, you can uncheck the check box and the command is removed from the card.

Multicast Group 1 (for point-to-point and RPR topologies)

Check the Enable Multicast Group 1 check box to enable the Multicast Group 1 bandwidth box. The default value (1%) is displayed. Edit this value as required. The valid range is from 1 to 95.

Class of Service (for point-to-point and RPR topologies)

Check the Enable Multicast Group 1 check box to enable the Class of Service box. The default value (4) is displayed. Edit this value as required. The valid range is from 0 to 7.

Enable Multicast Group 2 (for point-to-point and RPR topologies)

Check the Enable Multicast Group 2 check box to enable the Multicast Group 2 bandwidth and Class of Service text boxes and display the default values for those text boxes.

Note The Enable Multicast Group 2 check box is checked by default during Layer 2 topology modification if you previously specified the multicast bandwidth parameters for the L2 topology (either during L2 topology creation or during the last modify operation), and you can modify the Multicast Group 2 and Class of Service fields. If the Multicast Group 2 and Class of Service fields were not configured when the Layer 2 topology was created (and hence these check boxes are unchecked by default), you can check the check box to configure the Multicast Group 2 and Class of Service fields for the group if required. To remove the priority multicast command already set for the topology, you can uncheck the check box and the command is removed from the card.

Multicast Group 2 (for point-to-point and RPR topologies)

Check the Enable Multicast Group 2 check box to enable the Multicast Group 2 bandwidth box. The default value (1%) is displayed. Edit this value as required. The valid range is from 1 to 95.

Class of Service (for point-to-point and RPR topologies)

Check the Enable Multicast Group 2 check box to enable the Class of Service box. The default value (6) is displayed. Edit this value as required. The valid range is from 0 to 7.

Class Map Configuration

Low Latency Queue

Low Latency Queueing (LLQ) is used for latency/delay-sensitive traffic such as voice. On ML-series and CE-series cards, there is no limit on the bandwidth allocation of LLQ at the L2 topology level. It is limited only by input rate limiting of specific ports. Because some ports might be trusted (external CoS becomes internal CoS), Prime Optical does not know how much bandwidth might be used by LLQ, so it cannot reduce the calculated available bandwidth by the correct amount for the L2 topology. The actual available bandwidth allocation is the displayed available bandwidth value minus the amount (if any) that will be used for LLQ traffic.

For 802.17 RPR topologies, the LLQ value is not a percentage but a selectable value. Choose a, b, or c from the drop-down list to map low latency queuing to the selected service class. Choose None if you do not want to create the class map.

SP Management

Allows you to modify the bandwidth percentage used for the SP management traffic class. Values are 0 to 99. If the value is 0, Prime Optical does not set this value in the CLI for the cards participating in the topology.

For 802.17 RPR topologies, the SP Management value is not a percentage but a selectable value. Choose a, b, or c from the drop-down list to map SP management to the selected service class. Choose None if you do not want to create the class map.

Committed Rate

Allows you to modify the bandwidth percentage used for the CIR traffic class. Values are 0 to 99. If the value is 0, Prime Optical does not set this value in the CLI for the cards participating in the topology.

For 802.17 RPR topologies, the Committed Rate value is not a percentage but a selectable value. Choose a, b, or c from the drop-down list to map the committed rate to the selected service class. Choose None if you do not want to create the class map.

AVVID Control

Allows you to set the bandwidth percentage used for the AVVID control. Values are 0 to 99. If the value is 0, Prime Optical does not set this value in the CLI for the cards participating in the topology.

For 802.17 RPR topologies, the AVVID Control value is not a percentage but a selectable value. Choose a, b, or c from the drop-down list to map the AVVID control to the selected service class. Choose None if you do not want to create the class map.

Default Best Effort

Allows you to modify the default bandwidth percentage used for the best-effort traffic class. Values are 0 to 99. By default, Prime Optical does not allow you to proceed if you set this field to 0, and Prime Optical automatically assigns any remaining bandwidth as the best-effort bandwidth. For example, if you enter 0, Prime Optical automatically assigns 99 as the best-effort bandwidth.

For 802.17 RPR topologies, the Default Best Effort value is not a percentage but a selectable value. Choose a, b, or c from the drop-down list to map the default best effort to the selected service class. Choose None if you do not want to create the class map.

Available (Excluding LLQ)

(for point-to-point and RPR topologies)

Displays the available bandwidth.

CoS Commit

Committed CoS. This value is set when applying the base card configuration and the value is the same on all the cards in the topology. CoS values below this value are discard eligible.

Class of Service

Class of service for LLQ, SP management, CIR/PIR, and AVVID control types of traffic. The valid range is from 0 to 7.


Step 6 Click Apply to apply your settings or Reset to use the default settings.

Step 7 Click Close.


7.10.10  Filtering the Layer 2 Topology Table


Step 1 In the Domain Explorer window, choose Configuration > CTC-Based SONET NEs or CTC-Based SDH NEs > L2 Topology Table. The Layer 2 Topology table opens.

Step 2 Choose File > Filter (or click the Filter Data tool). The Filter dialog opens.

Step 3 Use the Filter dialog box to filter data according to criteria that you select and to display the results in the Layer 2 Topology table. The following table provides descriptions.

Step 4 After making your selections, click OK.


Table 7-63 Field Descriptions for the Layer 2 Topology Table Filter Dialog Box 

Tab
Description

L2 Topology Names

Displays the available topologies. Click Add and Remove to move topologies to and from the selected list. If you want to filter topologies and the name is not important, check the Ignore Topology Names check box.

L2 Topology Size

Allows you to filter topologies based on circuit size. Click All to include all circuit sizes in the filter.

L2 Topology Type

Allows you to filter topologies based on topology type. Click All to include all topology types in the filter.

L2 Topology State

Allows you to filter topologies based on circuit state (Complete or Incomplete). Click All to include all circuit states in the filter.


7.10.11  Modifying Ports in Layer 2 Topologies

Use the Modify Ports dialog box to modify Layer 2 topology endpoints.


Step 1 In the Domain Explorer window, choose Configuration > CTC-Based SONET NEs or CTC-Based SDH NEs > L2 Topology Table.

Step 2 In the Layer 2 Topology table, choose Configuration > Modify Ports. The Modify Ports dialog box opens. The following table provides descriptions.

Step 3 Configure the values in the NE/Slot and Enable/Disable Port areas as required.

Step 4 Click Apply. The new values are set on the selected card.


Note A progress animator is displayed while the new values are applied to the selected card.


Table 7-64 Field Descriptions for the Modify Ports Dialog Box 

Field
Description
NE/Slot Area

NE ID

Select an NE from the drop-down list.

Slot

Select an ML card slot number from the drop-down list.

Ether Tab

Port

Select the port number on the ML card.

State

Choose Enable to enable the port or Disable to disable the port.

MTU

Enter the maximum transmission unit (MTU) size. The valid range is from 64 to 9000. The default MTU size is 1500.

Speed

Select the speed from the drop-down list. Values are 10, 100, and auto. For an ML1000 card, auto is the only supported option.

Duplex

Select the Duplex value from the drop-down list. Values are full, half, and auto, based on the type of card selected. For example, for an ML1000 card, auto is the only supported option.

Flow Control (send)

Select the Flow Control (send) value from the drop-down list. Values are off, on, and desired. These values are supported by both Fast Ethernet and Gigabit Ethernet ports.

Flow Control (receive)

Select the Flow Control (receive) value from the drop-down list. Values are off, on, and desired. These values are supported by Gigabit Ethernet ports only.

CDP

Choose Enable to enable Cisco Discovery Protocol (CDP) on the ML100 or ML1000 card. Choose Disable to disable CDP on the ML-series card.

The CDP feature enables the ML card to send packets at regular intervals to discover other devices. CDP is used primarily to obtain protocol addresses of neighboring devices and discover the platform of those devices. CDP can also be used to show information about the interfaces that the router uses.

PoS Tab

Port

Select the port number on the ML card.

State

Choose Enable to enable the port or Disable to disable the port.

MTU

Enter an MTU size. The valid range is from 64 to 9000. The default MTU size is 1500.

Note You cannot set the MTU size on a PoS port for an RPR topology. MTU size for the PoS port can only be set for a PTP topology.

SPR Tab

Note The SPR tab is visible only when the Modify Ports dialog box is launched from an RPR port.

Port

Select the port number on the ML card.

MTU

Enter an MTU size for a PTP topology for the POS port. The valid range is from 64 to 9000. The default MTU size is 1500.

Note You cannot set the MTU size for an SPR interface for a PTP topology.


7.10.12  Inserting or Deleting a Card on an RPR Topology

This section describes how to add or remove a card on an existing RPR topology.


Note After an add or remove card operation, the new circuits are listed in the Circuit table and have the system time, rather than CTML2, appended to the circuit name and circuit alias.


7.10.12.1  Inserting a Card into an Existing RPR Topology


Note During the addition or removal of an ML-series card on an RPR topology, the POS interfaces of the circuits being deleted are automatically shut down before deletion. After the new circuits are created, the POS interfaces are automatically re-enabled. Shutting down the POS ports upon card insertion or removal ensures Layer 2 protection, so that traffic between all other cards is not lost.


Note Station IDs uniquely identify ML cards in the RPR ring. While inserting an ML card into an RPR topology (whose resynchronization state is Complete), the inserted ML card is assigned a station ID equal to the highest station ID in the existing RPR topology plus 1 (provided the highest station ID is less than or equal to 254). If the highest station ID is 254, unused station IDs in the topology less than 254 are used. The station ID of the ML card can be viewed in the Cisco IOS config file, within the interface SPR1 command block (applies only to an RPR topology). The following example shows a configuration snippet where the ML card is assigned a station ID of 1:

interface SPR1
no ip address
no keepalive
spr station-id 1
hold-queue 150 in
!


Step 1 Create a complete RPR topology. See Creating an RPR or 802.17 RPR Layer 2 Topology. The L2 Sync State of the topology must be Complete to add a new ML card.

Step 2 Take note of the card that will be added to the RPR topology.

Step 3 In the Domain Explorer window, choose Configuration > CTC-Based SONET NEs or CTC-Based SDH NEs > L2 Topology Table. The Layer 2 Topology table opens.

Step 4 In the Layer 2 Topology table, choose the appropriate L2 topology and choose Configuration > Add/Remove Card. The Add/Remove Card wizard opens. The following table provides descriptions.


Note The default circuit size for SONET and SDH is STS1 and VC4, respectively. During an add/remove card operation, if the topology size is equal to STS1 or VC4 for the new circuit segments to be provisioned, no warning message displays. However, if the topology size is greater than STS1 or VC4, and if all of the new circuit segments to be provisioned are equal to the default circuit size, a warning message displays.


Table 7-65 Field Descriptions for the Add/Remove Card Wizard 

Field
Description
Navigation Pane

The navigation pane on the left side of the wizard tells you where you are in the process of adding or removing cards. You can use the navigation pane to jump quickly from one task to the next, or to an already visited task.

Using the navigation pane is faster than using the Back and Next buttons, because you can jump over multiple panes in one step versus clicking Back or Next and moving through the panes sequentially.

Tip As you proceed through the wizard, the panes you have visited are highlighted in white and identified by a number.
Layer 2 Topology Information

L2 Topology Name

Displays the name of the selected L2 topology.

Description

Enter a description for the new topology.

L2 Topology Type

Select the type of topology you want to create (point-to-point or RPR).

Note The contents of subsequent wizard panes are dependent on the Topology Type selected.

L2 Topology Size

Select the topology size. When the size of the circuit underneath is not the same, the value is Mixed.

Operation Type Selection

Add Card

Click this radio button to add a card.

Note The insertion of a card results in one circuit being deleted from the existing RPR and two new circuits being created.

Remove Card

Click this radio button to remove a card.

Note The deletion of a card results in two circuits being deleted from the existing RPR and one new circuit being created.

Add Card Selection

Available Cards

Select a card from the list and click Add to add it to the Selected Cards list.

Selected Cards

Displays the card selected for the Layer 2 topology. Select a card and click Remove to remove it from the Selected Cards list.

Remove Card Selection

Configured Cards

Select a card from the list and click Add to add it to the Deleted Cards list.

Deleted Cards

Displays the card selected for the Layer 2 topology. Select a card and click Remove to remove it from the Deleted Cards list.

Delete Circuit Segment Info

Src NE

Displays the ID of the NE selected as the source node.

Src Slot

Displays the ID of the source slot.

Src Port

Displays the ID of the source port.

Dest NE

Displays the ID of the NE selected as the destination node.

Dest Slot

Specify the destination slot.

Dest Port

Displays the ID of the destination port.

Circuit Type

Specify the type of circuit: STS and STS-v for SONET NEs; VC_HO_PATH_VCAT_CIRCUIT, VC_HO-v, VC_LO_PATH_VCAT_CIRCUIT, and VC_LO-v for SDH NEs.

Circuit Size

Specify the size of the circuit. STS circuit sizes are STS-1, STS-3c, STS-6c, STS-9c, STS-12c, and STC-24c.

SDH circuit sizes are VC3, VC4, VC4-2c, VC4-3c, VC4-4c, and VC4-8c.

Route Type

Select Auto to route automatically or Manual to route manually.

Status

Displays the circuit segment status information.

Inserted Circuit Segment Info

Src NE

Displays the ID of the NE selected as the source node.

Src Slot

Displays the ID of the source slot.

Src Port

Displays the ID of the source port.

Dest NE

Displays the ID of the NE selected as the destination node.

Dest Slot

Specify the destination slot.

Dest Port

Displays the ID of the destination port.

Circuit Type

Specify the type of circuit: STS and STS-v for SONET NEs; VC_HO_PATH_VCAT_CIRCUIT, VC_HO-v, VC_LO_PATH_VCAT_CIRCUIT, and VC_LO-v for SDH NEs.

Circuit Size

Specify the size of the circuit. STS circuit sizes are STS-1, STS-3c, STS-6c, STS-9c, STS-12c, and STC-24c.

SDH circuit sizes are VC3, VC4, VC4-2c, VC4-3c, VC4-4c, and VC4-8c.

Route Type

Select Auto to route automatically or Manual to route manually.

Status

Displays the circuit segment status information.

Routing Preferences

Route Automatically

Allows you to enable or disable automatic route selection. If enabled, Prime Optical automatically determines the route for the circuit. If the source and destination of the circuit are on the same node, automatic routing is enabled. If disabled, you can specify the spans associated with the circuit. Under the Manual Route area, the Graphical radio button is selected by default.

Auto Route

Using Required Nodes/Links—(Available only if Route Automatically is checked) If checked, Prime Optical automatically routes the circuit through the required nodes and/or links.

Review Route Before Creation—(Available only if Route Automatically is checked) Check this check box to review the route before it is created.

VT-DS3 Mapper Conversion—(Available only if Route Automatically is checked) If checked, you can route the circuit using the DS3XM12 card.

Time Slot Restriction

If checked, you can enter an STS/VC4 value (to be used end-to-end) that Prime Optical uses to automatically determine the route for the circuit. Circuit creation fails if the same STS/VC4 is not available end-to-end. If circuit creation fails, you can try again using different values. The valid range is from 1 to 192 for SONET, or from 1 to 64 for SDH networks.

Note Time Slot Restriction is not available for OCHCC and OCHNC circuit creation types.

Note For VCAT circuits, you must enter multiple STS/VC4 values in the Member Preferences table > Time Slot Restriction field. The STS/VC4 values that you enter in the Time Slot Restriction field cannot be identical, or circuit creation will fail with an error message.

Fully Protected Path

If selected, Prime Optical ensures that the circuit is fully protected. You can provision the circuit in a UPSR DRI topology by checking Dual Ring Interconnect. Alternatively, if the circuit must pass across unprotected links, Prime Optical creates a primary and alternate circuit route (virtual UPSR) based on the following node diversity specifications:

Required—Ensures that the primary and alternate paths of the UPSR portions of the complete circuit path are node-diverse.

Desired—Prime Optical attempts node diversity. If node diversity is impossible, Prime Optical uses primary and alternate paths that are link-diverse for the UPSR portions of the complete circuit path.

Don't Care: Link Diverse Only—Prime Optical creates primary and alternate paths that are link-diverse for the UPSR portions of the complete circuit path. The paths might be node-diverse, but Prime Optical does not check for node diversity.

Node-Diverse Path

Required—Ensures that the primary and alternate paths of the UPSR portions of the complete circuit path are node-diverse.

Desired—Prime Optical attempts node diversity. If node diversity is impossible, Prime Optical uses primary and alternate paths that are link-diverse for the UPSR portions of the complete circuit path.

Don't Care: Link Diverse Only—Prime Optical creates primary and alternate paths that are link-diverse for the UPSR portions of the complete circuit path. The paths might be node-diverse, but Prime Optical does not check for node diversity.

Protection Channel Access

To route the circuit on a BLSR protection channel, if available, uncheck the Fully Protected Path check box, and check the Protection Channel Access check box.

Dual Ring Interconnect

If you selected Fully Protected Path and the circuit will be routed on a UPSR DRI, check the Dual Ring Interconnect check box.

Note For DRI and iDRI manually created circuits, you must double-click the DRI span for it to become DRI. A single-click does not enable the DRI span.

Diverse Shared Risk Link Group (SRLG)

If checked, fully protected circuits are routed through working and protected links that do not share risk groups.

Circuit Summary

Summarizes the selections you made in the wizard panes. To change the circuit summary, click Back and change your selection(s).

Manual Provisioning

Links/Nodes

Selected Node—Select the links/nodes in the graphic to populate the selected node field.

Tip Use the arrows to expand or reduce the graphical area, if required.

Spans

Available Spans—Lists the available spans. Span information includes:

From—Start point of the span

To—Endpoint of the span

Source STS

VT

DRI Span

Selected Spans—Click Add to add the selected spans to the Selected Spans list or click Remove to remove spans from the Selected Spans list.


Step 5 Click the Add Card radio button to add a card or click the Remove Card radio button to remove a card from the selected L2 topology.


Tip Fields highlighted in white in the Add/Remove Card wizard can be configured; those highlighted in gray cannot be selected or configured.


Step 6 Click Next.

Step 7 In the Add Card Selection pane, select a card from the list and click Add to add it to the Selected Cards list.

Step 8 Use the Up or Down arrows to move cards up or down according to the spans.

Step 9 Click Next. In the Delete Circuit Segment Info pane, the circuit to be deleted is displayed.

Step 10 Click Yes to continue. The Deleting Circuits dialog box opens, confirming that the circuits are being deleted.

The Insert Circuit Segment Info pane opens, displaying the circuits on the L2 topology that will exist after adding or removing the card. Circuits with a white background must be created to complete the add or remove operation.


Note For an IEEE 802.17 RPR, the sizes of the new circuits must be compatible with the values assigned to the A, A1, and B-CIR traffic classes in the base card configuration of the L2 topology. For details, see "IEEE 802.17 RPR Base Card Configuration" in Cisco Prime Optical 9.6 ML Provisioning Methodology.


Step 11 Click Next. A dialog box opens, confirming POS port shutdown on circuits being deleted and circuit deletion. Click Yes to continue.

Step 12 If you specified the route type for a specific segment as Auto, continue to Step 14. If you specified the route type for a specific segment as Manual, continue to Step 15. If you selected to route the entire RPR automatically, complete the following information:

Fully Protected Layer 1—If selected, Prime Optical ensures that the circuit is fully protected. You can provision the circuit if the circuit must pass across unprotected links. Prime Optical creates a primary and alternate circuit route (virtual UPSR) based on the following node diversity specifications:

Required—Prime Optical ensures that the primary and alternate paths within the UPSR portions of the complete circuit path are node-diverse.

Desired—Prime Optical attempts node diversity. If node diversity is impossible, Prime Optical uses primary and alternate paths that are link-diverse for the UPSR portions of the complete circuit path.

Don't Care: Link Diverse Only—Prime Optical creates primary and alternate paths that are link-diverse for the UPSR portions of the complete circuit path. The paths might be node-diverse, but Prime Optical does not check for node diversity.

Protection Channel Access—If Fully Protected Layer 1 is not selected, enable PCA to route the circuit on a BLSR protection channel.

Step 13 If you specified the route type for a specific segment as Manual, continue to Step 15. If you selected to route the entire RPR automatically, continue to Step 16. If you specified the route type for a specific segment as Auto, complete the following information:

a. Using Required Nodes/Links—Check this check box to let Prime Optical automatically route the circuit through the required nodes and/or links.

b. Review Route Before Creation—Check this check box to review the route before it is created.

c. Fully Protected Layer 1—If selected, Prime Optical ensures that the circuit is fully protected. You can provision the circuit if the circuit must pass across unprotected links. Prime Optical creates a primary and alternate circuit route (virtual UPSR) based on the following node diversity specifications:

Required—Prime Optical ensures that the primary and alternate paths within the UPSR portions of the complete circuit path are node-diverse.

Desired—Prime Optical attempts node diversity. If node diversity is impossible, Prime Optical uses primary and alternate paths that are link-diverse for the UPSR portions of the complete circuit path.

Don't Care: Link Diverse Only—Prime Optical creates primary and alternate paths that are link-diverse for the UPSR portions of the complete circuit path. The paths might be node-diverse, but Prime Optical does not check for node diversity.

d. Protection Channel Access—If Fully Protected Layer 1 is not selected, enable PCA to route the circuit on a BLSR protection channel. Once you enable PCA, a label reading PCA will appear on the link.

e. Click Next to specify the route constraints (available when Route Automatically and Using Required Nodes/Links are enabled):

Src NE ID—Display only.

Dest NE ID—Display only.

Nodes—Click this radio button if you want to add nodes to the route.

Links—Click this radio button if you want to add links to the route; then, choose Current NE ID, Adj NE ID, or Available Links.

f. Click Include to add the selected node or link to the route constraint, or Exclude to remove the selected node or link from the route constraint.

g. If the Review Route Before Creation check box (available when Route Automatically and Review Route before Creation are enabled) is checked and there are more segments for which you need to specify the routing information, click Next. RPR circuit segment details are displayed.

Step 14 If you specified the route type for a specific segment as Manual, complete the following information:

a. Fully Protected Layer 1—If selected, Prime Optical ensures that the circuit is fully protected. You can provision the circuit if the circuit must pass across unprotected links. Prime Optical creates a primary and alternate circuit route (virtual UPSR) based on the following node diversity specifications:

Required—Prime Optical ensures that the primary and alternate paths within the UPSR portions of the complete circuit path are node-diverse.

Desired—Prime Optical attempts node diversity. If node diversity is impossible, Prime Optical uses primary and alternate paths that are link-diverse for the UPSR portions of the complete circuit path.

Don't Care: Link Diverse Only—Prime Optical creates primary and alternate paths that are link-diverse for the UPSR portions of the complete circuit path. The paths might be node-diverse, but Prime Optical does not check for node diversity.

b. Protection Channel Access—If Fully Protected Layer 1 is not selected, enable PCA to route the circuit on a BLSR protection channel. Once you enable PCA, a label reading PCA will appear on the link.

c. Click Next to specify the following information:

Source Node—Displays the source node.

Destination—Displays the destination node.

Current Node—Displays the current node.

Adj NEID—Select the adjacent NE ID from the drop-down list.

Available Links—Select a link from the drop-down list.

d. Select the span from the Available Spans area. Span information includes:

From—Start point of the span.

To—Endpoint of the span.

Source—Select the source (STS for SONET NEs; VC4 for SDH NEs) from the drop-down list.

e. Click Add to add the span to the Selected Spans list. Click Remove to remove spans from the Selected Spans list.

f. Click Next Hop to specify links and nodes for the next hop. Complete substeps a through c for each hop.

g. Click Reset to reset link and node information.

h. Click Alternate Route to provision an alternate route.

i. If there are more segments for which you need to specify the routing information, click Next. The Inserted Circuit Segments Info pane appears.

Step 15 Repeat Step 12 through Step 14 until all required circuits are created.

Step 16 Click Finish to add the new card. An Enabling POS Ports confirmation dialog box opens, and a "no shut" is performed on the POS ports, which are shut down and then re-enabled. The Add/Remove Card wizard closes and you are returned to the Layer 2 Topology table.


7.10.12.2  Removing a Card from an Existing RPR Topology

To remove an ML card from a topology, at least two other ML cards must be part of the topology, because a valid topology has endpoints on at least two different NEs. For example, if you have two ML cards on a single NE, an L2 topology cannot be created across the two ML cards. If you have a topology with three ML cards (two cards on one NE and a third card on another NE), removal of the third card from the topology is not a valid operation because it reduces the number of NEs from two to one.


Note During the addition or removal of an ML-series card to or from an RPR topology, the POS interfaces of the circuits being deleted are automatically shut down before deletion. After the new circuits are created, the POS interfaces are automatically re-enabled. Shutting down the POS ports upon card insertion or removal ensures Layer 2 protection, so that traffic between all other cards is not lost.


Step 1 Create a complete RPR topology. See Creating an RPR or 802.17 RPR Layer 2 Topology. The L2 service resynchronization status of the topology must be Complete to remove an ML card.

Step 2 Take note of the card that will be removed from the RPR topology.

Step 3 In the Domain Explorer window, choose Configuration > CTC-Based SONET NEs or CTC-Based SDH NEs > L2 Topology Table. The Layer 2 Topology table opens.

Step 4 In the Layer 2 Topology table, select the appropriate L2 topology and choose Configuration > Add/Remove Card. The Add/Remove Card wizard opens. Table 7-65 describes the fields in the wizard.

Step 5 Click the Remove Card radio button to remove a card from the selected L2 topology.


Tip Fields highlighted in white in the Add/Remove Card wizard can be configured; those highlighted in gray cannot be selected or configured.


Step 6 Click Next.

Step 7 In the Remove Card Selection pane, select a card in the list and click Add to add it to the Deleted Cards list.

Step 8 Click Next. In the Delete Circuit Segment Info pane, the circuit that will be deleted is displayed.

Step 9 Click Next.

Step 10 In the Insert Circuit Segments Info pane, make your selections, as required.


Note In case of an IEEE 802.17 RPR, the sizes of the new circuits must be compatible with the values assigned to the class A, class A1, and class B-CIR traffic classes in the base card configuration of the L2 topology. For details, see "IEEE 802.17 RPR Base Card Configuration" in Cisco Prime Optical 9.6 ML Provisioning Methodology.


Step 11 Click Next. A dialog box opens; click Yes to confirm circuit deletion. The Deleting Circuits dialog box opens, confirming that the circuits are being deleted.

Step 12 The Insert Circuit Segment Info pane opens, displaying the circuits on the L2 topology that will exist after removing the card. Circuits with a white background must be created to complete the operation. When Next is clicked, the POS ports on the circuit are shut down and the circuit is deleted.

Step 13 If you specified the route type for a specific segment as Auto, continue to Step 14. If you specified the route type for a specific segment as Manual, continue to Step 15. If you selected to route the entire RPR automatically, complete the following information:

Fully Protected Layer 1—If selected, Prime Optical ensures that the circuit is fully protected. You can provision the circuit if it must pass across unprotected links. Prime Optical creates a primary and alternate circuit route (virtual UPSR) based on the following node diversity specifications:

Required—Prime Optical ensures that the primary and alternate paths within the UPSR portions of the complete circuit path are node-diverse.

Desired—Prime Optical attempts node diversity. If node diversity is impossible, Prime Optical uses primary and alternate paths that are link-diverse for the UPSR portions of the complete circuit path.

Don't Care: Link Diverse Only—Prime Optical creates primary and alternate paths that are link-diverse for the UPSR portions of the complete circuit path. The paths might be node-diverse, but Prime Optical does not check for node diversity.

Protection Channel Access—If Fully Protected Layer 1 is not selected, enable PCA to route the circuit on a BLSR protection channel.

Step 14 If you specified the route type for a specific segment as Manual, continue to Step 15. If you selected to route the entire RPR automatically, continue to Step 16. If you specified the route type for a specific segment as Auto, complete the following information:

a. Using Required Nodes/Links—Check this check box to let Prime Optical automatically route the circuit through the required nodes and/or links.

b. Review Route Before Creation—Check this check box to review the route before it is created.

c. Fully Protected Layer 1—If selected, Prime Optical ensures that the circuit is fully protected. You can provision the circuit if the circuit must pass across unprotected links. Prime Optical creates a primary and alternate circuit route (virtual UPSR) based on the following node diversity specifications:

Required—Prime Optical ensures that the primary and alternate paths within the UPSR portions of the complete circuit path are node-diverse.

Desired—Prime Optical attempts node diversity. If node diversity is impossible, Prime Optical uses primary and alternate paths that are link-diverse for the UPSR portions of the complete circuit path.

Don't Care: Link Diverse Only—Prime Optical creates primary and alternate paths that are link-diverse for the UPSR portions of the complete circuit path. The paths might be node-diverse, but Prime Optical does not check for node diversity.

d. Protection Channel Access—If Fully Protected Layer 1 is not selected, enable PCA to route the circuit on a BLSR protection channel.

e. Click Next to specify the route constraints (available when Route Automatically and Using Required Nodes/Links are enabled):

Src NE ID—Display only.

Dest NE ID—Display only.

Nodes—Click this radio button to add nodes to the route.

Links—Click this radio button to add links to the route; then, choose Current NE ID, Adj NE ID, or Available Links.

f. Click Include to add the selected node or link to the route constraint, or Exclude to remove the selected node or link from the route constraint.

g. If the Review Route Before Creation check box (available when Route Automatically and Review Route before Creation are enabled) is checked and there are more segments for which you need to specify the routing information, click Next. RPR circuit segment details are displayed.

Step 15 If you specified the route type for a specific segment as Manual, complete the following information:

a. Fully Protected Layer 1—If selected, Prime Optical ensures that the circuit is fully protected. You can provision the circuit if the circuit must pass across unprotected links. Prime Optical creates a primary and alternate circuit route (virtual UPSR) based on the following node diversity specifications:

Required—Prime Optical ensures that the primary and alternate paths within the UPSR portions of the complete circuit path are node-diverse.

Desired—Prime Optical attempts node diversity. If node diversity is impossible, Prime Optical uses primary and alternate paths that are link-diverse for the UPSR portions of the complete circuit path.

Don't Care: Link Diverse Only—Prime Optical creates primary and alternate paths that are link-diverse for the UPSR portions of the complete circuit path. The paths might be node-diverse, but Prime Optical does not check for node diversity.

b. Protection Channel Access—If Fully Protected Layer 1 is not selected, enable PCA to route the circuit on a BLSR protection channel.

c. Click Next to specify the following information:

Source Node—Displays the source node.

Destination—Displays the destination node.

Current Node—Displays the current node.

Adj NEID—Select the adjacent NE ID from the drop-down list.

Available Links—Select a link from the drop-down list.

d. Select the span from the Available Spans area. Span information includes:

From—Start point of the span.

To—Endpoint of the span.

Source STS.

e. Click Add to add the span to the Selected Spans list. Click Remove to remove spans from the Selected Spans list.

f. Click Next Hop to specify links and nodes for the next hop. Complete substeps a through c for each hop.

g. Click Reset to reset link and node information.

h. Click Alternate Route to provision an alternate route.

i. If there are more segments for which you need to specify the routing information, click Next. The Inserted Circuit Segments Info pane opens.

Step 16 Click Finish to remove the card. An Enabling POS Ports confirmation dialog opens, and a "no shut" is performed on the POS ports, which are shut down and then re-enabled. The Add/Remove Card wizard closes and you are returned to the Layer 2 Topology table.


7.10.13  Layer 2 Service Management Tasks

VLAN service is a collection of bridge groups within a Layer 2 topology. It can span multiple ML-series cards on a particular Layer 2 topology. In a point-to-point topology, no Layer 2 configuration is done on E-series, G-series, ML-100T-8, CE-100T-8, or OC-N cards. In an RPR topology, a VLAN can span the entire ring.

You can configure a VLAN service that consists of multiple service drops (Ethernet drops). Each service drop is classified according to:

Port type—NNI or UNI

Connection type—Dot1Q, QinQ, or Untagged

In a VLAN service, the recommended mix of port type and connection type is as follows:

UNI QinQ and NNI Dot1Q

UNI Dot1Q, UNI Untagged, and NNI Dot1Q

The following table summarizes the service drop configurations and associated parameters.

Table 7-66 Summary of Service Drop Configurations 

Port Type
Connection Type
Port VLAN ID
Layer 2 Tunneling
(stp, cdp, vtp)
Mode
(Dot1Q tunnel)
Encap
(Dot1Q)

UNI

Dot1Q

1-4093

Yes

NNI

Dot1Q

Service Provider VLAN ID

Yes

UNI

Untagged

UNI

QinQ

Yes

Yes


Use the following procedures to manage Layer 2 services:

Creating a Layer 2 Service

Showing a Layer 2 Service

Modifying a Layer 2 Service

Filtering the L2 Services Table

Deleting a Layer 2 Service

Showing an IP SLA

Creating an IP SLA

Enabling an IP SLA

Deleting an IP SLA

Restarting an IP SLA

Enabling or Disabling PM Data Collection for Each Drop Port

Viewing the L2 Service Drop Ports Table

Filtering the L2 Service Drop Ports Table

Creating L2 Service Drops

Deleting L2 Service Drops

Modifying L2 Service Drops

Viewing the QoS for Layer 2 Service Drop Port Table

Configuring a Layer 2 Service Resynchronization

7.10.13.1  Creating a Layer 2 Service

Use the Create Layer 2 Service wizard to create a new Layer 2 service.


Note Before creating a Layer 2 service, be sure that the topology state and the Layer 2 service resynchronization state are both Complete in the Layer 2 Topology table. See Viewing the Layer 2 Topology Table.


Step 1 In the Domain Explorer window, choose Configuration > CTC-Based SONET NEs or CTC-Based SDH NEs > L2 Topology Table. The Layer 2 Topology table opens.

Step 2 In the Layer 2 Topology table, select the topology on which to create the Layer 2 service.

Step 3 Choose Configuration > Create L2 Service. The Create Layer 2 Service wizard opens. The following table provides descriptions.

Table 7-67 Field Descriptions for the Create Layer 2 Service Wizard 

Field
Description
L2 Service Information

Layer 2 Topology Name

The name of the topology on which the Layer 2 service is created.

Service Provider VLAN ID

A unique number in a topology that is used to represent the VLAN. The valid range for service provider VLAN IDs is 1 to 4093. By default, the first VLAN number is displayed as 2, because VLAN 1 is an administration VLAN. You can change the default value and create VLAN 1, if it is available.

Managed VLAN

If checked, allows you to create a managed VLAN for an IP SLA.

Customer Information

Customer ID

The unique identification number of the customer for whom the Layer 2 service is being created.

Service ID

The service identification number of the customer for whom the Layer 2 service is being created.

Layer 2 Service Summary

Summarizes the selections you made in the wizard panes. To change the L2 service summary, click Back and change your selection(s).

Selected Drops (Node/Slot/Port)

The drop ports selected in the L2 Service Drop Ports table.

L2 Service Drops Selection

NE ID

Select the user-defined name of the selected NE.

Available L2 Service Drops

Slot

The ML-series card slot number.

Type

The ML-series card type.

Port

The port number on the ML-series card:

If the port number is preceded by C, it refers to the port number of the port channel interface.

If the port number is preceded by P, it refers to the port number of the Ethernet interface.

Port Type

The available port type—UNI, NNI, or Any. If both UNI and NNI port types are available, Any is displayed.

Connection Type

The connection type—QinQ, dot1q, Untagged, or Any. For the UNI port type, connection types are QinQ, dot1q, and Untagged. For the NNI port type, only the dot1q connection type is allowed. If all types are available, this field is shown as Any.

Selected L2 Service Drops

NE ID

The user-defined name of the selected NE.

Slot

The ML-series card slot number.

Type

Displays the ML-series card type—ML100 or ML1000.

Port

The port number on the ML-series card:

If the port number is preceded by C, it refers to the port number of the port channel interface.

If the port number is preceded by P, it refers to the port number of the Ethernet interface.

Port Type

The available port type—UNI, NNI, or Any. If both UNI and NNI port types are available, Any is displayed.

Connection Type

The connection type—QinQ, dot1q, Untagged, or Any. For the UNI port type, connection types are QinQ, dot1q, and Untagged. For the NNI port type, only the dot1q connection type is allowed. If all types are available, this field is shown as Any.

Add/Remove

Click Add to add the selected drop from the Available Layer 2 Service Drops list to the Selected L2 Service Drops list. Click Remove to remove drops from the Selected L2 Service Drops list.

Service Drops Configuration > Service Drops tab

Apply QoS Parameters to All UNI Ports

When selected, the quality of service (QoS) parameters specified in the QoS Parameters screen are applied to all the drops.

RSTP Enable

When checked, Rapid Spanning Tree Protocol (RSTP) is enabled for the VLAN.

NE ID

The user-defined name of the selected NE.

Slot

The slot number of the ML-series card.

Type

The ML-series card type.

Port

The port number on the ML-series card:

If the port number is preceded by C, it refers to the port number of the port channel interface.

If the port number is preceded by P, it refers to the port number of the Ethernet interface.

Enable

Used to enable or disable the drop port. When checked, the drop port is enabled.

Port Type

The port type—UNI or NNI.

Connection Type

The connection type. For the UNI port type, the connection type is QinQ, dot1q, or Untagged. For the NNI port type, only the NNI connection type is permitted.

Port VLAN ID

The port VLAN ID used for dot1q drops. By default, the NNI dot1q drop is populated with the SP VLAN ID.

CoS Accounting

When checked, the collection of CoS PM on a VLAN service drop is enabled.

RSTP

When checked, RSTP is enabled. This checkbox is enabled only when you configure a dot1q drop of the VLAN.

QoS Parameters

Match Any

Matches all the traffic. When selected, all other fields (DSCP, IP Precedence, and CoS) are disabled.

Match DSCP

Matches the DSCP value. The valid range is from 0 to 63.

DSCP Value

Displays the DSCP value.

Match IP

Matches the IP value. The valid range is from 0 to 7.

IP Value

Displays the IP value.

Match CoS

Matches the CoS value. The valid range is from 0 to 7.

CoS Value

Displays the CoS value.

AND/OR

Selecting AND/OR indicates Match All and Match Any of the traffic classifications, respectively.

The QoS profiles that are created with AND criteria are applied to dot1Q and QinQ and untagged (subinterface). For AND and OR criteria, a single value is allowed on CoS, DSCP, and IP Precedence.

Selecting OR indicates Match Any of the traffic classifications (Match DSCP, Match IP Precedence, or Match CoS), respectively.

The QoS profiles that are created with the OR criteria are not applied to dot1Q (subinterface).

CIR Type

Displays the CIR type.

Committed Rate

Displays the committed traffic rate value.

Committed Burst Size

Displays the committed burst size.

CIR CoS Type

Committed traffic CoS type (Trust or CoS Marked).

CIR CoS Value

Committed traffic CoS value. The valid range is from 0 to 7.

Excess Action

Excess traffic action type (Discard or Allow).

Peak Rate

Displays the peak traffic rate value.

Peak Burst Size

Displays the peak traffic burst value.

PIR CoS Type

Displays the peak traffic CoS type (Trust or CoS Marked).

PIR CoS Value

Displays the peak traffic CoS value. The valid range is from 0 to 7.

Violate Action

Displays the violate traffic action type (Discard or Allow).

Violate CoS

Displays the violate traffic CoS type (Trust or CoS Marked).

Violate CoS Value

Displays the violate traffic CoS value. The valid range is from 0 to 7.

Best Effort Type

Displays the best-effort traffic type (Line-Rate or Rate-Limited).

Max Rate

Displays the maximum rate value.

Max Burst Size

Displays the maximum burst value.

Service Drops Configuration > Port Attributes

NE ID

Select a user-defined NE name from the drop-down lists.

Slot

Select the ML card slot number from the drop-down lists.

Type

Displays the ML-series card type—ML100 or ML1000.

Port

Select the port number on the ML card. The port number is preceded by P, which indicates an Ethernet port.

MTU

Enter an MTU size. The valid range is from 64 to 9000. The default value is 1500.

Speed

Select the speed from the drop-down list. The Speed drop-down list displays three values: 10, 100, and auto. For an ML1000 card, auto is the only supported option.

Duplex

Select the Duplex value from the drop-down list. The Duplex drop-down list displays three values: full, half, and auto, based upon the type of card selected. For example, for an ML1000 card, auto is the only supported option.

Flow Control (send)

Select the Flow Control (send) value from the drop-down list. The Flow Control (send) drop-down box displays three values: off, on, and desired. These values are supported by both the Fast Ethernet and Gigabit Ethernet ports.

Flow Control (receive)

Select the Flow Control (receive) value from the drop-down list. The Flow Control (receive) drop-down box displays three values: off, on, and desired. These values are supported by the Gigabit Ethernet ports only.

Service Drops Configuration > IP SLA

NE ID

Displays the NE ID.

Slot

Displays the slot number of the ML-series card.

Type

Displays the type of ML-series card.

IP Address

Displays the IP address of the NE.

Subnet

Displays the subnetwork mask ID of the NE.

Protocol

Displays the protocol.

QoS Parameters > Profile

Load from QoS Profile

Select the QoS profile from the list displayed. See Creating QoS Profiles for details on how to create a QoS profile.

Note The remainder of the QoS parameters displayed on this tab are described earlier in this table.

Match Any

Matches all the traffic. When selected, all other fields (DSCP, IP Precedence, and CoS) are disabled.

Match DSCP

Matches the DSCP value. The valid range is from 0 to 63.

DSCP Value

Displays the DSCP value.

Match IP

Matches the IP value. The valid range is from 0 to 7.

IP Value

Displays the IP value.

Match CoS

Matches the CoS value. The valid range is from 0 to 7.

CoS Value

Displays the CoS value.

AND/OR

Selecting AND/OR indicates Match All and Match Any of the traffic classifications, respectively.

The QoS profiles that are created with AND criteria are applied to dot1Q and QinQ and untagged (subinterface). For AND and OR criteria, a single value is allowed on CoS, DSCP, and IP Precedence.

Selecting OR indicates Match Any of the traffic classifications (Match DSCP, Match IP Precedence, or Match CoS), respectively.

The QoS profiles that are created with the OR criteria are not applied to dot1Q (subinterface).

CIR Type

Displays the CIR type.

Committed Rate

Displays the committed traffic rate value.

Committed Burst Size

Displays the committed burst size.

CIR CoS Type

Committed traffic CoS type (Trust or CoS Marked).

CIR CoS Value

Committed traffic CoS value. The valid range is from 0 to 7.

Excess Action

Excess traffic action type (Discard or Allow).

Peak Rate

Displays the peak traffic rate value.

Peak Burst Size

Displays the peak traffic burst value.

PIR CoS Type

Displays the peak traffic CoS type (Trust or CoS Marked).

PIR CoS Value

Displays the peak traffic CoS value. The valid range is from 0 to 7.

Violate Action

Displays the violate traffic action type (Discard or Allow).

Violate CoS

Displays the violate traffic CoS type (Trust or CoS Marked).

Violate CoS Value

Displays the violate traffic CoS value. The valid range is from 0 to 7.

Best Effort Type

Displays the best-effort traffic type (Line-Rate or Rate-Limited).

Max Rate

Displays the maximum rate value.

Max Burst Size

Displays the maximum burst value.

QoS Parameters > Custom QoS

Load from QoS Profile

Select the QoS profile from the list displayed. See Creating QoS Profiles for details on how to create a QoS profile.

Note The remainder of the QoS parameters displayed on this tab are described earlier in this table.

Policing > Classification

Match Any

Matches all the traffic. When selected, all other fields (DSCP, IP Precedence, and CoS) are disabled.

Match DSCP

Matches the DSCP value. The valid range is from 0 to 63.

Match IP Precedence

Matches the IP precedence value. The valid range is from 0 to 7.

Match CoS

Matches the CoS value. The valid range is from 0 to 7.

AND

Selecting AND indicates Match All and Match Any of the traffic classifications, respectively.

The QoS profiles that are created with AND criteria are applied only to dot1Q (subinterface). For AND criteria only, a single value is allowed on CoS, DSCP, and IP Precedence.

OR

Selecting OR indicates Match Any of the traffic classifications (Match DSCP, Match IP Precedence, or Match CoS), respectively.

The QoS profiles that are created with the OR criteria are not applied to dot1Q (subinterface).

Policing > Committed Traffic

Line Rate

Rate and burst of the Ethernet port are applicable.

Rate Limited

User-specified rate and burst limits are applicable.

Committed Rate

Displays the committed rate.

Committed Burst Size

Displays the committed burst size.

Policing > Committed Traffic > Committed CoS Marking

Trust

CoS transmit value set to 0.

Mark CoS

The Layer 2 Mark CoS value entered. The valid range is from 0 to 7.

Policing > Excess Traffic

Discard

Excess traffic action should be set to "drop."

Allow

Excess traffic with CoS, as marked by the user, is transmitted.

Peak Rate

Peak rate value.

Peak Burst

Peak burst value.

Policing > Excess Traffic > Excess CoS Marking

Trust

CoS transmit value set to 0.

Mark CoS

The Layer 2 Mark CoS value entered. The valid range is from 0 to 7.

Policing > Violations

Discard

Excess traffic action should be set to "drop."

Allow

Excess traffic with CoS, as marked by the user, is transmitted.

Policing > Violations > Violations CoS Marking

Trust

CoS transmit value set to 0.

Mark CoS

The Layer 2 Mark CoS value entered. The valid range is from 0 to 7.

Policing > Best Effort

Line Rate

Rate and burst of the Ethernet port are applicable.

Rate Limited

User-specified rate and burst limits are applicable.

Max Rate

The maximum rate value.

Max Burst

The maximum burst value.

Policing > Best Effort > Best Effort CoS Marking

Trust

CoS transmit value set to 0.

Mark CoS

The Layer 2 Mark CoS value entered. The valid range is from 0 to 7.

Service Drops Configuration > Service Drops > Service Drops area

Apply QoS Parameters to All UNI Ports

When selected, the QoS parameters specified in the QoS Parameters screen are applied to all the drops.

RSTP Enable

When checked, RSTP is enabled.

NE ID

The user-defined name of the selected NE.

Slot

Information about the slot.

Type

Displays the ML-series card type.

Port

The port number on the ML-series card:

If the port number is preceded by C, it refers to the port number of the port channel interface.

If the port number is preceded by P, it refers to the port number of the Ethernet interface.

Enable

Used to enable or disable the drop port. When checked, the drop port is enabled.

Port Type

The port type—UNI or NNI.

Connection Type

The connection type. For the UNI port type, the connection type is QinQ, dot1q, or Untagged. For the NNI port type, only the NNI connection type is permitted.

Port VLAN ID

The port VLAN ID used for dot1q drops. By default, the NNI dot1q drop is populated with the service provider VLAN ID.

CoS Accounting

When checked, the collection of CoS PM on a VLAN service drop is enabled.

RSTP

When checked, RSTP is enabled. This is enabled only when the you configure a dot1q drop of the VLAN.

PM State

Check this check box to collect PM data for each drop port in an ML-series card. Checking the PM State box sets the Cisco IOS cos accounting command in each appropriate front port.

Service Drops Configuration > Service Drops > QoS Parameters area

Match Any

Matches all the traffic. When selected, all other fields (DSCP, IP Precedence, and CoS) are disabled.

Match DSCP

Matches the DSCP value. The valid range is from 0 to 63.

DSCP Value

Displays the DSCP value.

Match IP

Matches the IP value. The valid range is from 0 to 7.

IP Value

Displays the IP value.

Match CoS

Matches the CoS value. The valid range is from 0 to 7.

CoS Value

Displays the CoS value.

AND/OR

Selecting AND/OR indicates Match All and Match Any of the traffic classifications, respectively.

The QoS profiles that are created with AND criteria are applied to dot1Q and QinQ and untagged (subinterface). For AND and OR criteria, a single value is allowed on CoS, DSCP, and IP Precedence.

Selecting OR indicates Match Any of the traffic classifications (Match DSCP, Match IP Precedence, or Match CoS), respectively.

The QoS profiles that are created with the OR criteria are not applied to dot1Q (subinterface).

Committed Rate

Displays the committed traffic rate value.

Committed Burst Size

Displays the committed burst size.

CIR CoS Type

Committed traffic CoS type (Trust or CoS Marked).

CIR CoS Value

Committed traffic CoS value. The valid range is from 0 to 7.

Excess Action

Excess traffic action type (Discard or Allow).

Peak Rate

Displays the peak traffic rate value.

Peak Burst Size

Displays the peak traffic burst value.

PIR CoS Type

Displays the peak traffic CoS type (Trust or CoS Marked).

PIR CoS Value

Displays the peak traffic CoS value. The valid range is from 0 to 7.

Violate Action

Displays the violate traffic action type (Discard or Allow).

Violate CoS

Displays the violate traffic CoS type (Trust or CoS Marked).

Violate CoS Value

Displays the violate traffic CoS value. The valid range is from 0 to 7.

Best Effort Type

Displays the best-effort traffic type (Line-Rate or Rate-Limited).

Max Rate

Displays the maximum rate value.

Max Burst Size

Displays the maximum burst value.

Service Drops Configuration > Port Attributes

NE ID

Select a user-defined NE name from the drop-down lists.

Slot

Select the ML card slot number from the drop-down lists.

Type

Displays the ML-series card type—ML100 or ML1000.

Port

Select the port number on the ML card. The port number is preceded by P, which indicates an Ethernet port.

MTU

Enter an MTU size. The valid range is from 64 to 9000. The default value is 1500.

Speed

Select the speed from the drop-down list. The Speed drop-down list displays three values: 10, 100, and auto. For an ML1000 card, auto is the only supported option.

Duplex

Select the Duplex value from the drop-down list. The Duplex drop-down list displays three values: full, half, and auto, based upon the type of card selected. For example, for an ML1000 card, auto is the only supported option.

Flow Control (send)

Select the Flow Control (send) value from the drop-down list. The Flow Control (send) drop-down box displays three values: off, on, and desired. These values are supported by both the Fast Ethernet and Gigabit Ethernet ports.

Flow Control (receive)

Select the Flow Control (receive) value from the drop-down list. The Flow Control (receive) drop-down box displays three values: off, on, and desired. These values are supported by the Gigabit Ethernet ports only.


Step 4 In the L2 Service Information pane, complete the following information:

L2 Topology Name

Service Provider VLAN ID

Managed VLAN

Customer ID

Service ID

Step 5 Click Next.

Step 6 In the L2 Service Drop Ports Selection pane, complete the following information:

a. Select one of the NEs (from the NE ID drop-down list) on which to configure drops as part of the L2 service being created. After the NE is selected, all the available drops and their capabilities are displayed in the Available Drops area.

b. Select the L2 service drop ports. Click Add to add L2 service ports to the Selected L2 Service Drop Ports list. Click Remove to remove L2 service ports from the list.

c. Repeat substeps a and b to capture all the drops on different NEs that will be a part of the L2 service.


Note If Managed VLAN is checked, you can only select one drop from each ML-series card.


Step 7 Click Next.

Step 8 Configure the drop ports in the Service Drops tab by specifying the following information:

Apply QoS Parameters to All UNI Ports—Check this check box to apply the QoS parameters to all UNI ports.

RSTP Enable—Check this check box to enable RSTP.

NE ID—Displays the user-defined name of the selected NE.

Slot—Displays the slot where the card is located.

Type—Displays the type of ML-series card.

Port—Displays the port number. If the port number is preceded by C, it refers to the port number of the port channel interface. If the port number is preceded by P, it refers to the port number of the Ethernet interface.

Enable—Check this check box to enable drop port state. Uncheck it to disable the drop port state.

Port Type—Select the port type from the drop-down list for each of the drops selected in the previous screen.

Con Type—Select the connection type from the drop-down list for each of the drops selected in the previous screen.

Port VLAN ID—Specify the port VLAN ID for the dot1q drops.

PM State—Check this check box to collect PM data for each drop port in an ML-series card. Checking the PM State box sets the Cisco IOS cos accounting command in each appropriate front port.

Step 9 Click the Port Attributes tab. A confirmation window appears. Click Yes to continue.

Step 10 Configure the port attributes in the Port Attributes tab. Table 7-67 provides descriptions.

Step 11 Click Next.


Note You can select individual drop ports for QoS configuration or check the Apply QoS Parameters to All UNI Ports check box. If you select individual drop ports, you will need to repeat Step 8 through Step 14 for each drop port selected.


Step 12 The QoS Parameters pane opens, displaying the Profile and Custom QoS tabs. QoS parameters are applied to UNI ports. Select the QoS profile to use from the Load from QoS Profile drop-down list.

Step 13 Select the Custom QoS tab. The Custom QoS tab allows you to customize the QoS profile you selected.

Step 14 Configure the fields in the Policing area. Table 7-67 describes the fields in the Custom QoS tab.


Note The tabs displayed in the Policing area are dimmed or available depending on the selection you made from the Load from QoS Profile drop-down list. When Best Effort is selected, the Classification and Best Effort tabs in the Policing area are active and can be configured. When CIR/PIR is selected, the Classification, Committed Traffic, Excess Traffic, and Violations tabs in the Policing area are active and can be configured.


Step 15 Click Finish to create the Layer 2 service.

Step 16 In the confirmation dialog box, click OK.


Note A progress animator is displayed during this operation.


Note If the status of a Layer 2 topology is Incomplete but all the spans are present, it means that there is a configuration problem in the Layer 2 topology and you cannot add Layer 2 services that use this Layer 2 topology. You must delete the Layer 2 topology and add it again. See Creating Layer 2 Topologies or Deleting Layer 2 Topologies.


Note If you try to provision a Layer 2 service while the server resynchronization is in progress, an error message is displayed. Wait awhile before trying again. Also, there is a VLAN ID assigned for each Layer 2 service provisioning operation. If the same error is encountered, the VLAN ID is not available until the Prime Optical server recovers it.


7.10.13.2  Showing a Layer 2 Service


Step 1 In the Domain Explorer window, choose Configuration > CTC-Based SONET NEs or CTC-Based SDH NEs > L2 Topology Table.

Step 2 In the Layer 2 Topology table, choose Configuration > Show L2 Services. The L2 Services table opens, displaying all the Layer 2 services that are configured on a Layer 2 topology. The following table provides descriptions.


Table 7-68 Field Descriptions for the L2 Services Table 

Column
Description

Service Provider VLAN ID

A unique number in a topology that is used to represent the VLAN. The valid range for service provider VLAN IDs is 1 to 4093. By default, the first VLAN number is displayed as 2, because VLAN 1 is an administration VLAN. You can change the default value and create VLAN 1, if it is available.

Customer ID

Displays the unique identification number of the customer for whom the L2 service is being created.

Service ID

Displays the service identification number of the customer for whom the L2 service is being created.

VLAN Status

Displays the drop sufficiency of the L2 service; valid values are Incomplete and Complete. The VLAN status is Incomplete if there are not sufficient drops for the L2 service.

For RPR topologies, if there is not at least one drop per two ML-series cards in the topology, the VLAN status is Incomplete. For point-to-point topologies, the VLAN status is Incomplete if there is not at least one drop per ML card in the topology.

IP SLA Managed VLAN

A value of True means that the circuit is an IP SLA-managed VLAN circuit. A value of False means that the circuit is not an IP SLA-managed VLAN circuit.

IP SLA-managed VLAN status can be:

Complete-IP SLA Discovery In Progress—Managed VLAN discovered completely and IP SLA discovery in progress.

Complete-IP SLA Discovery Failed—Managed VLAN discovered completely and IP SLA discovery failed due to an error in retrieving IP SLA data.


7.10.13.3  Modifying a Layer 2 Service

Use the Modify L2 Service dialog box to modify some of the parameters of the selected L2 service.


Step 1 In the Domain Explorer window, choose Configuration > CTC-Based SONET NEs or CTC-Based SDH NEs > L2 Topology Table.

Step 2 In the Layer 2 Topology table, choose Configuration > Show L2 Services.

Step 3 In the L2 Services table, select a service to modify; then, choose Configuration > Modify L2 Service. The Modify L2 Service dialog box opens.

Step 4 In the Modify L2 Service dialog box, modify the information described in the following table, as required.

Table 7-69 Field Descriptions for the Modify L2 Service Dialog Box 

Area
Description

Customer ID

Customer identification.

Service ID

Service identification.


Step 5 Click Apply.

Step 6 Click Close.


7.10.13.4  Filtering the L2 Services Table


Step 1 In the Domain Explorer window, choose Configuration > CTC-Based SONET NEs or CTC-Based SDH NEs > L2 Topology Table.

Step 2 In the Layer 2 Topology table, choose Configuration > Show L2 Services.

Step 3 In the L2 Services table, choose File > Filter (or click the Filter Data tool). The L2 Service table filter opens. The following table provides descriptions.

Step 4 After making your selections, click OK.


Table 7-70 Field Descriptions for the L2 Service Table Filter Dialog Box 

Field
Description

Customer ID

Displays a list of available customer IDs. Click Add or Remove to move customer IDs to and from the Selected Customer IDs list and then run the filter. If you check Ignore All Customer IDs, Prime Optical ignores the customer IDs in the filter criteria.

Service ID

Displays a list of available service IDs. Click Add or Remove to move service IDs to and from the Selected Service IDs list and then run the filter. If you check Ignore All Service IDs, Prime Optical ignores the service IDs in the filter criteria.


7.10.13.5  Deleting a Layer 2 Service


Note You cannot delete an IP SLA-managed VLAN if there are IP SLAs associated with it. Be sure to delete all IP SLAs associated with the Layer 2 service before deleting the Layer 2 service.


Step 1 In the Domain Explorer window, choose Configuration > CTC-Based SONET NEs or CTC-Based SDH NEs > L2 Topology Table.

Step 2 In the Layer 2 Topology table, choose Configuration > Show L2 Services.

Step 3 In the L2 Services table, select one or more services to delete; then, choose Configuration > Delete L2 Service.

Step 4 In the confirmation dialog box, click Yes.


Note A progress animator is displayed during the deletion operation.


7.10.13.6  Showing an IP SLA


Step 1 In the Domain Explorer window, choose Configuration > CTC-Based SONET NEs or CTC-Based SDH NEs > L2 Topology Table.

Step 2 In the Layer 2 Topology table, choose Configuration > Show L2 Services.

Step 3 In the L2 Services table, select an L2 service and choose Configuration > Show IP SLA. The IP SLA table opens, displaying all of the IP SLAs that were created for the selected L2 service. The following table provides descriptions.


Table 7-71 Field Descriptions for the IPSLA Table 

Field
Description

IP SLA Number

Displays the IP SLA number.

NE ID

Displays the NE ID.

Slot Number

Displays the slot number.

Equipment Type

Displays the equipment type.

Host IP Address

Displays the host IP address.

Destination IP Address

Displays the destination IP address.

Operation Type

Displays the operation type.

Operation Status

Displays the operation status.


7.10.13.7  Creating an IP SLA


Step 1 In the Domain Explorer window, choose Configuration > CTC-Based SONET NEs or CTC-Based SDH NEs > L2 Topology Table.

Step 2 In the Layer 2 Topology table, choose Configuration > Show L2 Services. The L2 Services table opens.

Step 3 In the L2 Services table, select the L2 service on which to create the IP SLA and choose Configuration > Create IP SLA. The Create IPSLA Information wizard opens.

Step 4 Specify the following information:

Service Provider VLAN ID—Display only.

IP SLA ID—Display only.

Source IP Address—Select the source IP address from drop-down list.

Destination IP Address—Select the destination IP address from drop-down list.

Probe Type—Select the probe type from the drop-down list. Values are either Jitter or Echo. If you select Echo, proceed to Step 7.

Enable IP SLA—Check to enable IP SLA.

External Destination IP Address—Check to enter the external destination IP address. (The Destination IP Address drop-down list is disabled.)

Step 5 Click Next.

Step 6 Specify the following information:

Destination Port—Specify the destination port. The range is from 1 to 65535.

No. of Packets—Specify the number of packets. The range is from 1 to 60000.

Interval—Specify the time interval (in seconds) for collecting information. The range is from 1 to 60000.

Operation Frequency—Specify the operation frequency. The range is from 1 to 604800.

TOS—Specify the value that corresponds to the type of service. The range is from 1 to 255.

Step 7 Click Finish.


7.10.13.8  Enabling an IP SLA


Step 1 In the Domain Explorer window, choose Configuration > CTC-Based SONET NEs or CTC-Based SDH NEs > L2 Topology Table.

Step 2 In the Layer 2 Topology table, choose Configuration > Show L2 Services.

Step 3 In the L2 Services table, select an L2 service and choose Configuration > Show IP SLA.

Step 4 In the IP SLA table, select an IP SLA and choose Configuration > Enable IP SLA.


7.10.13.9  Deleting an IP SLA


Step 1 In the Domain Explorer window, choose Configuration > CTC-Based SONET NEs or CTC-Based SDH NEs > L2 Topology Table.

Step 2 In the Layer 2 Topology table, choose Configuration > Show L2 Services.

Step 3 In the L2 Services table, select an L2 service and choose Configuration > Show IP SLA.

Step 4 In the IP SLA table, select an IP SLA to delete and choose Configuration > Delete IP SLA.

Step 5 In the confirmation dialog box, click Yes.


7.10.13.10  Restarting an IP SLA


Step 1 In the Domain Explorer window, choose Configuration > CTC-Based SONET NEs or CTC-Based SDH NEs > L2 Topology Table.

Step 2 In the Layer 2 Topology table, choose Configuration > Show L2 Services.

Step 3 In the L2 Services table, select an L2 service and choose Configuration > Show IP SLA.

Step 4 In the IP SLA table, select an IP SLA to restart and choose Configuration > Restart IP SLA.


7.10.13.11  Enabling or Disabling PM Data Collection for Each Drop Port

Prime Optical allows you to enable or disable PM data collection for each appropriate drop port in an ML-series card. You can enable or disable PM data collection while:

Creating a Layer 2 service (see Creating a Layer 2 Service)

Adding drop ports (see Creating L2 Service Drops)

Modifying drops (see Modifying L2 Service Drops)


Note The enhanced statistics are only supported in the enhanced (nondefault) microcode image. The barebone configuration file that contains this command is bareboneCLI_Security_Enhanced_Microcode.txt.


7.10.13.12  Viewing the L2 Service Drop Ports Table


Step 1 In the Domain Explorer window, choose Configuration > CTC-Based SONET NEs or CTC-Based SDH NEs > L2 Topology Table.

Step 2 In the Layer 2 Topology table, choose Configuration > Show L2 Services.

Step 3 In the L2 Services table, select a service; then, choose Configuration > Show Drops. The L2 Service Drop Ports table opens, listing all the drops in the selected service. The following table provides descriptions.


Table 7-72 Field Descriptions for the L2 Service Drop Ports Table 

Column
Description

NE ID

User-defined name of the selected NE.

Slot Number

ML card slot number on which the drop is present.

Port

ML card port physical number on which the drop is present.

Port

ML card port physical number on which the drop is present.

Port VLAN ID

Port VLAN ID used for dot1q drops.

Interface Type

Interface type of the ML card. Values are Fast Ethernet, Gigabit Ethernet, or port channel.

Port Type

Port type. Values are UNI or NNI.

Con Type

Connection type. Values are QinQ, dotq, or Untagged.

QoS Profile Name

Name of the QoS profile.

Note Due to discrepancies between the ML card CLI and the values stored in the Prime Optical database, the QoS profile name might be shown as "Custom QoS" even though you specified a different QoS profile type. In this scenario, choose Configuration > Show QoS to view the QoS table for a particular drop and determine the exact configuration of the QoS profile set on the card for that drop.

Drop Status

Displays whether a drop is shut down or enabled.

CoS PM State

Check this check box to collect PM data for each drop port in an ML-series card. Checking the PM State box sets the Cisco IOS cos accounting command in each appropriate front port.

RSTP

When checked, RSTP is enabled.


7.10.13.13  Filtering the L2 Service Drop Ports Table


Step 1 In the Domain Explorer window, choose Configuration > CTC-Based SONET NEs or CTC-Based SDH NEs > L2 Topology Table.

Step 2 In the Layer 2 Topology table, choose Configuration > Show L2 Services.

Step 3 In the L2 Services table, select a service to which to add drops.

Step 4 Choose Configuration > Show Drops. The L2 Service Drop Ports table opens.

Step 5 Choose File > Filter (or click the Filter Data tool). The L2 Service Drop Ports Filter dialog box opens.

Step 6 Use the table filter to filter circuit data according to criteria that you select and to display the results in the table.

Step 7 Click OK.


7.10.13.14  Creating L2 Service Drops


Step 1 In the Domain Explorer window, choose Configuration > CTC-Based SONET NEs or CTC-Based SDH NEs > L2 Topology Table.

Step 2 In the Layer 2 Topology table, choose Configuration > Show L2 Services.

Step 3 In the L2 Services table, select a service to which to add drops.

Step 4 Choose Configuration > Show Drops. The L2 Service Drop Ports table opens.

Step 5 Choose Configuration > Add Drops. The Add L2 Service Drops wizard opens. The following table provides descriptions.

Table 7-73 Field Descriptions for the Add L2 Service Drops Wizard 

Field
Description
L2 Service Drop Ports Selection

NE ID

Displays the user-defined name of the NEs. Select an NE from the drop-down list. After the NE is selected, all the available drops and their capabilities are displayed in the Available L2 Service Drop Ports list.

Available L2 Service Drop Ports

Select the L2 service drop ports. Click Add to add L2 service ports to the Configured L2 Service Drop Ports list. Click Remove to remove L2 service ports from the list. Repeat to add or remove all the drops on different NEs that will be a part of the L2 service.

NE ID

Displays the user-defined name of the NEs. Select an NE from the drop-down list. After the NE is selected, all the available drops and their capabilities are displayed in the Available L2 Service Drop Ports list.

Slot

ML-series card slot number.

Type

ML-series card type—ML100 or ML1000.

Port

Port number on the ML card.

Port Type

Displays the available port type—UNI, NNI, or Any. If both UNI and NNI port types are available, Any is displayed.

Con Type

Connection type can be QinQ, dot1q, Untagged, or Any. For the UNI port type, connection types are QinQ, dot1q, and Untagged. For the NNI port type, only the dot1q connection type is allowed. If all types are available, this field is shown as Any.

L2 Service Summary

L2 Topology Name

Name of the topology on which the Layer 2 service drop is created.

Service Provider VLAN ID

A unique number in a topology that is used to represent the VLAN. The valid range for service provider VLAN IDs is 1 to 4093. By default, the first VLAN number is displayed as 2, because VLAN 1 is an administration VLAN. You can change the default value and create VLAN 1, if it is available.

Customer ID

Displays the unique identification number of the customer for whom the Layer 2 service drop is being created.

Service ID

Displays the service identification number of the customer for whom the Layer 2 service drop is being created.

Selected Drops (Node/Slot/Port)

Displays the drop ports selected in the L2 Service Drop Ports table.

Service Drops Configuration > Service Drops tab

Apply QoS Parameters to All UNI Ports

When selected, the QoS parameters specified in the QoS Parameters screen are applied to all the drops.

RSTP Enable

When checked, RSTP is enabled.

NE ID

Displays the user-defined name of the selected NE.

Slot

Displays information about the slot.

Type

ML-series card type—ML100 or ML1000.

Port

Port number on the ML card.

Enable

When checked, the drop port is enabled.

Port Type

Displays the port type—UNI or NNI.

Con Type

Connection type. For the UNI port type, the connection type can be QinQ, dot1q, or Untagged. For the NNI port type, only NNI is permitted.

Port VLAN ID

Port VLAN ID used for dot1q drops. For NNI dot1q drops, this field is populated by default with the service provider VLAN ID.

PM State

Check this check box to collect PM data for each drop port in an ML-series card. Checking the PM State box sets the Cisco IOS cos accounting command in each appropriate front port.

Service Drops Configuration > Port Attributes tab

NE ID

Select a user-defined NE name from the drop-down lists.

Slot

Select the ML card slot number from the drop-down lists.

Type

Displays the ML-series card type—ML100 or ML1000.

Port

Select the port number on the ML card.

MTU

Enter an MTU size. The valid range is from 64 to 9000. The default value is 1500.

Speed

Select the speed from the drop-down list. The Speed drop-down list displays three values: 10, 100, and auto. For an ML1000 card, auto is the only supported option.

Duplex

Select the Duplex value from the drop-down list. The Duplex drop-down list displays three values: full, half, and auto, based upon the type of card selected. For example, for an ML1000 card, auto is the only supported option.

Flow Control (send)

Select the Flow Control (send) value from the drop-down list. The Flow Control (send) drop-down box displays three values: off, on, and desired. These values are supported by both the Fast Ethernet and Gigabit Ethernet ports.

Flow Control (receive)

Select the Flow Control (receive) value from the drop-down list. The Flow Control (receive) drop-down box displays three values: off, on, and desired. These values are supported by the Gigabit Ethernet ports only.

QoS Parameters

Match Any

Matches all the traffic. When selected, all other fields (DSCP, IP Precedence, and CoS) are disabled.

Match DSCP

Matches the DSCP value. The valid range is from 0 to 63.

DSCP Value

Displays the DSCP value.

Match IP

Matches the IP value. The valid range is from 0 to 7.

IP Value

Displays the IP value.

Match CoS

Matches the CoS value. The valid range is from 0 to 7.

CoS Value

Displays the CoS value.

AND

Selecting AND indicates Match All and Match Any of the traffic classifications, respectively.

The QoS profiles that are created with AND criteria are applied only to dot1Q (subinterface). For AND criteria only, a single value is allowed on CoS, DSCP, and IP Precedence.

OR

Selecting OR indicates Match Any of the traffic classifications (Match DSCP, Match IP Precedence, or Match CoS), respectively.

The QoS profiles that are created with the OR criteria are not applied to dot1Q (subinterface).

Committed Rate

Displays the committed traffic rate value.

Committed Burst Size

Displays the committed burst size.

CIR CoS

Committed traffic CoS type (Trust or CoS Marked).

CIR CoS Value

Committed traffic CoS value. The valid range is from 0 to 7.

Excess Action

Excess traffic action type (Discard or Allow).

Peak Rate

Displays the peak traffic rate value.

Peak Burst Size

Displays the peak traffic burst value.

PIR CoS

Displays the peak traffic CoS type (Trust or CoS Marked).

PIR CoS Value

Displays the peak traffic CoS value. The valid range is from 0 to 7.

Violate Action

Displays the violate traffic action type (Discard or Allow).

Violate CoS

Displays the violate traffic CoS type (Trust or CoS Marked).

Violate CoS Value

Displays the violate traffic CoS value. The valid range is from 0 to 7.

Best Effort Type

Displays the best-effort traffic type (Line-Rate or Rate-Limited).

Max Rate

Displays the maximum rate value.

Max Burst Size

Displays the maximum burst value.

QoS Parameters > Profile

Load from QoS Profile

Select the QoS profile from the list displayed. See Creating QoS Profiles for details on how to create a QoS profile.

Note The remainder of the QoS parameters displayed on this tab are described earlier in this table.

QoS Parameters > Custom QoS

Load from QoS Profile

Select the QoS profile from the list displayed. See Creating QoS Profiles for details on how to create a QoS profile.

Note The remainder of the QoS parameters displayed on this tab are described earlier in this table.

Policing > Classification

Match Any

Matches all the traffic. When selected, all other fields (DSCP, IP Precedence, and CoS) are disabled.

Match DSCP

Matches the DSCP value. The valid range is from 0 to 63.

Match IP Precedence

Matches the IP precedence value. The valid range is from 0 to 7.

Match CoS

Matches the CoS value. The valid range is from 0 to 7.

AND

Selecting AND indicates Match All and Match Any of the traffic classifications, respectively.

The QoS profiles that are created with AND criteria are applied only to dot1Q (subinterface). For AND criteria only, a single value is allowed on CoS, DSCP, and IP Precedence.

OR

Selecting OR indicates Match Any of the traffic classifications (Match DSCP, Match IP Precedence, or Match CoS), respectively.

The QoS profiles that are created with the OR criteria are not applied to dot1Q (subinterface).

Policing > Committed Traffic

Line Rate

Rate and burst of the Ethernet port are applicable.

Rate Limited

User-specified rate and burst limits are applicable.

Committed Rate

Displays the committed rate.

Committed Burst Size

Displays the committed burst size.

Policing > Committed Traffic > Committed CoS Marking

Trust

CoS transmit value set to 0.

Mark CoS

The Layer 2 Mark CoS value entered. The valid range is from 0 to 7.

Policing > Excess Traffic

Discard

Excess traffic action should be set to "drop."

Allow

Excess traffic with CoS, as marked by the user, is transmitted.

Peak Rate

Peak rate value.

Peak Burst

Peak burst value.

Policing > Excess Traffic > Excess CoS Marking

Trust

CoS transmit value set to 0.

Mark CoS

The Layer 2 CoS marked. The valid range is from 0 to 7.

Policing > Violations

Discard

Excess traffic action should be set to "drop."

Allow

Excess traffic with CoS, as marked by the user, is transmitted.

Policing > Violations > Violations CoS Marking

Trust

CoS transmit value set to 0.

Mark CoS

The Layer 2 Mark CoS value entered. The valid range is from 0 to 7.

Policing > Best Effort

Line Rate

Rate and burst of the Ethernet port are applicable.

Rate Limited

User-specified rate and burst limits are applicable.

Max Rate

The maximum rate value.

Max Burst

The maximum burst value.

Policing > Best Effort > Best Effort CoS Marking

Trust

CoS transmit value set to 0.

Mark CoS

The Layer 2 Mark CoS value entered. The valid range is from 0 to 7.

Service Drops Configuration (Service Drop)

Apply QoS Parameters to All UNI Ports

When selected, the QoS parameters specified in the QoS Parameters screen are applied to all the drops.

RSTP Enable

When checked, RSTP is enabled.

NE ID

The user-defined name of the selected NE.

Slot

Information about the slot.

Type

Displays the ML-series card type—ML100 or ML1000.

Port

The port number on the ML card.

Enable

Used to enable or disable the drop port. When checked, the drop port is enabled.

Port Type

The port type—UNI or NNI.

Con Type

The connection type. For the UNI port type, the connection type is QinQ, dot1q, or Untagged. For the NNI port type, only the NNI connection type is permitted.

Port VLAN ID

The port VLAN ID used for dot1q drops. By default, the NNI dot1q drop is populated with the service provider VLAN ID.

PM State

Check this check box to collect PM data for each drop port in an ML-series card. Checking the PM State box sets the Cisco IOS cos accounting command in each appropriate front port.

QoS Parameters

The QoS parameters displayed on this screen are described earlier in this table.


Step 6 In the L2 Service Drop Ports Selection section, complete the following information:

a. Select one of the NEs in the NE ID drop-down list. After the NE is selected, all the available drops and their capabilities are displayed in the Available L2 Service Drop Ports list.

b. Select the L2 service drop ports. Click Add to add Layer 2 service ports to the Configured L2 Service Drop Ports list. Click Remove to remove Layer 2 service ports from the list.

c. Repeat substeps a and b to add or remove all the drops on different NEs that will be a part of the Layer 2 service.

Step 7 Click Next.

Step 8 In the Service Drops tab, complete the following information:

Apply QoS Parameters to All UNI Ports—Check this check box to apply the QoS parameters to all UNI ports.

Enable RSTP—Check this check box to enable RSTP.

Enable—Check this check box to enable the drop port state. Uncheck it to disable the drop port state.

Port Type—Select the port type.

Con Type—Select the connection type.

Port VLAN ID—Enter the VLAN ID for the dot1q drops.

PM State—Check this check box to collect PM data for each drop port in an ML-series card. Checking the PM State box sets the Cisco IOS cos accounting command in each appropriate front port.


Note You can select individual drop ports for QoS configuration or check the Apply QoS Parameters to All UNI Ports check box. If you select individual drop ports, you will need to repeat Step 8 through Step 14 for each drop port selected.


Step 9 Click the Port Attributes tab. A confirmation window appears. Click Yes to continue.

Step 10 Configure the port attributes in the Port Attributes tab. Table 7-73 provides descriptions.

Step 11 Click Next.

Step 12 Review the QoS parameters and their corresponding values in the QoS Parameters area.

Step 13 Review the Layer 2 service summary in the L2 Service Summary area.

Step 14 Click Next.

Step 15 The QoS Parameters pane opens, displaying the Profile and Custom QoS tabs. QoS parameters are applied to UNI ports. Select the QoS profile to use from the Load from QoS Profile drop-down list.

Step 16 Click the Custom QoS tab, which allows you to customize the QoS profile you selected.

Step 17 Configure the fields displayed in the Policing area. Table 7-73 provides descriptions.


Note The tabs displayed in the Policing area are dimmed or available depending on the selection you made from the Load from QoS Profile drop-down list. When Best Effort is selected, the Classification and Best Effort tabs in the Policing area are active and can be configured. When CIR/PIR is selected, the Classification, Committed Traffic, Excess Traffic, and Violations tabs in the Policing area are active and can be configured.


Step 18 Click Finish to add the Layer 2 service drop.

Step 19 In the confirmation dialog box, click OK.


7.10.13.15  Deleting L2 Service Drops


Step 1 In the Domain Explorer window, choose Configuration > CTC-Based SONET NEs or CTC-Based SDH NEs > L2 Topology Table.

Step 2 In the Layer 2 Topology table, choose Configuration > Show L2 Services.

Step 3 In the L2 Services table, select a service on which to delete drops.

Step 4 Choose Configuration > Show Drops. The L2 Service Drop Ports table opens.

Step 5 Choose Configuration > Delete Drops. The Modify L2 Service dialog box opens.

Step 6 In the confirmation dialog box, click Yes.


Note A progress animator is displayed while the delete operation is being performed.


7.10.13.16  Modifying L2 Service Drops

Use the Modify L2 Drops window to modify the selected L2 drops.


Note The Ethernet port attributes (for example, MTU, speed, and flow control), COS accounting, and port enabling/disabling values are not automatically mirrored to the standby ML card when modified on the active ML card. These values can be modified manually on the standby cards using NE Explorer.


Step 1 In the Domain Explorer window, choose Configuration > CTC-Based SONET NEs or CTC-Based SDH NEs > L2 Topology Table.

Step 2 In the Layer 2 Topology table, choose Configuration > Show L2 Services.

Step 3 In the L2 Services table, select a service on which to modify drops.

Step 4 Choose Configuration > Show Drops. The L2 Service Drop Ports table opens.

Step 5 Choose Configuration > Modify Drops. The Modify L2 Service Drops dialog box opens.

Step 6 Click the Enable/Disable Drop tab if you want to enable or disable drops. Check the Enable check box to enable the drop port state, and uncheck it to disable the drop port state. Check the RSTP Enable check box to enable RSTP.

Step 7 Click the QoS tab if you want to enable QoS parameters per drop; then, specify the following QoS parameters:

CIR/PIR—If selected, specify the following information:

Committed information rate—The range is from 1 to 800 Mb/s for Gigabit Ethernet ML-series cards and 1 to 90 Mb/s for FE ML-series cards.

Max CIR Burst—Cisco default is 8000 bytes. The range is from 8000 to 64000 bytes.

Peak Information Rate—The range is from 96000 to 800000000 bits per second. PIR should be greater than or equal to CIR.

Max PIR Burst—Cisco default is 64000 bytes. The range is from 8000 to 64000 bytes. PIR burst should be greater than or equal to CIR burst.

Best Effort—If selected, the following are set to the default values:

Best Effort Max Value—Corresponds to the CIR value. Cisco default is 96000 bits per second.

Burst—Corresponds to the Max CIR Burst value. Cisco default is 8000 bytes.


Note The PIR and Max PIR Burst do not need to be set. The card software sets these values to the same values as CIR and Max CIR Burst, respectively.


Step 8 Click the Performance Monitoring tab. Check the PM State box to collect PM data for each drop port in an ML-series card. Checking the PM State box sets the Cisco IOS cos accounting command in each appropriate front port.

Step 9 Click the Port Properties tab. Configure the following information if required:

NE ID—Select a user-defined NE name from the drop-down lists.

Slot—Select the ML card slot number from the drop-down lists.

Type—Displays the ML-series card type: ML100 or ML1000.

Port—Select the port number on the ML card.

MTU—Enter an MTU size. The valid range is from 64 to 9000. The default value is 1500.

Speed—Select the speed from the drop-down list. The Speed drop-down list displays three values: 10, 100, and auto. For an ML1000 card, auto is the only supported option.

Duplex—Select the Duplex value from the drop-down list. The Duplex drop-down list displays three values: full, half, and auto, based upon the type of card selected. For example, for an ML1000 card, auto is the only supported option.

Flow Control (send)—Select the Flow Control (send) value from the drop-down list. The Flow Control (send) drop-down box displays three values: off, on, and desired. These values are supported by both the Fast Ethernet and Gigabit Ethernet ports.

Flow Control (receive)—Select the Flow Control (receive) value from the drop-down list. The Flow Control (receive) drop-down box displays three values: off, on, and desired. These values are supported by the Gigabit Ethernet ports only.

Step 10 Click Apply to apply your settings or click Reset to use default settings.


Note A progress animator is displayed.


Step 11 Click Close.


7.10.13.17  Viewing the QoS for Layer 2 Service Drop Port Table


Step 1 In the Domain Explorer window, choose Configuration > CTC-Based SONET NEs or CTC-Based SDH NEs > L2 Topology Table. The Layer 2 Topology table opens.

Step 2 Choose Configuration > Show L2 Services. The Layer 2 Services table opens.

Step 3 Choose Configuration > Show Drops. The Layer 2 Services Drop Ports table opens.

Step 4 Choose Configuration > Show QoS. The QoS for Layer 2 Service Drop Port table opens. The following table provides descriptions.


Table 7-74 Field Descriptions for the QoS for Layer 2 Service Drop Port Table 

Column
Description

QoS Class Name

Name of the class map and QoS class of the selected Layer 2 service drop.

Match Any

Matches all the traffic. When selected, all other fields (DSCP, IP Precedence, and CoS) are disabled.

Match IP Precedence

Matches the IP precedence value. The valid range is from 0 to 7.

IP Precedence Value

Displays the IP precedence value.

Match DSCP

Matches the DSCP value. The valid range is from 0 to 63.

DSCP Value

Displays the DSCP value.

Match CoS

Matches the CoS value. The valid range is from 0 to 7.

AND

Selecting AND indicates Match All and Match Any of the traffic classifications, respectively.

The QoS profiles that are created with AND criteria are applied only to dot1Q (subinterface). For AND criteria only, a single value is allowed on CoS, DSCP, and IP Precedence.

OR

Selecting OR indicates Match Any of the traffic classifications (Match DSCP, Match IP Precedence, or Match CoS), respectively.

The QoS profiles that are created with the OR criteria are not applied to dot1Q (subinterface).

CoS Value

Displays the CoS value.

CIR Type

Displays the CIR type.

CIR Rate

Committed rate, in bits per second (b/s).

CIR Burst

Committed burst, in bytes.

CIR CoS Type

Committed traffic CoS type (Trust or CoS Marked).

CIR CoS Value

Committed traffic CoS value. The valid range is from 0 to 7.

Excess Action

Excess traffic action type (Discard or Allow).

PIR Rate

Peak rate, in b/s.

PIR Burst

Peak burst, in bytes.

PIR CoS Type

Displays the peak traffic CoS type (Trust or CoS Marked).

PIR CoS Value

Displays the peak traffic CoS value. The valid range is from 0 to 7.

Violate Action

Displays the violate traffic action type (Discard or Allow).

Violate CoS Value

Displays the violate traffic CoS value. The valid range is from 0 to 7.

Best Effort Type

Displays the best-effort traffic type (Line-Rate or Rate-Limited).

Best Effort Rate

Maximum rate, in b/s.

Best Effort Burst

Maximum burst, in bytes.


7.10.13.18  Configuring a Layer 2 Service Resynchronization


NoteWhen configuring Layer 2 service resynchronization, data provisioning is disabled. It is recommended that resynchronization become less frequent on the provisioning server and more frequent on the monitoring server.

The L2 Service Resync Delay field setting is the same for both SONET and SDH NE services. If you change this value in the Control Panel for CTC-based SONET NEs, the same value is reflected for CTC-based SDH NEs, and vice versa.


Complete the following steps to configure a Layer 2 service resynchronization:


Step 1 In the Domain Explorer window, choose Administration > Control Panel.

Step 2 Expand NE Service.

Step 3 Select either CTC-Based SONET NEs or CTC-Based SDH NEs.

Step 4 In the L2 Service Resync Delay field, enter the number of seconds before the Layer 2 service resynchronization resumes. The Cisco default is 600 seconds.

Step 5 Click Save.


7.10.14  Resynchronizing Layer 2 Topologies

You can resynchronize Layer 2 topologies that are in the following states:

Sync Failed

L2Service NotReady

Partially Completed

Complete


Note This feature only restarts the L2 topology resynchronization state. It does not forcefully apply any configuration on the ML-series card to complete the synchronization in the L2 topology.


Step 1 In the Domain Explorer window, choose Configuration > CTC-Based SONET NEs or CTC-Based SDH NEs > L2 Topology Table.

Step 2 In the Layer 2 Topology table, select the topology that you want to resynchronize and choose Configuration > Resync L2 Topology. The Prime Optical server reschedules the Layer 2 topology resynchronization process. After it has completed, Prime Optical performs the following:

Detect base card configuration

Discover VLANs

Update L2 topology state


7.10.15  Discovering Layer 2 Topologies

You can initiate a manual discovery of L2 topologies by triggering events for valid L1 circuits in the database. If the network contains split or incomplete L2 topologies, it is helpful to discover the missing topologies.


Step 1 In the Domain Explorer window, select a group or NE node and choose Configuration > CTC-Based SONET NEs or CTC-Based SDH NEs > Discover L2 Topologies.

Step 2 Click Yes at the following prompt:

Use this command only for split or undiscovered topologies. This command rediscovers the 
L2 topologies and causes loss of topology description information. Do you want to 
continue?

This action initiates a forceful discovery of the RPR and point-to-point topologies that are present under the selection context. During the discovery, topologies are deleted from the Layer 2 Topology table and then rediscovered.


7.10.16  Changing the Framing Mode for ML-Series Cards

This section describes how to change the framing mode for ML-series cards to HDLC, GFP, or RPR 802.17.

7.10.16.1  Changing the Framing Mode from HDLC to GFP

Depending on your configuration, complete one of the following steps for all cards that are involved in the L2 topology:


Step 1 For ONS 15454 ML cards, do the following:

a. Select an ONS 15454 NE in the Domain Explorer and choose Configuration > NE Explorer.

b. Click the ML card in the shelf view.

c. Click the Identification tab.

d. Change the Card Mode value to GFP-F.

e. Click Apply.

f. Click Yes at the following prompt:

This will commit your changes to the NE permanently. Do you want to continue?

g. Click Yes at the following prompt:

Changing the card mode will cause the NE to reboot. Make the change anyway?

Step 2 For ONS 15310 CL, ONS 15310 MA SONET, and ONS 15310 MA SDH ML-series cards, do the following:

a. Launch the Cisco IOS CLI to the card.

b. Enter the following CLI commands for all interfaces that are involved in the L2 topology:

default46#config
Configuring from terminal, memory, or network [terminal]? t
Enter configuration commands, one per line. End with CNTL/Z.
default46(config)#interface interface-ID-pos0-or-pos1
default46(config-if)#pos mode gfp fcs-disabled
#End
default46#write mem
#show controllers pos0-or-pos1

The show controllers command returns output that is similar to the following example:

default46#show controllers pos 0
Interface POS0
Hardware is Packet Over SONET
Framing Mode: GFP
Concatenation: VCAT
Alarms reportable to CLI: AIS-P LOP-P UNEQ-P TIM-P PLM-P ENCAP-MISMATCH RDI-P PD
I-P SF-P SD-P OOU_TPT-STS LOM-STS SQM-STS
Link state change defects: AIS LOP UNEQ PLM ENCAP RDI PDI LOA LOM SQM
Link state change time: 200 (msec)

7.10.16.2  Changing the Framing Mode from GFP to HDLC

Depending on your configuration, complete one of the following steps for all cards that are involved in the L2 topology:


Step 1 For ONS 15454 ML cards, do the following:

a. Select an ONS 15454 NE in the Domain Explorer and choose Configuration > NE Explorer.

b. Click the ML card in the shelf view.

c. Click the Identification tab.

d. Change the Card Mode value to HDLC.

e. Click Apply.

f. Click Yes at the following prompt:

This will commit your changes to the NE permanently. Do you want to continue?

g. Click Yes at the following prompt:

Changing the card mode will cause the NE to reboot. Make the change anyway?

Step 2 For ONS 15310 CL, ONS 15310 MA SONET, and ONS 15310 MA SDH ML-series cards, do the following:

a. Launch the Cisco IOS CLI to the card.

b. Enter the following CLI commands for all interfaces that are involved in the L2 topology:

default46#config
Configuring from terminal, memory, or network [terminal]? t
Enter configuration commands, one per line. End with CNTL/Z.
default46(config)#interface interface-pos0-or-pos1
default46(config-if)# no pos mode gfp
#End
default46#write mem
#show controllers pos0-or-pos1

The show controllers command returns output that is similar to the following example:

default46#show controllers pos 0
Interface POS0
Hardware is Packet Over SONET
Framing Mode: GFP
Concatenation: VCAT
Alarms reportable to CLI: AIS-P LOP-P UNEQ-P TIM-P PLM-P ENCAP-MISMATCH RDI-P PD
I-P SF-P SD-P OOU_TPT-STS LOM-STS SQM-STS
Link state change defects: AIS LOP UNEQ PLM ENCAP RDI PDI LOA LOM SQM
Link state change time: 200 (msec)

7.10.16.3  Changing the Framing Mode to RPR 802.17

RPR 802.17 is supported on the following ONS 15454 cards only:

ML100T-12

ML100X-8

ML1000-2

Complete the following steps to change the framing mode to RPR 802.17 for all cards that are involved in the L2 topology:


Step 1 Select an ONS 15454 NE in the Domain Explorer and choose Configuration > NE Explorer.

Step 2 Click the ML card in the shelf view.

Step 3 Click the Identification tab.

Step 4 Change the Card Mode value to RPR 802.17.

Step 5 Click Apply.

Step 6 Click Yes at the following prompt:

This will commit your changes to the NE permanently. Do you want to continue?

Step 7 Click Yes at the following prompt:

Changing the card mode will cause the NE to reboot. Make the change anyway?

Step 8 After changing the card mode to RPR 802.17, you must reload the barebone configuration on the ML card. See Initializing Layer 2 Cards.


7.10.17  Provisioning ML-Series Cards to Receive SNMP Traps


Note In a gateway NE-end NE (GNE-ENE) setup when the ENEs are not connected to the LAN, the only way that the Prime Optical server can communicate to the ENEs is through the GNE. When configuring the SNMP settings of the GNE, the GNE node must work as the SNMP proxy. The ENE nodes forward the SNMP traps to the Prime Optical server through the GNE. This means that the trap destination for the ENE nodes must be the GNE.


Step 1 In the Domain Explorer tree, select the NE that contains ML-series cards and choose Configuration > NE Explorer (or click the Open NE Explorer tool).

Step 2 In the node properties pane, click the Network tab.

Step 3 Click the SNMP subtab.

Step 4 If the NE is connected to the LAN-connected NE (LNE) or GNE, do the following:

a. Check the Allow SNMP Set check box.

b. If the LNE or GNE is acting as an SNMP proxy to forward traps from the ENE or DCC-connected NE, check the Allow SNMP Proxy check box.

c. Click Apply.

d. Click Create. The Create SNMP Trap Destination dialog box opens.

e. Complete the following fields in the Create SNMP Trap Destination dialog box:

IP Address—Enter the IP address of the Prime Optical server.

Community Name—Enter a community name that matches the community name in the node properties pane.

UDP Port—Enter 162 (Cisco default).

Trap Version—Choose SNMPv1 or SNMPv2c.

f. Click OK.

g. Click Apply.

Step 5 If the NE is not connected to the LAN but is DCC-connected to other NEs, do the following:

a. Check the Allow SNMP Set and Allow SNMP Proxy check boxes on the ENE.

b. Click Apply.

c. Click Create. The Create SNMP Trap Destination dialog box opens.

d. Complete the following fields in the Create SNMP Trap Destination dialog box:

IP Address—Create the relay IP address with the IP address of the GNE.

Community Name—Enter a community name that matches the community name in the node properties pane.

UDP Port—Enter 391.

Trap Version—Choose SNMPv1 or SNMPv2c.

Relay {A | B | C} IP Address, Relay {A | B | C} Community Name—Enter the relay IP addresses of all intermediate NEs that are part of the relay with the relay community name.

e. Click OK.

f. Click Apply.


7.10.18  Initializing ML-Series Cards

Initializing the ML-series cards of ONS 15310 CL SONET, ONS 15310 MA SDH, ONS 15310 MA SONET, ONS 15454 SDH, and ONS 15454 SONET NEs involves the following tasks:

Configuring the card mode

Downloading the base card configuration (BCC) barebone file

Complete the following steps to initialize the ML-series cards:


Step 1 In the Domain Explorer window, select the Prime Optical domain, group, ONS 15310 CL SONET, ONS 15310 MA SDH, ONS 15310 MA SONET, ONS 15454 SDH, or ONS 15454 SONET NE; then, choose Configuration > CTC-Based SONET NEs or CTC-Based SDH NEs > Initialize ML Cards. The Initialize ML Cards wizard opens.

Step 2 Select one or more NEs from the Available NEs list; then, click Add to add them to the Selected NEs list. Click Remove to remove the NE(s) from the Selected NEs list. The list of available NEs depends on the following conditions:

If you selected the Prime Optical domain in the Domain Explorer window, the list of available NEs includes ONS 15310 CL SONET, ONS 15310 MA SDH, ONS 15310 MA SONET, ONS 15454 SDH, or ONS 15454 SONET NEs that have at least one ML-series card that is not involved in any L2 topology.

If you selected a group in the Domain Explorer window, the list of available NEs includes the following:

NEs that belong to the group and contain at least one ML-series card that is not involved in any L2 topology.

NEs that are linked to the NEs of the group and contain at least one ML-series card that is not involved in any L2 topology.

If you selected an NE in the Domain Explorer window, the list of available NEs includes the following:

The selected NE, if it contains at least one ML-series card that is not involved in any L2 topology.

NEs that are linked to the selected NE and contain at least one ML-series card that is not involved in any L2 topology.


Note The Card Mode operation is disabled if the Selected NEs list contains at least one ONS 15310 CL SONET, ONS 15310 MA SDH, or ONS 15310 MA SONET NE.


Step 3 Click Next.

Step 4 In the Card Selection area, select the ML-series card to initialize from the Available Cards list; then, click Add. Click Remove to remove an ML-series card from the Selected Cards list.


Note Select at least one ML-series card for each NE that you selected in Step 2.


Step 5 To configure the BCC barebone file, do the following:

a. In the ML Parameters area, be sure that the Configure BCC check box is checked.

b. In the File to BCC area, select one of the following radio buttons:

Local—The BCC barebone file is on your local client workstation. Enter the path for the file, or click Browse to search for it.

Server—The BCC barebone file is located on a server. Use the drop-down list to select a server.


Note Be sure that the BCC barebone file that you select is applicable to the NE on which the file will be uploaded.


Step 6 To set the card mode parameter, do the following:

a. In the ML Parameters area, check the Configure Card Mode check box.

b. Select HDLC, GFP-F, or RPR 802.17 from the Card Mode drop-down list.


Note The Configure Card Mode check box and Card Mode drop-down list are disabled if you selected at least one ONS 15310 CL SONET, ONS 15310 MA SDH, or ONS 15310 MA SONET NE in Step 2.


Step 7 (Optional) In the Job Comments text box, enter comments about the ML-series card initialization.

Step 8 To set a time for the ML-series card initialization, choose one of the following radio buttons:

Now—Begins the ML-series card initialization immediately.

At Time—Specifies when to begin the ML-series card initialization.

Step 9 Click Finish. The selected ML-series cards are restarted, and a new entry is added to the Job Monitor table with the Task Type parameter set to "Initialize ML cards." The Audit Log reports any errors.


7.10.19  Managing Port Channel Link Aggregation on ML-Series Cards

ML-series cards offer port channel (also known as link aggregation) for Gigabit Ethernet and Fast Ethernet ports.

Port channel is a trunking technology that groups multiple full-duplex, IEEE 802.3 Gigabit Ethernet/Fast Ethernet interfaces to provide fault-tolerant, high-speed links to switches, routers, and servers. Port channel forms a single higher bandwidth routing or bridging endpoint and was designed primarily for host-to-switch connectivity. Port channel provides the following benefits:

Logical aggregation of bandwidth

Load balancing

Fault tolerance

To govern reciprocal peer packet transmission, ML cards support Link Aggregation Control Protocol (LACP) on the aggregated channels. LACP, which is defined as part of the IEEE specification 802.3ad, provides load balancing and automatic creation of port channels by exchanging LACP packets between ports. LACP learns the capabilities of port groups dynamically and informs the other ports. Once LACP identifies correctly matched Ethernet links, it facilitates grouping the links into a port channel.

The following table lists the link aggregation features that Prime Optical supports for ML100T-12, ML100X-8, and ML1000-2 cards on ONS 15310 CL, ONS 15310 MA SONET, ONS 15310 MA SDH, ONS 15454 SONET, and ONS 15454 SDH NEs.

Table 7-75 Link Aggregation Features Supported in Prime Optical 

Link Aggregation Feature
Supported?

Create, modify, or delete a port channel

Yes

Add or remove members to or from a port channel

Yes

Configure LACP in active, passive, or transparent mode

Yes

Configure LACP port priority

Yes

Configure VLAN on a port channel

Yes

Configure the port channel ID

No

Configure the LACP system priority

No

Configure the port channel IP address

No

Monitor the port channel interface

No

Limit the LACP maximum bundle

No

Configure link aggregation across multiple ML-series cards

N/A

Configure policing on port channel interfaces

N/A

Configure Subnetwork Access Protocol (SNAP) or Interswitch Link (ISL) encapsulated frames

N/A


The following table lists the maximum number of port channels and port channel members that ML-series cards can support.

Table 7-76 Maximum Number of Port Channels and Members per Card

Card Type
Maximum No. of Fast Ethernet and Gigabit Ethernet Channels
Maximum No. of Members

ML1000-2

2

2

ML100T-12

6

4

ML100X-8

4

4


The following sections describe how to create, modify, and delete port channels and port channel members.

7.10.19.1  Creating a Port Channel


Step 1 Select one of the following NEs in the Domain Explorer tree and choose Configuration > NE Explorer:

ONS 15310 CL

ONS 15310 MA SONET

ONS 15310 MA SDH

ONS 15454 SONET

ONS 15454 SDH

Step 2 In the tree view of the NE Explorer window, select the ML100T-12, ML100X-8, or ML1000-2 card.

Step 3 Click the Port Channel tab.

Step 4 In the Port Channel Table area, click the Create button. The Create Port Channel ID dialog box opens.


Note The Create button is dimmed if the ML card already contains the maximum number of port channels.


Step 5 Configure the fields described in the following table.

Step 6 Click Apply. The new port channel interface is created and appears in the Port Channel Table area.


Table 7-77 Field Descriptions for the Create Port Channel ID Dialog Box 

Field
Description

Port Channel ID

Display only. The port channel ID identifies the port channel interface. Prime Optical generates the ID automatically; the range is from 1 to 64.

Admin State

Select the status of the port channel interface (Up or Down).

MTU

Enter the maximum transmission unit (MTU) size, which is the largest acceptable packet size configured for the port channel interface. The range is from 64 to 9000 bytes; the Cisco default is 1500 bytes.

Note For ONS 15310 CL, ONS 15310 MA SONET, and ONS 15310 MA SDH NEs, the MTU field is read-only.

Hold Queue In

Enter the size of the memory packet input queue. The range is from 0 to 4096 bytes. If you check the Auto check box, the value that Prime Optical displays depends on the previous interface settings on the selected ML card. (This behavior is the same as for manual Cisco IOS configurations.)

Hold Queue Out

Enter the size of the memory packet output queue. The range is from 0 to 4096 bytes. If you check the Auto check box, the output queue size is determined automatically, and the Hold Queue Out field is dimmed.


7.10.19.2  Modifying a Port Channel


Step 1 In the Domain Explorer tree, select the NE that contains the aggregate link that you want to modify and choose Configuration > NE Explorer.

Step 2 In the tree view of the NE Explorer window, select the ML100T-12, ML100X-8, or ML1000-2 card.

Step 3 Click the Port Channel tab.

Step 4 In the Port Channel Table area, select the port channel interface; then, click the Modify button. The Modify Port Channel ID dialog box opens.

Step 5 Modify the fields described in the following table.

Step 6 Click Apply. The modified port channel interface appears in the Port Channel Table area.


Table 7-78 Field Descriptions for the Modify Port Channel ID Dialog Box 

Field
Description

Port Channel ID

Display only. The port channel ID identifies the port channel interface. Prime Optical generates the ID automatically; the range is from 1 to 64.

Admin State

Modify the status of the port channel interface (Up or Down).

MTU

Modify the MTU size, which is the largest acceptable packet size configured for the port channel interface. The range is from 64 to 9000 bytes; the Cisco default is 1500 bytes.

Note For ONS 15310 CL, ONS 15310 MA SONET, and ONS 15310 MA SDH NEs, the MTU field is read-only.

Hold Queue In

Modify the size of the memory packet input queue. The range is from 0 to 4096 bytes. If you check the Auto check box, the value that Prime Optical displays depends on the previous interface settings on the selected ML card. (This behavior is the same as for manual Cisco IOS configurations.)

Hold Queue Out

Modify the size of the memory packet output queue. The range is from 0 to 4096 bytes. If you check the Auto check box, the output queue size is determined automatically, and the Hold Queue Out field is dimmed.


7.10.19.3  Deleting a Port Channel


Step 1 In the Domain Explorer tree, select the NE that contains the port channel and choose Configuration > NE Explorer.

Step 2 In the tree view of the NE Explorer window, select the ML100T-12, ML100X-8, or ML1000-2 card.

Step 3 Click the Port Channel tab.

Step 4 In the Port Channel Table area, select the port channel interface that you want to delete; then, click the Delete button.


Note You cannot delete an aggregate link that contains active members. You must first disaggregate all of the associated members from the port channel, then delete the empty port channel.


Step 5 In the confirmation dialog box, click OK. The port channel interface disappears from the Port Channel Table area.


7.10.19.4  Creating a Port Channel Member


Step 1 Select one of the following NEs in the Domain Explorer tree and choose Configuration > NE Explorer:

ONS 15310 CL

ONS 15310 MA SONET

ONS 15310 MA SDH

ONS 15454 SONET

ONS 15454 SDH NE

Step 2 In the tree view of the NE Explorer window, select the ML100T-12, ML100X-8, or ML1000-2 card.

Step 3 Click the Port Channel tab.

Step 4 In the Port Channel Members Table area, click the Add button. The Add Port Channel Member on Port Channel ID dialog box opens.


Note The Add button is dimmed if the ML card already contains the maximum number of port channel members.


Step 5 Configure the fields described in the following table.

Step 6 Click Apply. The new port channel member is created and appears in the Port Channel Members Table area.


Table 7-79 Field Descriptions for the Add Port Channel Member on Port Channel ID Dialog Box 

Field
Description

Ethernet Port

Select the available Ethernet front port, which identifies the port channel member.

LACP Enabled

If checked, Link Aggregation Control Protocol (LACP) is enabled. If unchecked, LACP is disabled, and the LACP Mode and LACP Port Priority fields are dimmed.

LACP Mode

Specify the mode for LACP packet exchange between ports:

Transparent—LACP is disabled.

Active—Places a port into an active negotiating state, in which the port initiates negotiations with remote ports by sending LACP packets.

Passive—Places a port into a passive negotiating state, in which the port responds to LACP packets it receives but does not initiate LACP negotiation. In this mode, the port channel group attaches the interface to the bundle.

LACP Port Priority

Enter the number for LACP to use with the port number to form the port identifier. The port priority determines which ports should be put in standby mode when there is a hardware limitation that prevents all compatible ports from aggregating. The range is from 1 to 65535. If you check the Auto check box, the priority is determined automatically, and the LACP Port Priority field is dimmed.


7.10.19.5  Modifying a Port Channel Member


Step 1 In the Domain Explorer tree, select the NE that contains the port channel member and choose Configuration > NE Explorer.

Step 2 In the tree view of the NE Explorer window, select the ML100T-12, ML100X-8, or ML1000-2 card.

Step 3 Click the Port Channel tab.

Step 4 In the Port Channel Members Table area, select the port channel member; then, click the Modify button. The Modify Port Channel Member on Port Channel ID dialog box opens.

Step 5 Modify the fields described in the following table.

Step 6 Click Apply. The modified port channel member appears in the Port Channel Members Table area.


Table 7-80 Field Descriptions for the Modify Port Channel Member on Port Channel ID Dialog Box 

Field
Description

Ethernet Port

Display only. The port number identifies the selected Ethernet front port.

LACP Enabled

Display only. Once the port member has been added, you cannot change the Link Aggregation Control Protocol (LACP) Enabled value. To change the LACP Enabled value, you must first remove the port channel member; then, you can add a new port channel member with the correct LACP Enabled value.

LACP Mode

Display only. Once the port member has been added, you cannot change the LACP mode. To change the LACP mode, you must first remove the port channel member; then, you can add a new port channel member with the correct LACP mode.

LACP Port Priority

Modify the number for LACP to use with the port number to form the port identifier. The port priority determines which ports should be put in standby mode when there is a hardware limitation that prevents all compatible ports from aggregating. The range is from 1 to 65535. If you check the Auto check box, the priority is determined automatically, and the LACP Port Priority field is dimmed.


7.10.19.6  Deleting a Port Channel Member


Step 1 In the Domain Explorer tree, select the NE that contains the port channel member and choose Configuration > NE Explorer.

Step 2 In the tree view of the NE Explorer window, select the ML100T-12, ML100X-8, or ML1000-2 card.

Step 3 Click the Port Channel tab.

Step 4 In the Port Channel Members Table area, select the port channel member that you want to delete; then, click the Remove button.

Step 5 In the confirmation dialog box, click OK. The port channel member disappears from the Port Channel Members Table area.


7.11  Managing QoS Profiles

QoS profiles provide a flexible and powerful way of specifying a QoS configuration. They allow you to define a number of sets of QoS classes for different types of service requirements. The major advantages of provisioning using QoS profiles are the ability to create similar types of services quickly using the same profile and the flexibility to customize certain values of a selected profile.


Note There is no association between the values of QoS profiles and values of QoS parameters used in an L2 service drop port instance.


Managing the QoS profiles is accomplished from the QoS Profile table.

7.11.1  QoS Profile Management Tasks

Use the following procedures to manage ONS 15454 SONET and ONS 15454 SDH DWDM nodes:

QoS Profile Management Tasks

Viewing the QoS Profile Table

Creating QoS Profiles

Modifying QoS Profiles

Duplicating QoS Profiles

Deleting QoS Profiles

Viewing the QoS Classes Table

7.11.2  Viewing the QoS Profile Table

In the Domain Explorer window, choose Configuration > CTC-Based SONET NEs or CTC-Based SDH NEs > QoS Profile Table. The QoS Profile table opens. The following table provides descriptions.

Table 7-81 Field Descriptions for the QoS Profile Table 

Column Name
Description

Profile Name

Displays the name of the QoS profile.

Profile Type

Displays the QoS profile type.

Profile Description

Displays a description of the selected profile.


7.11.3  Creating QoS Profiles


Step 1 In the Domain Explorer window, choose Configuration > CTC-Based SONET NEs or CTC-Based SDH NEs > QoS Profile Table. The QoS Profile table opens.

Step 2 Choose Configuration > Create QoS Profile (or click the Create QoS Profile icon). The Create QoS Profile dialog box opens. The following table provides descriptions.

Table 7-82 Field Descriptions for the Create QoS Profile Dialog Box 

Field
Description

Profile Name

Displays the name of the selected profile.

Profile Type

Allows you to select the type of profile to create. Choose Best Effort, CIR/PIR, or Advanced.

When Best Effort is selected, the Classification and Best Effort tabs in the Policing area are active and can be configured.

When CIR/PIR or Advanced is selected, the Classification, Committed Traffic, Excess Traffic, and Violations tabs in the Policing area are active and can be configured.

Description

Enter a description for the profile.

Policing > Classification

Match Any

Matches all the traffic. When selected, all other fields (DSCP, IP Precedence, and CoS) are disabled.

Match DSCP

Matches the DSCP value. The valid range is from 0 to 63.

Match IP Precedence

Matches the IP precedence value. The valid range is from 0 to 7.

Match CoS

Matches the CoS value. The valid range is from 0 to 7.

AND

Selecting AND indicates Match All and Match Any of the traffic classifications, respectively.

The QoS profiles that are created with AND criteria are applied only to dot1Q (subinterface). For AND criteria only, a single value is allowed on CoS, DSCP, and IP Precedence.

OR

Selecting OR indicates Match Any of the traffic classifications (Match DSCP, Match IP Precedence, or Match CoS), respectively.

The QoS profiles that are created with the OR criteria are not applied to dot1Q (subinterface).

Policing > Committed Traffic

Line Rate

Rate and burst of the Ethernet port are applicable.

Rate Limited

User-specified rate and burst limits are applicable.

Committed Rate

Displays the committed rate.

Committed Burst Size

Displays the committed burst size.

Policing > Committed Traffic > CoS Marking

Trust

CoS transmit value set to 0.

Mark CoS

The Layer 2 Mark CoS value entered. The valid range is from 0 to 7.

Policing > Excess Traffic

Discard

Excess traffic action should be set to "drop."

Allow

Excess traffic with CoS, as marked by the user, is transmitted.

Peak Rate

Peak rate value.

Peak Burst

Peak burst value.

Policing > Excess Traffic > Excess CoS Marking

Trust

CoS transmit value set to 0.

Mark CoS

The Layer 2 Mark CoS value entered. The valid range is from 0 to 7.

Policing > Violations

Discard

Violate traffic action should be set to "drop."

Allow

Excess traffic with CoS, as marked by the user, is transmitted.

Policing > Violations > Violations CoS Marking

Trust

CoS transmit value set to 0.

Mark CoS

The Layer 2 Mark CoS value entered. The valid range is from 0 to 7.

Policing > Best Effort

Line Rate

Rate and burst of the Ethernet port are applicable.

Rate Limited

User-specified rate and burst limits are applicable.

Max Rate

Displays the maximum rate value.

Max Burst

Displays the maximum burst value.

Policing > Best Effort > Best Effort CoS Marking

Trust

CoS transmit value is set to 0.

Mark CoS

The Layer 2 Mark CoS value entered. The valid range is from 0 to 7.


Step 3 Enter a name for the QoS profile in the Profile Name field.

Step 4 Select the type of profile you want to create from the Profile Type drop-down list.

Step 5 Configure the fields in the Classification, Committed Traffic, Excess Traffic, Violations, and Best Effort tabs, as necessary.

Step 6 Click Add to add the configuration to the list displayed in the table. Repeat this step to add more than one policing configuration to the QoS profile.

Step 7 Click Save.

Step 8 In the confirmation dialog box, click OK. The new QoS profile appears in the QoS Profiles table.


7.11.4  Modifying QoS Profiles

The Modify QoS Profile wizard allows you to modify selected QoS profiles.


NoteThe profile name and profile type cannot be changed in the Modify QoS Profile wizard. To change the name or type of QoS profile, you must create a new profile.

You cannot modify a QoS profile that was created through the Create Layer 2 Service, Add Drops, or Modify Drops wizards. However, you can view an existing QoS profile, customize another QoS profile like it, and apply it to a drop.

If a customized QoS profile was first applied to a VLAN code drop and then modified, the new values will not be automatically applied to the same VLAN code drop. If the changes need to be applied to the VLAN code drop, Operator users should modify it with a QoS template.


Complete the following steps to modify QoS profiles:


Step 1 In the Domain Explorer window, choose Configuration > CTC-Based SONET NEs or CTC-Based SDH NEs > QoS Profile Table. The QoS Profile table opens.

Step 2 Select a profile in the QoS Profile table and choose Configuration > Modify QoS Profile (or click the Modify QoS Profile icon). The Modify QoS Profile wizard opens. The following table provides descriptions.

Table 7-83 Field Descriptions for the Modify QoS Profile Wizard 

Field
Description

Profile Name

Display only. Displays the name of the selected profile.

Profile Type

Display only. Displays the type of profile (Best Effort, CIR/PIR, or Advanced).

When Best Effort is selected, the Classification and Best Effort tabs in the Policing area are active and can be configured.

When CIR/PIR or Advanced is selected, the Classification, Committed Traffic, Excess Traffic, and Violations tabs in the Policing area are active and can be configured.

Description

Enter a description for the profile.

Policing > Classification

Match Any

Matches all the traffic. When selected, all other fields (DSCP, IP Precedence, and CoS) are disabled.

Match DSCP

Matches the DSCP value. The valid range is from 0 to 63.

Match IP Precedence

Matches the IP precedence value. The valid range is from 0 to 7.

Match CoS

Matches the CoS value. The valid range is from 0 to 7.

AND

Selecting AND indicates Match All and Match Any of the traffic classifications, respectively.

The QoS profiles that are created with AND criteria are applied only to dot1Q (subinterface). For AND criteria only, a single value is allowed on CoS, DSCP, and IP Precedence.

OR

Selecting OR indicates Match Any of the traffic classifications (Match DSCP, Match IP Precedence, or Match CoS), respectively.

The QoS profiles that are created with the OR criteria are not applied to dot1Q (subinterface).

Policing > Committed Traffic

Line Rate

Rate and burst of the Ethernet port are applicable.

Rate Limited

User-specified rate and burst limits are applicable.

Committed Rate

Displays the committed rate.

Committed Burst Size

Displays the committed burst size.

Policing > Committed Traffic > Committed CoS Marking

Trust

CoS transmit value is set to 0.

Mark CoS

The Layer 2 Mark CoS value entered. The valid range is from 0 to 7.

Policing > Excess Traffic

Discard

Excess traffic action should be set to "drop."

Allow

Excess traffic with CoS, as marked by the user, is transmitted.

Peak Rate

Peak rate value.

Peak Burst

Peak burst value.

Policing > Excess Traffic > Excess CoS Marking

Trust

CoS transmit value is set to 0.

Mark CoS

The Layer 2 Mark CoS value entered. The valid range is from 0 to 7.

Policing > Violations

Discard

Excess traffic action should be set to "drop."

Allow

Excess traffic with CoS, as marked by the user, is transmitted.

Policing > Violations > Violations CoS Marking

Trust

CoS transmit value is set to 0.

Mark CoS

The Layer 2 Mark CoS value entered. The valid range is from 0 to 7.

Policing > Best Effort

Line Rate

Rate and burst of the Ethernet port are applicable.

Rate Limited

User-specified rate and burst limits are applicable.

Max Rate

The maximum rate value.

Max Burst

The maximum burst value.

Policing > Best Effort > Best Effort CoS Marking

Trust

CoS transmit value is set to 0.

Mark CoS

The Layer 2 Mark CoS value entered. The valid range is 0 to 7.


Step 3 Configure the parameters displayed in the various tabs, as necessary.

Step 4 Click Add to add the configuration to the list displayed in the table. Repeat this step to add more than one policing configuration to the QoS profile.

Step 5 Click Save.

Step 6 In the confirmation dialog box, click OK. The modified QoS profile appears in the QoS Profiles table.


7.11.5  Duplicating QoS Profiles

Prime Optical allows you to create a new QoS profile by cloning an existing QoS profile.


Step 1 In the Domain Explorer window, choose Configuration > CTC-Based SONET NEs or CTC-Based SDH NEs > QoS Profile Table. The QoS Profile table opens.

Step 2 Select the QoS profile that you want to duplicate.

Step 3 Choose Configuration > Duplicate QoS Profile (or click the Duplicate QoS Profile icon). The Duplicate QoS Profile dialog box opens.

Step 4 Enter a name for the new QoS profile.

Step 5 Click OK to create the new duplicated QoS profile.

Step 6 In the confirmation dialog box, click OK. The new QoS profile appears in the QoS Profile table. You can now modify the new QoS profile if required.


7.11.6  Deleting QoS Profiles


Step 1 In the Domain Explorer window, choose Configuration > CTC-Based SONET NEs or CTC-Based SDH NEs > QoS Profile Table. The QoS Profile table opens.

Step 2 Select the QoS profile that you want to delete.

Step 3 Choose Configuration > Delete QoS Profile (or click the Delete QoS Profile icon).

Step 4 In the confirmation dialog box, click Yes.

Step 5 In the subsequent confirmation dialog box, click OK. The QoS Profile is deleted from the QoS Profile table.


7.11.7  Viewing the QoS Classes Table


Step 1 In the Domain Explorer window, choose Configuration > CTC-Based SONET NEs or CTC-Based SDH NEs > QoS Profile Table. The QoS Profile table opens.

Step 2 Choose Configuration > Show QoS Profile (or click the Show QoS Profile tool). The QoS Classes table opens. The following table provides descriptions.


Table 7-84 Field Descriptions for the QoS Classes Table 

Column
Description

Match Any

Matches all the traffic. When selected, all other fields (DSCP, IP Precedence, and CoS) are disabled.

Match IP Precedence

Matches the IP precedence value. The valid range is from 0 to 7.

IP Precedence Value

Displays the IP precedence value.

Match DSCP

Matches the DSCP value. The valid range is from 0 to 63.

DSCP Value

Displays the DSCP value.

Match CoS

Matches the CoS value. The valid range is from 0 to 7.

CoS Value

Displays the CoS value.

AND

AND indicates Match All or Match Any of the traffic classifications, respectively.

OR

Selecting OR indicates Match Any of the traffic classifications (Match DSCP, Match IP Precedence, or Match CoS), respectively.

The QoS profiles that are created with the OR criteria are not applied to dot1Q (subinterface).

Committed Traffic Type

Displays the committed traffic type.

Committed Rate

Displays the committed rate.

Committed Burst

Displays the committed burst size.

Committed CoS Type

Displays the committed CoS type.

Committed CoS Value

Displays the committed CoS value.

Excess Action

Excess traffic action type (Discard or Allow).

Peak Rate

Peak rate value.

Peak Burst

Peak burst value.

PIR CoS Type

Displays the peak traffic CoS type (Trust or CoS Marked).

PIR CoS Value

Displays the peak traffic CoS value. The valid range is from 0 to 7.

Violate Action

Displays the violate traffic action type (Discard or Allow).

Violate CoS Value

Displays the violate traffic CoS value. The valid range is from 0 to 7.

Best Effort Type

Displays the best-effort traffic type (Line-Rate or Rate-Limited).

Best Effort Rate

Maximum rate.

Best Effort Burst

Maximum burst.


7.12  Managing DWDM Nodes

Use the tasks described in the following table to manage ONS 15454 SONET and ONS 15454 SDH DWDM nodes.


Note Internal patchcords that involve passive cards can be viewed in Prime Optical, but can only be provisioned in CTC.


Use the following procedures to manage ONS 15454 SONET and ONS 15454 SDH DWDM nodes:

Calculating DWDM Connections—ONS 15454 SONET and ONS 15454 SDH R7.2 and Earlier

Calculating Internal Patchcord Connections—ONS 15454 SONET and ONS 15454 SDH R8.0 and R9.0

Creating DWDM Connections—ONS 15454 SONET and ONS 15454 SDH R7.2 and Earlier

Creating Internal Patchcords—ONS 15454 SONET and ONS 15454 SDH R8.0 and Later

Deleting DWDM Connections or Internal Patchcords

7.12.1  Calculating DWDM Connections—ONS 15454 SONET and ONS 15454 SDH R7.2 and Earlier

To verify if the DWDM connection matches the connections on the DWDM design plan:


Step 1 In the Domain Explorer, select an ONS 15454 SONET or ONS 15454 SDH DWDM NE and choose Configuration > NE Explorer (or click the Open NE Explorer tool).

Step 2 In the node properties pane, click the DWDM tab.

Step 3 Click the Connections subtab.

Step 4 Click Calculate Connections. The DWDM connections are displayed with the following information:

Slot-From

Unit-From

Port-From

Slot-To

Unit-To

Port-To

State


7.12.2  Calculating Internal Patchcord Connections—ONS 15454 SONET and ONS 15454 SDH R8.0 and R9.0


Tip This section applies to NE releases from 8.0 to 9.0. For NE releases 9.1 and later, see Configuring ANS on Release 9.1 and Later NEs.


It is possible for Prime Optical to automatically create an internal patchcord if a node is configured correctly. To calculate internal patchcord connections so the TCC card can create the internal patchcord based on the card provisioned in the node:


Note Internal patchcords that involve passive cards can be viewed but not provisioned in Prime Optical. Provisioning must be done in CTC.


Step 1 In the Domain Explorer, select an ONS 15454 SONET or ONS 15454 SDH DWDM NE and choose Configuration > NE Explorer (or click the Open NE Explorer tool).

Step 2 In the node properties pane, click the DWDM tab.

Step 3 Click the Connections subtab.

Step 4 Click Calculate Connections. The internal patchcord connections are displayed with the following information:

From—The unit or port from which the internal patchcord originates.

To—The unit or port to which the internal patchcord terminates.

Wavelength—Shows the wavelength value if the internal patchcord is between two channel ports. Otherwise, it shows N/A.


7.12.3  Creating DWDM Connections—ONS 15454 SONET and ONS 15454 SDH R7.2 and Earlier


Note Internal patchcords that involve passive cards cannot be viewed in Prime Optical for NE releases earlier than 9.3.


Step 1 In the Domain Explorer, select an ONS 15454 SONET or ONS 15454 SDH DWDM NE and choose Configuration > NE Explorer (or click the Open NE Explorer tool).

Step 2 In the node properties pane, click the DWDM tab.

Step 3 Click the Connections subtab.

Step 4 Click Create. The Create Optical Link dialog box opens.

Step 5 Specify the following information:

From Slot—Select the slot from which the DWDM connection will originate.

From Port—Select the port from which the DWDM connection will originate.

To Slot—Select the slot to which the DWDM connection will terminate.

To Port—Select the port to which the DWDM connection will terminate.

Bidirectional—Check if you want the DWDM connection to be bidirectional.

Step 6 Click OK.


7.12.4  Creating Internal Patchcords—ONS 15454 SONET and ONS 15454 SDH R8.0 and Later

The following section applies to NE releases from 8.0 to 9.0. On NE release 9.1 and later, the ability to create internal patchcords has been removed from CTM.


Note Internal patchcords that involve passive cards can only be created in CTC.


Step 1 In the Domain Explorer, select an ONS 15454 SONET or ONS 15454 SDH DWDM NE and choose Configuration > NE Explorer (or click the Open NE Explorer tool).

Step 2 In the node properties pane, click the DWDM tab.

Step 3 Click the Connections subtab.


Note For OTU2_XP cards, the card name might be shown as XP_4_10G_LINE_CARD.


Step 4 Click Create. The Internal Patchcord wizard opens.

Step 5 Specify the following information:

Trunk to Trunk (Layer 2)—If this radio button is selected, Prime Optical allows you to create patchcords between the trunk ports of 10GE_XP and GE_XP cards.


Note The Layer 2 1+1 protection group is created only between client ports on GE_XP or 10GE_XP cards (in L2 over DWDM mode), and only if L2 trunk-to-trunk internal patchcords are created between the cards' trunk ports.


OTS/OCH to OTS/OCH—If this radio button is selected, Prime Optical allows you to select an OTS or OCH port as the source and destination for the patchcord. For example, you can create OTS patchcords between an amplifier and a MUX, DMX, WSS, or WXC port. You can create OCH patchcords between TXP/MXP OCH ports.

OCH-Trunk to OCH-Filter—If this radio button is selected, Prime Optical allows you to create patchcords from TXP trunk ports to MUX, DMX, or WSS ports.

OCHNC Wavelength—Available if the OCH-Trunk to OCH-Filter radio button is selected. Specify the OCHNC wavelength.

Bidirectional—Available if the OTS/OCH to OTS/OCH radio button is selected. If checked, it indicates that the patchcord is bidirectional and you need to select the ports for both directions.

Step 6 Click Next.

Step 7 Specify the internal patchcord source. Specify the following information; then, click Next:

Shelf

Slot

TX port

Reverse port

Step 8 Specify the internal patchcord destination. Specify the following information; then, click Next:

Shelf

Slot

TX port

Reverse port

Step 9 Review the internal patchcord summary.

Step 10 Click Finish.


7.12.5  Deleting DWDM Connections or Internal Patchcords

The following section applies to NE releases 9.0 and earlier. On NE release 9.1 and later, the ability to delete internal patchcords has been removed from Prime Optical.


Note Internal patchcords that involve passive cards can only be deleted in CTC.


If a DWDM connection or an internal patchcord does not match the DWDM design plan, you can delete the DWDM connection or internal patchcord.


Step 1 In the Domain Explorer, select an ONS 15454 SONET or ONS 15454 SDH DWDM NE and choose Configuration > NE Explorer (or click the Open NE Explorer tool).

Step 2 In the node properties pane, click the DWDM tab.

Step 3 Click the Connections subtab.

Step 4 Select the DWDM connection or internal patchcord to delete.

Step 5 Click Delete.

Step 6 In the confirmation dialog box, click OK.


7.12.6  Importing Cisco MetroPlanner Configuration Files—ONS 15454 SONET and ONS 15454 SDH R6.0 and Earlier

If you have a Cisco MetroPlanner configuration file, you can import this file into the DWDM node to configure the node automatically.


Step 1 In the Domain Explorer, select an ONS 15454 SONET or ONS 15454 SDH DWDM NE and choose Configuration > NE Explorer (or click the Open NE Explorer tool).

Step 2 In the node properties pane, click the DWDM tab.

Step 3 Click the Provisioning subtab.

Step 4 Click Import.

Step 5 Select the configuration file using the Open dialog box; then, click OK.

Step 6 Click Apply.


7.12.7  Provisioning DWDM Nodes Manually


Step 1 In the Domain Explorer, select an ONS 15454 SONET or ONS 15454 SDH DWDM NE and choose Configuration > NE Explorer (or click the Open NE Explorer tool).

Step 2 In the node properties pane, click the DWDM tab.

Step 3 Click the Provisioning subtab.

Step 4 Depending on the optical type of the NE, modify the available parameters for each optical type as shown in the following table. For drop-down lists, select an item from the list. For numerics, double-click the field and type the new number.

Step 5 After making your selections, click Apply.


Table 7-85 ONS 15454 SONET and ONS 15454 SDH ANS Parameters—Provisioning Subtab 

Parameter
Description
Options
OADM

Network Type

Defines the DWDM network type.

The network type can be one of the following:

Metro-Core—Channels are equalized. (Cisco default value.)

Metro-Access—Channels are not equalized to minimize the number of amplifiers in the ring.

System Type

Defines the DWDM system type.

The system type can be one of the following:

SMF-28 32 Ch Control Gain (Cisco default value)

SMF-28 32 Ch Control Power

SMF-28 8 Ch Control Power

SMF-28 16 Ch Control Power

Pin OADM Stage

Sets the per-channel input power at the OADM stage.

-50 dBm to 30 dBm

Pout OADM Stage

Sets the per-channel power out at the OADM stage.

-50 dBm to 30 dBm

Pout Band 30.3

Sets the per-band power out for the 30.3 drop band.

-50 dBm to 30 dBm

Pout Band 34.2

Sets the per-band power out for the 34.2 drop band.

-50 dBm to 30 dBm

Pout Band 38.1

Sets the per-band power out for the 38.1 drop band.

-50 dBm to 30 dBm

Pout Band 42.1

Sets the per-band power out for the 42.1 drop band.

-50 dBm to 30 dBm

Pout Band 46.1

Sets the per-band power out for the 46.1 drop band.

-50 dBm to 30 dBm

Pout Band 50.1

Sets the per-band power out for the 50.1 drop band.

-50 dBm to 30 dBm

Pout Band 54.1

Sets the per-band power out for the 54.1 drop band.

-50 dBm to 30 dBm

Pout Band 58.1

Sets the per-band power out for the 58.1 drop band.

-50 dBm to 30 dBm

Hub

Network Type

Defines the DWDM network type.

The network type can be one of the following:

Metro-Core—Channels are equalized. (Cisco default value.)

Metro-Access—Channels are not equalized to minimize the number of amplifiers in the ring.

System Type

Defines the west-side DWDM fiber type, number of channels, and control mode.

The system type can be one of the following:

SMF-28 32 Ch Control Gain (Cisco default value)

SMF-28 32 Ch Control Power

SMF-28 8 Ch Control Power

SMF-28 16 Ch Control Power

Pdrop

Sets the expected power level on the client interface.

-50 dBm to 30 dBm

Pexpress

Sets the expected per-channel power on the pass-through interface.

-50 dBm to 30 dBm

Pout MUX Stage

Sets the per-channel power out at the multiplexing stage.

-50 dBm to 30 dBm

Terminal

Network Type

Defines the west-side DWDM fiber type, number of channels, and control mode.

The network type can be one of the following:

SMF-28 32 Ch Control Gain (Cisco default value)

SMF-28 32 Ch Control Power

SMF-28 8 Ch Control Power

SMF-28 16 Ch Control Power

System Type

Defines the west-side DWDM fiber type, number of channels, and control mode.

The system type can be one of the following:

SMF-28 32 Ch Control Gain (Cisco default value)

SMF-28 32 Ch Control Power

SMF-28 8 Ch Control Power

SMF-28 16 Ch Control Power

Pdrop

Sets the expected power level on the client interface.

-50 dBm to 30 dBm

Pout MUX Stage

Sets the west-side per-channel power out at the multiplexing stage.

-50 dBm to 30 dBm

Line

Network Type

Defines the DWDM network type.

The network type can be one of the following:

Metro-Core—Channels are equalized. (Cisco default value.)

Metro-Access—Channels are not equalized to minimize the number of amplifiers in the ring.

System Type

Defines the west-side DWDM fiber type, number of channels, and control mode.

The system type can be one of the following:

SMF-28 32 Ch Control Gain (Cisco default value)

SMF-28 32 Ch Control Power

SMF-28 8 Ch Control Power

SMF-28 16 Ch Control Power


7.12.8  Provisioning the Power Level of DWDM Nodes


Step 1 In the Domain Explorer, select an ONS 15454 SONET or ONS 15454 SDH DWDM NE and choose Configuration > NE Explorer (or click the Open NE Explorer tool).

Step 2 In the node properties pane, click the DWDM tab.

Step 3 Click the Port Status subtab.

Step 4 Click the Launch ANS button.

Step 5 In the confirmation dialog box, click OK. The Automatic Node Setup (ANS) adjusts the values of the variable optical attenuators (VOAs) to equalize the per-channel power at the amplifier level.


7.12.9  Checking the Span Loss Between DWDM Nodes

The Span Check subtab allows you to check the span loss between the selected node and the previous node in the chain. The span check is always in reception.


Step 1 In the Domain Explorer, select an ONS 15454 SONET or ONS 15454 SDH DWDM NE and choose Configuration > NE Explorer (or click the Open NE Explorer tool).

Step 2 In the node properties pane, click the DWDM tab.

Step 3 Click the Span Check subtab.

Step 4 Click the Retrieve Span Loss Values button to run the span loss verification function and retrieve values for the measure span loss column.

Step 5 In the confirmation dialog box, click OK.


7.12.10  Managing APC Domains

The APC domain refers to a set of interconnected NEs on which to run the APC.

7.12.10.1  Viewing the APC Domain Table

In the Domain Explorer, select an ONS 15454 SONET or ONS 15454 SDH DWDM NE and choose Configuration > CTC-Based SONET NEs or CTC-Based SDH NEs  > APC Domain Management. The APC Domain table opens. The following table provides descriptions.

Table 7-86 Field Description for the APC Domain Table 

Field
Description

Domain Name

Displays the APC domain name.

APC State

Displays the actual state of the APC. Possible values are:

Enabled—APC is enabled.

Disabled—APC is disabled.

Force Disabled—APC is disabled by the user.

Not Applicable—APC domain is incomplete.

APC Admin State

Displays the APC administrative state. Possible values are:

APC free to run—You can run the APC on the APC domain.

APC Force Disable—APC is disabled and you cannot run the APC on the APC domain.

Sides

Lists all the NEs and their sides that belong to the APC domain.


7.12.10.2  Running APC


Step 1 In the Domain Explorer, select an ONS 15454 SONET or ONS 15454 SDH DWDM NE and choose Configuration > CTC-Based SONET NEs or CTC-Based SDH NEs  > APC Domain Management.

Step 2 In the APC Domain table, select Edit > Run APC (or click the Run APC tool).


7.12.10.3  Viewing the APC Results


Step 1 In the Domain Explorer, select an ONS 15454 SONET or ONS 15454 SDH DWDM NE and choose Configuration > CTC-Based SONET NEs or CTC-Based SDH NEs  > APC Domain Management.

Step 2 Choose a domain from the APC Domain table and choose Edit > APC Results (or click the APC Results tool). The APC Results table opens. It contains APC data for the nodes and sides that belong to the selected domain. The following table provides descriptions.


Table 7-87 Field Descriptions for the APC Results Table 

Field
Description

NE ID

Displays the ID of the node that belongs to the selected APC domain.

Side

Displays the side that belongs to the selected APC domain.

Parameter

Displays the APC parameter associated with the ports.

Last Modification

Displays the date and time when the power control setpoint was last modified.

Last Check

Displays the date and time when the power control setpoint was last verified.


7.12.10.4  Enabling and Disabling APC


Step 1 In the Domain Explorer, select an ONS 15454 SONET or ONS 15454 SDH DWDM NE and choose Configuration > CTC-Based SONET NEs or CTC-Based SDH NEs  > APC Domain Management.

Step 2 In the APC Domain table, do one of the following:

Select Edit > Enable APC (or click the Enable APC tool) to enable APC.

Select Edit > Disable APC (or click the Disable APC tool) to disable APC.


Caution Disabling APC should be performed only for specific maintenance actions. When APC is disabled, aging compensation calculations are not performed and circuits cannot be activated.

Step 3 Click Yes in the confirmation dialog box.

Step 4 Verify that the APC state of the APC domain changes to Disable.


7.12.10.5  Discovering the APC Domain


Step 1 In the Domain Explorer, select an ONS 15454 SONET or ONS 15454 SDH DWDM NE and choose Configuration > CTC-Based SONET NEs or CTC-Based SDH NEs  > APC Domain Management.

Step 2 In the APC Domain table, select Edit > Discover APC Domain (or click the Discover APC Domain tool).


7.12.11  Configuring Automatic Node Setup

You should run the Automatic Node Setup (ANS) wizard based on the input supplied by the Cisco MetroPlanner application. The Cisco MetroPlanner application generates an entire network setup/configuration based on customer requirements. The ANS wizard (launched from the Node Setup subtab) allows you to provision card and ANS parameters based on the content of an XML file that is generated by the Cisco MetroPlanner application. Using the contents of the XML file generated by the Cisco MetroPlanner application ensures that the NE configuration and optical parameters are set correctly.

You would normally run the ANS wizard when an NE has been inserted or discovered in Prime Optical (as long as Cisco MetroPlanner has been used for the customer network).

Preprovisioning is based on the output XML file that you select. The Cisco MetroPlanner application generates an XML configuration file for your network configuration. The Automatic Node Provisioning (ANP) XML file contains information that allows Prime Optical to provision:

OPT-AMP-L role (booster/preamp)

ANS provisioning parameters

7.12.11.1  Configuring ANS on Release 9.0 and Earlier NEs

Complete the following steps to run the ANS wizard on release 9.0 and earlier NEs:


Step 1 In the Domain Explorer, select an ONS 15454 SONET or ONS 15454 SDH DWDM NE and choose Configuration > NE Explorer (or click the Open NE Explorer tool).

Step 2 In the node properties pane, click the DWDM tab.

Step 3 Click the Node Setup subtab. The following table provides descriptions.

Table 7-88 Field Descriptions for the Node Setup Subtab 

Field
Description
XML Settings

Select XML file

Click Browse to select an XML file (generated by the MetroPlanner application). Prime Optical automatically checks the XML file you select to verify that the file is formatted correctly.

Log Settings

Select Log File

Click Browse to select a log file where the results of the operations you perform will be saved in ASCII format.

Launch ANS Wizard button

Click the Launch Wizard button to launch the ANS wizard.

ANS Node Selection

Select Node Profile

From the list of available profiles displayed, select the node profile you want to apply to the NE.

ANS Section Selection

Provision Card Parameters

Check the Provision Card Parameters check box to display the Provision Card Parameters window in the wizard. If you do not check this check box, the Provision Card Parameters window does not appear in the wizard.

Provision ANS Parameters

Check the Provision ANS Parameters check box to display the Provision ANS Parameters window in the wizard. If you do not check this check box, the Provision ANS Parameters window does not appear in the wizard.

Provision Card Parameters

Name

Name of the card parameter being set.

Value

Value of the card parameter being set.

Shelf

Shelf ID where the card is preprovisioned or equipped.

Slot

Slot number where the card is preprovisioned or equipped.

PPM

PPM number the card parameter refers to.

Log

Displays a list of commands Prime Optical executes to preprovision the card parameters.

Provision ANS Parameters

Parameter

Name of the ANS parameter being set.

Value

Value of the ANS parameter being set.

Log

Displays a list of commands Prime Optical executes to preprovision the card parameters.

Apply button

Click the Apply button to begin preprovisioning. Once completed, the Log pane displays the results of the preprovisioning action. Operations that did not succeed are highlighted in red text.

Note If a preprovisioning action fails while running the ANS wizard, the ANS wizard continues to execute (as CTC does) the remaining preprovisioning actions. Actions that did not succeed are highlighted in red text, detailing the failure and its cause. You can click the Cancel button to exit the ANS wizard, resolve the issue that prevented the highlighted action from executing, and then rerun the ANS wizard.

Finish button

Click the Finish button to close the wizard.


Note To avoid raising surplus alarms, it is recommended that you change the state of the selected NE to Under Maintenance before you perform any operations through CTC. You must change the state of the NE to Out of Service (OOS) in Prime Optical before launching the node layout preprovisioning from CTC. After the ANS execution completes successfully, you can change the state of the NE back to In Service.


Step 4 Click Browse to select the XML configuration file (generated by the Cisco MetroPlanner application) that you want to use to preprovision the NE. Prime Optical automatically examines the selected XML file to verify that the file is formatted correctly.

Step 5 Click Browse to select the log file where the results of the operations you perform will be saved.

Step 6 Click the Launch Wizard button. The first step of the Automatic Node Setup wizard appears. For an explanation of the fields that appear in the Automatic Node Setup wizard, see Table 7-88.

Step 7 From the list of profiles displayed, select the node profile you want to apply to the NE. The list of node profiles displayed is obtained from the XML configuration file selected in Step 4.

Step 8 Click Next. The ANS Selection area appears.

Step 9 Click the appropriate check boxes to select the corresponding windows you want to appear in the wizard:

Provision Card Parameters—Check this check box to display the Provision Card Parameters window.

Provision ANS Parameters—Check this check box to display the Provision ANS Parameters window.


Note You can check any of the check boxes displayed in the ANS Selection area as long as the corresponding information is present in the XML file. If you leave a check box unchecked, that selection does not appear in the wizard. For example, if you do not check the Provision Card Parameters check box, the corresponding window does not appear in the wizard.


Step 10 Click Next. Go to:

Step 11 if you selected the Provision Card Parameters check box in Step 9.

Step 13 if you selected the Provision ANS Parameters check box in Step 9.

Step 11 Click Apply to begin preprovisioning the card parameters. Once completed, the Log pane displays the results of the preprovisioning action. Operations that did not succeed are highlighted in red text.

Step 12 Click Next. The Provision ANS Parameters window appears if you checked the Provision ANS Parameters check box in Step 9. The name of the board parameter, its value, its shelf number, its slot, and the PPM of the board are displayed on the left side.

Step 13 Click Apply to begin preprovisioning the ANS parameters. Once completed, the Log pane displays the results of the preprovisioning actions. Operations that did not succeed are highlighted in red text. The Log pane displays the results of all the preprovisioning actions applied to the NEs.

Step 14 Click Finish to close the wizard.


7.12.11.2  Configuring ANS on Release 9.1 and Later NEs

Complete the following steps to run the ANS wizard on release 9.1 and later NEs:


Step 1 In the Domain Explorer, select an ONS 15454 SONET or ONS 15454 SDH DWDM NE and choose Configuration > NE Explorer (or click the Open NE Explorer tool).

Step 2 In the node properties pane, click the DWDM tab.

Step 3 Click the Node Setup subtab. The following table provides descriptions.

Table 7-89 Field Descriptions for the Node Setup Subtab 

Field
Description
XML Settings

Select XML file

Click Browse to select an XML file (generated by the MetroPlanner application). Prime Optical automatically checks the XML file you select to verify that the file is formatted correctly.

Log Settings

Select Log File

Click Browse to select a log file where the results of the operations you perform will be saved in ASCII format.

Launch ANS Wizard button

Click the Launch Wizard button to launch the ANS wizard.

ANS Node Selection

Select Node Profile

From the list of available profiles displayed, select the node profile you want to apply to the NE.

Apply button

Click the Apply button to begin preprovisioning. Once completed, the Log pane displays the results of the preprovisioning action. You can view the action status in the Job Monitor table. (For more details, see Viewing the Job Monitor Table.)

Finish button

Click the Finish button to close the wizard.


Note To avoid raising surplus alarms, it is recommended that you change the state of the selected NE to Under Maintenance before you perform any operations through CTC. You must change the state of the NE to Out of Service (OOS) in Prime Optical before launching the node layout preprovisioning from CTC. After the ANS execution completes successfully, you can change the state of the NE back to In Service.


Step 4 Click Browse to select the XML configuration file (generated by the Cisco MetroPlanner application) that you want to use to preprovision the NE. Prime Optical automatically examines the selected XML file to verify that the file is formatted correctly.

Step 5 Click Browse to select the log file where the results of the operations you perform will be saved.

Step 6 Click the Launch Wizard button. The first step of the Automatic Node Setup wizard appears. For an explanation of the fields that appear in the Automatic Node Setup wizard, see Table 7-89.

Step 7 From the list of profiles displayed, select the node profile you want to apply to the NE. The list of node profiles displayed is obtained from the XML configuration file selected in Step 4.

Step 8 Click Apply to begin preprovisioning the ANS parameters. Once completed, the Log pane displays the results of the preprovisioning action. You can view the action status in the Job Monitor table. (For more details, see Viewing the Job Monitor Table.)

Step 9 Click Finish to close the wizard.


7.12.12  Creating Side Objects


Step 1 In the Domain Explorer, select an ONS 15454 SONET or ONS 15454 SDH DWDM NE and choose Configuration > NE Explorer (or click the Open NE Explorer tool).

Step 2 In the node properties pane, click the DWDM tab.

Step 3 Click the Side subtab.

Step 4 Click Create. The Create Side dialog box opens.

Step 5 Specify the following:

Side ID—Select a side ID from the drop-down list.

Line In—Select the receive side of the OTS port from the drop-down list.

Line Out—Select the transmit side of the OTS port from the drop-down list.

Step 6 Click OK.


7.12.13  Modifying Side Objects


Step 1 In the Domain Explorer, select an ONS 15454 SONET or ONS 15454 SDH DWDM NE and choose Configuration > NE Explorer (or click the Open NE Explorer tool).

Step 2 In the node properties pane, click the DWDM tab.

Step 3 Click the Side subtab.

Step 4 Select the side to modify; then, click Modify. The Modify Side dialog box opens.

Step 5 Change the side ID.

Step 6 Click OK.


7.12.14  Deleting Side Objects


Step 1 In the Domain Explorer, select an ONS 15454 SONET or ONS 15454 SDH DWDM NE and choose Configuration > NE Explorer (or click the Open NE Explorer tool).

Step 2 In the node properties pane, click the DWDM tab.

Step 3 Click the Side subtab.

Step 4 Select the side to delete; then, click Delete.

Step 5 In the confirmation dialog box, click OK.


7.12.15  Creating Alien Wavelength


Step 1 In the Domain Explorer, select an ONS 15454 SONET or ONS 15454 SDH DWDM NE and choose Configuration > NE Explorer (or click the Open NE Explorer tool).

Step 2 In the node properties pane, click the DWDM tab.

Step 3 Click the Alien Wavelength subtab.

Step 4 Click Create. The Create Alien Wavelength dialog box opens.

In Card Selection:

Type—Select the type of card on which the alien wavelength is configured (optical or passive)


Note Each of these card options is available only if the corresponding card type is available on the network.


Shelf—Choose the shelf on which the card resides.

Slot—Choose the slot in which the card resides.


Note Shelf and Slot fields are displayed only for optical cards.


Port—Choose the card port on which the alien wavelength is configured.

Lambda—Displays the lambda associated to the optical port.

In Settings:

Alien Wavelength—Choose the alien wavelength class.

FEC—Set the FEC mode on the alien wavelength channel. You may change the FEC mode. The available modes are:

Disabled

Standard

Enhanced

Enhanced I.4

Enhanced I.7

Step 5 Click OK to continue the operation, or click Cancel.


7.12.16  Editing Alien Wavelength


Step 1 In the Domain Explorer, select an ONS 15454 SONET or ONS 15454 SDH DWDM NE and choose Configuration > NE Explorer (or click the Open NE Explorer tool).

Step 2 In the node properties pane, click the DWDM tab.

Step 3 Click the Alien Wavelength subtab.

Step 4 Select the alien wavelength to modify; then, click Edit.

The Edit Alien Wavelength dialog box opens.

Step 5 Change the alien wavelength class.

Click OK to continue the operation, or click Cancel.